Gunter L'il Standy Build

...ask your questions in the appropriate forums BUT document your build here...preferably in a single thread...dates for updates, are appreciated....

Re: Gunter L'il Standy Build

Postby bdosborn » Mon May 08, 2023 5:00 pm

Awesome build, I like your woodworking skills. I've been hanging around the van building forum and those guys aren't as good as what I'm seeing on your build. :thumbsup:
Bruce
2009 6.5'X11' TTT - Boxcar
All it takes is a speck of faith and a few kilowatts of sweat and grace.
Image
Boxcar Build
aVANger Build
User avatar
bdosborn
Donating Member
 
Posts: 5494
Images: 772
Joined: Wed May 05, 2004 11:10 pm
Location: CO, Littleton

Re: Gunter L'il Standy Build

Postby Mark Gunter » Mon May 08, 2023 7:12 pm

Thanks, bd!

In another life, I had a little cabinet shop where we built high-end custom furniture and fabricated some architectural Millwork, but my business’s main specialty was repairing, finishing, maintaining & refinishing architectural millwork in high rise buildings in Dallas. I acquired some building and woodworking skills, but I’m not stressing over perfection in this build, just making things functional and pretty to please the Mrs. and me.

I built out a van a few years ago when I was single, and didn’t make it nearly this pretty. But this build has plenty of mistakes incorporated, lol. A big part of my business has always been to make things look good, no matter whether things are “just right” or not. If you can make it look good, you’re the well paid hero lol.
I'm a happy man, I love my life!

My Gunter Li’l Standy build journal:
https://www.tnttt.com/viewtopic.php?f=50&t=75291
User avatar
Mark Gunter
Teardrop Advisor
 
Posts: 76
Images: 211
Joined: Tue Nov 29, 2022 9:54 am
Location: Cleburne, Texas

Re: Gunter L'il Standy Build

Postby Mark Gunter » Thu May 11, 2023 10:53 am

That’s a mighty impressive van build you’re doing, bd!
I'm a happy man, I love my life!

My Gunter Li’l Standy build journal:
https://www.tnttt.com/viewtopic.php?f=50&t=75291
User avatar
Mark Gunter
Teardrop Advisor
 
Posts: 76
Images: 211
Joined: Tue Nov 29, 2022 9:54 am
Location: Cleburne, Texas
Top

Re: Gunter L'il Standy Build

Postby bdosborn » Thu May 11, 2023 2:30 pm

Thanks Mark! We just got back from a 2 day road trip and the van makes it so much easier than we're used to.
Bruce
2009 6.5'X11' TTT - Boxcar
All it takes is a speck of faith and a few kilowatts of sweat and grace.
Image
Boxcar Build
aVANger Build
User avatar
bdosborn
Donating Member
 
Posts: 5494
Images: 772
Joined: Wed May 05, 2004 11:10 pm
Location: CO, Littleton
Top

Re: Gunter L'il Standy Build

Postby Mark Gunter » Fri May 12, 2023 9:07 am

That’s awesome. I can’t wait to test this little camper in the wild. I feel like I’m two months behind now, and there’s so much more to be done. Hopefully we’ll at least get some summer camping done, looks like Spring will be gone long before I’m ready.
I'm a happy man, I love my life!

My Gunter Li’l Standy build journal:
https://www.tnttt.com/viewtopic.php?f=50&t=75291
User avatar
Mark Gunter
Teardrop Advisor
 
Posts: 76
Images: 211
Joined: Tue Nov 29, 2022 9:54 am
Location: Cleburne, Texas
Top

Re: Gunter L'il Standy Build

Postby Bezoar » Fri May 12, 2023 9:38 am

Looking great - don't forget us when you snap some new pics!!
User avatar
Bezoar
Teardrop Master
 
Posts: 155
Images: 37
Joined: Mon Mar 10, 2008 9:01 pm
Location: Southern Wisconsin
Top

Re: Gunter L'il Standy Build

Postby Mark Gunter » Mon May 22, 2023 9:43 am

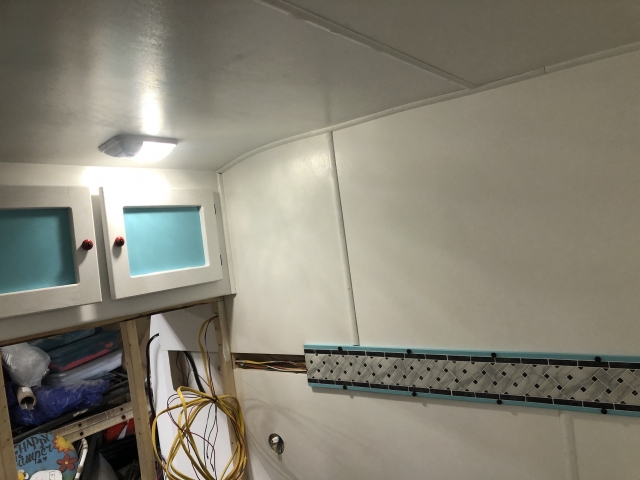
Here's another update ...

With a cramped workspace, plenty of rain, no decent table saw or workbenches, it took quite a while to make our cabinet doors. I just used 1x3 pine for stiles and rails attached to 1/8 plywood. Once finished, I painted them according to our color scheme and went about installing them once the paint was dry.

I first put the stiles and rails together with glue and wavy fasteners while clamped together and clamped to a flat piece of 1/2" baltic birch, then milled the edges inside & out with a 1/4" round-over bit once the glue was set. Then I attached them to the 1/8" plywood panel and re-clamped to the flat bb panel to let them set up.

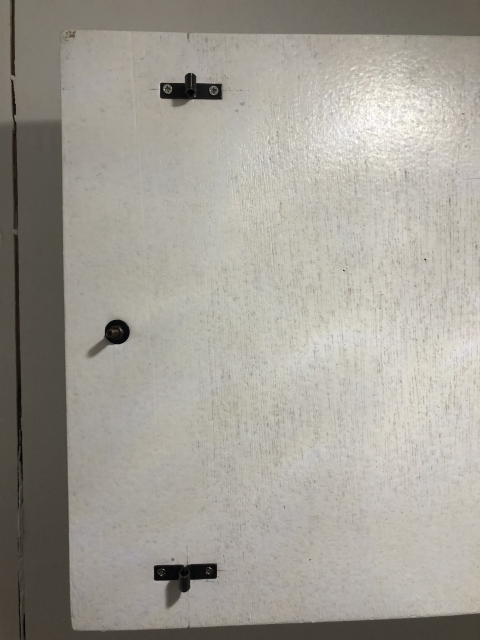
Once ready, I measured and marked for the hinges and door pulls and installed the hardware. Then I clamped a straight 1x4 across the bottom of the cabinet to align the doors in a row while I screwed in the hinges. Satisfied with that, I removed all the hardware and painted.

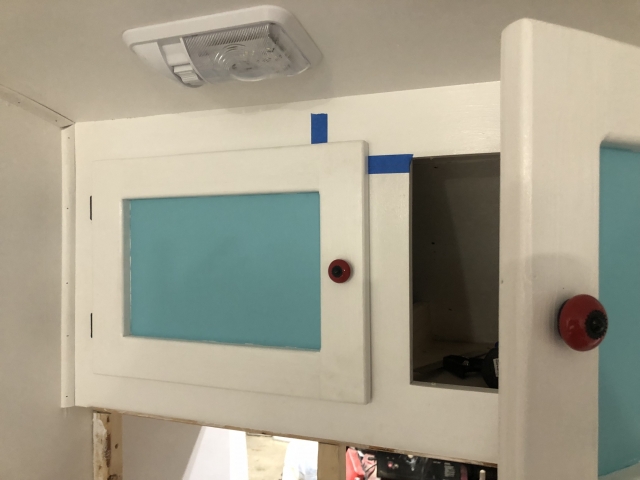
While the doors were drying, I installed more moldings in the cabin and rounded over the bottom edge of the cabinet face with a 3/8" round-over bit and painted the cabinet.

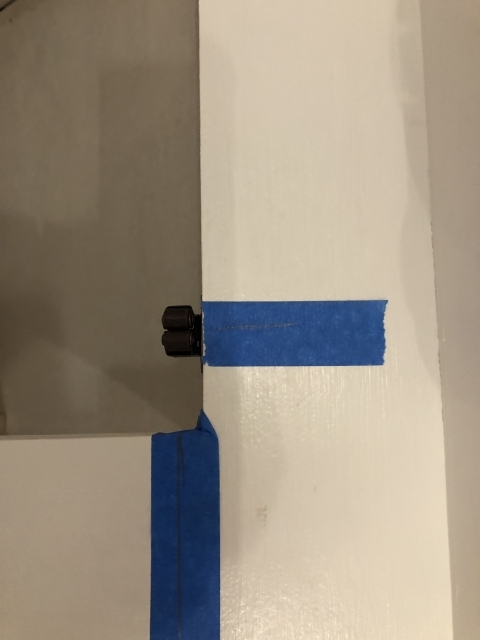
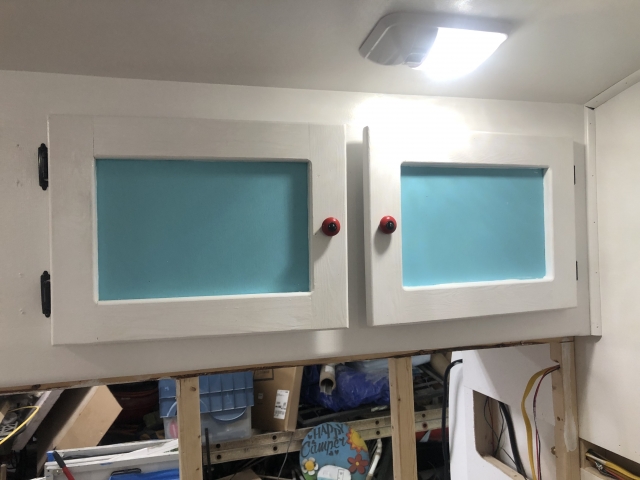
Then came time to install the doors, so back on with the hardware and hung the doors. Next I installed the roller latches, and used tape with a square and pencil to mark their position. I could then close a door, mark and measure the coordinates to install the latch on the door.

Image

Image

Image

Image

Image

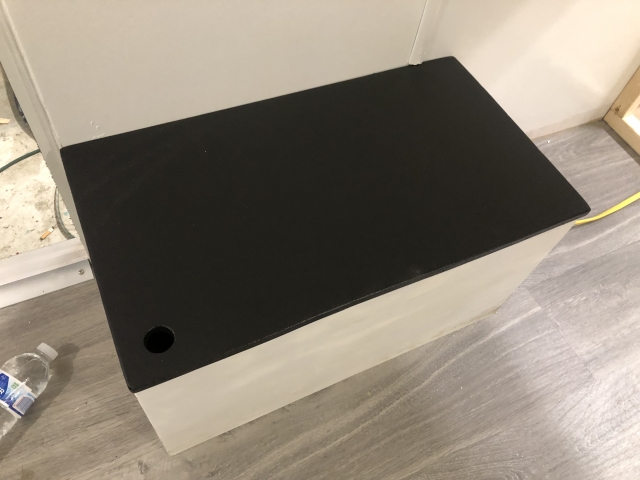
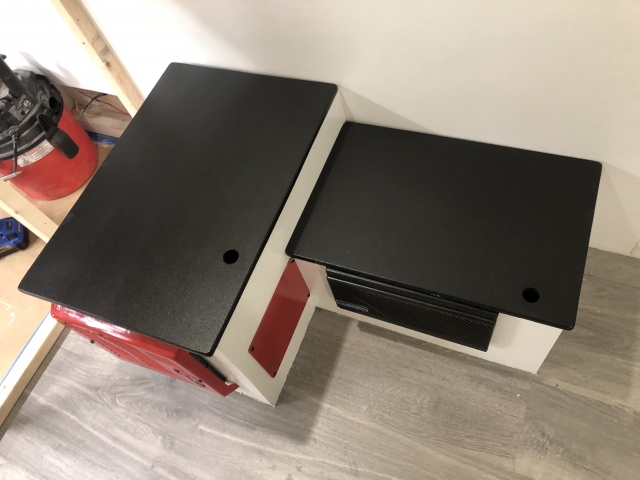
I finished the lid on the starboard side wheel cover cabinet, and took the opportunity to repaint the port side cabinet lids as well.

Image

Image

Image

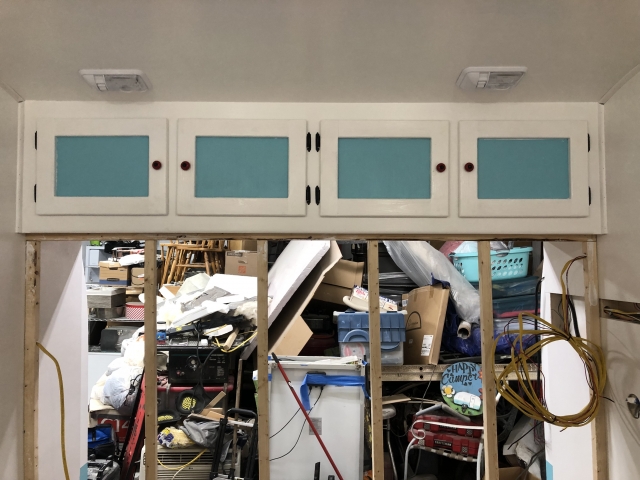
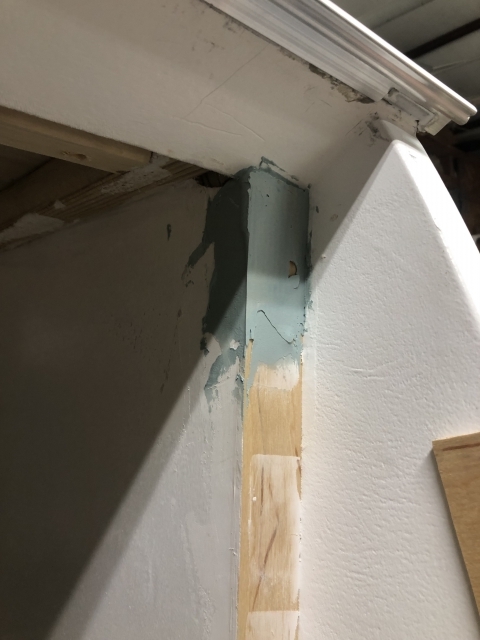
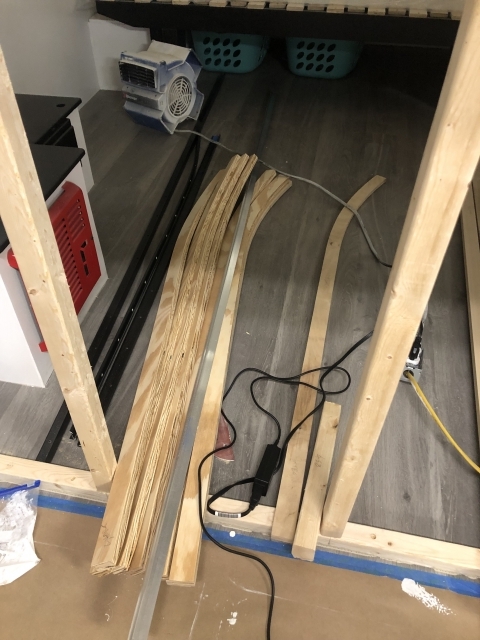
Bulkhead, with a lot of junk in the background.

Image

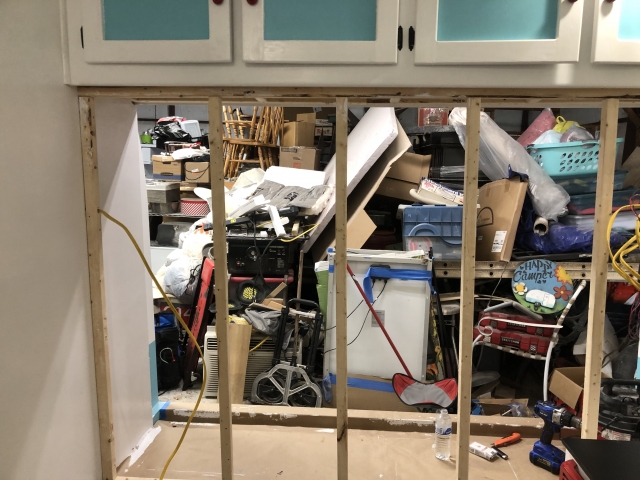
All the junk you see piled in this shop belongs to the pack rat landlord I'm renting my space from, by the way. But a few items in the forefront are mine: solar panels, etc.

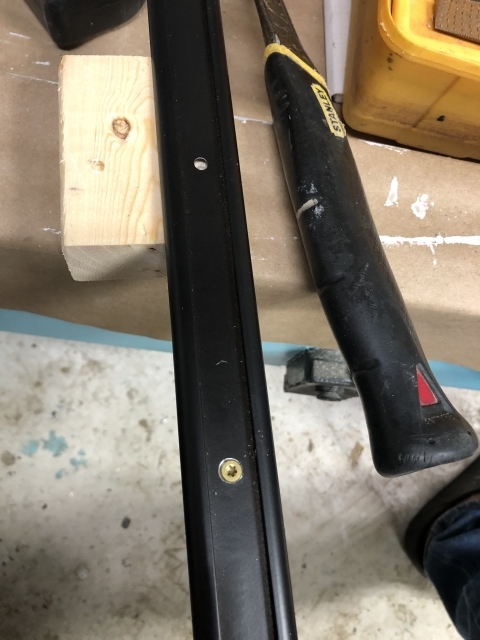
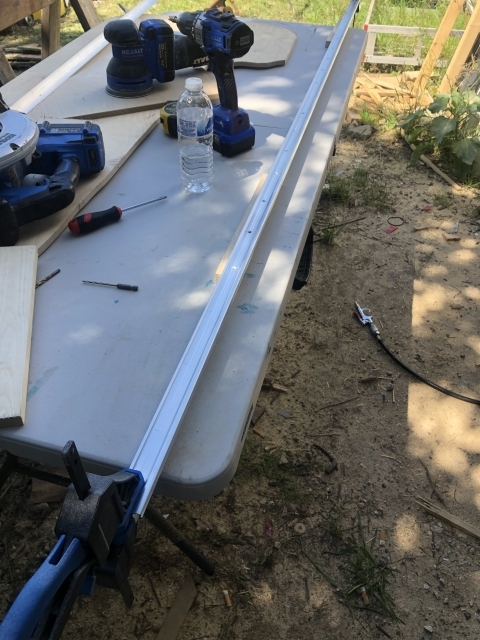
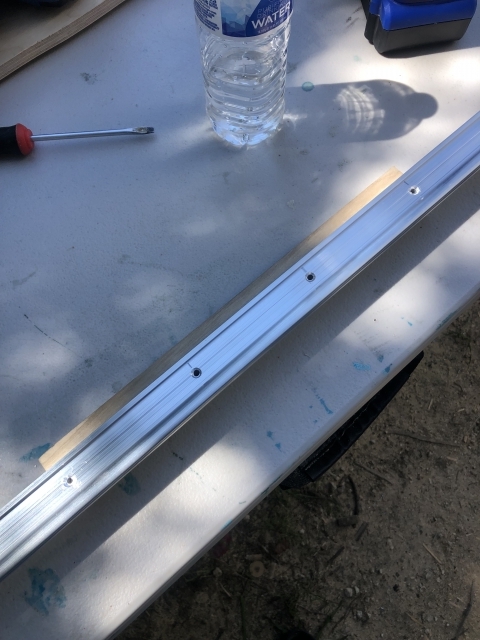
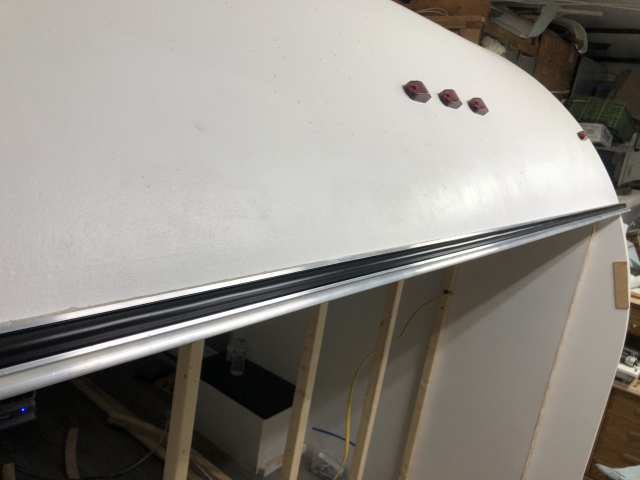
Here's a shot of the aluminum trim that will go on the sidewall of the hatch; this trim will receive my weatherstrip. I am countersinking the existing holes.

Image

I started with a 1/4" plywood pattern for the shape of my ribs, just getting started in this pic.

Image

In this next pic I'm machining the top part of hurricane hinge for screws.

Image

Image

And here it is installed

Image

I've been busy making ribs too, and reading in the forum about hatches, la da di, la da da.

Then I had to halt my hatch door project for a day, yesterday, to do a little bondo work and paint work that needed done before I proceed with the hatch.

Image

Image

And that brings us to today!

Image

Next up: The scariest part! Building a big hatch door! Will it work? Will it fit? Will it seal? Time will tell ...
I'm a happy man, I love my life!

My Gunter Li’l Standy build journal:
https://www.tnttt.com/viewtopic.php?f=50&t=75291
User avatar
Mark Gunter
Teardrop Advisor
 
Posts: 76
Images: 211
Joined: Tue Nov 29, 2022 9:54 am
Location: Cleburne, Texas
Top

Re: Gunter L'il Standy Build

Postby bdosborn » Mon May 22, 2023 10:34 am

Mark Gunter wrote:Image


That wire chase is a great idea!
Bruce
2009 6.5'X11' TTT - Boxcar
All it takes is a speck of faith and a few kilowatts of sweat and grace.
Image
Boxcar Build
aVANger Build
User avatar
bdosborn
Donating Member
 
Posts: 5494
Images: 772
Joined: Wed May 05, 2004 11:10 pm
Location: CO, Littleton
Top

Re: Gunter L'il Standy Build

Postby TimC » Mon May 22, 2023 12:34 pm

bdosborn wrote:
That wire chase is a great idea!
Bruce


Yes, brilliant. I might have to incorporate that in my next TD.
Tim
Niagara, WI
My First Benroy Teardrop Build Thread - A 5x8 Woodie - http://www.tnttt.com/viewtopic.php?f=50&t=63575
My Second Teardrop (partial) Build Thread - Started August '16 - http://www.tnttt.com/viewtopic.php?f=50&t=66939
#3 My son's Benroy Foamie team build - Started July '20 - http://www.tnttt.com/viewtopic.php?f=50&t=72877

Image
User avatar
TimC
Gold Donating Member
 
Posts: 1372
Images: 733
Joined: Sat May 23, 2015 4:15 am
Location: WI/MI border
Top

Re: Gunter L'il Standy Build

Postby Mark Gunter » Mon May 22, 2023 1:27 pm

It’s a result of my worrying, at least I can get to that main run of wires. Unfortunately, I used little retainers on the wires across the walls and ceilings after they left the chase, so it won’t really be possible to easily pull a wire if the problem lies elsewhere. I’m still glad I did the main run this way.
I'm a happy man, I love my life!

My Gunter Li’l Standy build journal:
https://www.tnttt.com/viewtopic.php?f=50&t=75291
User avatar
Mark Gunter
Teardrop Advisor
 
Posts: 76
Images: 211
Joined: Tue Nov 29, 2022 9:54 am
Location: Cleburne, Texas
Top

Re: Gunter L'il Standy Build

Postby Mark Gunter » Sun Jun 18, 2023 12:36 pm

Just a very quick update on my build.

I completed the hatch door a couple weeks ago, it was by far the most stressful part of the build. I haven’t weighed it nor ordered the gas struts for it yet.

Not long after, I finally moved the camper out of the shop and drove with about 15 miles, it pulled very nicely.

Since then, it’s lived just outside the shop door and I’ve been busy building out the galley. First thing I did, though, once it came outside, was to install the Maxxair fan and the cable gland for my solar cables in order to keep the weather out. It rained 3 inches the next day, and the galley area and cabin remained bone dry. That was a big stress relief.

Pics to come soon.
I'm a happy man, I love my life!

My Gunter Li’l Standy build journal:
https://www.tnttt.com/viewtopic.php?f=50&t=75291
User avatar
Mark Gunter
Teardrop Advisor
 
Posts: 76
Images: 211
Joined: Tue Nov 29, 2022 9:54 am
Location: Cleburne, Texas
Top

Re: Gunter L'il Standy Build

Postby featherliteCT1 » Sun Jun 18, 2023 1:27 pm

Beautiful work! :thumbsup:
featherliteCT1
1000 Club
1000 Club
 
Posts: 1125
Joined: Wed Dec 28, 2016 6:54 am
Location: Southern Indiana
Top

Re: Gunter L'il Standy Build

Postby Mark Gunter » Sun Jun 18, 2023 3:39 pm

Thanks Featherlite!
I'm a happy man, I love my life!

My Gunter Li’l Standy build journal:
https://www.tnttt.com/viewtopic.php?f=50&t=75291
User avatar
Mark Gunter
Teardrop Advisor
 
Posts: 76
Images: 211
Joined: Tue Nov 29, 2022 9:54 am
Location: Cleburne, Texas
Top

Re: Gunter L'il Standy Build

Postby Mark Gunter » Mon Jun 26, 2023 10:38 am

No pics, didn't happen, so ... my pics left off as I was preparing to build my hatch door, here it is in progress.

First, the frame & ribs went up in place

Image

Image

Image

Then, the 1/4" ply skin

Image

Image

Then the canvas skin

Image

Image

Then I took it out to fold the canvas around the sealing edge, and painted

Image

Image

Meanwhile, I installed the black aluminum trim and D seals.
Afterward, it was permanently installed and a few more coats of paint.

Image

Went to work in tight quarters to insulate it

Image

Got my latches installed

Image

Tight quarters installing the inside 1/4" skin

Image

Opened her up and trimmed edges with router

Image

Image

Image

Finished skinning the bottom and added a rail across the bottom, I guess it's a "prop rail" for now since I haven't order the struts yet.

Image

"Cleaned up" my act for the umpteenth time

Image

Wrangling wires for the galley

Image

Installing galley wall to bulkhead

Image

Image

After this, I decided it's time to move it out of the shop. Once out, I had to take a drive to see how this top-heavy monstrosity pulls down the road. I made a 15 - 20 mile round trip with a couple of stops, and was surprised at how easily it pulls. Took pics at the Dollar General parking lot.

Image

Image

Image

Image

Since then I've begun on the galley.

In the lower cavity on the right will live a 12v refrigerator that used to live in my van for boondocking. On the counter directly above it will be the a/c refrigerator that came from the sacrificial popup, feshly painted red to match my new stove/oven.

Image

Image

I built a slanted rack for holding four camp dishes (plates)

Image

Image

Figuring out a face frame piece for the electronics

Image

Water pump from sacrificial popup

Image

Lower face frames going in

Image

Image

A pull out cutting board for extra space

Image

I thought I had more pics of the galley progress but have to wait, I guess. I got a little more accomplished, then had to go to Chicago on business. More to come soon!
I'm a happy man, I love my life!

My Gunter Li’l Standy build journal:
https://www.tnttt.com/viewtopic.php?f=50&t=75291
User avatar
Mark Gunter
Teardrop Advisor
 
Posts: 76
Images: 211
Joined: Tue Nov 29, 2022 9:54 am
Location: Cleburne, Texas
Top

Re: Gunter L'il Standy Build

Postby bdosborn » Mon Jun 26, 2023 5:39 pm

Nice! Are you officially dried in and ready for weather? Seems like its time to camp if you are... :thumbsup:
Bruce
2009 6.5'X11' TTT - Boxcar
All it takes is a speck of faith and a few kilowatts of sweat and grace.
Image
Boxcar Build
aVANger Build
User avatar
bdosborn
Donating Member
 
Posts: 5494
Images: 772
Joined: Wed May 05, 2004 11:10 pm
Location: CO, Littleton
Top

PreviousNext

Return to Build Journals

Who is online

Users browsing this forum: No registered users and 38 guests