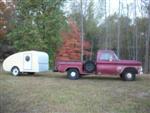
Bread loaf, sort of...

Canned Hams of all types and sizes...and Bread Boxes to go with that ham......

Postby oicu812 » Sat Oct 29, 2011 9:04 am

Great pictures, shows shots most of us never see. I really like the pre-war

Bread Loaves. On fabricating the frame and skin look at some shrinker

stetcher machines and E-wheel's from Baileigh or Eastwood.

If you could find a good metal worker to work with would be a big help

on the learning curve. The RV museum in Elkhart has a nice 1937

Hayes in great shape, not too far, might be time for a road trip.

Keep us posted.
Pie are square?
User avatar
oicu812
Teardrop Advisor
 
Posts: 73
Images: 1
Joined: Sun Jul 04, 2010 6:58 pm
Location: Indpls.

Postby doug hodder » Sun Oct 30, 2011 10:17 pm

Rob...not to bug you, but is there any sort of schedule on this? You unfortunately have me all jazzed up now on something I've been brewing for a while. I'm slowly collecting parts, but seeing what you have acquired has gotten the wheels turning now.

I like how you do things up...spend your time, finding just what is exactly correct for the period and executing it perfectly. Thanks for the inspiration. Doug
doug hodder
*Snoop Dougie Doug
 
Posts: 12625
Images: 562
Joined: Tue Dec 14, 2004 11:20 pm

Postby 48Rob » Sat Nov 05, 2011 6:13 pm

Doug,

Sorry, somehow I missed your post!

In my mind, my schedule is to have it done next month...but reality says it will probably take a couple years.

As all I have are a few parts and a mock up, the "project" amounts to me starting from scratch to design and build a trailer that "looks" like the 1937 Hayes that I took to the ground.

I found a metal worker who is supposed to come by next week to look at what I have.
If he can reproduce the compound curves...affordably...then I'll start getting this together.
If he can't, then I have some hard choices.
I really don't want to do fiberglass, I can do canvas, but am not sure I want a museum piece.

After thinking about this project the last few weeks, building a teardrop or straight sided trailer seems like childs play...

If I can pull it off, it will be (in my opinion) the coolest travel trailer out there!
But, I just keep wondering if I have what it takes to see it through... :thinking:

Rob
Waiting for "someday" will leave you on your deathbed wondering why you didn't just rearrange your priorities and enjoy the time you had, instead of waiting for a "better" time to come along...
User avatar
48Rob
Super Lifetime Member
 
Posts: 3882
Images: 4
Joined: Thu Nov 17, 2005 6:47 pm
Location: Central Illinois
Top

Postby 48Rob » Sat Nov 05, 2011 6:22 pm

I've been really busy at work so no real progress on the trailer project.
I did get lucky though and another old trailer person shared a very rare advertisement with me.
Remember how my wife thought the trailer looked like a train? Well, while doing some cleaning I uncovered a depressed area just above the center of the front windows that was about 8" across, and round. Kind of looked like maybe a place for a large light/lamp to go with the two on either side.

<IMG src="http://im1.shutterfly.com/media/47a1ce30b3127ccefe02bf6afc4300000030O02AbNGjdu5bMge3nww/cC/f%3D0/ps%3D50/r%3D0/rx%3D550/ry%3D400/">
Something like a train engine of the era...
<IMG src="http://im1.shutterfly.com/media/47a1ce35b3127ccefe089a62863f00000030O02AbNGjdu5bMge3nww/cC/f%3D0/ps%3D50/r%3D0/rx%3D550/ry%3D400/">

Here is the picture from the ad;

<IMG src="http://images.yuku.com/image/pjpeg/183260f4545cb59f46438908828c78e716134011.jpg">
Sure looks like they were going for that locomotive look!

Today while browsing Craigslist, I came across an ad for a travel trailer frame.

I called and went right out to look at it. The fellow had bought a 2006, 30' Gulfstream travel trailer and discovered it was very moldy inside the walls from several leaks. He didn't want to dump it on anyone else (good guy!) and stripped it to the frame.

He was going to build a flatbed, but then thought better of the idea.
Worked out pretty well for me!

The frame is too long/big, but it is a fine start, considering the price of steel is out of sight. I got a good non rusty frame, 2 brake axles, 4 stabilizer jacks, and a good title for $280.00.

<IMG title=applause alt=applause src="http://images.yuku.com/image/gif/4ef26d44b65805bd424315002ff3b1a4d6bb0763.gif" width=48 height=32>

Rob


<IMG src="http://im1.shutterfly.com/media/47a1cf24b3127ccefedf4193ba2700000030O02AbNGjdu5bMge3nww/cC/f%3D0/ps%3D50/r%3D0/rx%3D550/ry%3D400/">
<IMG src="http://im1.shutterfly.com/media/47a1cf24b3127ccefede52a75bfe00000030O02AbNGjdu5bMge3nww/cC/f%3D0/ps%3D50/r%3D0/rx%3D550/ry%3D400/">
Waiting for "someday" will leave you on your deathbed wondering why you didn't just rearrange your priorities and enjoy the time you had, instead of waiting for a "better" time to come along...
User avatar
48Rob
Super Lifetime Member
 
Posts: 3882
Images: 4
Joined: Thu Nov 17, 2005 6:47 pm
Location: Central Illinois
Top

Postby doug hodder » Fri Nov 11, 2011 2:11 am

Great foundation Rob! Gonna stretch it and use both axles or remove one? I'm really envious on this project....mid 30's stuff is just the best! I keep waking up in the night thinking of Deco ideas....It looks like you got plenty of iron to play with. Doug
doug hodder
*Snoop Dougie Doug
 
Posts: 12625
Images: 562
Joined: Tue Dec 14, 2004 11:20 pm
Top

Postby 48Rob » Fri Nov 11, 2011 8:17 am

Hi Doug,

No stretching, 30' is already way too long!

I've determined that 24' (overall, including tongue and bumper) is the ideal number for the re creation.
I've already cut the rear end off and removed the rear axle.
I'll move the remaining axle forward about three feet.
Currently plan to have just a single axle, but before I start welding I've got some serious figuring to do to come up with a realistic weight, to be sure 1 axle is safe/practical.

Rob
Waiting for "someday" will leave you on your deathbed wondering why you didn't just rearrange your priorities and enjoy the time you had, instead of waiting for a "better" time to come along...
User avatar
48Rob
Super Lifetime Member
 
Posts: 3882
Images: 4
Joined: Thu Nov 17, 2005 6:47 pm
Location: Central Illinois
Top

Postby doug hodder » Sat Nov 12, 2011 8:56 pm

Guess I didn't word that correctly....I meant to stretch the build to fit the frame, since you have the end caps. Seems like a lot of the newer stuff is sticking tandems under fairly short trailers, not like they used to do. Doug
doug hodder
*Snoop Dougie Doug
 
Posts: 12625
Images: 562
Joined: Tue Dec 14, 2004 11:20 pm
Top

Postby 48Rob » Sun Nov 13, 2011 9:01 am

Doug,

My bad...I should have thought about your question before I answered...

Yes, stretching the trailer is the idea I have.
The original was 21' bumper to ball.
The new one will be 24' overall.
I have a metal worker coming today to look over the endcaps and corners to determine if he can reproduce them.
If he can (easily and without too much expense...) I'm also going to stretch it in width another 14 inches.

I've been researching the older trailers from the 30's, and most over 21' have tandem axles, so it looks like it would be period if I chose to, or need to go that route.
Calculating the total weight, and the balance thereof will decide.


Rob
Waiting for "someday" will leave you on your deathbed wondering why you didn't just rearrange your priorities and enjoy the time you had, instead of waiting for a "better" time to come along...
User avatar
48Rob
Super Lifetime Member
 
Posts: 3882
Images: 4
Joined: Thu Nov 17, 2005 6:47 pm
Location: Central Illinois
Top

Postby bdosborn » Sun Nov 13, 2011 9:38 am

Rob,

I don't want to bog you down in another tire thread but I think that tire capacity will tell you whether you need a tandem axle or not. In my opinion (and its just that, my opinion!) I would go tandem axle on anything over 3,500#. That way you'll have plenty of reserve capacity in your tires without having to use big honkin' trailer tires that are hard to find in small towns. I did a ton of reading on trailer tires after our Marathon blowout and my conclusion is that my trailer tires *will* have *at least* 25% spare capacity over GVWR from now on.

Here's a link to give you an idea of typical tire capacities.

Goodyear Tire Inflation Tables

Good luck, this will be a great build!

Bruce
2009 6.5'X11' TTT - Boxcar
All it takes is a speck of faith and a few kilowatts of sweat and grace.
Image
Boxcar Build
aVANger Build
User avatar
bdosborn
Donating Member
 
Posts: 5494
Images: 772
Joined: Wed May 05, 2004 11:10 pm
Location: CO, Littleton
Top

Postby 48Rob » Sun Nov 13, 2011 10:23 am

Bruce,

Thank you.

No worries, I like the tire threads... ;)

Using the capacity of the tires is a good gauge, thanks.

It is my intention to place the axle a bit further back than most, but again, calculating/knowing the completed weight will have to be done first, before too many choices can be made, such as vintage or retro rims, which also need weights to be determined.
It may be that I have to go tandem...
I should know a lot more soon, after getting the report fom the metal man on how, and what to do the end caps with.

Rob
Waiting for "someday" will leave you on your deathbed wondering why you didn't just rearrange your priorities and enjoy the time you had, instead of waiting for a "better" time to come along...
User avatar
48Rob
Super Lifetime Member
 
Posts: 3882
Images: 4
Joined: Thu Nov 17, 2005 6:47 pm
Location: Central Illinois
Top

Postby Mark72 » Sun Nov 13, 2011 11:49 am

This is one to watch Folks! I know you can pull this off Rob!

Mark
ImageImage
User avatar
Mark72
Donating Member
 
Posts: 998
Images: 127
Joined: Sun Dec 10, 2006 5:35 pm
Location: Indiana-Fredericksburg
Top

Postby Rusty O'Toole » Thu Jan 26, 2012 11:12 pm

This project is very doable. The only compound curves are the front cap and the rear corners, and you have those.

Every other part of the exterior is flat or simple curve, that you can make from flat stock by bending it around.

You can make a mold and duplicate the compound curved parts at low cost in fibreglas. It will take some work but here is how I would do it.

First you need to mount the pieces to a wooden framework. Make sure they are as straight and true as possible, your finished parts will only be as good as the mold.

Sand off the old paint, straighten the metal, fill with plastic filler and block sand smooth. Your bodyman friend may help with this. You may want to use some thin plywood or paneling scraps to make templates so you can check that the pieces are the same contour both sides.

When the parts are straight you can make a mold of hydrocal plaster. Just go to a good lumber yard and ask for some hard plaster, I used a brand called Diamond Hard, there are various kinds of plaster from hard to soft.

Cover the parts with Saran wrap or thin plastic like a dry cleaner's bag. If you oil the parts the plastic will stick down. Smooth out any wrinkles.

Now mix up some plaster, dip a piece of burlap in the plaster and lay it on. Cover the part with plaster soaked burlap. When it is dry add another coat, you want to build up a thickness of 3 or 4 inches. Before you finish, stick a wooden box or milk crates to the plaster to make a base. You want to be able to turn your mold upside down and have it sit stable on the floor.

Let the plaster dry for a few days. Then carefully work your mold loose from the metal, or the metal loose from the mold.

Now you have a mold that will allow you to make parts from fibreglas. If you ar careful to wax it good, or use the right mold release, and don't knock it around you can make dozens of parts from a plaster mold.

There are other tricks, like drill some holes thru the mold and put in air hose connections. A little compressed air will lift a part out of the mold like magic. Fill the holes with a dab of plasticene and no hole will show in the finished part.

The rest of the trailer can be made in the usual way, framed with wood covered with thin plywood and finished with sheet aluminum, sheet fibreglas or Masonite. The roof can be fibreglased and sanded smooth with the help of some Bondo or plastic filler.

This would be quite a monumental job of trailer building but what a trailer you would have!

It might even be possible to sell a kit of the molded fibreglas parts to other builders and recoup some of your cost for the molds.

Just some ideas, there are lots of books on fibreglas and web sites. The stuff is not that hard to work with.

In fact there may be a fibreglas boat manufacturer or small truck cap maker who could mold the parts for you if you have the molds.
Rusty O'Toole
Teardrop Inspector
 
Posts: 11
Joined: Thu Jan 26, 2012 10:50 pm
Location: Cobourg Canada
Top

Postby 48Rob » Sun Jan 29, 2012 10:38 am

Rusty,

Thank you so much for the nice tutorial!

I've been considering doing fiberglass as I'm still having trouble finding a metalworker to form the compound curve sections affordably.

Though I do have the "templates" they really are not of much use other than a general guide.
I plan to build the body 12" wider than it is now.

The current plan is to build the body, then use the framework to fit the metal to.
If I did fiberglass, I would need to stretch material of some sort over the framework? then apply the layers.

Rob
Waiting for "someday" will leave you on your deathbed wondering why you didn't just rearrange your priorities and enjoy the time you had, instead of waiting for a "better" time to come along...
User avatar
48Rob
Super Lifetime Member
 
Posts: 3882
Images: 4
Joined: Thu Nov 17, 2005 6:47 pm
Location: Central Illinois
Top

Postby Rusty O'Toole » Sun Jan 29, 2012 6:42 pm

"Though I do have the "templates" they really are not of much use other than a general guide.
I plan to build the body 12" wider than it is now."

Not sure what you mean. There is no reason you can't build the body any length or width you want.

The only hard to make parts are the compound curved, front cap and rear corners.

I was suggesting you make molds off the old parts and mold new parts out of fibreglas.

The reason for cutting templates is so you can be sure your parts are the same side to side before you make the mold. They are purely a measuring device easily cut from thin plywood or scrap paneling.
Rusty O'Toole
Teardrop Inspector
 
Posts: 11
Joined: Thu Jan 26, 2012 10:50 pm
Location: Cobourg Canada
Top

Postby 48Rob » Sun Jan 29, 2012 7:08 pm

Hi Rusty,

The templates I was referring to are the end cap and rear corners.

I understand the use of templates to check the profile from side to side.

The issue with making the body wider is that the end cap(s) will no longer be the same profile.
It is difficult to see in the pictures, but the compound curve goes all the way across the front cap, no part of it is flat.

The rear corners were cut from a similar rear cap, it too has no "flat" sections.
So, if I create a wider body, the existing metal isn't of use for patterns.

Does all that make sense?
I'm figuring I'll have to make the new wood frame, then cover it with something so I have a base for the fiberglass.
If I go with metal, the wood framework should be enough.

The really good news is that I have refined the interior layout so that everything I want fits within a 16' body. :applause:
The original was 19' long and didn't have half of what I'm going to put in there!

Rob
Waiting for "someday" will leave you on your deathbed wondering why you didn't just rearrange your priorities and enjoy the time you had, instead of waiting for a "better" time to come along...
User avatar
48Rob
Super Lifetime Member
 
Posts: 3882
Images: 4
Joined: Thu Nov 17, 2005 6:47 pm
Location: Central Illinois
Top

PreviousNext

Return to Canned Hams & Bread Loaves

Who is online

Users browsing this forum: No registered users and 7 guests