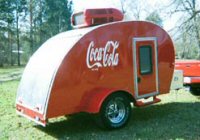
Okay, let’s get caught up. I had Karl to lend
a hand and take some pics as I worked on Thursday.
One
of the reasons I put so much effort into the stretcher method
of clamping was because it could be applied
with the hatch latched shut. My thinking was that if there was any stiffening gained in the hatch by the application
of the
foam, it would be less likely to create fitment issues if it was applied
with the hatch in the closed position. Well the first layer
of foam hasn’t really shown any tendency to change the stiffness
of the hatch, so I figured that was
a moot point.
After the failure
of the stretcher on the starter piece (hatch second layer, bottom rear), and having let the whole thing simmer on the back burner for
a few days, I decided to prop the hatch open slightly so that I could clamp backer bars to the edges
of the hatch to ensure that the
foam is clamped properly this time. Though, I may still go back to the stretcher for the tighter curve.
As discussed above, I decided to use the PL300 again
with an improved
technique (water cleanup, easy application, reasonable working time, and thickened consistency are all working in its favor). Sticking
with the finer notched trowel; adding the shallow ventilation kerfs; fewer and smaller beads
of PL; only running beads in the vertical direction (except for at the top and bottom edges
of the panel); making sure that the trowel notches run vertically in the field, and across the top and bottom (for
a possible chimney effect between kerfs), and horizontally at the sides; plus the improved clamping
technique, I think I have this thing licked!
Here I am applying the PL300.


First tip the panel into the bottom along the top
of the bumper.

Then wipe
a little excess squeeze out
with a damp rag, so that it doesn’t get glued to the clamp backer.

Clamp the bottom first; roll the panel up while pressing along the length; and clamp the top. The middle portion
of the top edge
of the panel wanted to pucker up, so wedge shims were tucked in under the backer bar. Here I am
with the damp cloth and
a stick wiping the excess.
 A
A closer look at the top edge and shims.


Tonight I broke down the clamp setup and am pleased to report that everything seemed to have gone well. No major gaps, no major shifting and no sign
of weakness in the join. This one is not coming back off!
Time to start dry fitting the next panel (!?!?! Really? If you don’t recall, you’ll see what I mean shortly). So I get the next full panel; dry fit it to figure out where I want the full depth/more frequently spaced kerfs to be, as well as the shallower vent kerfs; do the saw setup; run the kerfs; check the vacuum system; wipe the dust off
of the panel; and get back to dry fitting it… when I realized that I had already started fabricating the same panel, including locating the taillights and license plate bracket, as well as adding the wire holes. All I needed to do to it was add
a few more kerfs. DOH.
No big deal, I can adjust the kerfing and use the other piece at the tight radius for the next piece up.
Here is the kerfed panel w/o the extra details.

Here’s
a look under the table saw cabinet after running both pieces
with the vacuum connected to the base
of the cabinet.

And here’s the tub
of the dust separator.

Seems like there was more dust still in the saw than what made it into the tub, but I guess that is to be expected
with all
of the chinks and gaps in the saw cabinet. I can tell you that there has been
a marked reduction in very fine airborne dust
with the use
of the vac for active dust collection.
I decided to put the hatch wiring harness in place before sticking the next panel. I can still reverse that decision when it comes time to cut out behind the taillight bezels. I just used small pieces
of packing tape here and there to “baste” the harness into the route. Wrapped the pigtails
with a small piece
of electrical tape to hold them together and make it easier to fish them thru the panel at fit up. This was
a dry run.

Karl happened to be visiting, so I spread the PL and he helped me get the panel in place and the clamps set up. It could have been
a one man job, but was quicker and went much smoother
with two, so thanks again to Karl (he really is my best friend). We started the same way by clamping the bottom first, rolling and pressing up the curve to about the midpoint
of the panel, adding another bar and clamps, and working up to the top. The top backer bar is the one that is stapled into the end
of the stretcher. I didn’t bother to take the stretcher apart to use it, just left the Tyvek attached and flopped it around as needed to get the job done. We decided to add another backer after seeing evidence
of a little puckering at the edges.

Here I have flipped the Tyvek down and have added
a row
of wedge shims to pinch the top edge down securely in the middle.

 A
A better look at the profile under the clamps.

You can kind
of see how the top edge is sucked up tightly, but the black sharpie line I used as
a reference for where to stop applying the PL makes it look like there is still
a gap.

Shortly after taking that pic I decided that it would be
a good idea to inspect the wires more closely and make sure they were all still free to wiggle around. Good thing I did. I found that the brown wire had jumped out
of the route and become pinched just to the right
of the left hand taillight. Fortunately the trouble was localized, the PL was still plenty soft, and the
foam has enough compliance that all I had to do was gently tug on the wire
a little for it to pop back into the trough. Then I made sure to check each wire at all access points to make sure that I saw corresponding movement when each wire was wiggled.
And that was where I got to tonight. Tomorrow I’m going to help Karl ship his motorcycles down from the loft, so I spent
a little bit
of time clearing my stuff out
of the way so that we can roll the camper off
of the shipping hatch to use the hoist. Maybe I’ll have
a chance to practice my video
technique. Between that and the fact that tomorrow is Yvette’s and my wedding anniversary, I don’t expect to get much, if anything, done on the camper; but Sunday is another day.


 I know , it’s
  Water based , it should be compatible ... maybe? ( another test is indicated )
 Looks like
 I figure if the wiring stops working someplace I will just surface mount some wiring loom to the inside wall if I can't fix the original; it's all 16ga12v stuff direct from an auto-battery power source so no real cautionary. I only have 4 wiring runs