So our team captain failed to tell the pool organization that we were taking time off and they put us on the schedule again. We didn’t realize until the last minute, and didn’t want to leave the opposing team hanging, nor did we want to have to pay the game fees without playing, so we pulled a team together and are back in it again. Oh well.
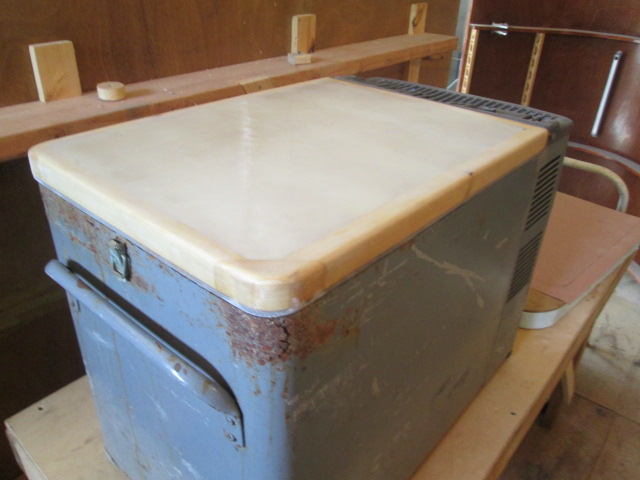
Still made a little progress on the fridge lid and camper this weekend. The top two plies of 6oz glass on the lid were well cured and ready to be trimmed.
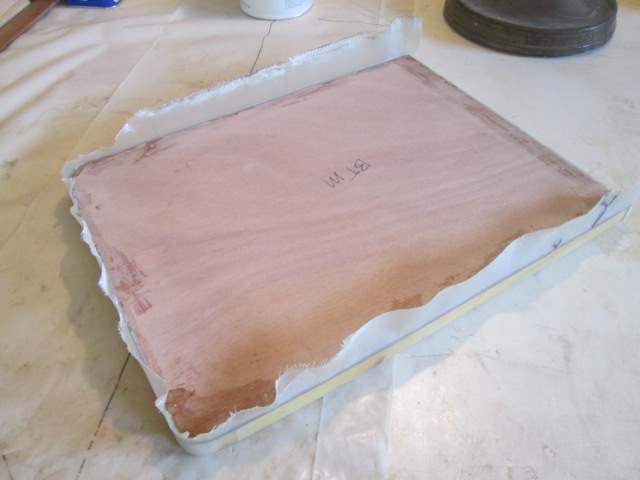
I used the cheap serrated steak knife in a sawing action making sure to cut on the push stroke, thus not risking separation of the glass from the lid (not that it was a big concern, just being cautious).
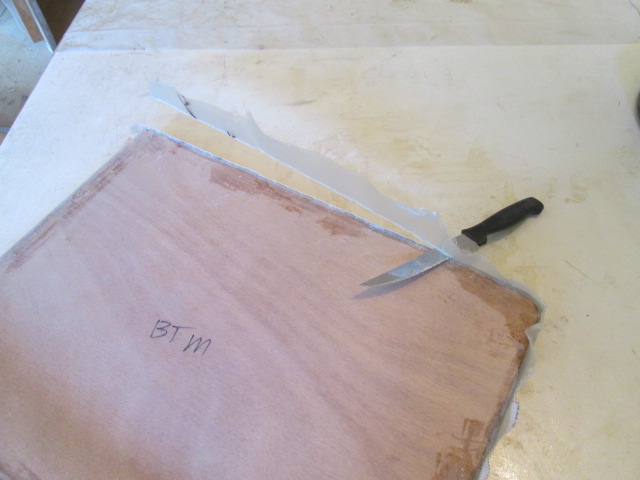
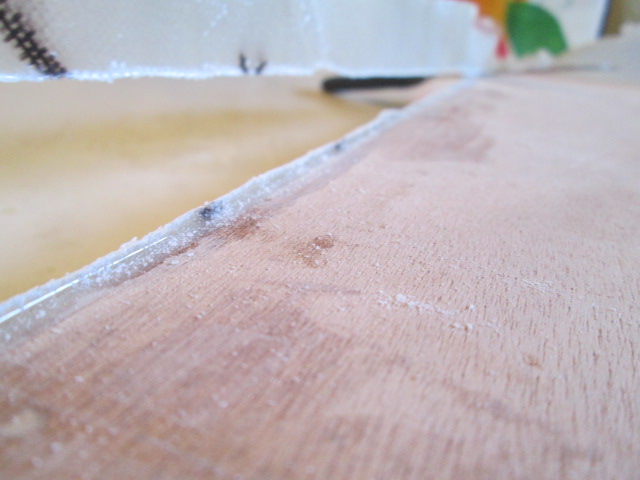
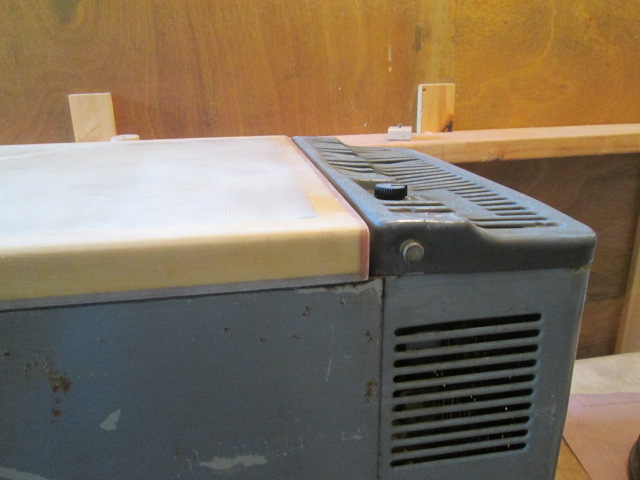
The knife has coarser serrations and a larger bevel on one side, so I keep that side up and it follows the edge easier without digging down in. There always seems to be a bit of a bead of epoxy right at the edge that would be very difficult to trim off with the knife, so I just glide above that taking the dangerous spiked bits and easy stuff off. The long cured epoxy was notably harder to cut than when I catch it the next day when it is still a little “green”, but it wasn't too difficult. Here’s a closeup of the standing edge after the rough cut.
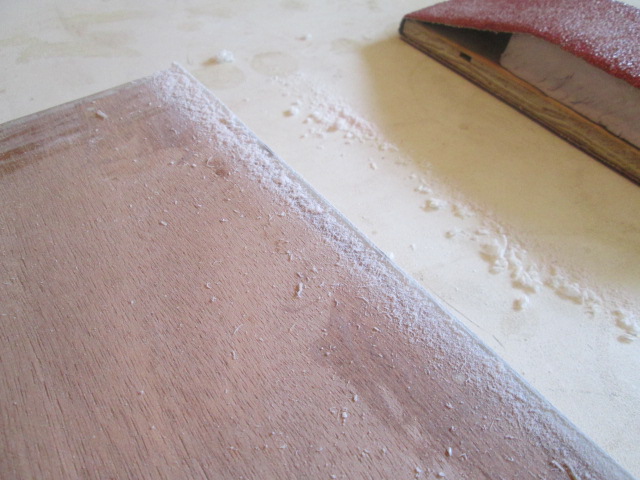
Here it is after rough sanding with 36 grit on the medium block. Note the dusty fibers. Always wear your respirator. Just a bit more work with the 100 grit and this will clean up nicely.
A little test fit before washing off the amine with water and a greenie pad.
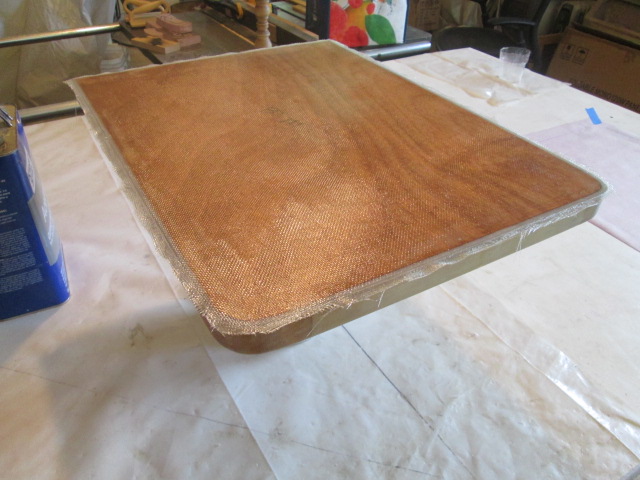
After making sure that the wooden underside was good and dry (weather was good and I held it in front of the big fan for a bit), I laid a single ply of 6oz on the under side. First I wet out the cloth on a piece of plastic sheet on the bench, then brushed the plywood to make sure it was wet and did not leach out too much epoxy from the glass. Rather than using the PMPP technique, I figured the piece was small enough to just pick it up and lay it by hand. That nearly backfired with some big ripples and the cloth getting a little skewed, but it was small enough that I could lift an edge here and there, and squeegee it out flat again. I had to remove a bit of excess epoxy, too. Then I trimmed the edge close while wet (to avoid the dreaded edge lift blisters), and went over everything again with the short bristle brush making sure everything was poked down good.
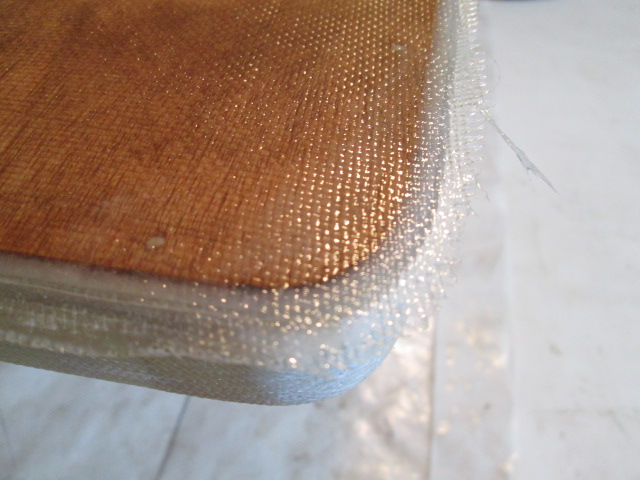
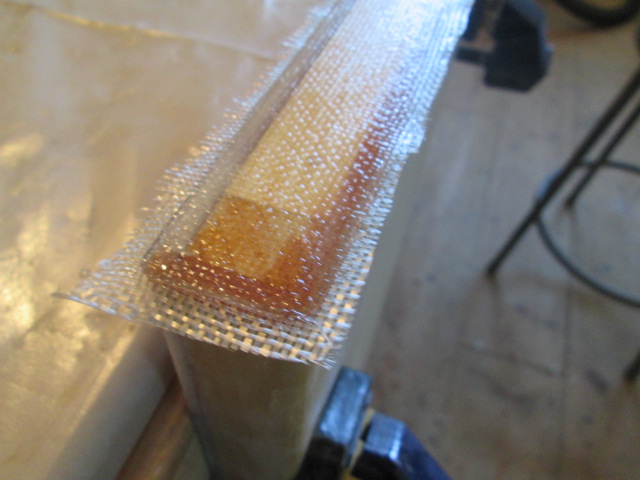
In the previous pic you can clearly see the flocked edge and a couple of the filled screw holes where the flocking dam had been temporarily screwed on.
Today I prepared a couple of areas on the street side of the cabin that had blistered up; one the size of a large triangular corn chip behind the door, and the other about the size of a silver dollar in front of the door, both about 3/4 of the way up. Rather than just drill a fill and vent hole, I decided to drill several holes around the perimeter and one in the middle of each area. This ended up being easier to know that I was getting epoxy in and all of the air out. At first I was worried that these delaminations were due to the spackle, but there wasn’t any evidence of it under the second spot, and the areas were clearly bulged out, so I’m left wondering if there is some sort of off gassing going on. I did have to wipe the whole side of the camper down first as there was a layer of shop dust collected on it, which is how I found the second spot (which I had not noticed in earlier operations so can only conclude that it developed in the interim).
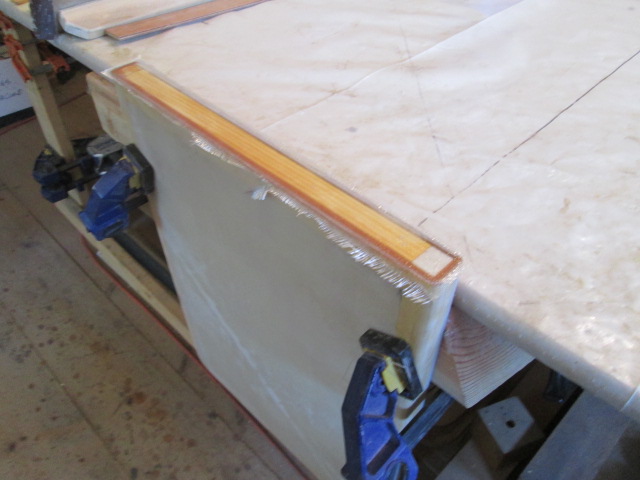
Anyway, I had trimmed the bottom ply of glass from the fridge lid, washed amine, sanded the edges flush in addition to some drips and stray strands of glass; and clamped the lid with some standoff blocks to the edge of the bench so that the back edge was held horizontal. Then I mixed up a small batch of epoxy, wet the edge and laid a strip of 6oz on it. Dabbed on a bit more epoxy, and trimmed the excess glass close.
I used a hypo syringe (just the syringe, no needle) to inject epoxy into the holes I had drilled, palpitating the blisters to pump air out and let excess standing epoxy slurp back in (since the cabin is still laying on its side). I had already prepared a couple of pieces of 1/2 plywood with release material (one I used packing tape and the other I just stuffed into a zip lock baggy), which I placed on top with a full gallon jug on each to weigh them down flat. I made sure to leave one of the drill holes uncovered so that any excess epoxy could squeeze out (which I wiped up with a paper towel so as not to leave a large hard lump later).
The rest of the epoxy I mixed with some fairing filler and spread on some of the unfilled weave of the front of the wall. I’m not a body man and am getting discouraged by the scope of work left to do to get this thing even close to fair. Had a fleeting think about just going to paint without bothering to fair the rest of the weave. I dunno, maybe the heat was getting to me, so I called it a day there.


 Frank
Frank


 Glad you’re back ….
 I wonder what we can do with this (besides make little plastic octopi)?
 , but it’s Pricy ...