Thanks GPW, I'm trying to avoid any big warts that would put a tarnish on all of my hard work, so it's sort of like the snowball effect... just keeps getting bigger and bigger... train kept a rollin'. You know, pride in your work, details details details, forest for the trees, blinded by science.
Karl thinks its funny the nits that I am picking (he makes ultra quality look easy and gets paid a pretty shiny nickel for his troubles! ... I should be taking pic's of the bronze railings, gates, and gate hdwr that he has been turning out; slick). I reminded him that I still have to erect the walls, bulkhead and face frames, maybe finish out the cabinet floors and cleats (time permitting… would prefer to do this before the roof goes on), build the roof and hatch (no small feats), and cover the whole thing… mount the doors, pre-prep primer, paint and under canvas details, canvas, paint, window install, fit the latches, wiring, install lights, …and on and on.
If I can freeze some of the warts off and not have to look at them anymore, that's what I'll do. If they are going to be covered or hidden, I try not to worry about them too much (...but it would be nice to be able to avoid and/or fix those, too... it's a curse... fix the easy ones, "oh well" to the others). It's all relative to the time it takes, and in a way, the expense of the materials. I want to do justice to the materials that I have spent good “do-re-me” on. It would be kind of hard to explain 3 years of my every waking spare moment and $6k on a pile of "ssssshtuff", so I "must" do a good job. Remember this is also a tribute to my dad, and he appreciated the finer elements of design and craftsmanship, spent the time and finesse to get it right. Let's all hoist one


for Wolffarmer's dad, mine, and anyone else out there that has lost a loved one and gets it.
I’m averaging 24 hrs/wk on the build and got almost another 6 in today after getting out early and getting new tires on the Ford this morning.
And now a progress report:
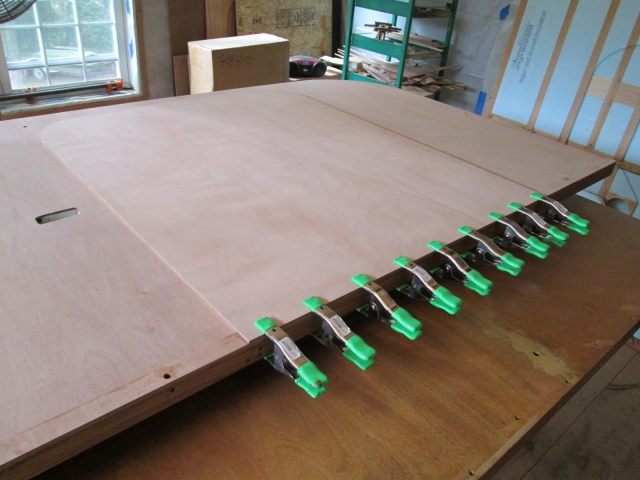
Got Karl to help me shuffle and flip walls. With the door flanges in I am reluctant to pick the whole wall up by the door opening like I had been doing in the past.
Back to the street side wall. Similar to the curbside so I will breeze thru these pics.
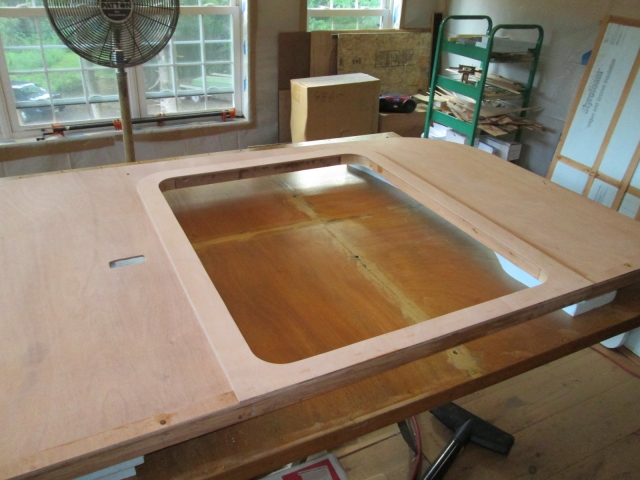
I fit the door seal flange blank to the shims, clamped it in place.
Transferred the offset cut line for the edge trim seal.
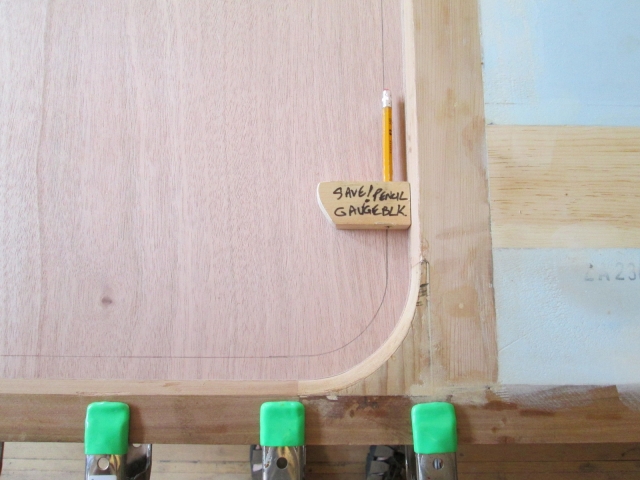
Scored the cut line using the extruded fence as a guide, then free handed the corner radii.
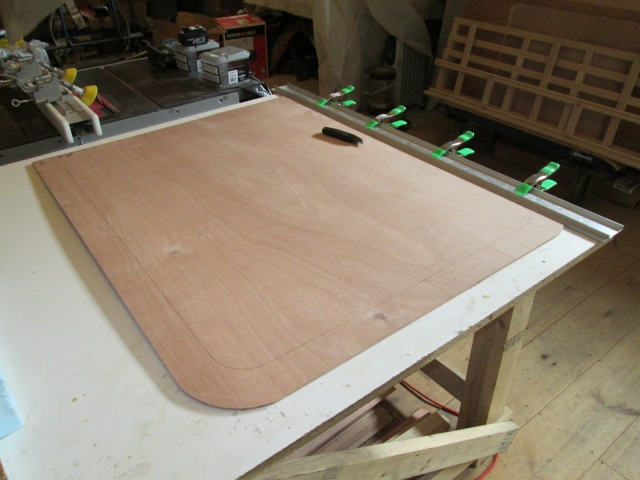
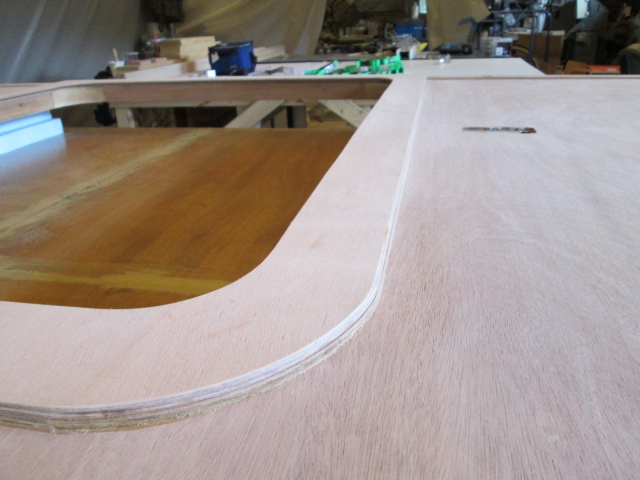
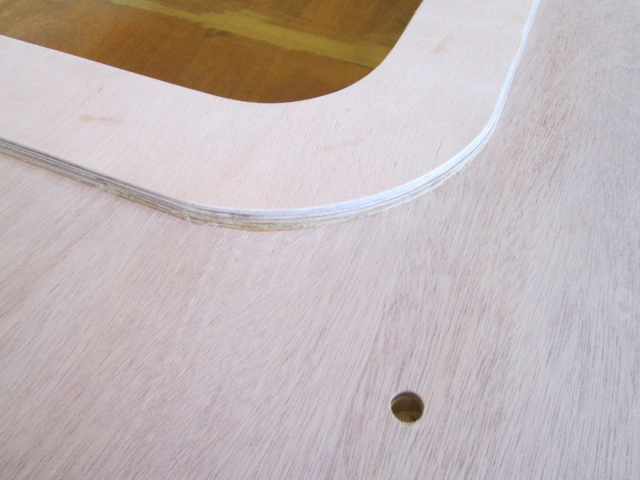
After jig sawing out the middle and a bunch of quality time with the small sanding block (truing up the cut line, rounding over both sides of the opening so the trim slides on easy w/o splintering, and rounding over the face of the cabin side edge), and making sure to put the glue on the correct face this time, I managed to get the flange glued and clamped in place.
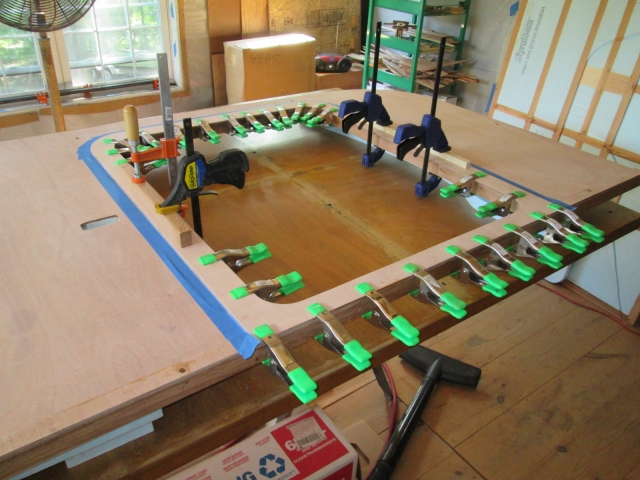
Well I got the correct side glued, but after aligning, clamping the bottom, top and sides, when I came back around to the bottom I found that it had slide off to the rear by about 1/16 inch. Double checked the top and found that it was down almost that much in the middle. I was really trying hard to avoid having brad holes to fill in the face of the flange, but there is such a “hydroplane effect” with the glue that, even with a ton of clamp force, it wants to slide around. Too far along in the glue up, will have to deal with it after. I should have shot just a couple of brads initially to hold position; I could have put them along the bottom where the Wiremold would have hidden them.
So after that cured off I spent about 1-1/2 hrs with the small matchbox plane, 3/8 chisel, and small sanding block truing things back up nice and flush.
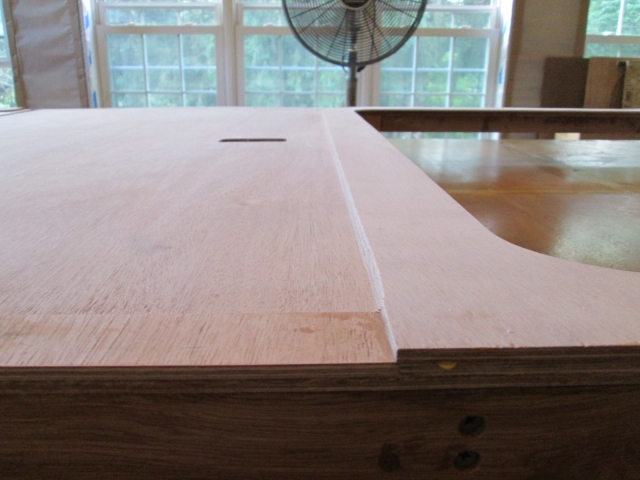
Note that I did not round over where the toe board butts up to the door flange.
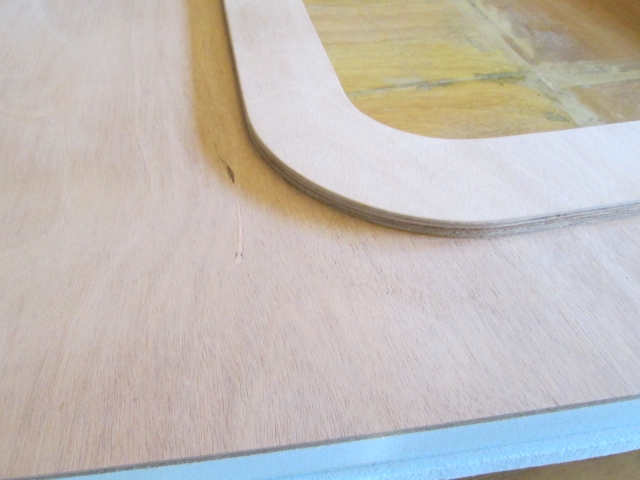
The patch in the foreground of the previous pic is the only one that I have found in the good side of all of the 16 sheets that were purchased. I can live with that. Also note the harem effect of the plastic drape wall having been rolled and clamped up. The wife noted that it suits the Mecca metaphor, what with the homage to the dessert nomad theme.
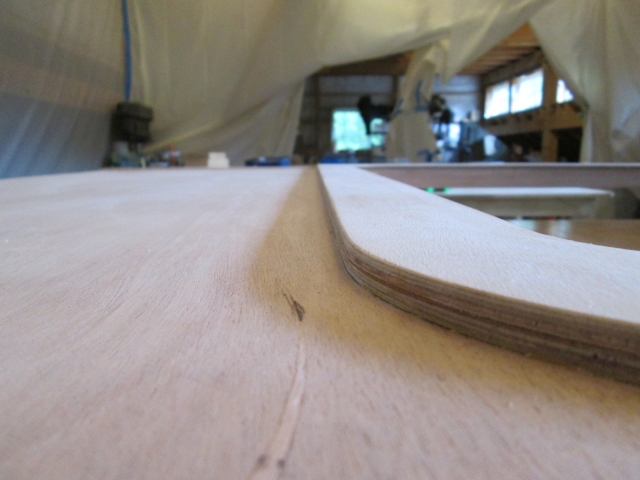
On the curbside wall I noticed some strafe marks that the plane made: had to sand them out. The tabs of the frog (the piece that clamps the blade) which register into the sides of the plane shoe stuck out the side just a tad and made ever so slight depressions where they rubbed on the wall skins. So I disassembled the plane and filed the tabs down so that they would not stick out the sides of the shoe no matter how the frog fits the shoe. (Sorry, forgot to take a pic.) Details.
 ... They always seem to have the “right stuff” , unlike the general trailer sites where you have to wade through tons of things you don’t need ...
  Keep it in the “Family” ...


 We both kept busy and I am looking forward to her report on their trip to Mystic.
  )
)


