The Poet Creek Express - Foamie Hybrid

Canvas covered foamies (Thrifty Alternatives...)

Moderator: eaglesdare

Re: The Poet Creek Express - Foamie Hybrid

Postby GPW » Thu Jul 04, 2013 6:00 am

KC, no reason to rush to completion !!! No matter what we say ... :lol:
There’s no place like Foam !
User avatar
GPW
Gold Donating Member
 
Posts: 14912
Images: 546
Joined: Thu Feb 09, 2006 7:58 pm
Location: New Orleans

Re: The Poet Creek Express - Foamie Hybrid

Postby KCStudly » Thu Jul 04, 2013 7:11 am

RandyG, That's a thought, however one of the concerns that Karl warned me about was that, at least when using glass and epoxy, the excess can tend to go places... well, everywhere. With the ply laminate and the pressure that I was able to achieve that wasn't really an issue. Not sure about the canvas and glue/paint. And you didn't get it wrong, I haven't decided yet. I'm pretty sure that I will do the "back prep" (cut in any canvas that needs to go inside corners of the doors, back prime behind the marker lights in the recesses, etc.) in the flat. Not sure whether to poly the inside before or after canvas. Thanks for the thought; it is a possibility, but it might lend complication. My initial thought was to just do it the tried and true method that has worked great for several, and good for many others (lay out canvas, fold or roll back, slather both sides in small steps, unfold/unroll, and smooth/stretch; perhaps using some well place bamboo skewers to assist with pinning the edges). I had also given some thought to using a dry paint roller on the outside once the canvas is down to try and press the canvas down gentle, if it seems like it wants that... schmaybe. :thinking:

Geep, Thanks for the stabilizing words. I feel like a weather vane in a stiff wind, pointed in a single direction.

:thumbsup:
KC
My Build: The Poet Creek Express Hybrid Foamie

Poet Creek Or Bust
Engineering the TLAR way - "That Looks About Right"
TnTTT ORIGINAL 200A LANTERN CLUB = "The 200A Gang"
Green Lantern Corpsmen
User avatar
KCStudly
Donating Member
 
Posts: 9617
Images: 8169
Joined: Mon Feb 06, 2012 10:18 pm
Location: Southeastern CT, USA

Re: The Poet Creek Express - Foamie Hybrid

Postby GPW » Thu Jul 04, 2013 8:09 am

Doing all the covering Flat should be Very EASY :thinking: ... Gravity doing the pulling , so no sagging , glue running ... That’s really the way to go huh ? :thumbsup: Finished panels are just popped together , and strips connect the skins... I see the Logic of it !!! 8)
There’s no place like Foam !
User avatar
GPW
Gold Donating Member
 
Posts: 14912
Images: 546
Joined: Thu Feb 09, 2006 7:58 pm
Location: New Orleans
Top

Re: The Poet Creek Express - Foamie Hybrid

Postby KCStudly » Thu Jul 04, 2013 3:30 pm

I would still plan on leaving the edges long and doing the overlap thing so that there is only one seam edge showing.
KC
My Build: The Poet Creek Express Hybrid Foamie

Poet Creek Or Bust
Engineering the TLAR way - "That Looks About Right"
TnTTT ORIGINAL 200A LANTERN CLUB = "The 200A Gang"
Green Lantern Corpsmen
User avatar
KCStudly
Donating Member
 
Posts: 9617
Images: 8169
Joined: Mon Feb 06, 2012 10:18 pm
Location: Southeastern CT, USA
Top

Re: The Poet Creek Express - Foamie Hybrid

Postby GPW » Thu Jul 04, 2013 5:22 pm

That oughta’ look really NICE !!! :thumbsup: 8) 8) 8)
There’s no place like Foam !
User avatar
GPW
Gold Donating Member
 
Posts: 14912
Images: 546
Joined: Thu Feb 09, 2006 7:58 pm
Location: New Orleans
Top

Re: The Poet Creek Express - Foamie Hybrid

Postby KCStudly » Fri Jul 05, 2013 1:02 am

Thanks, Geep. I hope I can do as good a job as you are doing on the FS.

Okay, where do we start?

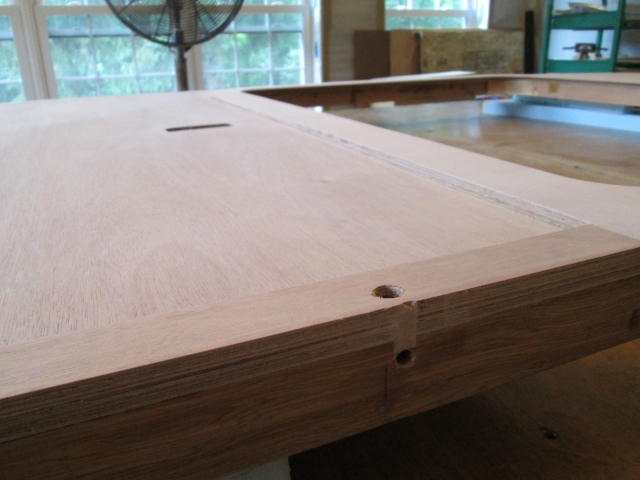
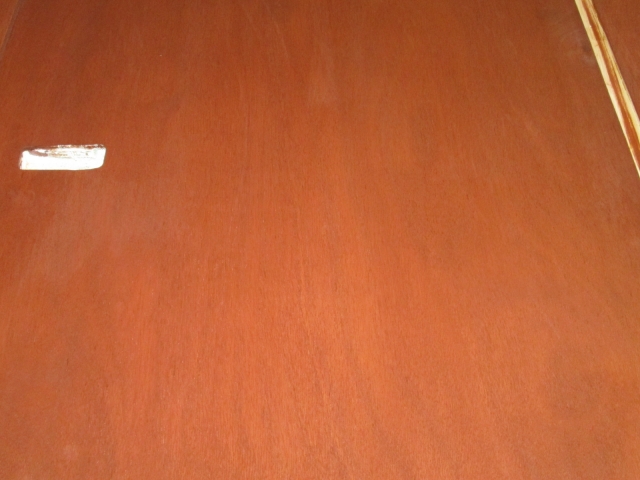
Monday I took care of a couple of divots that needed some filler. First, when I flushed off the toe board and door seal flange to the sill on the street side wall I didn’t remember my prior instructions to myself and forgot to set the depth of the bottom bearing to clear the countersunk screw holes or wire way holes in the bottom of the wall sill. When the bearing found the wire way hole for the foot light it dropped in and so did the cut, creating a “donkey track” (or as I like to call it, an “Eeyore”). It’s not quite filled in perfectly, but it will be under the Wiremold and mattress, and my goal was only to ensure against water migrating … which would have to come thru the barrier of the canvas any way, so...
Image

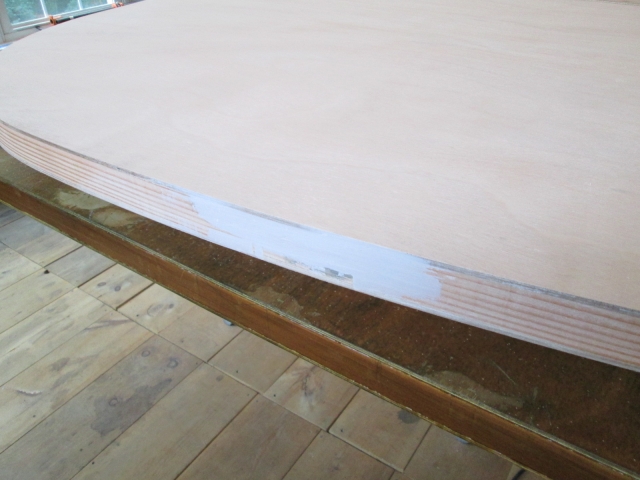
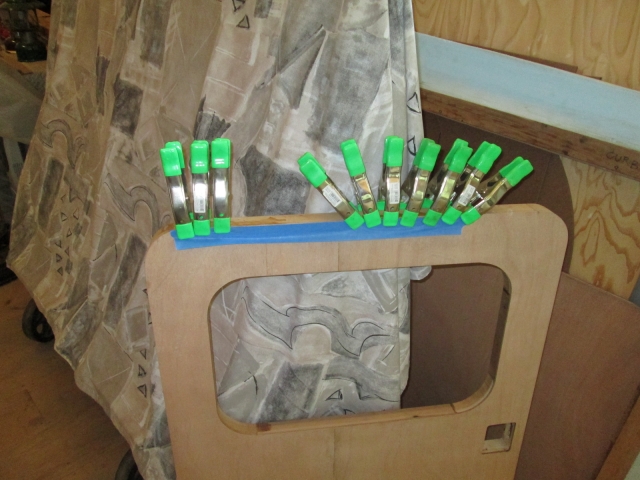
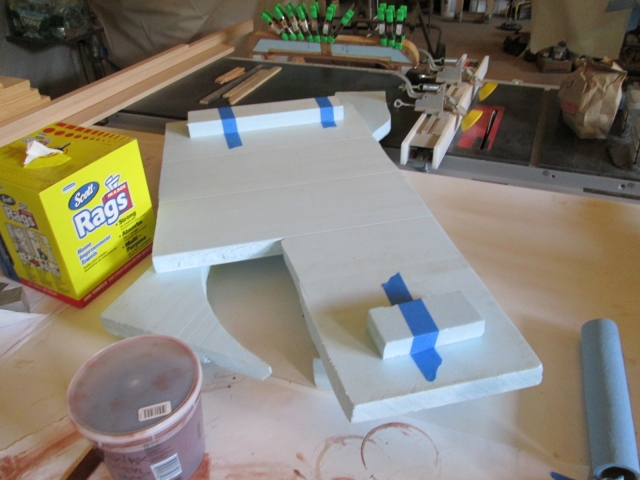
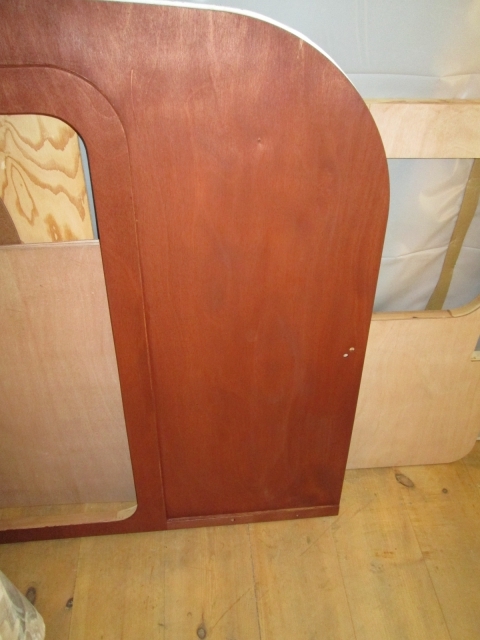
This is the back of the galley arch. The laminated wall edge was just shy of the CNC template by a whisker so when I cut the profile the inner skin was just a tad past the laminated part. A touch of filler knocked down with the Surform, a quick pass over with the small sanding block and it was good. The light colored patch in the middle is the filler.
Image

Next I tried to scale up a big batch of the dye to color the wall inner panels. I wanted to make up a large enough batch to do the whole camper (inner walls, bulkhead, floor, ceiling, shelves, cabinet bottoms, etc.). However, when I did a color sample it was looking pink again. :?
Image
Seemed like a good place to stop for the night.

Wednesday I tried adding some more dark brown to the dye batch and did another color test, but I realized that throughout all of the dye testing it was very hit or miss on the color stability. YMMV if using proper aniline wood dyes, but my luck with the fabric dyes was iffy (maybe if I had heated it up as for fabric?); too much risk and wasted time.

The maple sample stained with Minwax natural has a bit of yellowing effect to it, and the poly over that just makes it a bit more yellow. The Gunstock that I thought I would like as a contrast to the maple was a bit too orange/yellow and did not contrast enough for my taste. I wanted a richer (darker) red or the royalty of purple in an earthy brown tone to contrast with the lightness of the maple.

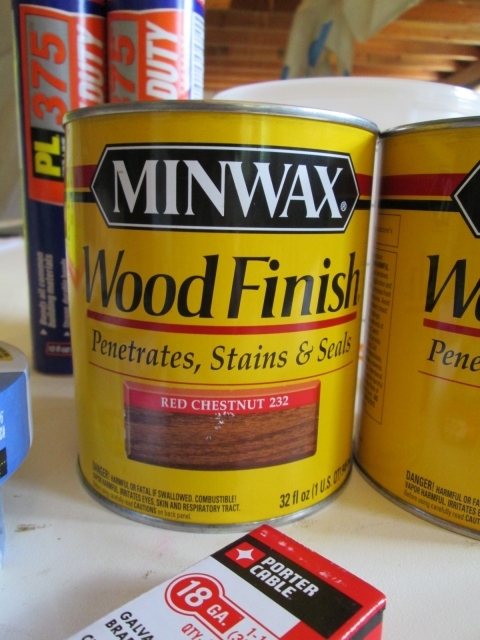
I had brought some small sample size cans of stain that we were checking out for the window trim selections we had been trying to make for the house, but had not tried the Red Chestnut on the Okoume since we did not like it on the pine samples we had made up for the windows at home.

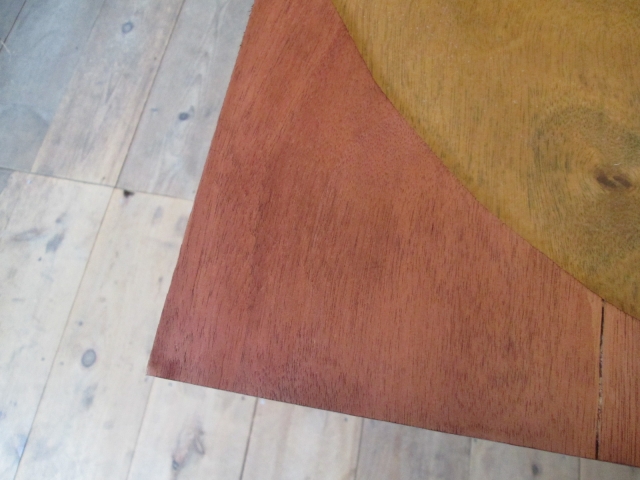
Well, in a fit of frustration with the dyes, and feeling stuck, I tried the Red Chestnut on a piece of the Okoume and, lo and behold, it was about as close to what I had originally envisioned as I could hope for; a deep red brown. Maybe a little dark, but that will just make it easier to sleep in! Like I said, if it becomes overwhelmingly dark, I can always scuff and paint the ceiling between the cabinets in a lighter color.

Up early(er) on the 4th and on to the hardware store. Hmm, just one quart can of the stain. With the little can that I have it might be enough coverage, but I would rather have two cans from the same color lot, just to be sure that I don’t run out. Guy looked it up for me and found that the next Ho-de-po up the road had multiple cans (7, supposedly). Made the extra trip to find 4 cans, all dented with color oozing out the lids. The 2 cans from the same color lot were the ones with the worst dents. :?

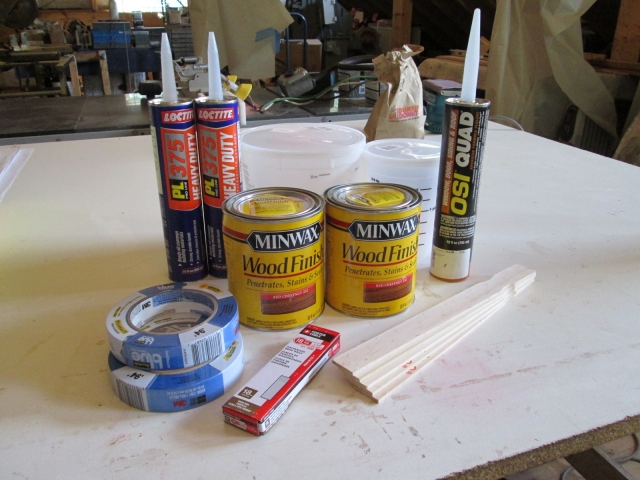
Oh well, have to build on. Got them, some mixing cups with lids, some PL375 (planning for wall and bulkhead erection), some of the OSI for later use sealing exterior fittings, stir sticks, 1-1/4 x 18 ga pneumatic brads, and more 3/4 inch blue tape (except they are only stocking 0.94 inch now… make you buy more than 3/4, but cheat you on full 1 inch… what is the world coming to).
Image
Image

Can you see where this is going?

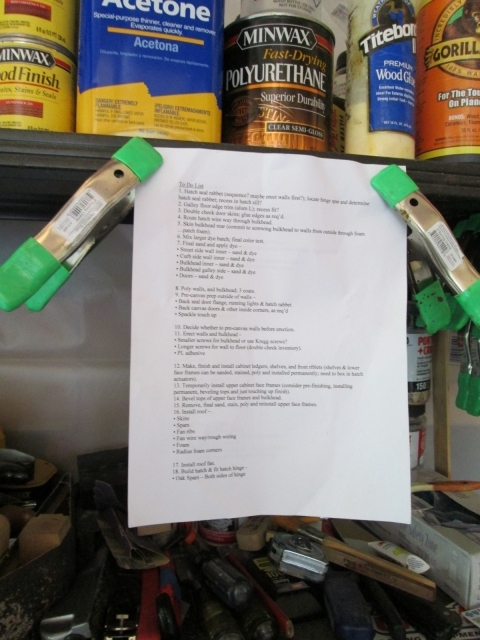
Hung a copy of my knock list in plain sight (with a few things added that I had forgotten, like galley counter, hatch handle blocking and handle, and wing tables).
Image

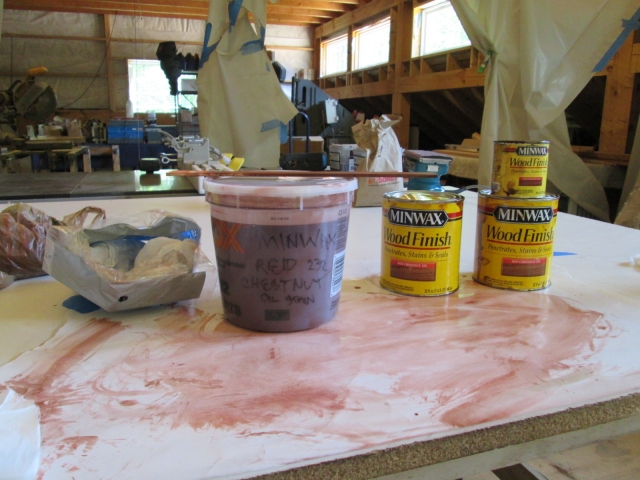
Taped a piece of the freezer paper to the bench, stirred each of the cans of stain, and mixed them into a common 2-1/2 qt plastic bucket (with lid). I wanted to make sure that the stain colors are all the same throughout the project.
Image

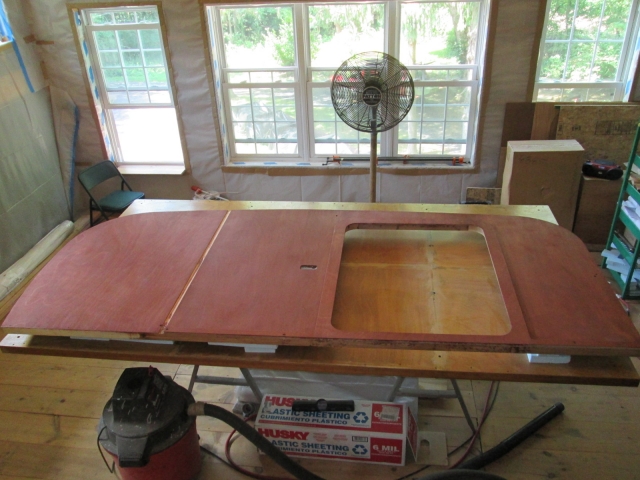
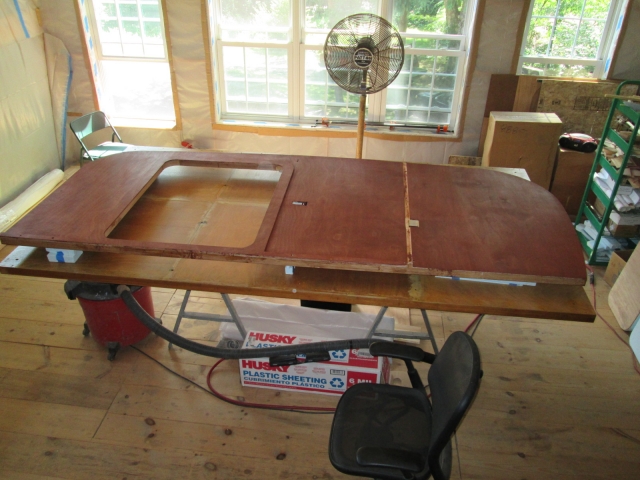
And here you go, street side wall inner skin stained with Minwax Red Chestnut oil stain.
Image
Image
Image
Image

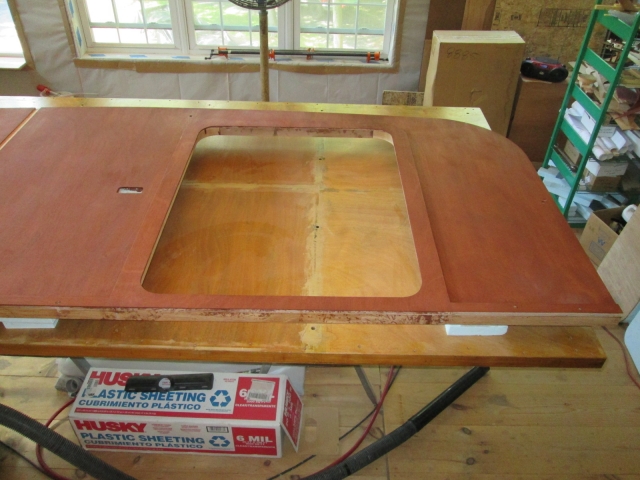
I found that some of the door skin edges had lifted a bit, so I used the technique that Doug Hodder recommended to Becky for the corner of her hatch (except I used TB2 instead of epoxy); stick a thin knife in the seam and drizzle glue down in, drag the glue down in with the knife and/or a thinner razor knife, then clamp.
Image
Did that in a few spots. Not sure if it was a dry glue issue (rolling glue on over a big area in the heat), a lack of level situation with the foam, or a lack of squeeze during the vacuum bagging process. The fix was easy enough but took some time to cycle thru the different areas that needed attention.

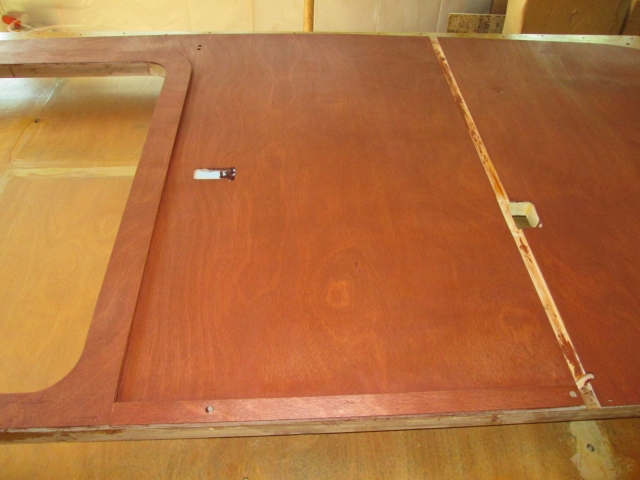
Moving on back to the curb side wall. I decided to take a minute and tape the foam spacer blocks that I have been using to hold the walls up off of the floor/table, rather than continue chasing them around in the wind of the fan.
Image

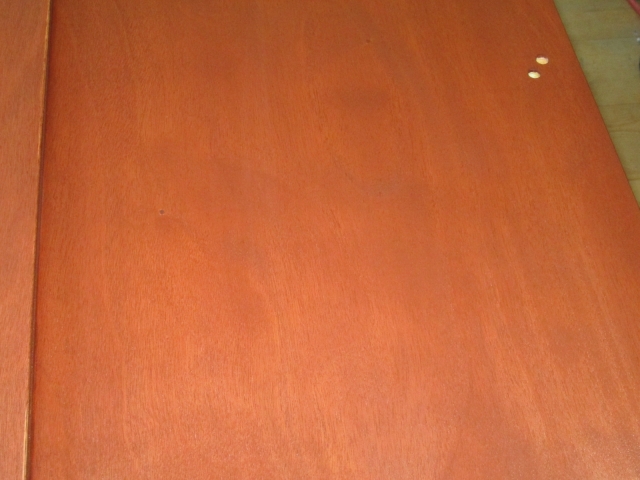
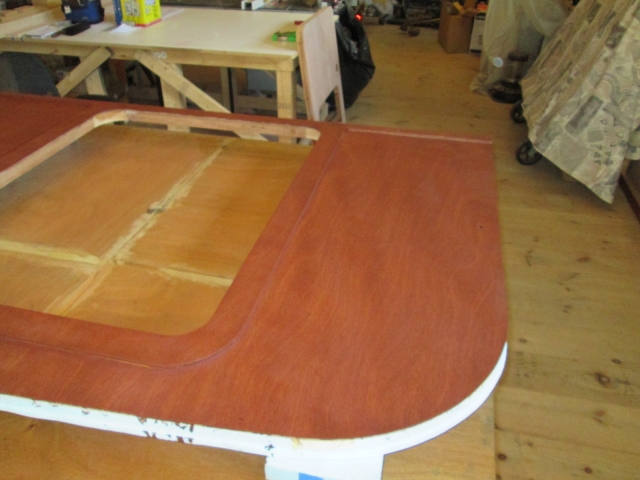
Loft was up to 91 deg F and 65/ct humidity when I was happy with the coloration on the curb side inner, and finally turned the fan back on.
Image
Image
Image
Image
Image
Image

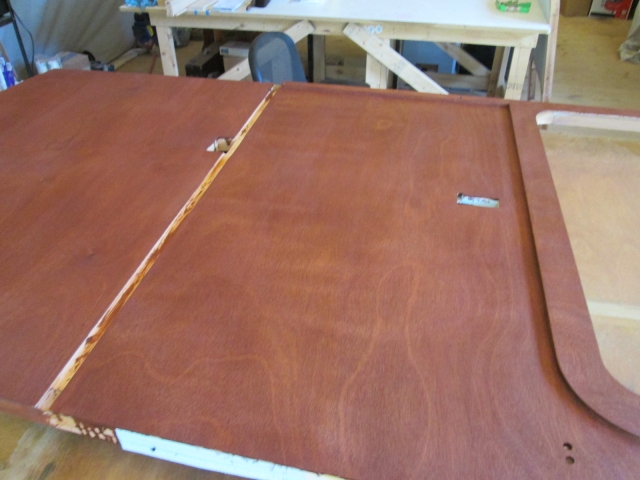
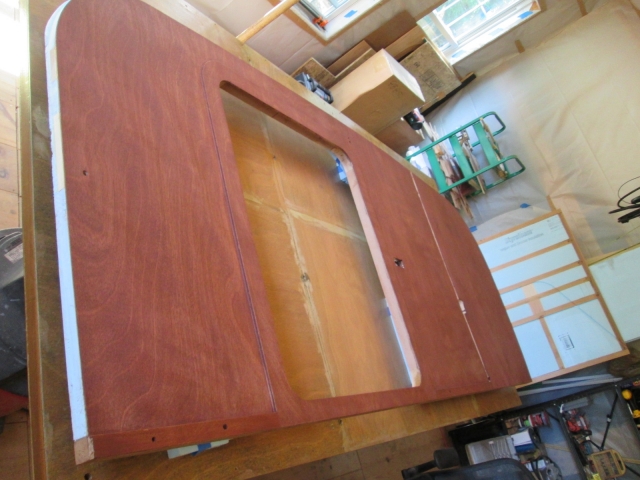
And one more of the street side wall peeking out.
Image

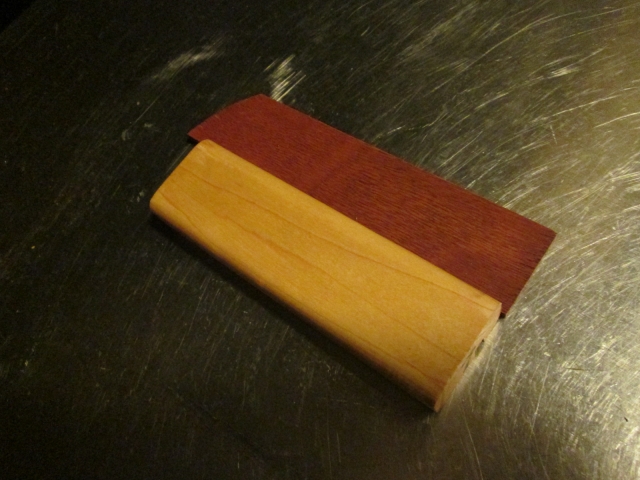
Here is a sample of the Red Chestnut on Okoume (no poly yet) next to the sample of the maple with “natural” stain and poly. First on a white paper back drop with flash.
Image

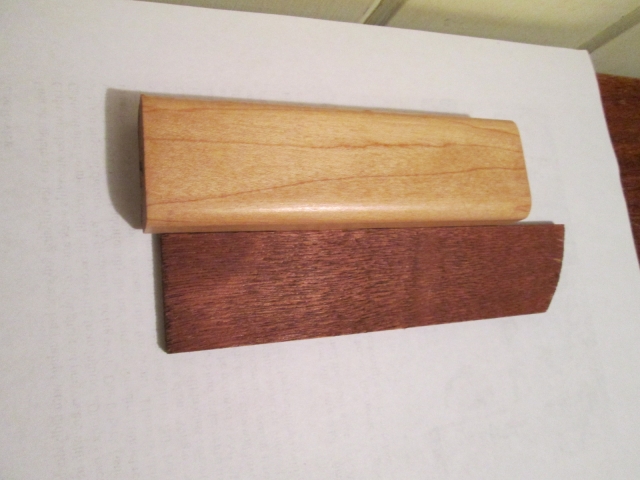
Then on the stainless steel drain pan of our kitchen counter w/o flash in low light.
Image

Off to moms for a family get together. Put your feed bag on.
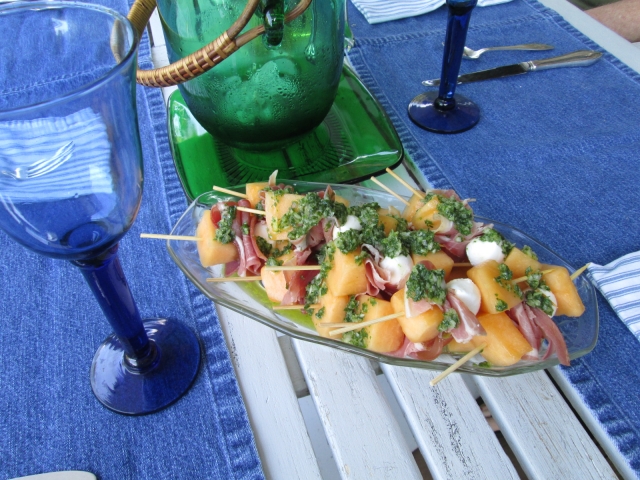
Melon kebobs: cantaloupe, prosciutto, mozzarella balls and a basil, scallion, olive oil pesto drizzled on top, yum. Nice ripe melon and an interesting variation on std. pesto.
Image

Vegetable crudité: blanched asparagus, sweet peas, and baby carrots with a mild dip.
Image

Mixed olives with feta (I didn’t actually get any of these, but they looked good).
Image
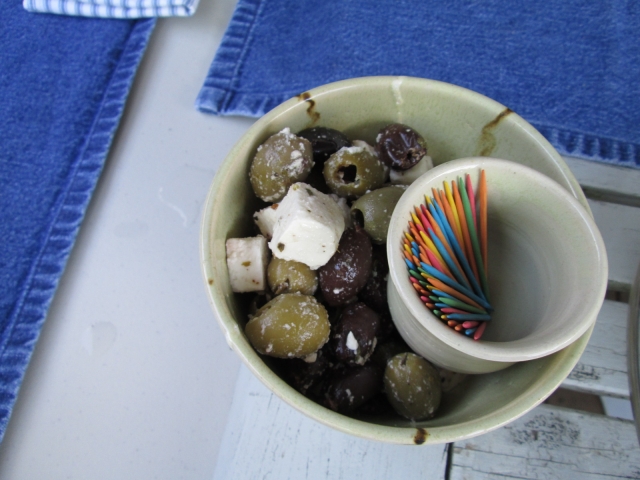
The bowl and pick holder appear to be some of Yvette’s pottery creations.

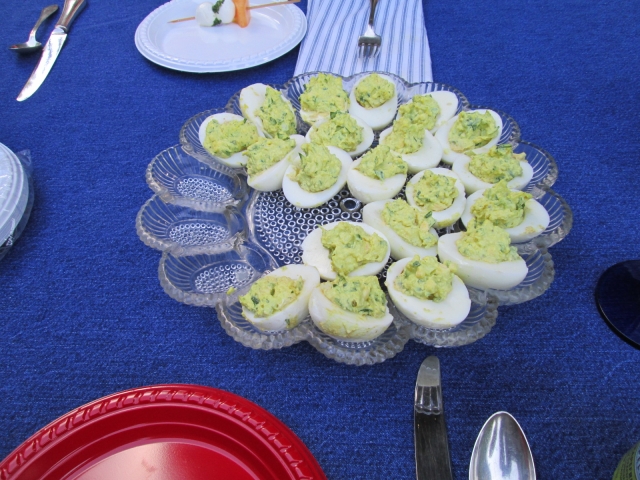
Curried deviled eggs.
Image

Enjoying the 4th on the deck at moms with family (me, Bill, Heather’s friend Matt, and my sis, Heather). The hanging quilt was inspired by mom and Bill’s trip to New Zealand last year.
Image

That was the apps. Main course was BBQ chicken breast with a citrus marinade; quinoa salad with dried cranberries, almond slices and scallions; and a killer broccoli salad with hard boiled egg whites, bacon, and a sweet and sour mayonnaise and vinegar dressing (a big hit). I had stopped taking pics at this point and was concentrating on food and :wine: .

Aunt Sandra had attempted to make ice cream, twice, but found that her fridge/freezer was failing; so she brought local dairy ice cream (fabulous vanilla), with fresh blueberries and strawberries for a lovely red, white, and blue dessert.

Sis and I talked a bit and she is no longer dead set on making the trip this year. Her situation has changed again (tho still somewhat the same) and she may choose to put it off. We will decide for sure by next week.

Sooooo, that's about a 95/ct reprieve. In about a week Yvette and I may once again have to decide what we will do for a short notice vacation here in New England; probably go north and stop in to visit her elderly aunt in Nashua; the best meatloaf sandwich ever at the cafe next to the church.
Last edited by KCStudly on Fri Jul 05, 2013 7:55 am, edited 1 time in total.
KC
My Build: The Poet Creek Express Hybrid Foamie

Poet Creek Or Bust
Engineering the TLAR way - "That Looks About Right"
TnTTT ORIGINAL 200A LANTERN CLUB = "The 200A Gang"
Green Lantern Corpsmen
User avatar
KCStudly
Donating Member
 
Posts: 9617
Images: 8169
Joined: Mon Feb 06, 2012 10:18 pm
Location: Southeastern CT, USA
Top

Re: The Poet Creek Express - Foamie Hybrid

Postby GPW » Fri Jul 05, 2013 5:22 am

That color came out really NICE KC !!! 8) :thumbsup:
There’s no place like Foam !
User avatar
GPW
Gold Donating Member
 
Posts: 14912
Images: 546
Joined: Thu Feb 09, 2006 7:58 pm
Location: New Orleans
Top

Re: The Poet Creek Express - Foamie Hybrid

Postby KCStudly » Fri Jul 05, 2013 6:08 am

Thank you, GPW. I credit the Okoume for taking the stain very well, and the care that I took to keep glue off of the good faces.
KC
My Build: The Poet Creek Express Hybrid Foamie

Poet Creek Or Bust
Engineering the TLAR way - "That Looks About Right"
TnTTT ORIGINAL 200A LANTERN CLUB = "The 200A Gang"
Green Lantern Corpsmen
User avatar
KCStudly
Donating Member
 
Posts: 9617
Images: 8169
Joined: Mon Feb 06, 2012 10:18 pm
Location: Southeastern CT, USA
Top

Re: The Poet Creek Express - Foamie Hybrid

Postby Heifer Boy » Fri Jul 05, 2013 6:18 am

KCStudly wrote:Thanks for the stabilizing words. I feel like a weather vane in a stiff wind, pointed in a single direction.


It looks like my throw-away thought a few posts back may have put your brain into a bit of a tailspin. I must apologize about that as it certainly wasn't my intention to divert you from your primary goal of getting the TPCE finished in any way but with the craftsmanship and attention to detail you have always shown. Not only in your actual build process but in the way in which you document and share that craftsmanship. So sorry if I caused a moment of diversion and doubt :oops:

It looks like you are full steam ahead anyway and you walls are looking fantastic. Should be a very warm and comfortable environment to bed down in.

I do have a question though and it's a little off your current process and it's about glue. Why Titebond II for all your gluing and lamination work?

Titebond is not a common glue down Oz way but we have similar (Selleys) but from what I can tell Titebond II is an interior PVA and Titebond III is waterproof exterior one which seems to make more sense for a teardrop build. Any insights?

HB

PS - Happy Independence Day!!
Heifer Boy
Teardrop Builder
 
Posts: 38
Joined: Mon Feb 28, 2011 1:51 am
Location: Woolamia, NSW
Top

Re: The Poet Creek Express - Foamie Hybrid

Postby KCStudly » Fri Jul 05, 2013 6:51 am

HB, Thanks for the kind words. No tail spin, just a moment of doubt and indecision contemplating your worthy idea. The only bad idea is one that is not shared.

What I have learned from the experiences of many that have come before me here is that while TB3 is waterproof, TB2 is highly water resistant at the high end of the water resistant std. The nod goes to TB2 because it will stick to itself, whereas TB3 must be scuffed up in order to form a mechanical bond to itself. Also, IIRC, TB2 will reactivate with moderate heat (allowing lifts and bubbles to be resealed), whereas this does not work with TB3... at least I think I read that somewhere recently, but have not tried the iron technique yet.

Caution: If using water based glue to laminate large areas of wood to foam, use a minimal amount spread very thin so that the wood has the ability to soak up all of the moisture. Excess glue between wood and foam will not cure if it can not evaporate or becomes trapped in pockets.
KC
My Build: The Poet Creek Express Hybrid Foamie

Poet Creek Or Bust
Engineering the TLAR way - "That Looks About Right"
TnTTT ORIGINAL 200A LANTERN CLUB = "The 200A Gang"
Green Lantern Corpsmen
User avatar
KCStudly
Donating Member
 
Posts: 9617
Images: 8169
Joined: Mon Feb 06, 2012 10:18 pm
Location: Southeastern CT, USA
Top

Re: The Poet Creek Express - Foamie Hybrid

Postby GPW » Fri Jul 05, 2013 7:16 am

... and TB3 leaves a dark glue line .... grrrrr!!!
There’s no place like Foam !
User avatar
GPW
Gold Donating Member
 
Posts: 14912
Images: 546
Joined: Thu Feb 09, 2006 7:58 pm
Location: New Orleans
Top

Re: The Poet Creek Express - Foamie Hybrid

Postby Heifer Boy » Fri Jul 05, 2013 7:34 am

Thanks for the info. That's the kind of stuff you don't get from the product websites.
Heifer Boy
Teardrop Builder
 
Posts: 38
Joined: Mon Feb 28, 2011 1:51 am
Location: Woolamia, NSW
Top

Re: The Poet Creek Express - Foamie Hybrid

Postby GPW » Fri Jul 05, 2013 8:32 am

Hef’, one thing we learned to do here is Test EVERYTHING !!! And we’re pretty picky :o ... using several different kinds of glues for different jobs , on the same trailer (or Home ) . The right glue for the right job, as exemplified by KC’s build...!!! 8) .

Speaking of testing .... during Katrina we had several solid body guitars that got SOAKED (immersed) for several weeks :shock: ... all glued with T2 , after a good drying out (and proper sanitizing) there were no discernible glue joint failures ... That’s pretty water resistant in my book ... :thumbsup:
There’s no place like Foam !
User avatar
GPW
Gold Donating Member
 
Posts: 14912
Images: 546
Joined: Thu Feb 09, 2006 7:58 pm
Location: New Orleans
Top

Re: The Poet Creek Express - Foamie Hybrid

Postby KCStudly » Sun Jul 07, 2013 9:57 pm

We have had a string of hot and humid weather here lately. I have made the pilgrimage many times to find the loft temps to be mind numbing. Right/creative brain, “pour that glue and roll it on, let’s get something done!” Left brain/logic, “uh, you sure you want to turn that fan off so the glue doesn’t dry too fast? Maybe we forgot something. Sit down in front of the fan and make sure we are ready. Drink some more water. Maybe we forgot something. Maybe it’s so hot that we won’t have time to get the glue rolled out, fit that bulkhead panel, and the next, and so on, then get the vacuum bag in place in time to get it done. You will melt without the fan.”

Brain fade in the membrane.

Friday I made the trip, then talked to my friend Dale with the boat. He and T were up for the weekend and were going to make a commuter run over to Fisher’s Island to pick up Mary Lynn (another friend that they visit in New London). Let’s see, boat ride in the cool Long Island Sound or slog it out in the loft at 95 deg plus. Duh.

Arriving at West Harbor, Fisher’s Island YC, NY.
Image
Image

Leaving West Harbor.
Image

Dale added a new removable deck table with compass rose.
Image

Saturday I got out early to try and beat the heat. After some contemplation I realized I had a wiring bottleneck on the street side where the wires would go around the bulkhead. On the curbside there is only the side marker light and ground (GND), and the hatch actuator power and GND (separate circuits, 4 wires). On the street side there are ten (10) wires: red light and GND; bulkhead vent fan and GND; Hatch galley light and GND; and std. 4-wire trailer tail lights (GND, running/tail light hot, right turn/brake, and left turn/brake). Decided that I had better check and see if I could get all of those wires to fit before I get to the stage of having the walls and bulkhead up and the fix would be much more difficult.

Turns out that I could only get 6 wires thru comfortably. Thru trial and error I was able to drill out the hole in the toe board (from 7/16 to about 3/4), chisel out the router path and remove some of the plys under the toe board so that the wires could make the turn.
Image

Here I have used a single piece of wire wrapped thru the opening 10 times to check fit.
Image

I also opened up the Wiremold hole and trimmed the rear piece to compensate for shifting the bulkhead forward 1/8 inch. It will be tight getting the wires down thru the Wiremold but I want control of the red light and bulkhead fan on my side of the cabin, so it did not make sense to divide the runs more equally from side to side.

To the left of the aluminum straight edge you can see the wire way that I have routed into the rear face of the bulkhead for the leads running up into the hatch (6 wires: galley light and GND, plus 4-wire trailer lights).
Image

I decided to use a bullnose bit so as to reduce stresses in the bulkhead frame work, since this cut would be wider than the rest and would be cutting straight up thru all of the bulkhead xmbrs. Also note that I stepped the wire way away from the side stile a bit to keep from cutting into the xmbr biscuits.
Image

Next I started arranging and fitting the rear bulkhead panels, and documenting were all of the wire ways were and where the wire holes needed to be.
Image
Image
Image

I rounded over the entrance to the bulkhead (using the utility knife and small chisel) where the wires make the u-turn.
Image

Another detailed shot of the bulkhead lower left rear wire ways for the record.
Image

And one of the lower right rear bulkhead wire ways.
Image
(Now Sunday, note the finish nails next to the centerlines to help align the panels during glue up; same as the method used early on to do the floor and front of the bulkhead).

After getting about this far on Saturday (slow progress due to brain being fried), when the loft temp hit about 91 I ran up the road a piece to my sister/brother in-law’s and spent the rest of the day bobbing in their pool with a :beer: or three.

On Sunday I laid out the bulkhead centerlines, added the nails to assist with alignment, and masked off the rear bulkhead panel edges to guard against glue squeeze out.
Image

Set up the vacuum bag then realized that I was out of glue and had forgotten to pick up more. Mind you that this had taken several hours at 90 deg F, while I intermittently sat in front of the fan and tried to convince myself to keep working.

Left brain logic won out, “go in the air conditioned car to the air conditioned store and buy more glue; while you’re there buy another case of water.” No gallons of TB2 at Wallie world. “Get back in the air conditioned car and go to the other air conditioned store to get glue.” Killed an hour in the AC doing the logical thing.

Back at Mecca after hauling two gallons glue and 35 half liters of water up the stairs (about the time your head breaks the plane of the loft floor you feel the 6 deg temperature differential (89 deg downstairs, 95 deg up), you come to the realization that the right brain is not going to win. Sit in front of the fan for another 1/2 hr to 45 min getting nothing done. Time to go.

At least I will be all set up to go tomorrow night when it is supposed to be cooler.
KC
My Build: The Poet Creek Express Hybrid Foamie

Poet Creek Or Bust
Engineering the TLAR way - "That Looks About Right"
TnTTT ORIGINAL 200A LANTERN CLUB = "The 200A Gang"
Green Lantern Corpsmen
User avatar
KCStudly
Donating Member
 
Posts: 9617
Images: 8169
Joined: Mon Feb 06, 2012 10:18 pm
Location: Southeastern CT, USA
Top

Re: The Poet Creek Express - Foamie Hybrid

Postby Bogo » Mon Jul 08, 2013 4:58 am

This time use some sort of batting between your piece and the vacuum bag. That way it can develop an even pressure. A usually the stack for vacuum bagging is the piece, then release cloth, then polyester batting, then vacuum bag. The way it works is the vacuum pump removes the air from within the batting. The outside air presses on the plastic in a vain attempt to replace the air in the batting. As it does so, it compresses the batting, and the batting presses on the piece.
User avatar
Bogo
500 Club
 
Posts: 658
Images: 39
Joined: Tue Oct 02, 2012 4:32 pm
Location: The land between two rivers.
Top

PreviousNext

Return to Foamies

Who is online

Users browsing this forum: No registered users and 9 guests