The Poet Creek Express - Foamie Hybrid

Canvas covered foamies (Thrifty Alternatives...)

Moderator: eaglesdare

Re: The Poet Creek Express - Foamie Hybrid

Postby S. Heisley » Thu Aug 01, 2013 9:24 pm

Image

:QM :laughter: :rofl2: :laughing1:

.....That's a good one!
User avatar
S. Heisley
Super Lifetime Member
 
Posts: 8866
Images: 495
Joined: Mon Sep 17, 2007 10:02 am
Location: No. California

Re: The Poet Creek Express - Foamie Hybrid

Postby Ned B » Thu Aug 01, 2013 9:50 pm

keep on keepin on!


my first thought when i see the bus with the TD is that it's the mother in law apartment.
User avatar
Ned B
1000 Club
1000 Club
 
Posts: 1036
Joined: Sat Apr 16, 2011 10:25 am
Location: Syracuse NY (ish)

Re: The Poet Creek Express - Foamie Hybrid

Postby GPW » Fri Aug 02, 2013 5:17 am

KC, covering and finishing ... PATIENCE is a Virtue !!!

Here’s an old trick ... If you can still smell the paint/ varnish ... it’s NOT cured yet ... ;)
There’s no place like Foam !
User avatar
GPW
Gold Donating Member
 
Posts: 14920
Images: 546
Joined: Thu Feb 09, 2006 7:58 pm
Location: New Orleans
Top

Re: The Poet Creek Express - Foamie Hybrid

Postby Wobbly Wheels » Fri Aug 02, 2013 8:58 am

Ned B wrote:keep on keepin on!


my first thought when i see the bus with the TD is that it's the mother in law apartment.


Trouble is, that behemoth is too much to get onto the road quietly in the middle of the night...after unhooking the trailer...

Bah-DUMP-pah !!
User avatar
Wobbly Wheels
Donating Member
 
Posts: 1080
Joined: Tue Mar 15, 2011 9:51 am
Top

Re: The Poet Creek Express - Foamie Hybrid

Postby GPW » Fri Aug 02, 2013 10:36 am

Subtle !!! :lol: :lol: :lol: :lol: :lol: :lol: :lol: :lol:
There’s no place like Foam !
User avatar
GPW
Gold Donating Member
 
Posts: 14920
Images: 546
Joined: Thu Feb 09, 2006 7:58 pm
Location: New Orleans
Top

Re: The Poet Creek Express - Foamie Hybrid

Postby doug hodder » Sat Aug 03, 2013 9:36 pm

KC..have you thought about spraying the finish? Thing is with a brush, it really piles on the material and is difficult to get a uniformly thick coat, unless it's thinned, and if the subsequent coats haven't outgassed completely, they may tend to get gummy, wrinkly etc...with additional coats on it. Oil based type products take more time to cure over a catalyzed type. The color and appearance is great though! Just give it some time...worst thing you can do is to mess with it before it's completely cured...I've screwed up lots of stuff by not waiting. Doug
doug hodder
*Snoop Dougie Doug
 
Posts: 12625
Images: 562
Joined: Tue Dec 14, 2004 11:20 pm
Top

Re: The Poet Creek Express - Foamie Hybrid

Postby KCStudly » Sat Aug 03, 2013 10:32 pm

Thank you for the insight, Doug. As a near complete novice at wood finishing, I was more or less coming to the same conclusion. Too thick, and not enough time to dry. The can does say to put on a "thin" (in bold) coat and to sand "lightly". Also says that you will get a finished result in two coats. Says nothing about spraying. The thin coat direction and high build product label are, in fact, contradictory, and the label drying times are completely bogus.

Karl and I did contemplate the option of spraying briefly, but I have no practical experience with that and the loft is really not set up for it (dusty... and hot this time of year). I don't do well in the heat and could not imagine myself donning all of the necessary PPE required to spray.

It will not be perfect, but it will certainly be presentable to all but the 1/ct'ers. I know where the flaws are. I was going to say that if I was as dedicated as you are, I would wait the seven or eight days for it to really set up hard, then wet sand and buff. I don't think that I have reached that level of Zen just yet, but there are a lot of other details I could be working on, and the floor has probably sat that long... I can't believe that I am actually thinking about it!

I better not. It will only highlight some of the other issues, like sanding scratches in the wood before the stain went on. I was concerned that if I tried to sand them all out I would bust through the thin 1mm plys.

Thanks for watching. I hope to get a build update in tonight... but I always seem to get caught up in following the forums when I should be posting pics! :wine:
KC
My Build: The Poet Creek Express Hybrid Foamie

Poet Creek Or Bust
Engineering the TLAR way - "That Looks About Right"
TnTTT ORIGINAL 200A LANTERN CLUB = "The 200A Gang"
Green Lantern Corpsmen
User avatar
KCStudly
Donating Member
 
Posts: 9640
Images: 8169
Joined: Mon Feb 06, 2012 10:18 pm
Location: Southeastern CT, USA
Top

Re: The Poet Creek Express - Foamie Hybrid

Postby KCStudly » Sun Aug 04, 2013 1:13 am

Okay, let’s get caught up!

I’ve lost track of which day was which, but here is a photo dump!

The fourth coat on the curb side wall inner and cabin side of the bulkhead came out well enough. I can still find the areas where I broke thru to the gummy stuff while sanding, if I look very critically, but they don’t jump out horribly and should be subdued by the mattress, and shadows from the cabinets.
Image

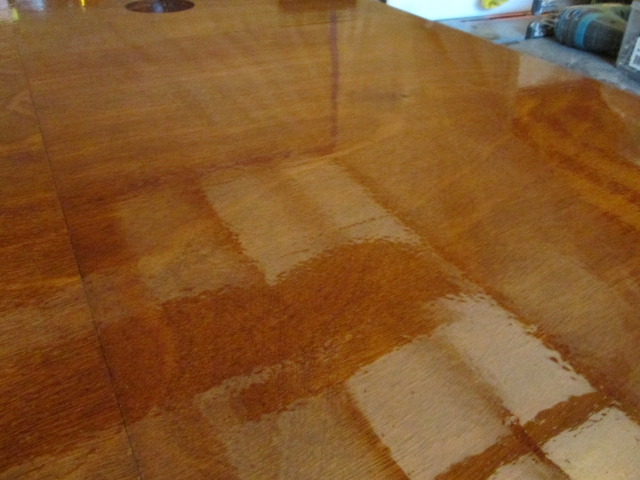
Here is a generally good spot ahead of the door. Image

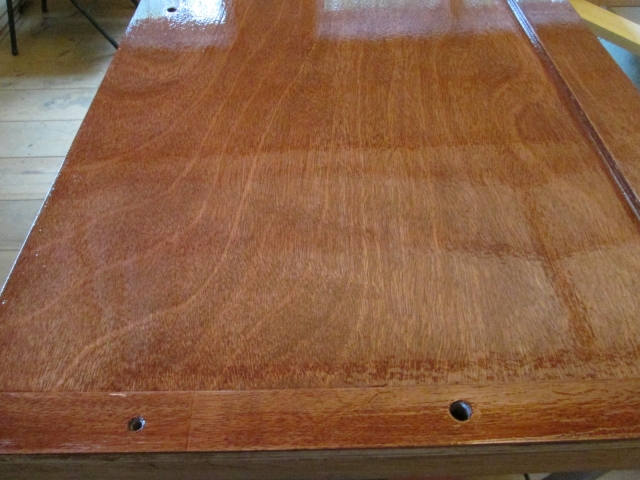
Here you can see some of the typical little pin holes, and the slightly mottled looking area that was depressed after sanding out a gummy area.
Image
Should be covered by the mattress and linens, but I would like to perfect my skills to avoid such issues in the future. Need to put it on thinner, wait longer and use more coats. Consider using standard build product and/or thinning more.

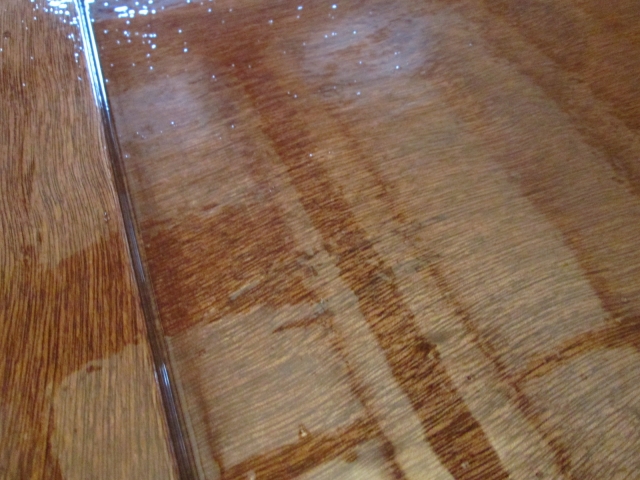
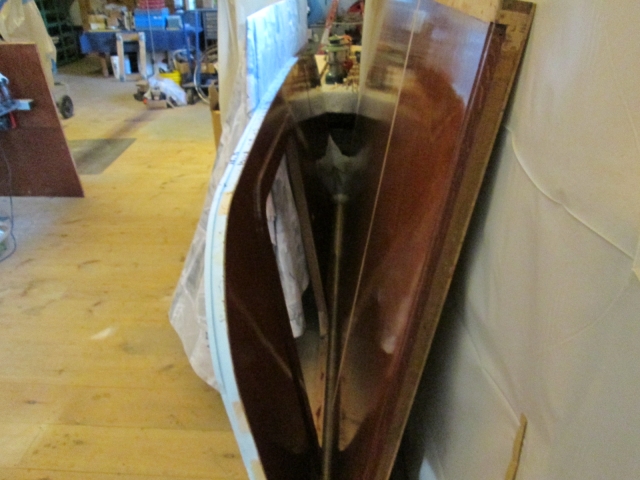
Here is the bulkhead with some orange peel (visible at this angle) and a few of the sanding gouges in the previous coat of poly just barely visible.
Image

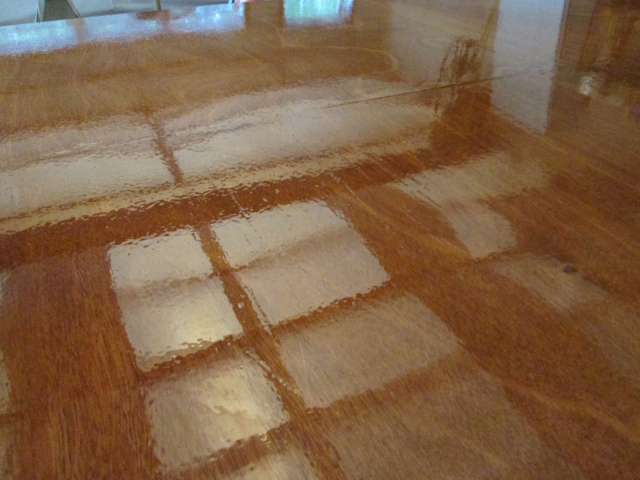
Gouges are much less visible in this shot, and the orange peel isn’t so bad either.
Image

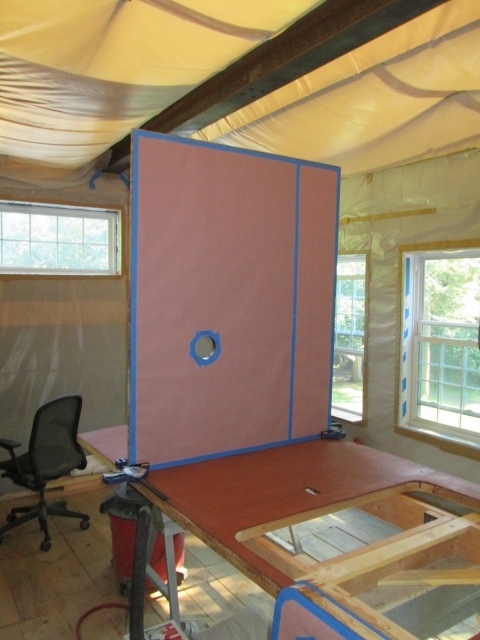
To avoid having the floor and wall finishes resting against each other or something else until they were truly hard, I put a few wedges of scrap maple under the wheels of the panel cart and slid the wall in behind.
Image

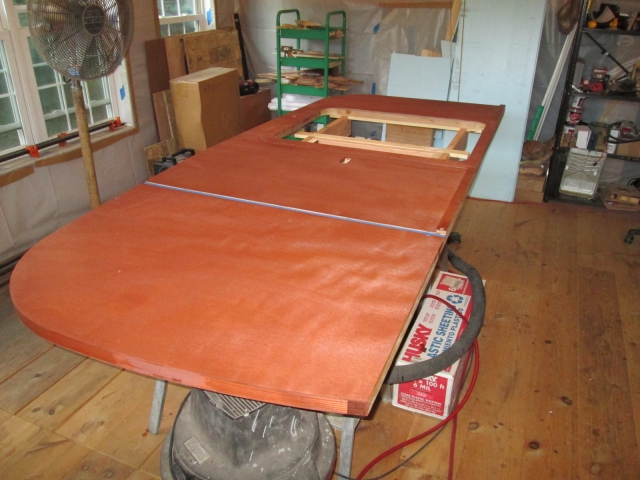
Shuffled parts, and before putting the stained side up, I ran the 1/8 inch radius bit around three sides of the door opening. The sill, being sloped meant that the bottom bearing would not allow the bit to cut the inner edge of the sill, so I just hit that with the small block and some sandpaper (no pic). Anyway, here is the street side inner wall ready for poly.
Image

In the meantime I spent a bunch of time scraping excess poly and drips from the unmasked edges and rabbet areas of the bulkhead and curb side wall dado.

I guess that gets us thru to Saturday night when I picked up some rosin paper on the way home.
Image
Image

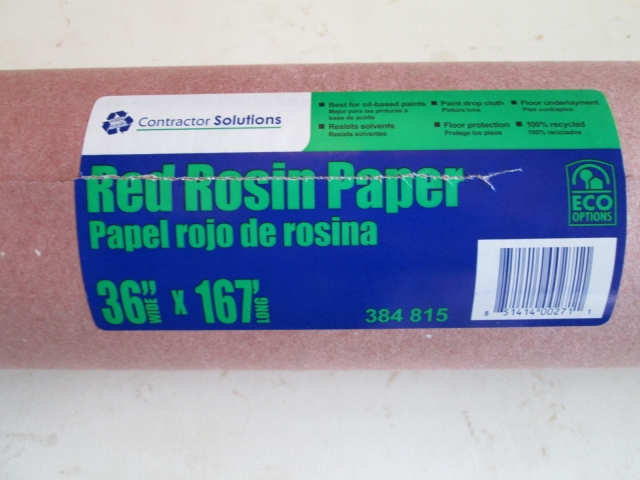
I have plenty of work to do fitting and joining these shiny parts together and I want to minimize the risk of damage to the finish during the following phases, so I will mask with the rosin paper. It is supposed to be good when used with oil based finishes.

Here I have almost completed masking off the door; just the door latch area left to do.
Image

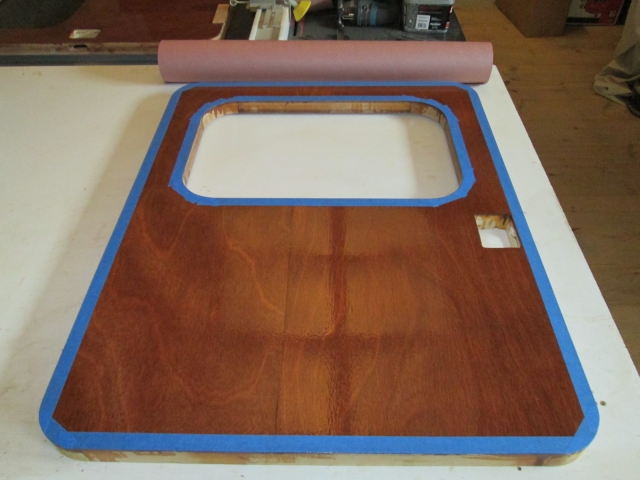
Next I rolled out some of the paper, offset under the door on two sides, and trimmed with the razor knife by following the other two sides. Then traced the window and latch openings, and trimmed those outside the line so that they could be taped to the edge masking as well.

Here is the door with the rosin paper all taped down.
Image
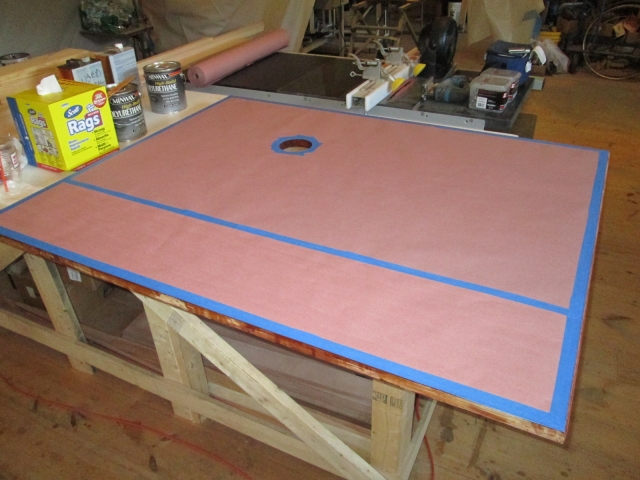
Other door was done the same way.

Bulkhead was done similarly.
Image

Meanwhile still scraping excess poly from the edges.

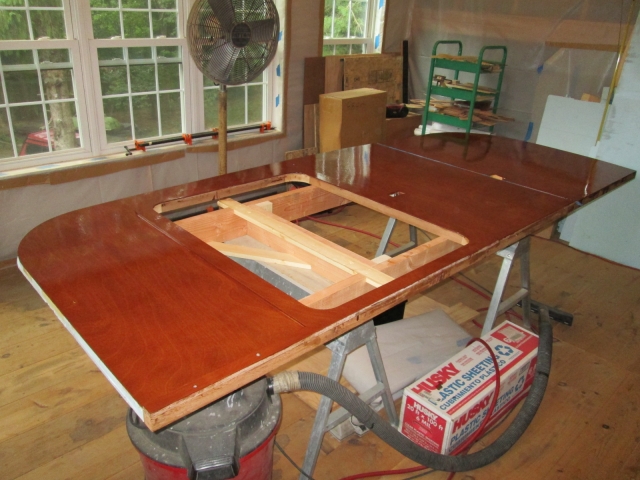
My plan from the beginning has been to erect the walls and bulkhead and then hand plane the top of the bulkhead to match the shape of the ceiling (520 inch radius in profile). However, I had second thoughts that it might be better to make an angled pass across the top of the bulkhead on the table saw to get it close.

So I did a trial fit of the bulkhead to wall, with some difficulty positioning it gingerly by myself… didn’t want to drop into the dado slot. Note the quick clamps used as outrigger supports to keep it from flopping down.
Image
Image

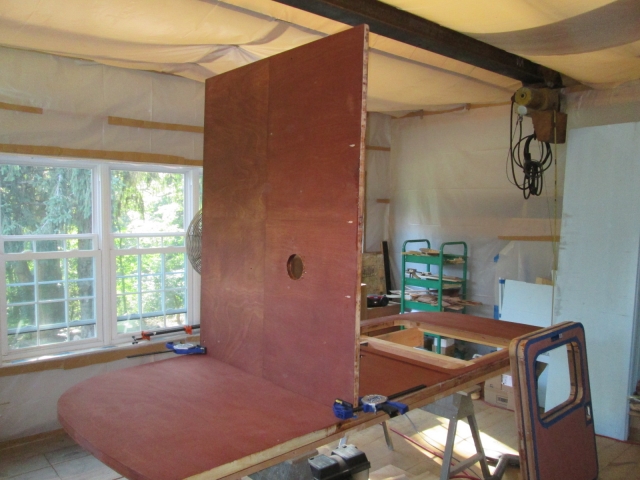
It turns out that the trim job needed is so slight that it’s not worth risking screwing up with the saw. Just a few quick passes with the hand plane once installed and it will be good.

That decided I used the scrapper to lightly remove some poly drips that had worked their way thru the fan hole and along the top and bottom edges, trying to avoid lumps in the galley side finish.

That made a few barely noticeable scratches down thru the stain, so I touched those areas with a dab more stain and set the bulkhead aside.

Next I filled all of the screw holes and minor divots in the door frame wood.
Image
The screw holes were from the clamp method I used during glue up, and from attaching the router jigs for the window recesses and door latches.

Next I rounded over the door outer frame edges to accommodate the canvas wrapping over the corners. Used the same little outrigger shoe to help stabilize the router.
Image
Image

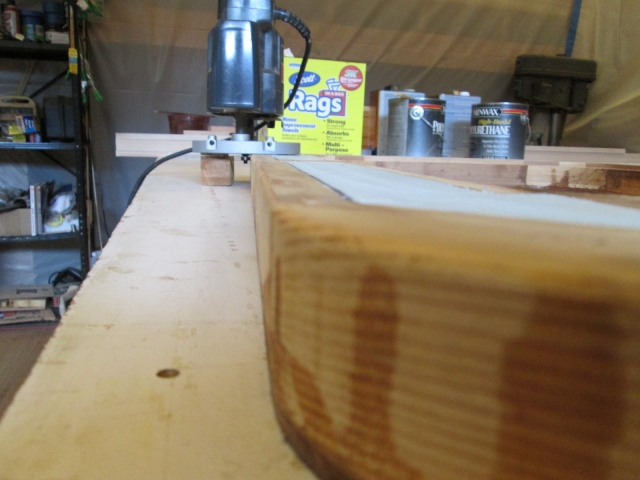
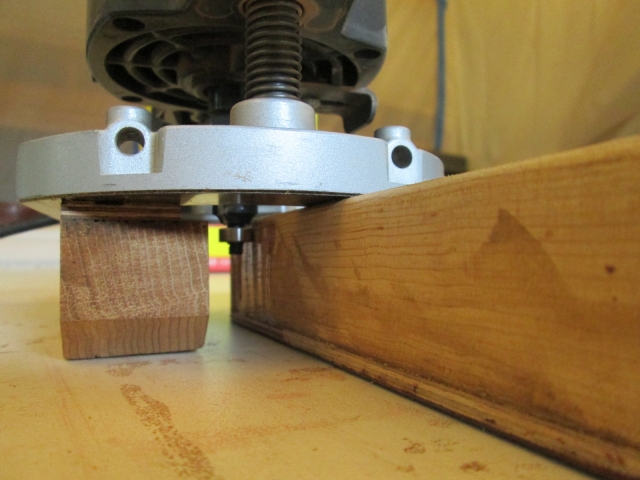
The shoe has one drywall screw that just acts like a locating pin, and the other uses a small scrap of 5 mm ply as a washer. Makes change overs quicker and easier than having two screws with washers.
Image
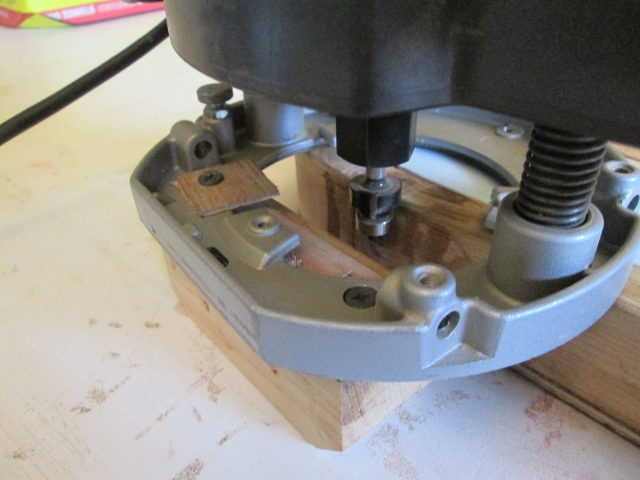
I just touched that gentle with the small block and some sandpaper to remove any tool marks.

That’s about 2 hrs each Wed., Thur. and Fri. and another 5 hrs today before hitting the proverbial wall.

Tomorrow (Sunday) I plan to spackle the outsides of the doors and lay the first coat of poly on the street side wall and galley side of the bulkhead.
Last edited by KCStudly on Sun Aug 04, 2013 10:05 am, edited 2 times in total.
KC
My Build: The Poet Creek Express Hybrid Foamie

Poet Creek Or Bust
Engineering the TLAR way - "That Looks About Right"
TnTTT ORIGINAL 200A LANTERN CLUB = "The 200A Gang"
Green Lantern Corpsmen
User avatar
KCStudly
Donating Member
 
Posts: 9640
Images: 8169
Joined: Mon Feb 06, 2012 10:18 pm
Location: Southeastern CT, USA
Top

Re: The Poet Creek Express - Foamie Hybrid

Postby bonnie » Sun Aug 04, 2013 5:36 am

That is amazing. You know, your imperfections are only seen in isolation. Once completed, everyone will see the whole wonderful teardrop not the imperfections. Works that way with quilting. :)
Remember, the turtle won. :)
User avatar
bonnie
Donating Member
 
Posts: 1390
Images: 107
Joined: Sun Jul 24, 2011 4:14 pm
Location: Roxana, IL
Top

Re: The Poet Creek Express - Foamie Hybrid

Postby KCStudly » Sun Aug 04, 2013 8:56 am

Thank you Bonnie. I do realize that, it's just that if I don't remain obsessively diligent the sum total of the warts (or heaven forbid if a "whopper" should occur) might win over!

When people see TPCE in person, I'm hoping to at least make a very good first impression!
Last edited by KCStudly on Sun Aug 04, 2013 9:58 am, edited 1 time in total.
KC
My Build: The Poet Creek Express Hybrid Foamie

Poet Creek Or Bust
Engineering the TLAR way - "That Looks About Right"
TnTTT ORIGINAL 200A LANTERN CLUB = "The 200A Gang"
Green Lantern Corpsmen
User avatar
KCStudly
Donating Member
 
Posts: 9640
Images: 8169
Joined: Mon Feb 06, 2012 10:18 pm
Location: Southeastern CT, USA
Top

Re: The Poet Creek Express - Foamie Hybrid

Postby wagondude » Sun Aug 04, 2013 9:34 am

Just remember that TLAR works for finishes too. You have so much shine going on you may not even need lights. 8)
Bill

TnTTT ORIGIONAL 200A LANTERN CLUB
101137
User avatar
wagondude
1000 Club
1000 Club
 
Posts: 1535
Images: 35
Joined: Sun Jan 16, 2011 7:41 pm
Location: Land of the Jayhawks
Top

Re: The Poet Creek Express - Foamie Hybrid

Postby GPW » Sun Aug 04, 2013 9:44 am

QUOTE: "I'm hoping to at least make a very good first impression! “ ... and at what distance might that be ??? :roll:

Silly statement KC, must be the Heat !!! You know (and we Know too) that it’s going to be “Killer” or you wouldn’t have gone to all this trouble eh !!! ... ;) Patience !!!
There’s no place like Foam !
User avatar
GPW
Gold Donating Member
 
Posts: 14920
Images: 546
Joined: Thu Feb 09, 2006 7:58 pm
Location: New Orleans
Top

Re: The Poet Creek Express - Foamie Hybrid

Postby KCStudly » Sun Aug 04, 2013 10:18 am

Thank you gentlemen. I appreciate the support. I am, however, fearful that if I get in the habit of saying "that's good enough" too soon or too often, then the warts will win!

If I keep my nose down close and keep surgically removing any warts, then all that will be left is the good stuff!

Please don't take my attitude the wrong way, I do sincerely thank you for your kind comments (secretly I agree that it is looking very nice indeed), I just don't want to be presumptuous and have the fickle hand of fate deal me a major set back.

Patience and diligence are the order of the day. :D
KC
My Build: The Poet Creek Express Hybrid Foamie

Poet Creek Or Bust
Engineering the TLAR way - "That Looks About Right"
TnTTT ORIGINAL 200A LANTERN CLUB = "The 200A Gang"
Green Lantern Corpsmen
User avatar
KCStudly
Donating Member
 
Posts: 9640
Images: 8169
Joined: Mon Feb 06, 2012 10:18 pm
Location: Southeastern CT, USA
Top

Re: The Poet Creek Express - Foamie Hybrid

Postby Greg M » Sun Aug 04, 2013 10:30 am

You are a wise man KC
Give a person a fish and you feed them for a day; teach a person to use the Internet and they won't bother you for weeks.
User avatar
Greg M
*Geek Extraordinaire
 
Posts: 1167
Images: 85
Joined: Mon Sep 12, 2005 12:40 am
Location: Victoria, BC, Canada
Top

Re: The Poet Creek Express - Foamie Hybrid

Postby KCStudly » Sun Aug 04, 2013 7:18 pm

Greg M wrote:You are a wise man KC

Thanks Greg. I like to think so, but sometimes I suppose that is debatable! We all have are moments of glory and failure; so long as we get there in the end, we are ahead of the game!

Arrived at Mecca today and found a Cox Trailer 5-1/2 x 6 ft 9 inch utility with a bent street side tongue rail and little 8 inch tires sitting out by the old barn.
Image
There's a piece of flat bar scabbed on to the inside of the bent tongue rail as reinforcement.

The short little stake sides have some funky chrome p/u truck bedside rails on top with built in running lights and it has a sturdy looking step bumper on the rear. Slipper leaf springs.
Image

Turns out it belongs to one of Karl’s paver customers and will be getting a 10 inch extension in length and 6 inches each side in width so that the guy can haul two quad’s on it.

Karl is currently working on a Lexan blast shield for an industrial sheet coil winder. Think 2 ft wide x 2 ft diameter bundle of energy akin to a giant lawnmower coil starter. They had a coil fracture at the core cascading into an explosion of energy that sent shrapnel flying into the ceiling and adjacent machinery, and thought maybe the operator should have a bit more protection. Karl said the carnage was scary! It will be a bit more sturdy then what you have seen on Myth Busters! 4x4 box tube and 3/8 thk Lexan (I’ll try to remember to take some pic’s tomorrow.)

I started out by laying down a first go of spackle on the outside surfaces of the doors (sorry, no pic’s).

Then I coated the galley side of the bulkhead and the inner surface of the street side wall with the first coat of polyurethane. Based on my previous issues and all of the helpful suggestions from you folks, I put it on painfully dry. And I do mean painful: the added friction from the dry brush irritated the carpal tunnel/arthritis in my right wrist (years of CAD work using the mouse all day long). Really a minor annoyance, but a noticeable difference. It still went on pretty evenly and I think it will be better in the end; might even dry fully in a shorter period of time. I’ll just have to be extra careful sanding, maybe just use the greenie if the block seems like it wants to clog. Maybe wrap the greenie around the block?

Here are the wet/still tacky pic’s.
Image
Image
Image
Image
Image

Note that I also decided to mask around the edge of the bulkhead; trying to avoid having to scrape poly drips off of the glue surface. Turns out that with the very dry application there weren’t near as many drips and runs.

Here’s hoping that this technique will yield better results in a shorter period of time with less effort!

Thanks again for following and cheering me on!
Last edited by KCStudly on Thu Aug 08, 2013 7:13 pm, edited 1 time in total.
KC
My Build: The Poet Creek Express Hybrid Foamie

Poet Creek Or Bust
Engineering the TLAR way - "That Looks About Right"
TnTTT ORIGINAL 200A LANTERN CLUB = "The 200A Gang"
Green Lantern Corpsmen
User avatar
KCStudly
Donating Member
 
Posts: 9640
Images: 8169
Joined: Mon Feb 06, 2012 10:18 pm
Location: Southeastern CT, USA
Top

PreviousNext

Return to Foamies

Who is online

Users browsing this forum: No registered users and 17 guests