The Poet Creek Express - Foamie Hybrid

Canvas covered foamies (Thrifty Alternatives...)

Moderator: eaglesdare

Re: The Poet Creek Express - Foamie Hybrid

Postby Wolffarmer » Sun Aug 04, 2013 9:59 pm

Al right, we are starting to get some 3D. I am waiting for the day you go mobile. I will play the Who's song, " Going Mobile"

Randy
"these guys must be afraid of the dark"
User avatar
Wolffarmer
Donating Member
 
Posts: 4612
Images: 309
Joined: Wed May 02, 2007 1:32 pm
Location: Idaho Rupert

Re: The Poet Creek Express - Foamie Hybrid

Postby Wolffarmer » Sun Aug 04, 2013 10:07 pm

For those to young, Or just plain missed it.

Going Mobile

Randy
"these guys must be afraid of the dark"
User avatar
Wolffarmer
Donating Member
 
Posts: 4612
Images: 309
Joined: Wed May 02, 2007 1:32 pm
Location: Idaho Rupert

Re: The Poet Creek Express - Foamie Hybrid

Postby Ned B » Mon Aug 05, 2013 12:07 am

Thanks Randy... I think...

KC thumbs up! Looks handsome from here!
User avatar
Ned B
1000 Club
1000 Club
 
Posts: 1036
Joined: Sat Apr 16, 2011 10:25 am
Location: Syracuse NY (ish)
Top

Re: The Poet Creek Express - Foamie Hybrid

Postby KCStudly » Mon Aug 05, 2013 9:46 pm

Thanks Ned!

And now the news:
Success! Based on the great input form many of you, I think I might have this poly thing figured out. The extremely nice weather we’ve been having (mid 70’s with low humidity in the mid to low 50/ct range) surely didn’t hurt, either.

Took Tom’s advice and just used the greenie pad at first. Here is the bulkhead rear (galley) face with the top half scuffed.
Image

I used the small oak block to back up the greenie; probably not necessary.
Image

That went really well and with the ultra-dry coat I had put on for the first coat there were no signs of gummy globs or streaks. The greenie didn’t knock the little nubs down as well as I would have liked, so in relative confidence I went ahead and scuffed all again with the 220 grit.

I did get some clogging of the paper from the nubs, but was mindful to clean it out with a small toothbrush sized wire brush. That would work once, and then I’d get a fresh piece of paper.

Anyway, I got thru the bulkhead and the wall and was able to lay another coat down tonight. The bulkhead went well. On the wall I started in coating the galley area before I realized that I hadn’t wiped it down with spirits. Switched gears, wiped everywhere that I hadn’t coated, then went back to brushing. The wall has a bit more texture, so I couldn’t put it on as dry as the bulkhead, but the weather is supposed to stay dry and it will be Wednesday before I get back up there.

The street side wall does seem as though it is a little lighter in color than the curb side and floor. I’m hoping that it’s not too noticeable in the build.

Second wet coat.
Image
Image
Image
Image
Image

Put me down for another couple of hours building time. It’s coming along, step by step.
Last edited by KCStudly on Sat Aug 10, 2013 5:51 pm, edited 1 time in total.
KC
My Build: The Poet Creek Express Hybrid Foamie

Poet Creek Or Bust
Engineering the TLAR way - "That Looks About Right"
TnTTT ORIGINAL 200A LANTERN CLUB = "The 200A Gang"
Green Lantern Corpsmen
User avatar
KCStudly
Donating Member
 
Posts: 9640
Images: 8169
Joined: Mon Feb 06, 2012 10:18 pm
Location: Southeastern CT, USA
Top

Re: The Poet Creek Express - Foamie Hybrid

Postby S. Heisley » Mon Aug 05, 2013 11:39 pm

:thumbsup: :thumbsup:
User avatar
S. Heisley
Super Lifetime Member
 
Posts: 8866
Images: 495
Joined: Mon Sep 17, 2007 10:02 am
Location: No. California
Top

Re: The Poet Creek Express - Foamie Hybrid

Postby kudzu » Tue Aug 06, 2013 7:16 am

KCStudly wrote:Image

Put me down for another couple of hours building time. It’s coming along, step by step.


Beautiful. I should have furniture with finishes that nice. Step by step is how great things are done.
kudzu
Donating Member
 
Posts: 439
Images: 16
Joined: Wed Mar 27, 2013 3:20 pm
Top

Re: The Poet Creek Express - Foamie Hybrid

Postby KCStudly » Thu Aug 08, 2013 10:34 am

Thank you Sharon and Kudzu. Your compliments are very much appreciated.

Last night (Wednesday) I was a little later than usual getting out to Mecca, but I did manage to get the back of the bulkhead and the street side wall scuffed back down for what I hope will be the last coat of poly on all of the major panels.

There's a long way to go, and lots more parts to be fit and finished, but it is one step after the other!
Last edited by KCStudly on Thu Aug 08, 2013 11:04 am, edited 1 time in total.
KC
My Build: The Poet Creek Express Hybrid Foamie

Poet Creek Or Bust
Engineering the TLAR way - "That Looks About Right"
TnTTT ORIGINAL 200A LANTERN CLUB = "The 200A Gang"
Green Lantern Corpsmen
User avatar
KCStudly
Donating Member
 
Posts: 9640
Images: 8169
Joined: Mon Feb 06, 2012 10:18 pm
Location: Southeastern CT, USA
Top

Re: The Poet Creek Express - Foamie Hybrid

Postby GPW » Thu Aug 08, 2013 10:44 am

No rush eh??? it’s looking terrific !!! :thumbsup: 8) 8) 8) Glad you got your poly sorted , cooler weather too ... :D
There’s no place like Foam !
User avatar
GPW
Gold Donating Member
 
Posts: 14920
Images: 546
Joined: Thu Feb 09, 2006 7:58 pm
Location: New Orleans
Top

Re: The Poet Creek Express - Foamie Hybrid

Postby KCStudly » Fri Aug 09, 2013 10:28 pm

Thanks GPW, your compliments and comments are always welcome.

Some pics from Thursday night.

Karl spent that day extending the ATV trailer.
Image
Image
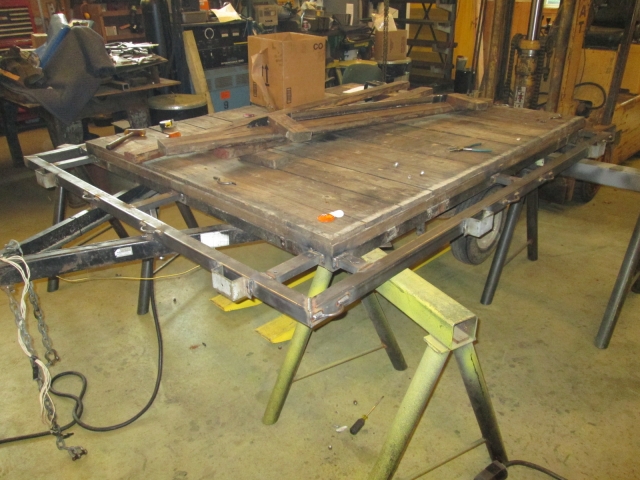
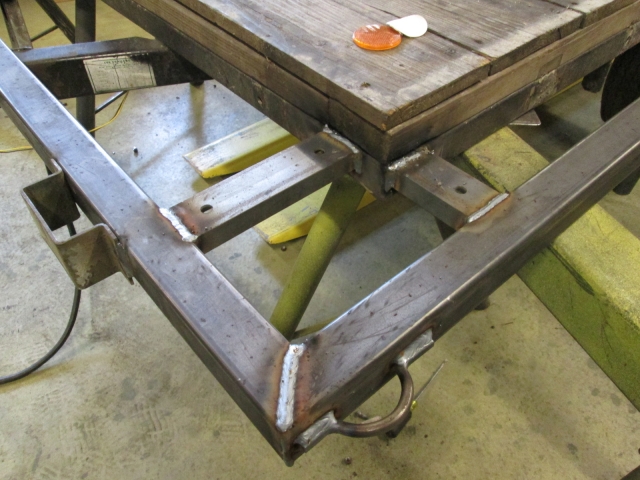
He slapped a couple of boards on there (even though it was not part of the deal), slipped the stake sides back into the relocated pockets, and the thing looked presentable (despite the reduced turning radius… the customer is only right sometimes).

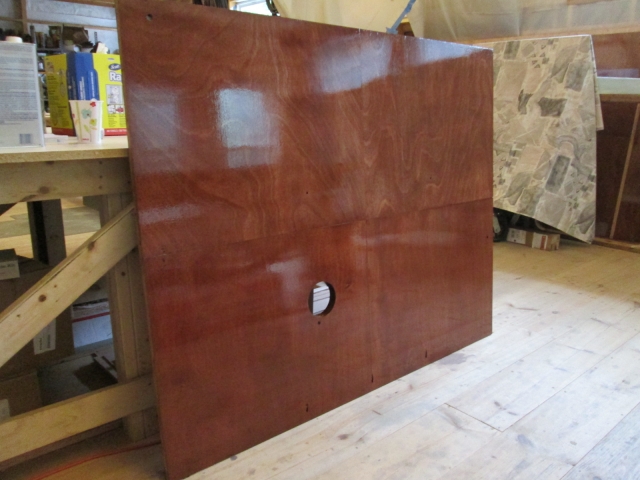
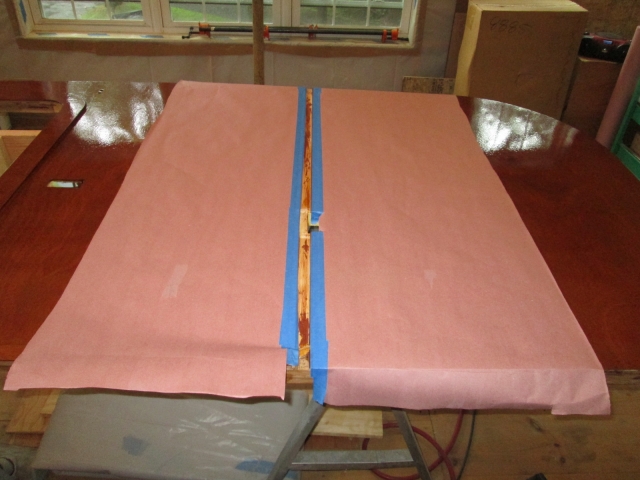
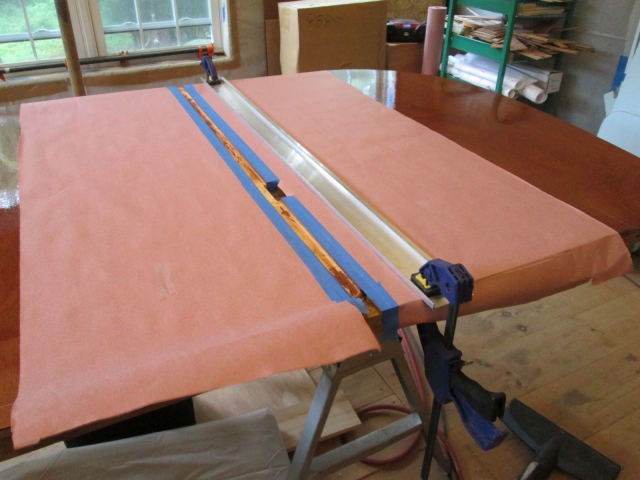
Some pic’s of the 3rd wet coat on the rear of the bulkhead and street side wall.
Image
Image
Image
Image

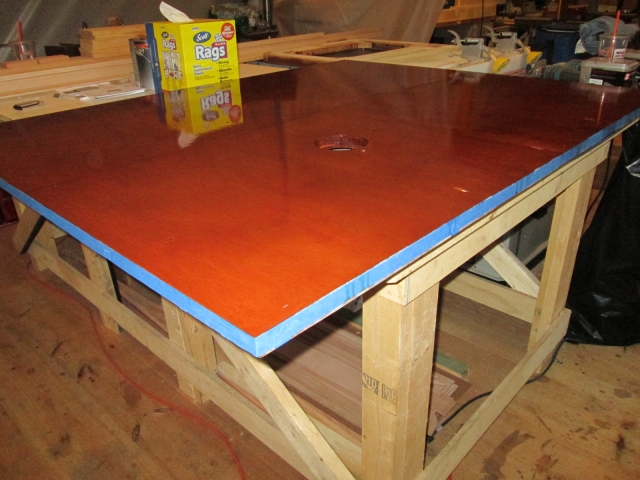
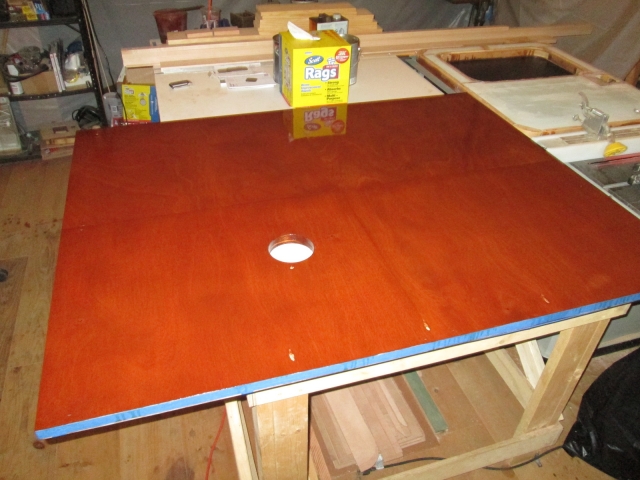
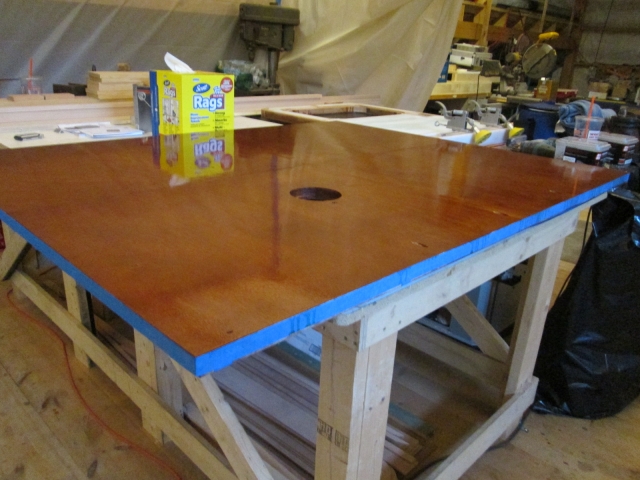
In this one you can kind of see the lightness of color compared to the other parts.
Image

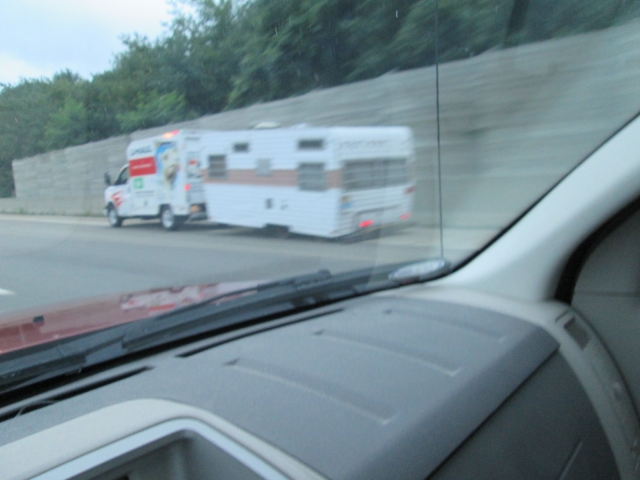
On the ride home I managed to snap a pic of this poor guy dragging an old TT down the shoulder riding on the rim, pieces of tire rubber flailing in his wake.
Image

Tonight, Friday, I got some redundant pics of the same parts after drying… at least partially… very humid here again and they, especially the wall, have a lot more “zits” (those little solvent pits… should have listened to the experts and thinned the final coat… wasn’t as critical in the dryer weather).
Image
Image

It was very difficult trying to set the bulkhead up on the wall dado. The bulkhead is just heavy and large enough that it is a bit of a stretch to gently set it in place by myself. After scraping the excess poly from the edges of the dado and bulkhead, I tried to dry fit them with them standing up on the floor. The floor is rough T&G plank and is not very even, but I was able to get the top of the joint started.
Image
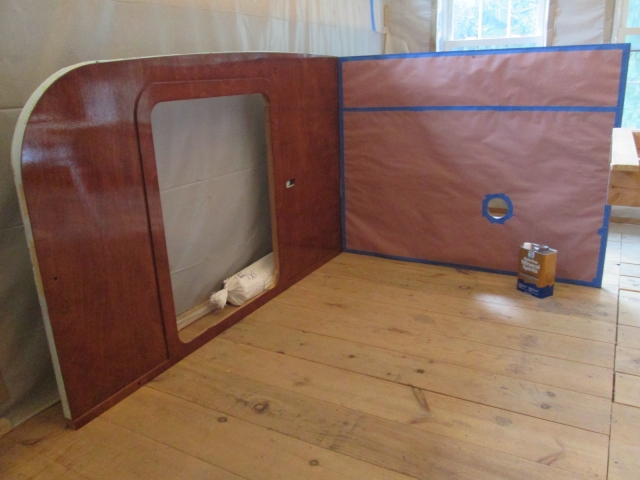
Still some adjustments to be made in order to have this ‘snap together’ during glue and screw-up. I could have left a good 1/16 extra clearance allowing for the poly and other variations and the joint would have still been reasonably tight.

Took the opportunity to get a size perspective shot using the camera delay timer. Here I am sitting up against the bulkhead, even though the cabinets to come will prevent this in the future.
Image
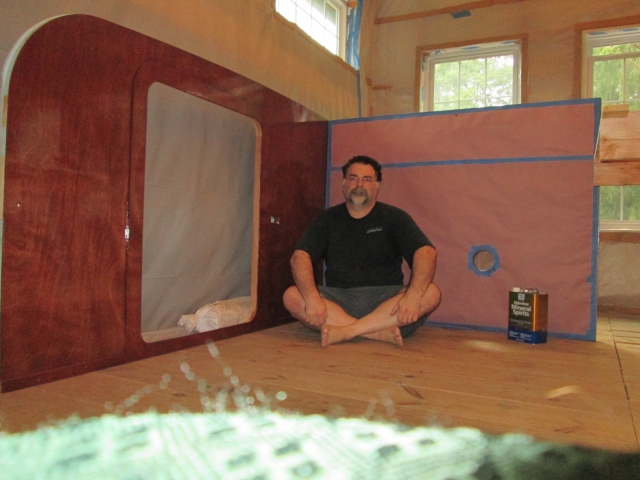
Sorry about the seat cushion in the foreground; I set the camera on a chair for the shot.

Galley side.
Image

In order to trim the dado a bit wider, I masked it off on both sides so that the router shoe would not scratch the finish. Left the tape a little wide on the rear edge so that it would not eat the tape.
Image

Careful measurement and a test at the start of the cut, with minor adjustment helped to set the extruded fence location for a skim cut.
Image

I found it was easier to just set the router up in the slot and adjust the depth to suit by sighting thru the dado under the cutter. When I checked the depth setting against a scrap of 5mm I found it to be quite a bit deeper. I attributed this to the tape, rosin paper, and multiple coats of poly.

Ran the router and then had to trim the remainder where the toe kick boards kept the router from completing the cut. I did this by repositioning the fence, scoring with the std. utility knife, and working with the 3/8 chisel.

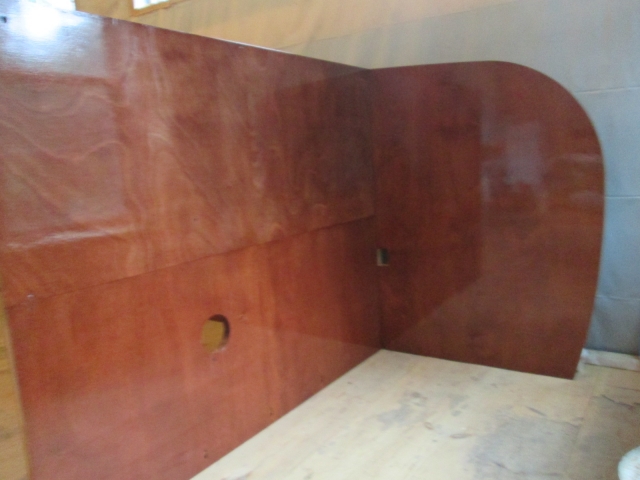
I managed to get the bulkhead up onto the wall again to check fit after the cutting, but it was still just a little tight at the middle. I’ll have to set it back up again tomorrow and trim a hair more.

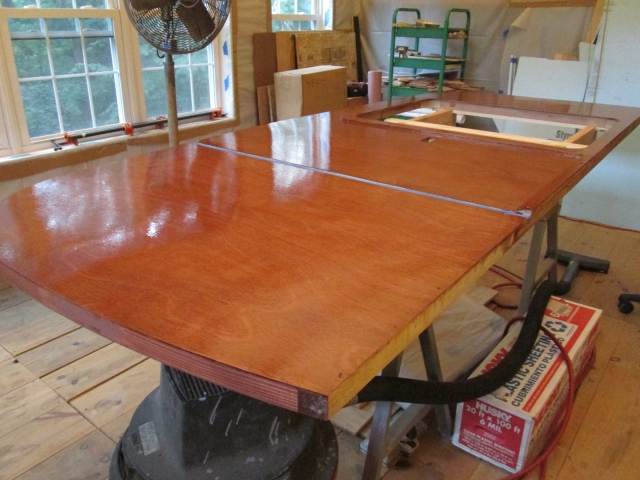
I have mixed emotions about the panel finish. Close up I wish it was better quality at this effort level, but overall I am pretty happy with it. As usual the pics make it look 10 to 15/ct better than it is.

I’m moving on.

BTW, 2 week vacation has officially started at end of work day today! Would have been the big trip if done, but instead will be one week of straight out build time, and a week off.

Hope to get the cabin shell put together this week. Just a little more detail work on the walls and a helping hand from Karl and the walls will be up!

About time, eh?
KC
My Build: The Poet Creek Express Hybrid Foamie

Poet Creek Or Bust
Engineering the TLAR way - "That Looks About Right"
TnTTT ORIGINAL 200A LANTERN CLUB = "The 200A Gang"
Green Lantern Corpsmen
User avatar
KCStudly
Donating Member
 
Posts: 9640
Images: 8169
Joined: Mon Feb 06, 2012 10:18 pm
Location: Southeastern CT, USA
Top

Re: The Poet Creek Express - Foamie Hybrid

Postby GPW » Sat Aug 10, 2013 5:52 am

Wow!!! That’s Looking Great !!! Plenty of room inside .... :thumbsup: 8) :applause:
There’s no place like Foam !
User avatar
GPW
Gold Donating Member
 
Posts: 14920
Images: 546
Joined: Thu Feb 09, 2006 7:58 pm
Location: New Orleans
Top

Re: The Poet Creek Express - Foamie Hybrid

Postby CampsALot » Sat Aug 10, 2013 6:04 am

That will be a family heirloom. :applause:
Are you assembling the cabin separate from the trailer or putting it together on the trailer?
I've yet to see a trailer that is perfectly square.

Super job, the only thing that shiny in mine is the mirror I use to shave with :lol:

Warren
Foam Away From Home
106754106755
Start of Build Thread viewtopic.php?f=50&t=55752
New Build Thread viewtopic.php?f=55&t=56489
User avatar
CampsALot
Teardrop Advisor
 
Posts: 79
Images: 74
Joined: Sun May 12, 2013 12:16 pm
Location: Nova Scotia, Canada
Top

Re: The Poet Creek Express - Foamie Hybrid

Postby kudzu » Sat Aug 10, 2013 8:13 am

Oh this is exciting! I see a camper emerging from all those myriad parts. You've got lots of head room in there. In fact, it might even be a slouchy for someone my height. :lol:

Campsalot, nothing shiny will be going into mine either. If I spent the time to get the finish that nice & then I ram my trike's chain ring into it or saw a dog rake a claw across it I'd... well, better not to say. So I'll skip the fine woodworking in my build. I sure am enjoying watching it in KC's though.
kudzu
Donating Member
 
Posts: 439
Images: 16
Joined: Wed Mar 27, 2013 3:20 pm
Top

Re: The Poet Creek Express - Foamie Hybrid

Postby Wobbly Wheels » Sat Aug 10, 2013 8:32 am

Yeah, between dogs and gear, mine is going to have a utilitarian interior as well. In the early pages of this thread though, he explains his reasoning for wanting to make this something special...which he's certainly accomplishing ! :thumbsup: :thumbsup:

KC, that finish really pops - the pic of you sitting in there reminded me how fortunate I've been to work on some exquisitely finished boats - sometimes after I'm done I'll just sit and take in all the brightwork. TPCE is a feast for the eyes, for sure.
User avatar
Wobbly Wheels
Donating Member
 
Posts: 1080
Joined: Tue Mar 15, 2011 9:51 am
Top

Re: The Poet Creek Express - Foamie Hybrid

Postby KCStudly » Sat Aug 10, 2013 8:47 am

Thanks everyone.

Warren, the trailer was built way back in the beginning of this thread and it is as straight as we could get it! My recollection is that it was less than 1/32 inch off on the diagonals and/or width (I'd have to look back now to be sure which one was slightly off... it had to do with putting the jack stand braces in and how one side pulled a little). We also used a hydraulic ram and jig table to straighten out the camber in the side rails that came from welding, making it pretty dam close to being flat, too. If you haven't checked out that part of my build, you may find it interesting to go back and have a look.

The floor was made square, as well. It was dry fit to the trailer to locate the mounting bolt holes before bringing it up the stairs (...took 3 people on that move) and it fits very nicely indeed. :D

I want to wrap the canvas under the floor before placing the cabin on the trailer, and am committed (...or should be :frightened: ) to completing the cabin up in the loft before lowering it down to ground level where the trailer is.

Thanks for watching and, hey, nice work on your Sequoia and your first trip! :thumbsup:
KC
My Build: The Poet Creek Express Hybrid Foamie

Poet Creek Or Bust
Engineering the TLAR way - "That Looks About Right"
TnTTT ORIGINAL 200A LANTERN CLUB = "The 200A Gang"
Green Lantern Corpsmen
User avatar
KCStudly
Donating Member
 
Posts: 9640
Images: 8169
Joined: Mon Feb 06, 2012 10:18 pm
Location: Southeastern CT, USA
Top

Re: The Poet Creek Express - Foamie Hybrid

Postby Ned B » Sat Aug 10, 2013 9:49 am

KC, I know you've set the bar 'high', but man have you ever met those high standards! Short of having commercial spray gear, and a dust free booth etc... I don't know how you'd get a 'better' finish than what you've got. :applause:
User avatar
Ned B
1000 Club
1000 Club
 
Posts: 1036
Joined: Sat Apr 16, 2011 10:25 am
Location: Syracuse NY (ish)
Top

PreviousNext

Return to Foamies

Who is online

Users browsing this forum: No registered users and 9 guests