The Poet Creek Express - Foamie Hybrid

Canvas covered foamies (Thrifty Alternatives...)

Moderator: eaglesdare

Re: The Poet Creek Express - Foamie Hybrid

Postby KCStudly » Sat Nov 30, 2013 10:29 am

Thanks GPW. :D
KC
My Build: The Poet Creek Express Hybrid Foamie

Poet Creek Or Bust
Engineering the TLAR way - "That Looks About Right"
TnTTT ORIGINAL 200A LANTERN CLUB = "The 200A Gang"
Green Lantern Corpsmen
User avatar
KCStudly
Donating Member
 
Posts: 9640
Images: 8169
Joined: Mon Feb 06, 2012 10:18 pm
Location: Southeastern CT, USA

Re: The Poet Creek Express - Foamie Hybrid

Postby AlgoDan » Sun Dec 01, 2013 5:17 am

Looking good and progress is coming, well done...
Here now but Camping later.............Dan

Build Journal
http://www.tnttt.com/viewtopic.php?f=50&t=54681
102535 103199 105576
From .................Paper...........................To.......................... Pavement............................
User avatar
AlgoDan
The 300 Club
 
Posts: 449
Images: 238
Joined: Mon Feb 25, 2013 4:08 am
Location: Ontario, Canada

Re: The Poet Creek Express - Foamie Hybrid

Postby KCStudly » Sun Dec 01, 2013 9:58 am

Thanks, Dan.
KC
My Build: The Poet Creek Express Hybrid Foamie

Poet Creek Or Bust
Engineering the TLAR way - "That Looks About Right"
TnTTT ORIGINAL 200A LANTERN CLUB = "The 200A Gang"
Green Lantern Corpsmen
User avatar
KCStudly
Donating Member
 
Posts: 9640
Images: 8169
Joined: Mon Feb 06, 2012 10:18 pm
Location: Southeastern CT, USA
Top

Re: The Poet Creek Express - Foamie Hybrid

Postby Ned B » Sun Dec 01, 2013 3:08 pm

KC, looking great as always!

I Tivo'd the Punkin' Chunkin show and caught MB's 3 seconds on screen.
User avatar
Ned B
1000 Club
1000 Club
 
Posts: 1036
Joined: Sat Apr 16, 2011 10:25 am
Location: Syracuse NY (ish)
Top

Re: The Poet Creek Express - Foamie Hybrid

Postby KCStudly » Sun Dec 01, 2013 4:30 pm

Thanks, Ned. Hope you are enjoying the show! :thumbsup:

I have spent a couple more days tweaking the front cabinet and key catcher shelf; getting the masking done and the poly on the walls scuffed; and rubbing the natural oil all over the maple parts.

I had hoped that today, being a little warmer, might allow me to get another coat of poly on the rear panels, but the sun never came out, so still couldn't get enough temperature rise. Karl has a bigger kerosene heater; I might have to bust that out and get things cranking a little more.

Off to celebrate Yvette's big one, her 50th... and it's a surprise so don't say anything until we get back! :R :R :R
KC
My Build: The Poet Creek Express Hybrid Foamie

Poet Creek Or Bust
Engineering the TLAR way - "That Looks About Right"
TnTTT ORIGINAL 200A LANTERN CLUB = "The 200A Gang"
Green Lantern Corpsmen
User avatar
KCStudly
Donating Member
 
Posts: 9640
Images: 8169
Joined: Mon Feb 06, 2012 10:18 pm
Location: Southeastern CT, USA
Top

Re: The Poet Creek Express - Foamie Hybrid

Postby Ned B » Sun Dec 01, 2013 5:49 pm

I see they picked 'favorites' or 'feel good stories' to focus on. Nice to see the MythBuster techies getting some airtime, but wish they'd done more in depth in all of the classes.
User avatar
Ned B
1000 Club
1000 Club
 
Posts: 1036
Joined: Sat Apr 16, 2011 10:25 am
Location: Syracuse NY (ish)
Top

Re: The Poet Creek Express - Foamie Hybrid

Postby KCStudly » Sun Dec 01, 2013 8:11 pm

In fairness to the producers, they are trying to cover 3 days worth of event with something like 120 or so machines shooting each day.

Condense all that down into about 1-1/2 hrs of actual airtime, and they're not going to go into much detail on anything.

NPR had a talk (maybe the TED Radio Hour?) about how television keeps being dumbed down more and more, and how they play the same clips repeatedly (in the premiere, before the commercial, and again after the commercial) rather than having more content, or even more intellectual content. They paraphrased a quote by H. L. Mencken, something along the lines of, "No producer has ever lost money by underestimating the intelligence of their television audience."

I believe this is the original:
"No one in this world, so far as I know - and I have searched the records for years, and employed agents to help me - has ever lost money by underestimating the intelligence of the great masses of the plain people." - H. L. Mencken
KC
My Build: The Poet Creek Express Hybrid Foamie

Poet Creek Or Bust
Engineering the TLAR way - "That Looks About Right"
TnTTT ORIGINAL 200A LANTERN CLUB = "The 200A Gang"
Green Lantern Corpsmen
User avatar
KCStudly
Donating Member
 
Posts: 9640
Images: 8169
Joined: Mon Feb 06, 2012 10:18 pm
Location: Southeastern CT, USA
Top

Re: The Poet Creek Express - Foamie Hybrid

Postby ghcoe » Sun Dec 01, 2013 10:58 pm

That is why I do not watch TV anymore. Just plain dumb and a waist of time. I refuse to be a slave in this day and age.....
George.

Gorrilla Glue, Great Stuff and Gripper. The three G's of foamie construction.

My build viewtopic.php?t=54099
Working with flashing for foamie construction viewtopic.php?f=55&t=60303
Making a hot wire http://tnttt.com/viewtopic.php?f=55&t=55323
User avatar
ghcoe
1000 Club
1000 Club
 
Posts: 1982
Joined: Fri Dec 11, 2009 11:20 pm
Location: SW Idaho
Top

Re: The Poet Creek Express - Foamie Hybrid

Postby GPW » Mon Dec 02, 2013 7:25 am

Foamlings' are "different” eh !!! Like I’ve implied all along , we’re the “Thinkers” .... unwilling to accept what’s presented to us without some Careful consideration !!! :thinking: .... and testing ! ;)

KC , just those few added parts really brings TPCE into 3D for we humble viewers... :thumbsup: 8) :applause: :beer:
There’s no place like Foam !
User avatar
GPW
Gold Donating Member
 
Posts: 14920
Images: 546
Joined: Thu Feb 09, 2006 7:58 pm
Location: New Orleans
Top

Re: The Poet Creek Express - Foamie Hybrid

Postby KCStudly » Mon Dec 02, 2013 11:19 pm

I’ve lost track of the days relative to the pictures left in the camera, but I think this was about 4 hrs on Saturday.

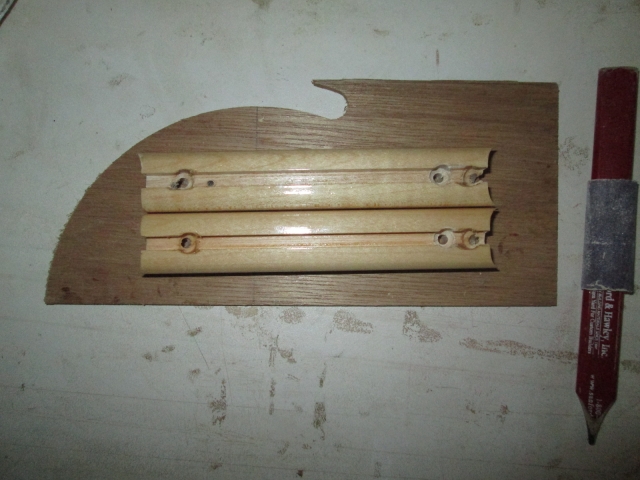
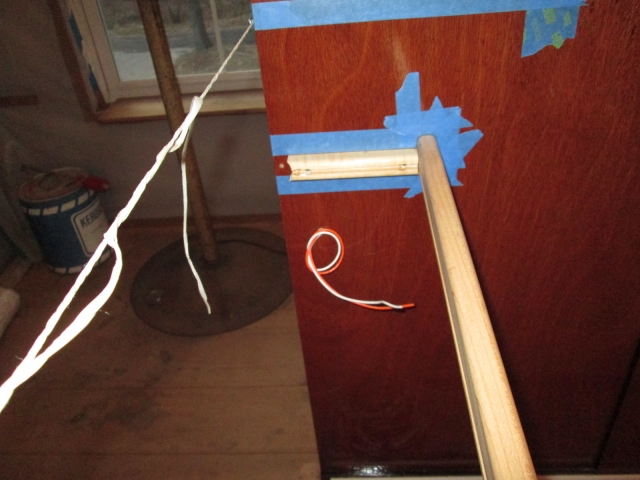
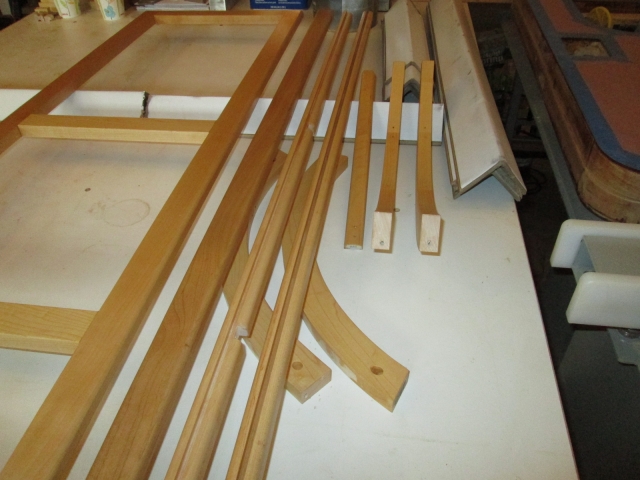
Here’s the mess I left for myself from the night before. Notice the blue tape stuck down with indication marks that I used to locate the second middle riblet in the Kregg “fixture”.
Image

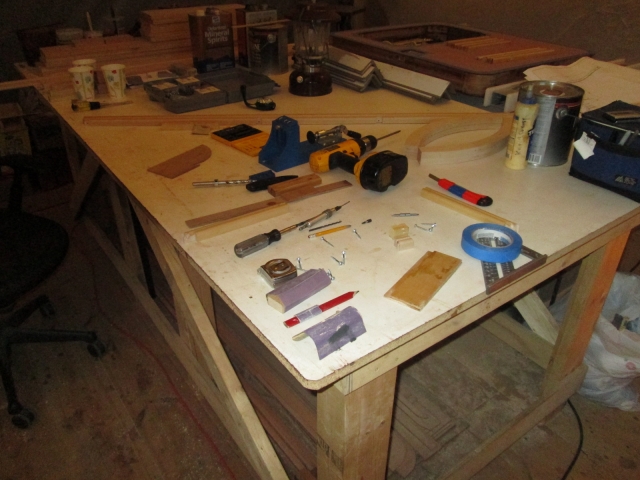
… and here it is after just a couple of minutes cleaning up. Much better.
Image

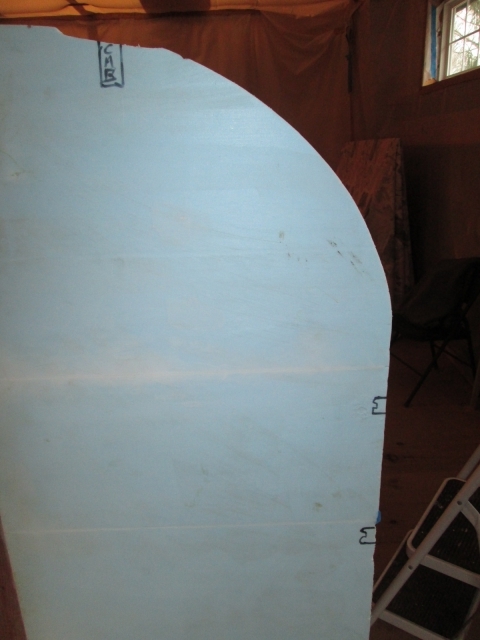
I took all of the upper front cabinet parts back apart, trimmed the masking tape where needed, and scuffed the poly in prep for glue.
Image
Image

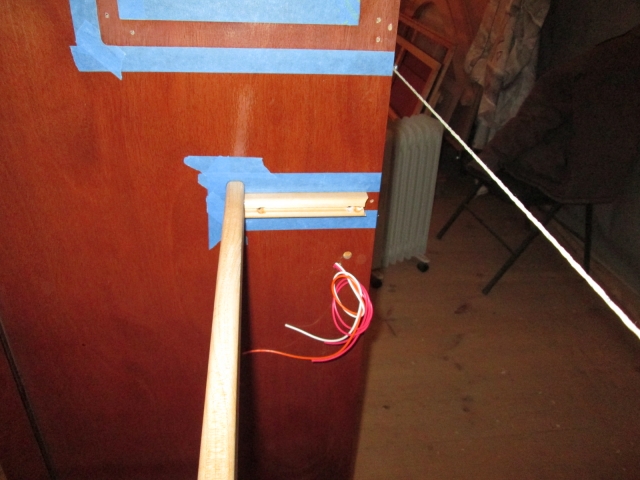
Then I used the same techniques to fit and mask off the key catcher shelf that goes across the front wall below the front cabinet. Since there are no riblets to contend with here, I was able to use the standard Kregg pocket through the “back” of the ledger into the side wall blocking.
Image
Image
Image

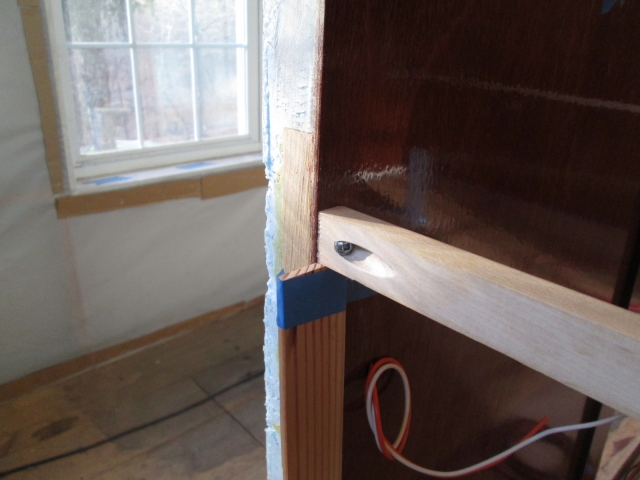
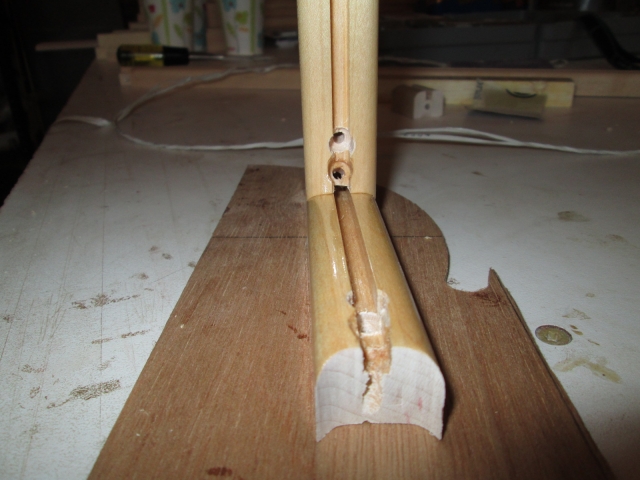
My original “work as you go” plan was to miter these side ledgers the same as the rear cabinets, but w/o the front wall in, and with no plan to add additional wood in the front wall, I realized that I needed to leave the front ledgers “full” to allow for the screws into the sides, and switch the already mitered (and finished) side ledgers over to a coped fit. Trimming the tips of the miters off of the side ledgers was easy enough, and the edge of the miter was the perfect pattern to follow for the copes; but the screw holes that I had added already became too close to the ends and I had to add additional holes (no harm, no foul).

Here is a look at how I did the copes using the bandsaw.
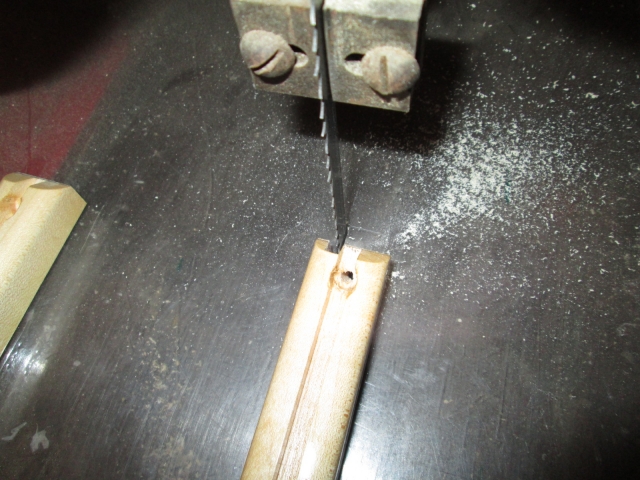
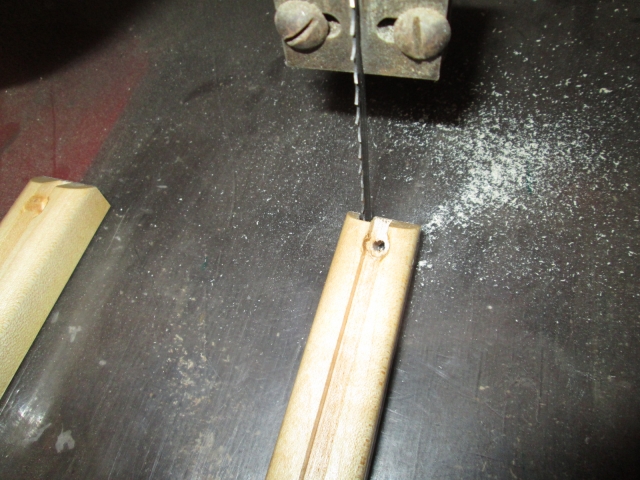
Image
Image

The extra holes.
Image

Test fitting the cope after some detail work with the 220 grit wrapped around a carpenter’s pencil.
Image

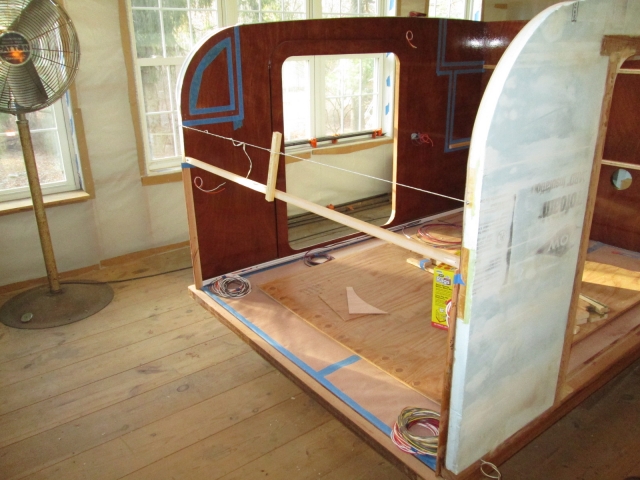
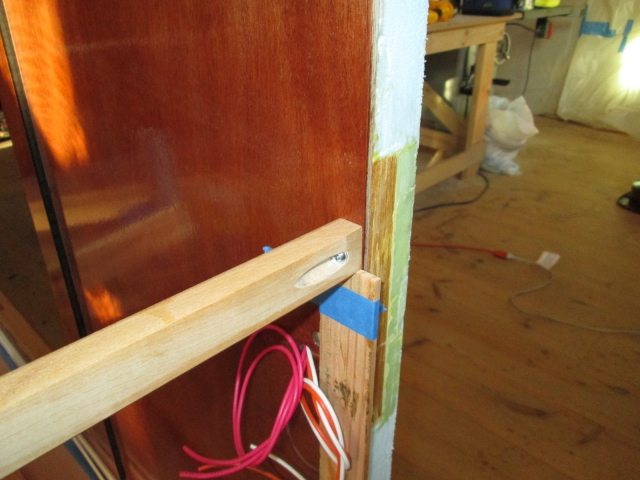
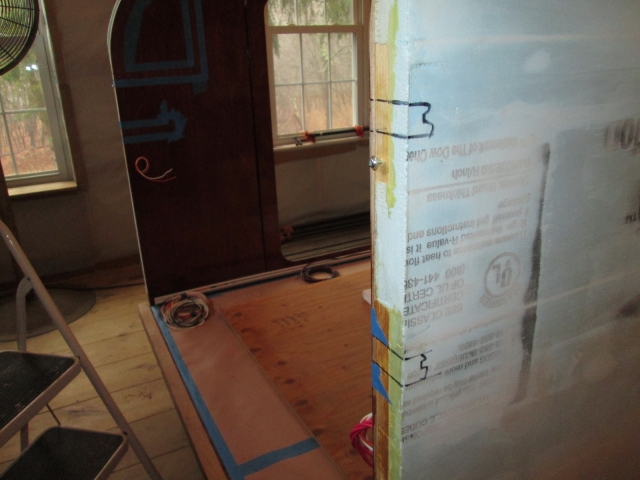
I clamped the quick square to the wall referencing the front of the wall and the top of the front ledger, then I held the side ledgers to the square and screwed them to the walls. Once I had the side ledgers fit to the front ledger I removed the front ledger (to get it out of the way) and fit the shelf front using a piece of 5 mm scrap at each end as an alignment key.
Image
Image
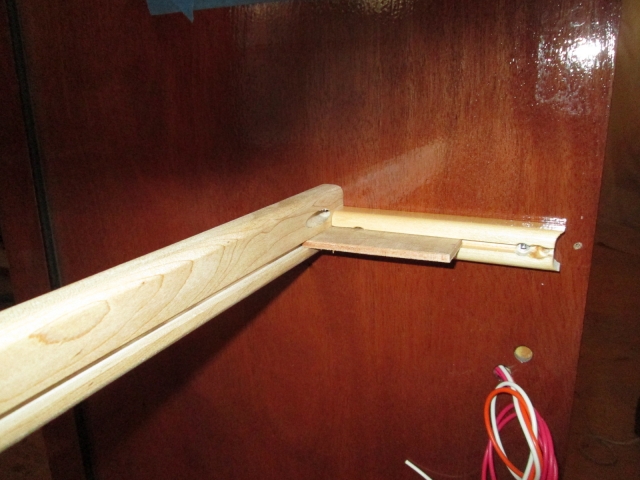
We’re looking at the “back” (front of cabin, back of shelf) here.

The wires below the key catcher shelf are for the pillow lights (“reading” lights).

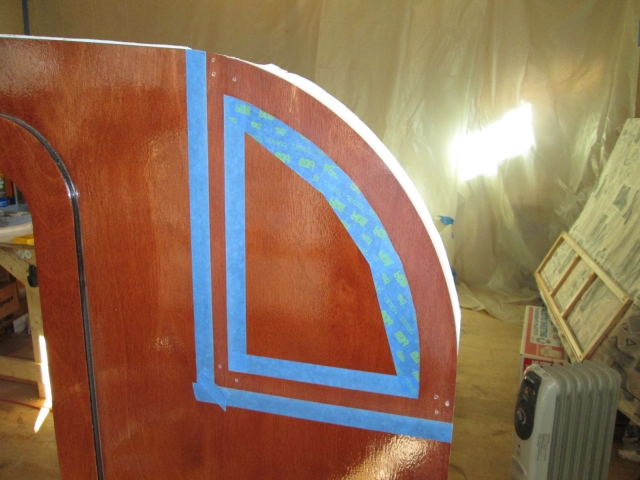
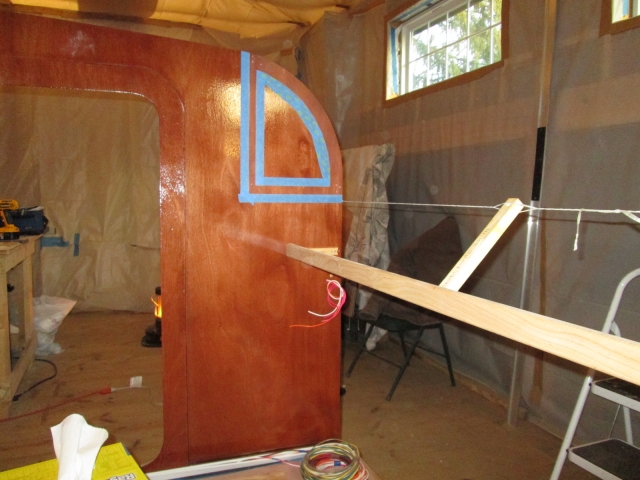
Here it is from the cabin side looking forward from the curb side doorway.
Image

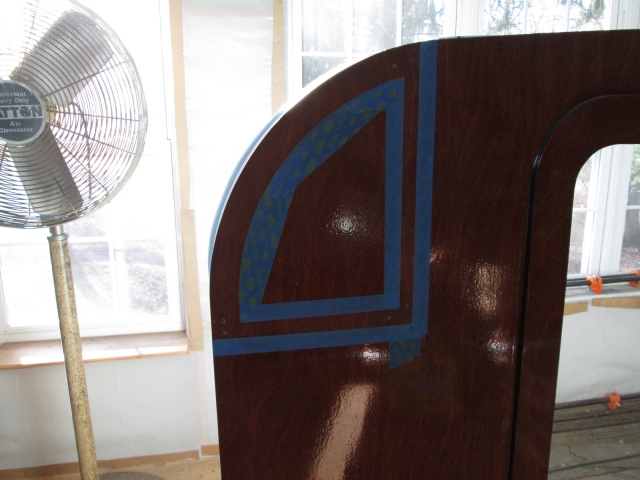
I sort of flip flopped between screwing this in and masking around it.
Image
Image

All the while putting many of the items I had tidied up earlier right back where they had been… only much more organized this time.
Image

Someone on a thread I read somewhere here on the forums mentioned that their husband “had to” go use an outlet in the bath house to grind his coffee because they had not put power outlets in their camper. Well, I too prefer fresh ground coffee, but I use the classic hand cranked mill that my dad used to use.
Image
If anyone knows the thread I am referring to, please feel free to link. Sometimes the solution to a problem is easier than we can see, but the trees for the forest. (The rubber band around the catch bin drawer keeps it from shifting open while grinding.)

I managed to get 4 hrs in on Sunday before scurrying off to Yvette’s surprise B-day dinner (her B-day is actually today).

Started by cleaning the bench again and removing the key catcher parts that had been fit and masked. Then I rubbed natural oil on all of the maple parts, avoiding areas where there will be glue.
Image
Image
I found a couple of areas where I could have done a better job of sanding (saw marks and router chatter), but they are not going to be prominent so I will probably let them slide.

After trimming out the mask for the key catcher where I had traced some areas, I scuffed the poly in prep for glue.
Image
Image

Then I transferred the front ledger locations to the side walls so that I can snap screw lines for the front wall/ceiling panels later.
Image
Image

I still had a little time left, so I started working on the little trim base for the red night light that will be mounted under the rear cabinet (at our feet facing the bulkhead). I resawed a piece of 1x4 maple to match the thickness of the wire chase trim (same as the reveal between the lower edge and groove under the cabinet face frames); trimmed it to length; traced and cut the radii on the band saw; sanded the radii to the line using the small oak block; and laid out and chiseled the wire way relief in the top side. Here it is mocked up with the lamp bezel, and a scrap of the wire chase trim, as well as with a chunk of the cabinet face frame material.
Top side that will fit up against the bottom of the lower rear cabinet floor panel.
Image

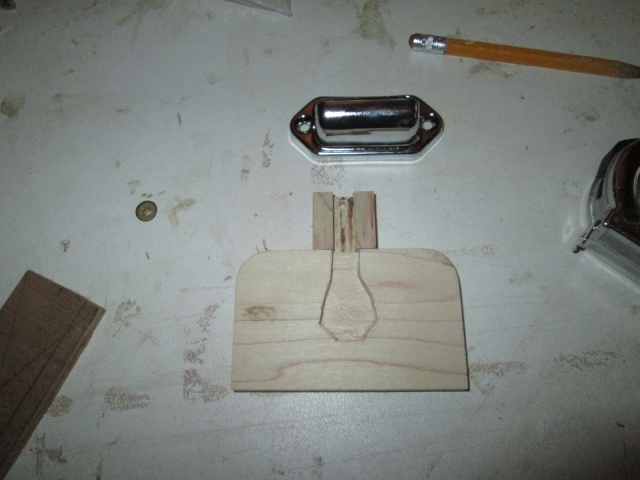
Bottom view (looking up) representing what it will look like on the underside of the cabinet.
Image
The front edge will be coped to blend into the radius of the cabinet face frame, and the trailing edges will be rounded over to match the face frame and the wire way chase trim.

And that’s about when Karl called me on my cell (from inside the house) to remind me that I needed to go get ready for Yvette’s party… I was engrossed in my work.

No hassle. I got home in plenty of time to casually get ready and get her to the party on time… she was surprised!

Coincidentally, my good friend Dale’s sister in law (…Dale is the one with the boat) was our waitress at the Steak Loft in Olde Mystic Village. They have a great salad bar, my usual is their teriyaki strip steak, and a twice baked stuffed potato. BIL Rene made a killer 6 layer carrot cake with coconut and cream cheese frosting; Yvette’s favorite (… “the French girl likes some wine and cheese, go figure!” …. one of her favorite self-descriptive sayings).

Took tonight off to share more b-day time with Yvette.

Weather is supposed to be warmer, so maybe polyurethane on Wednesday.
Last edited by KCStudly on Fri Jan 10, 2014 6:00 pm, edited 2 times in total.
KC
My Build: The Poet Creek Express Hybrid Foamie

Poet Creek Or Bust
Engineering the TLAR way - "That Looks About Right"
TnTTT ORIGINAL 200A LANTERN CLUB = "The 200A Gang"
Green Lantern Corpsmen
User avatar
KCStudly
Donating Member
 
Posts: 9640
Images: 8169
Joined: Mon Feb 06, 2012 10:18 pm
Location: Southeastern CT, USA
Top

Re: The Poet Creek Express - Foamie Hybrid

Postby KCStudly » Thu Dec 05, 2013 12:29 am

I need psychiatric help. I spent another 3 hrs working on that little block of wood that will become the red night light mounting block.

It may never be seen by anyone but me (…and Karl) …though it will technically be visible under the cabinet, over foot.

The devil is in the details, or the devil is in me. Maybe the details are the devil? Maybe the motivation to attend to the details is devilish?

I swear, if I ever build a 2nd my priority will be to build the antithesis to TPCE; a utilitarian camper, painted all one color inside and out. No stain, no poly, no two tone theme, no fancy joinery, and no attempt at precision wood working.

The journey may just be the destination, and this is how I have envisioned it in my designing mind's eye; so it shall be done.

Let’s proceed with my efforts making the red light mounting block; a trim plate if you will.

Moving on from the last picture I have laid out and added the two pilot holes for the screws that will attach the light fixture, and a larger center hole for the wires. Then I notched a piece of fir slat and used double sided tape to stick the block and a scrap of the wire way trim to the slat; a handle to use while rounding the corners of the block over without getting my fingers too close to the router bit.
Image
Image

I wasn’t sure that I would show this because I was a little concerned that it was a bit sketchy safety wise, but in the end it was quite manageable. Basically, the router table was still set up with the round nose bit and I didn’t want to change that back and forth; so I used my plunge router with the round over bit as a small router table by clamping it to the bench.
Image
This blocked the flow of cooling air to the motor windings, but for such a small task, I felt that this would be okay. The router has a flat top and flats under the handles, so it was very secure with the two clamps adjusted equally, and my hands were always well away from the cutter. Plus I made 3 separate passes to minimize the amount of material being removed with each cut, further reducing the possibility of strain, or biting in and hurling parts (… or hands).

I do not recommend this for anyone that does not have a lot of experience with power tools. You need to have a healthy respect for the tool’s capabilities, and develop your method in such a way to preclude the risk of injury (even if the unexpected happens). My router was well suited to being clamped in this manner. I fully expected the part to become separated from the stick and go flying off, or for cutter to bite in and take the stick out of my hand, so I positioned myself behind one of the clamps, using it as a form of safety guard; plus I always wear proper safety glasses. By taking very small cuts, keeping a firm grip and using the leverage from the stick to hold the part down flat to the shoe, there was no drama.

Call me a daredevil!

The plunge router is not the best tool for setting a precise depth of cut. Despite setting the stop using a gauge block, after making the final cut at that setting, the cut was a little deep, leaving a little step ring around the top.
Image

After sanding with 100 and 220 grits.
Image

Removed from the stick “fixture”.
Image

Next to come were several passes of increasing depth to cope the straight side that will mate to the back underside of the lower rear cabinet face frame.
Image

Match mating the cope to the frame using the wire way trim molding (same radius as the cabinet face frame) wrapped with sand paper.
Image

Dry test fit.
Image

Mock up showing what it will look like on the underside of the cabinet.
Image
The light faces the bulkhead where the wires come from thru the wire way trim piece. To the right is a scrap of rounded and grooved 1x2 that represents the lower rail of the cabinet face frame. (Imagine that you are lying down on the mattress backwards with your head under the cabinet that would normally be over your feet.) The chrome bezel of the light fixture will be openly visible below the cabinet when viewed from pillow level.

So do me a favor. If you ever happen to be in proximity to TPCE in real life, and you have the opportunity to get a tour, please, please, please remind me to show you this detail. Otherwise I am totally crazy, and should not be building this camper.

Maybe Ben’s assessment is not too far off (said with sarcasm from the perspective of an entrepreneur who casts a critical eye on something that takes more effort to make than the open market can stomach), “The Million Dollar Camper”.

I am truly crazy!

After a couple of hours in I did manage to get the loft up to 55 deg F, but by then I was wrapped up in this madness, and had been creating a fresh dose of sawdust. The cabinet parts weren't up to that temp, so I did not have the ambition to get that all important next coat of poly on them. Oh well, as soon as I cut the heat off and leave, the temps would surely plummet well before the poly would have had a chance to kick off. (The recorded low since last checking the thermo was 23 deg F!)

No, I think I need to leave that ‘til the weekend.
KC
My Build: The Poet Creek Express Hybrid Foamie

Poet Creek Or Bust
Engineering the TLAR way - "That Looks About Right"
TnTTT ORIGINAL 200A LANTERN CLUB = "The 200A Gang"
Green Lantern Corpsmen
User avatar
KCStudly
Donating Member
 
Posts: 9640
Images: 8169
Joined: Mon Feb 06, 2012 10:18 pm
Location: Southeastern CT, USA
Top

Re: The Poet Creek Express - Foamie Hybrid

Postby working on it » Thu Dec 05, 2013 1:02 am

KCStudly wrote:I need psychiatric help. I spent another 3 hrs working on that little block of wood that will become the red night light mounting block.

It may never be seen by anyone but me (…and Karl) …though it will technically be visible under the cabinet, over foot.

The devil is in the details, or the devil is in me. Maybe the details are the devil? Maybe the motivation to attend to the details is devilish?

I swear, if I ever build a 2nd my priority will be to build the antithesis to TPCE; a utilitarian camper, painted all one color inside and out. No stain, no poly, no two tone theme, no fancy joinery, and no attempt at precision wood working.

The journey may just be the destination, and this is how I have envisioned it in my designing mind's eye; so it shall be done.


:twisted: ...I am totally crazy...

I am truly crazy!
Obsessed, possessed, crazy, whatever...you're a craftsman with a vision, so you HAVE to do this perfectly, detailed to the Nth degree. I had a vision also, but being the antithesis of a craftsman, I may have built the opposite number of the TPCE before you could. Like everyone else that reads your build thread, I can't wait for the grand finale (assuming it is ever finished, probably by page # 627, post # 31625). Unbelievable detailing! How many hours spent planning, prepping, and executing? Keep it coming.
2013 HHRv "squareback/squaredrop", rugged, 4x8 TTT, 2225 lbs
  • *3500 lb Dexter EZ-Lube braked axle, 3000 lb.springs, active-progressive bumpstop suspension
  • *27 x 8.5-14LT AT tires (x 3) *Weight Distribution system for single-beam tongue
  • *100% LED's & GFCI outlets, 3x fans, AM/FM/CD/Aux. *A/C & heat, Optima AGM, inverter & charger(s)
  • *extended-run, on-board, 2500w generator *Coleman dual-fuel stove & lantern, Ikea grill, vintage skillet
  • *zinc/stainless front & side racks *98"L x 6" diameter rod & reel carrier tube on roof
173193172890148599
User avatar
working on it
2000 Club
2000 Club
 
Posts: 2189
Images: 457
Joined: Tue Oct 04, 2011 9:05 pm
Location: DFW Texas
Top

Re: The Poet Creek Express - Foamie Hybrid

Postby KCStudly » Thu Dec 05, 2013 8:48 am

WOI, too many hours. :?

Thanks for the compliments. :D
KC
My Build: The Poet Creek Express Hybrid Foamie

Poet Creek Or Bust
Engineering the TLAR way - "That Looks About Right"
TnTTT ORIGINAL 200A LANTERN CLUB = "The 200A Gang"
Green Lantern Corpsmen
User avatar
KCStudly
Donating Member
 
Posts: 9640
Images: 8169
Joined: Mon Feb 06, 2012 10:18 pm
Location: Southeastern CT, USA
Top

Re: The Poet Creek Express - Foamie Hybrid

Postby GPW » Thu Dec 05, 2013 8:56 am

QUOTE: “ Like everyone else that reads your build thread, I can't wait for the grand finale (assuming it is ever finished “ ... :lol: :lol: :lol: They’re never “finished” eh !!! :R
There’s no place like Foam !
User avatar
GPW
Gold Donating Member
 
Posts: 14920
Images: 546
Joined: Thu Feb 09, 2006 7:58 pm
Location: New Orleans
Top

Re: The Poet Creek Express - Foamie Hybrid

Postby KCStudly » Thu Dec 05, 2013 9:03 am

Hey GPW, I didn't see you around much yesterday; was getting worried and was about to send out a search party! :R

I have said it many times; it may seem foolish to work on such a small detail now and to not prioritize "the big picture", but I see the finished product in my mind (and in my computer model... most of it) and it just makes more sense to me to attend to these things now while I have easy access.

Thanks to everyone for watching.
KC
My Build: The Poet Creek Express Hybrid Foamie

Poet Creek Or Bust
Engineering the TLAR way - "That Looks About Right"
TnTTT ORIGINAL 200A LANTERN CLUB = "The 200A Gang"
Green Lantern Corpsmen
User avatar
KCStudly
Donating Member
 
Posts: 9640
Images: 8169
Joined: Mon Feb 06, 2012 10:18 pm
Location: Southeastern CT, USA
Top

PreviousNext

Return to Foamies

Who is online

Users browsing this forum: No registered users and 12 guests