Re: The Poet Creek Express - Foamie Hybrid
Gave a tour of the build this evening. A business collaborator of Karl’s was dropping off and had a look. We all had a nice chat, but I didn’t get much work done as a result… despite it being hot and very humid. 
I did break down the clamp setup from the rear ceiling panel glue up; scraped the excess glue a little bit; sanded the good side some; and threw it up on the roof to have a look see.
I was a little concerned that the longitudinal backer might make the panel stiffer in the direction of the bend, and I suppose it did a little, but I could still flex it plenty by hand with no creeks or cracks so I figured it would be okay. Something that I had noticed with the bigger front panel, and mentioned previously, is that the panels are tending to lie flat or sag in the middle. My assumption is that this will improve once I get the spars glued on top, but it is looking like there may still be too few to hold the shape, at least until the foam and outer skin are on (and maybe regardless).
Here is the rear panel taped and weighted at the four corners. It’s difficult to see well in the pictures, but the short edges match the side profile well, while the middle remains flat.
Long discussion and numerous options were considered. At the time we narrowed it down as follows: 1) build a temporary support rib (or two) for inside the cabin to hold the panels up to the profile while completing the roof and hope that it doesn’t sag later when the supports are removed; 2) make two full length permanent ribs that run on top of the ceiling on either side of the roof vent bridging from the front cabinet face frame to the bulkhead, half lapping the spars (a flat spot, or parapet could be incorporated into the area at the vent)… 2a) option 1, above could be used and these permanent ribs could be added as a secondary step, or 2b) these ribs could be added during the ceiling bench build out and installed as a unit with the spars, skin and all; 3) add more spars spanning across the top of the ceiling.
Then I had another thought; maybe I could train the panel prior to putting it on the roof; so I am conducting a test. I clamped the rear edge of the panel to the edge of the bench, propped up on a 1x2 in the middle, and weighted with a straight edge on the sprung side.
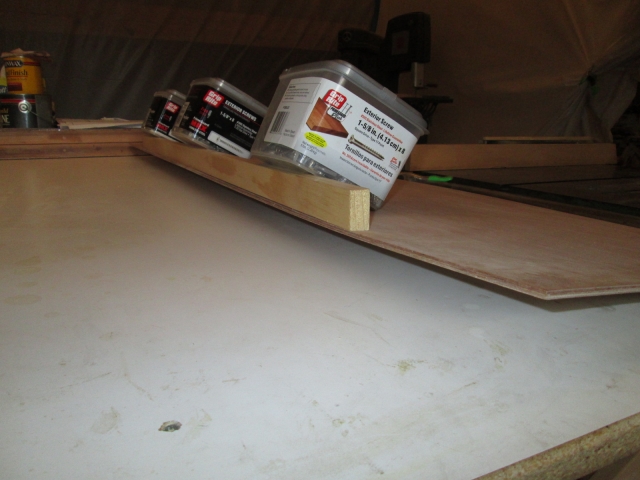
Just 15 lbs, but I am curious to see the effect upon my return. Perhaps the humidity will help, too.
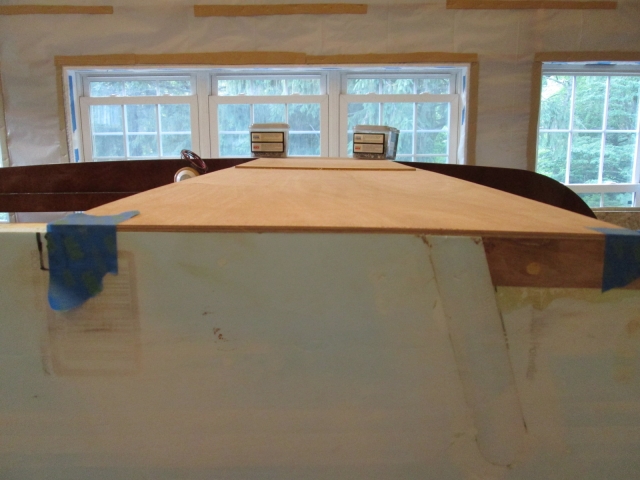
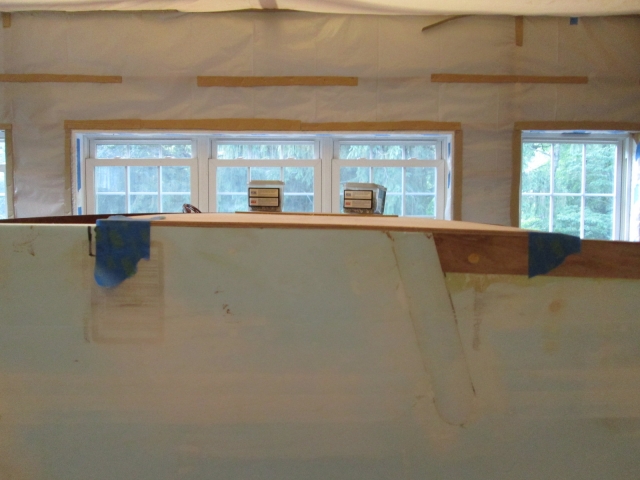
I did break down the clamp setup from the rear ceiling panel glue up; scraped the excess glue a little bit; sanded the good side some; and threw it up on the roof to have a look see.
I was a little concerned that the longitudinal backer might make the panel stiffer in the direction of the bend, and I suppose it did a little, but I could still flex it plenty by hand with no creeks or cracks so I figured it would be okay. Something that I had noticed with the bigger front panel, and mentioned previously, is that the panels are tending to lie flat or sag in the middle. My assumption is that this will improve once I get the spars glued on top, but it is looking like there may still be too few to hold the shape, at least until the foam and outer skin are on (and maybe regardless).
Here is the rear panel taped and weighted at the four corners. It’s difficult to see well in the pictures, but the short edges match the side profile well, while the middle remains flat.
Long discussion and numerous options were considered. At the time we narrowed it down as follows: 1) build a temporary support rib (or two) for inside the cabin to hold the panels up to the profile while completing the roof and hope that it doesn’t sag later when the supports are removed; 2) make two full length permanent ribs that run on top of the ceiling on either side of the roof vent bridging from the front cabinet face frame to the bulkhead, half lapping the spars (a flat spot, or parapet could be incorporated into the area at the vent)… 2a) option 1, above could be used and these permanent ribs could be added as a secondary step, or 2b) these ribs could be added during the ceiling bench build out and installed as a unit with the spars, skin and all; 3) add more spars spanning across the top of the ceiling.
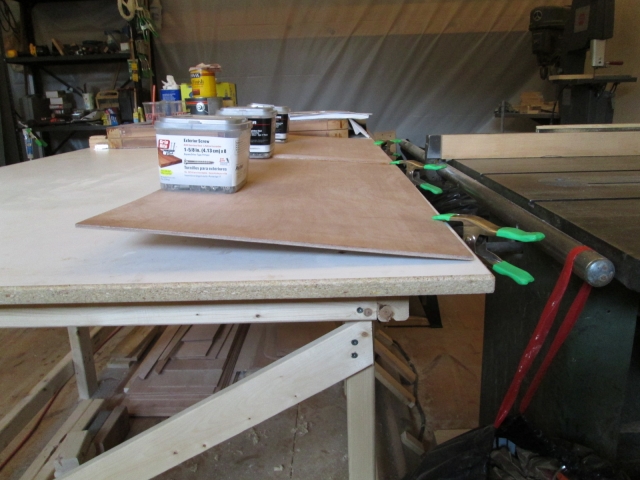
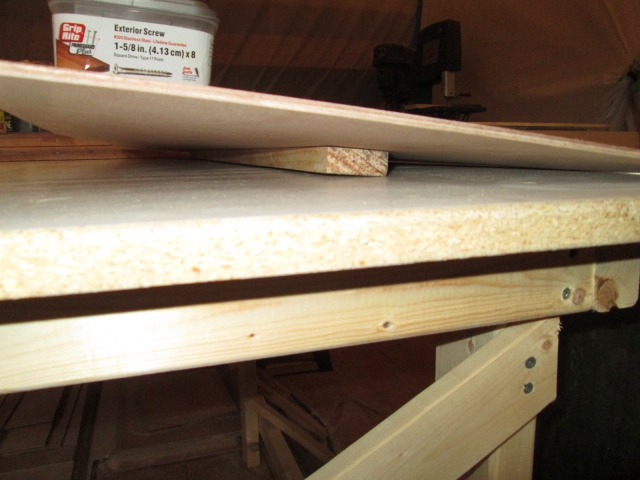
Then I had another thought; maybe I could train the panel prior to putting it on the roof; so I am conducting a test. I clamped the rear edge of the panel to the edge of the bench, propped up on a 1x2 in the middle, and weighted with a straight edge on the sprung side.
Just 15 lbs, but I am curious to see the effect upon my return. Perhaps the humidity will help, too.
 Getting excited! All the planning is coming together.


