Re: The Poet Creek Express - Foamie Hybrid
Heat and humidity were both at 80. I think that was working in my favor.
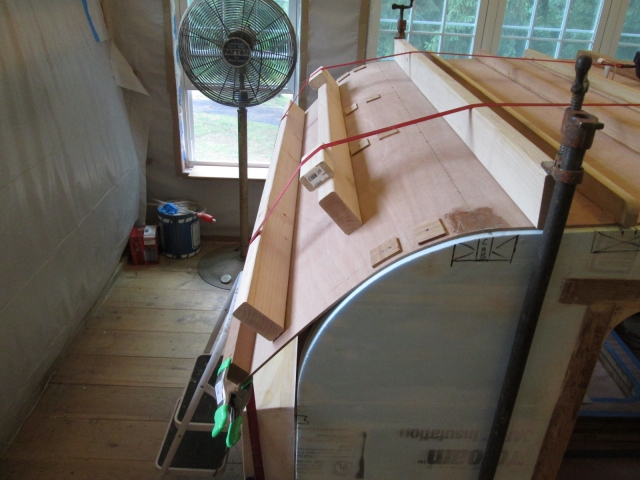
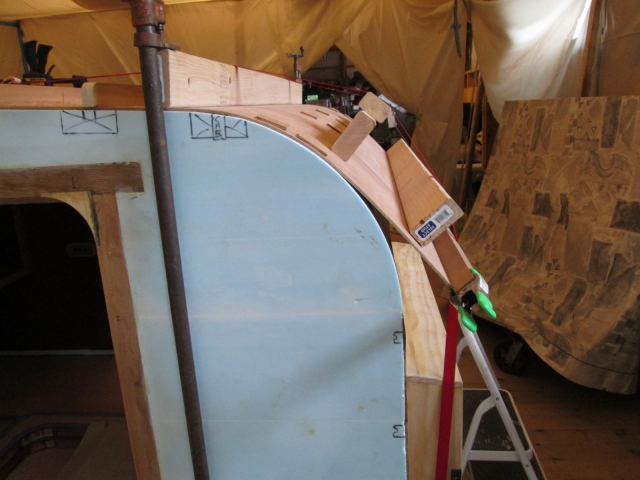
The front flap seemed to have regained a little spring to it. It was pretty taught yesterday, and when I pushed down by hand a tad today it seemed a little more forgiving, so I took a couple more clicks on the ratchets. Between this and shifting the backers around a little it looked like I could get the first row of screws into the front riblets.
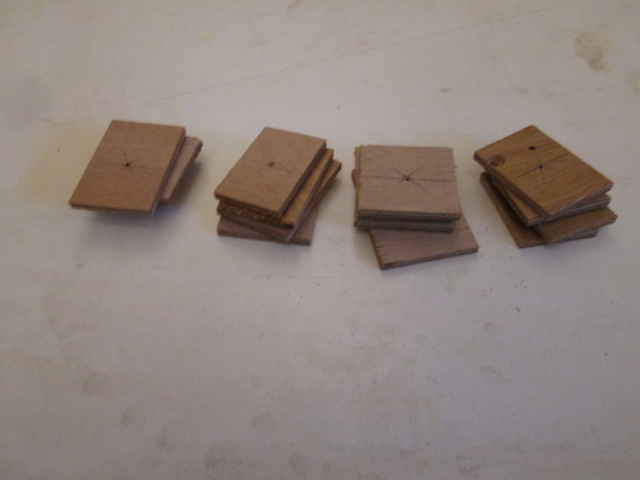
I used some scraps of the ply, about 2x2, as wooden washers under the screw heads just to be sure they don’t pull through (when you sink the flat head screws in the thin ply it tends to move some wood out of the way, and some areas are softer than others).
That went well so I took another round and sank another row of screws.
At some point, as I was fussing about, I heard a distinct click/crack sound… dread . My heart sank a mile and I was instantly on the verge of despair, turning quickly to see the impending doom. However, that didn’t happen. It wasn't a loud snick, but it wasn't too quiet either. I gave it a good once over paying particular attention to the fiberglass patch, but everything looked okay. I guess it was just settling in (fingers crossed).
So it is going to be humid here the next couple of days, which I normally dislike, but if it helps this process at all I consider myself lucky to have the weather pulling in my direction.
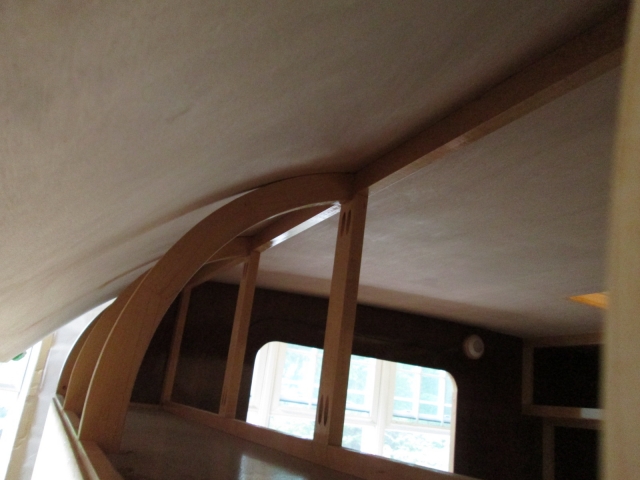
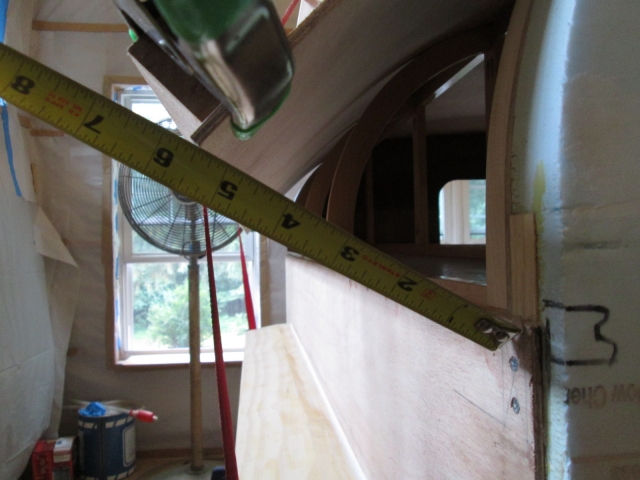
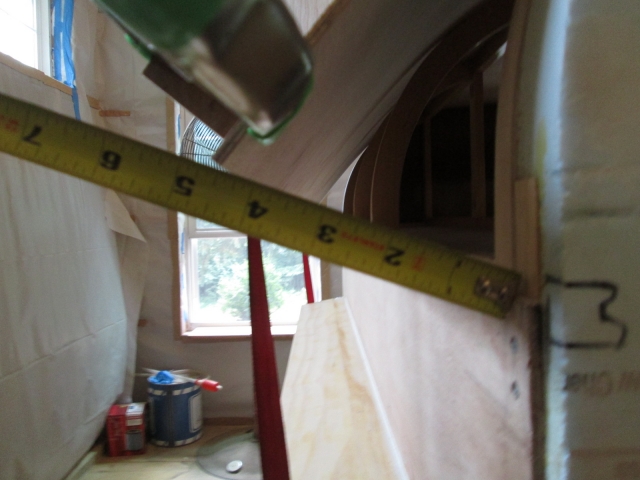
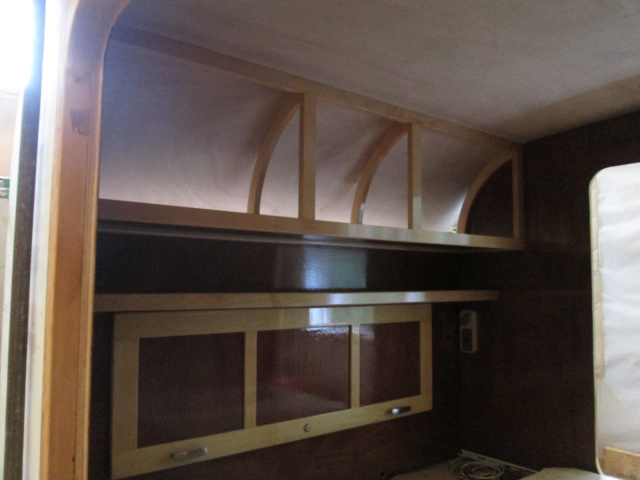
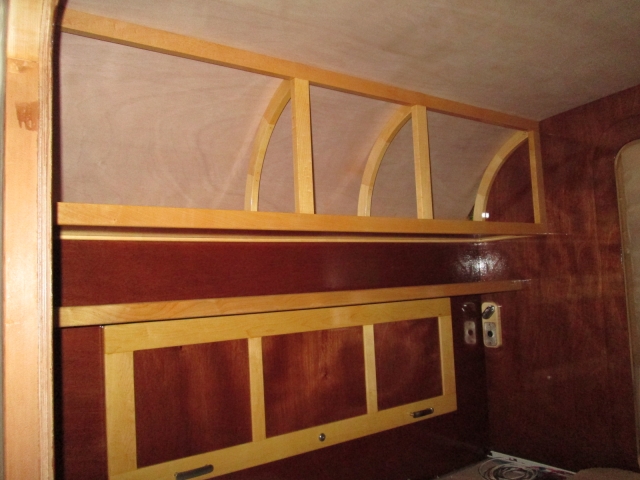
I took a few extra pics for perspective.
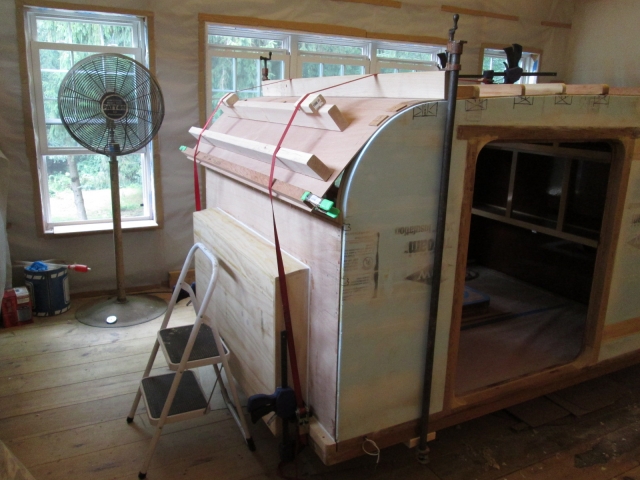
Then I made up enough of the wood washers to do four more rows of screws, and called it a night (just 1-1/2 hrs).
The front flap seemed to have regained a little spring to it. It was pretty taught yesterday, and when I pushed down by hand a tad today it seemed a little more forgiving, so I took a couple more clicks on the ratchets. Between this and shifting the backers around a little it looked like I could get the first row of screws into the front riblets.
I used some scraps of the ply, about 2x2, as wooden washers under the screw heads just to be sure they don’t pull through (when you sink the flat head screws in the thin ply it tends to move some wood out of the way, and some areas are softer than others).
That went well so I took another round and sank another row of screws.
At some point, as I was fussing about, I heard a distinct click/crack sound… dread
. My heart sank a mile and I was instantly on the verge of despair, turning quickly to see the impending doom. However, that didn’t happen. It wasn't a loud snick, but it wasn't too quiet either. I gave it a good once over paying particular attention to the fiberglass patch, but everything looked okay. I guess it was just settling in (fingers crossed).So it is going to be humid here the next couple of days, which I normally dislike, but if it helps this process at all I consider myself lucky to have the weather pulling in my direction.
I took a few extra pics for perspective.
Then I made up enough of the wood washers to do four more rows of screws, and called it a night (just 1-1/2 hrs).


 )
)


 .) So I stuffed them back in there and screwed them in solid to the 2x4. Here they are after they popped out.
 ... and that was wood treated with the mix ( it didn’t rot, just split ) and that, well primed and painted. Disappointing
  ... Had I even just skinned it after bending , it probably would have been fine , or at least not show the splits ...
  ... if it’s gonna’ do it , then fill it eh ?