Teardrops n Tiny Travel Trailersor t n ttt for short (tnttt.com) |
The Poet Creek Express - Foamie Hybrid
Moderator: eaglesdare
Re: The Poet Creek Express - Foamie Hybrid
![]() by OP827 » Sat Apr 04, 2015 4:10 pm
by OP827 » Sat Apr 04, 2015 4:10 pm
Your both surfaces are non porous, except foam has kerfs. it may require more time for PLP to setup, unless you put some moisture in. Did you do this glueup somewhere else?
-

OP827 - Donating Member
- Posts: 1595
- Images: 414
- Joined: Fri Apr 25, 2014 7:27 pm
- Location: Bruce County Ontario
Re: The Poet Creek Express - Foamie Hybrid
![]() by KCStudly » Sun Apr 05, 2015 1:44 am
by KCStudly » Sun Apr 05, 2015 1:44 am
Both the foam and epoxy/glass have enough tooth to grab using either of these products.
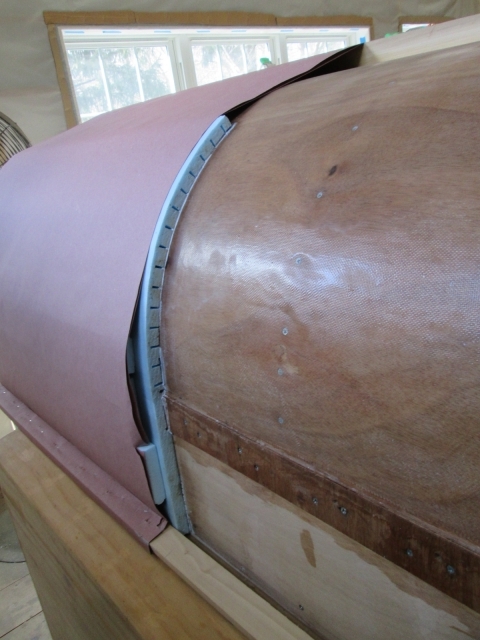
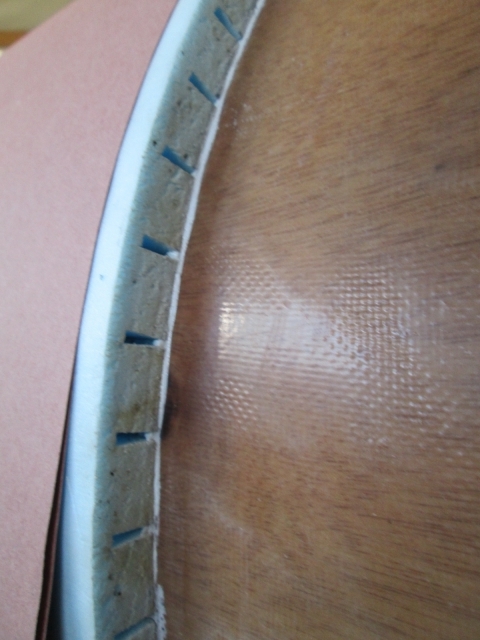
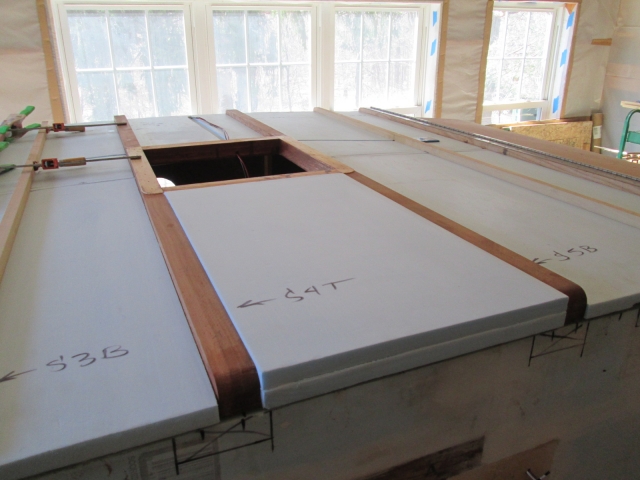
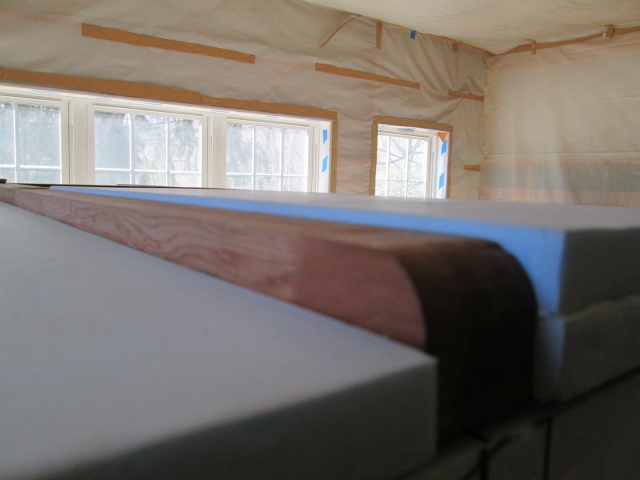
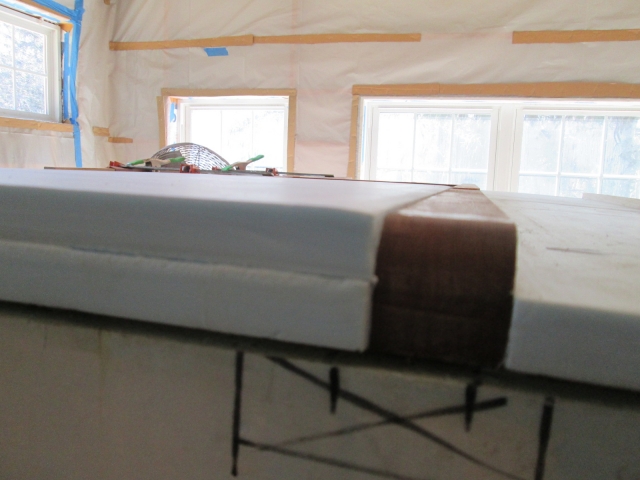
And I can press the foam into the adhesive by hand and smooth the panels down easy enough. The hard part was holding the front panel everywhere long enough for the adhesive to grab and set. On the gently curved top of the roof with the foam fitting snugly between the spars it pretty much took care of itself. On the tighter curve at the front it was a different story, and presumably will be again on the hatch.
The problems with the traditional straps on the foam is that the foam is not stiff like plywood so it doesn’t transmit that strap load away from the point of application well. The strap could be pulled very tightly, but would (potentially) crush the foam under it while just a few inches away the foam would lift. Juggling wood under straps didn’t solve the problem; it just shifted where the point load was applied. With the stretcher it applies the force evenly and gently over a broader area, and it just doesn’t take that much force if it is applied correctly. A small force applied evenly does the job.
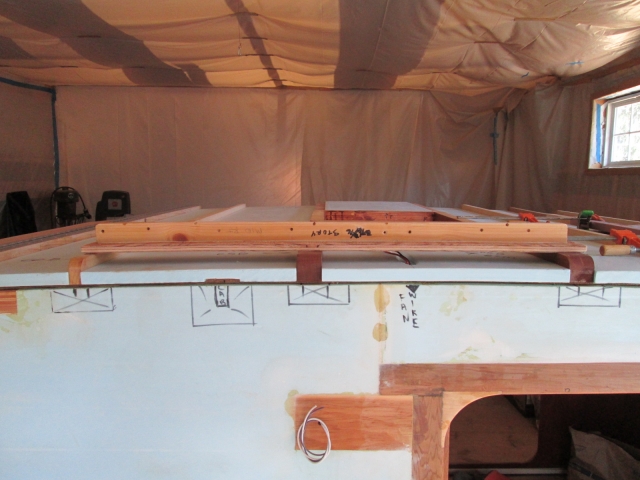
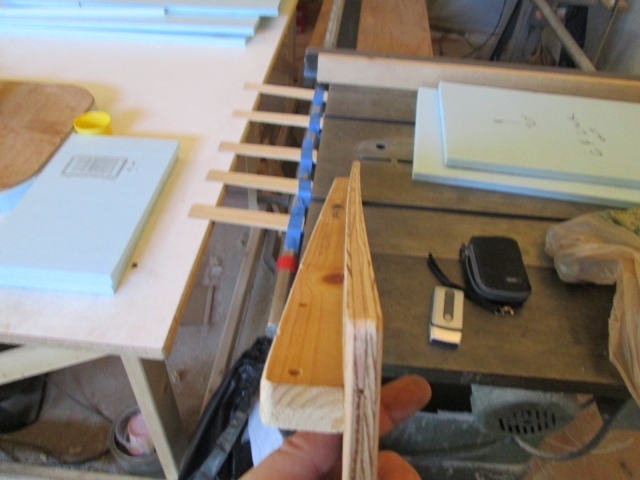
So to do the actual glue up of the front curb side panel I first traced the dry fit panel with a sharpie so I would know where to put the adhesive. Then I spread the adhesive and stuck the panel down. This is about the limit on what I am comfortable spreading with the PL300; it started to get a little draggy by the time I actually had the panel down. Part of that was because I tried to use some GS along the top of the locker (to fill the factory cove in the edge of the foam) and along the wall edge to fill the kerfs, but my can of GS wouldn’t cooperate; nothing would come out despite having cleaned the nozzle first. So I had to back track a bit and lay some more PL300 in those areas. Anyway, the stretcher clamp worked as advertised. This is after running a damp rag down the edge, mostly just to clean up where I painted outside the line, with just a thin bead of squeeze out.
The cord clamp method left room to install the second layer of foam next to the locker bump out on the street side where the shovel mount blocking is.
My math isn’t so good tho, the 2 layers of 3/4 inch foam are thicker than the 1-1/2 inch tall blocking and 1x2 rock guard "sparette".
There will be lots of sanding foam in my future.


While I was at it I put the second layer in the street side fan bay. Same thing; sticks up a bunch in the front. It looks like it sticks up less in the rear, but the foam there has a bit of a rolled or crushed edge, so it is actually higher than it looks.
Front edge.
Back edge.
Seeing a lot more sanding of big curved profile in my future, and having glued all of the pre-fit foam that I could, I found a drop of 1/2 inch ply that had a curve warped into it and another scrap of 1x with a curve warped into it, and banged together this sanding board that closely matches the roof radius.
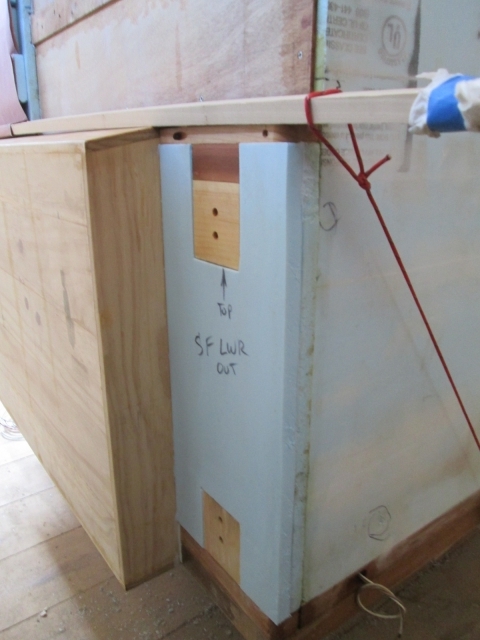
I know what I have to do to finish the front and roof foam, so while that front panel was kicking off I started looking ahead to the hatch area foam again. I need to settle the locations for the lighting (galley, license plate and tail), and once and for all decide if I am putting blocking in for the handle or not. Inspired by Atomic77’s tail light work, I decided to zoom in on the tail light mounting nacelles. After all, it will help me figure out where the wire runs need to be in the foam.
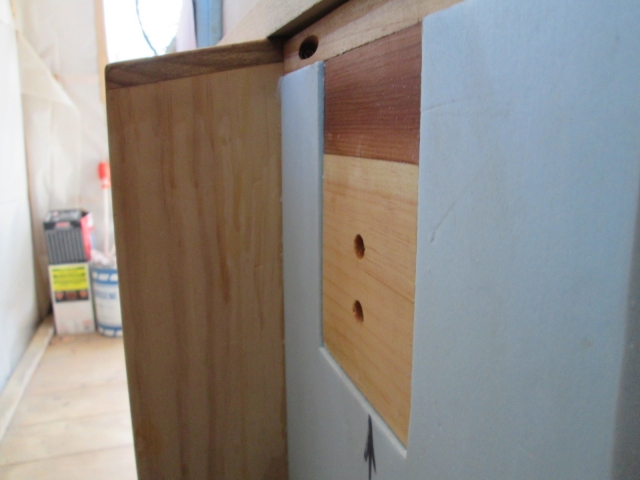
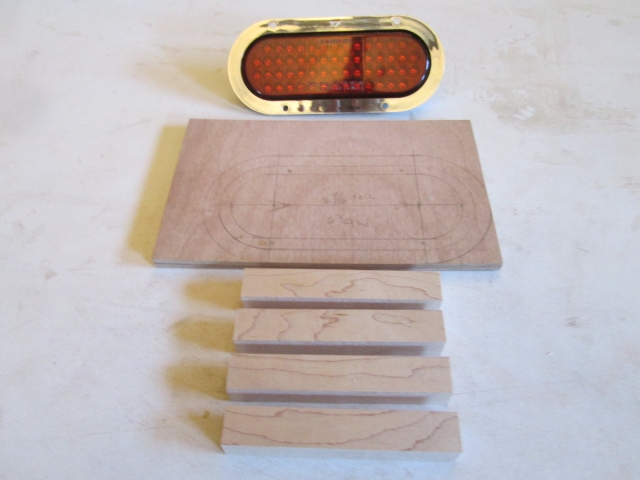
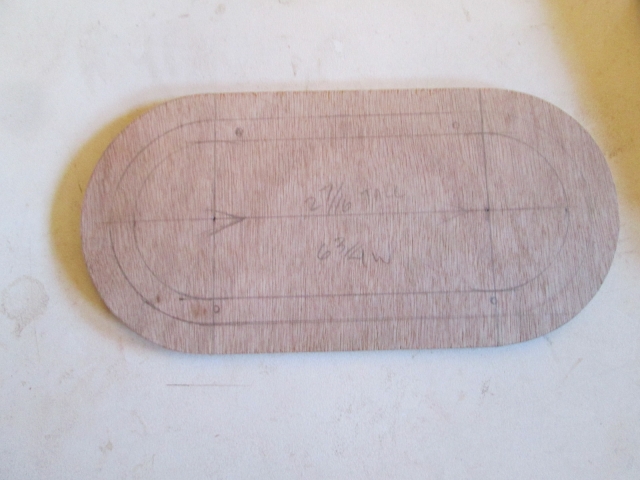
The plan is to make 5 mm plywood mounting surfaces backed by some 1x1 maple blocks for the mounting screws. These will be set into foam blisters that hold the lens vertical, provide the necessary depth for the wire harness plug, and fair into the curve of the hatch. Here is one of the tail lights, the layout of the mounting surface, and the maple screw blocks.
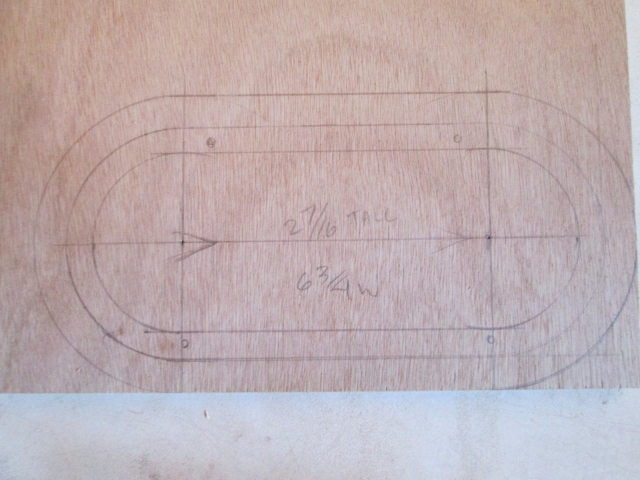
Close up of the mounting layout. The inner oval is the cutout for the fixture; the middle oval is the footprint of the chrome flange; and the outer oval represents the edge of the mount giving a consistent margin.
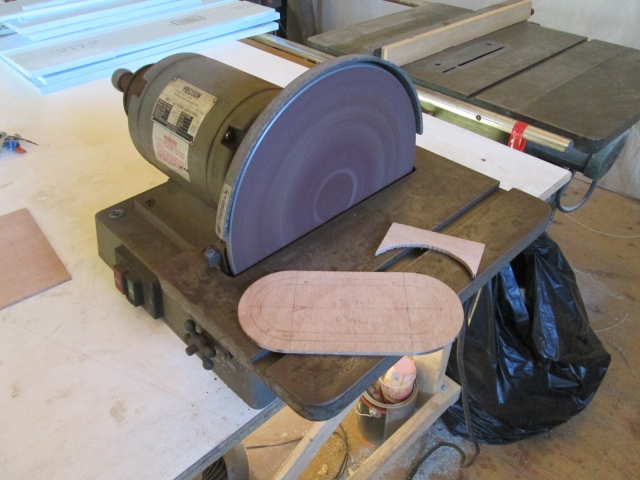
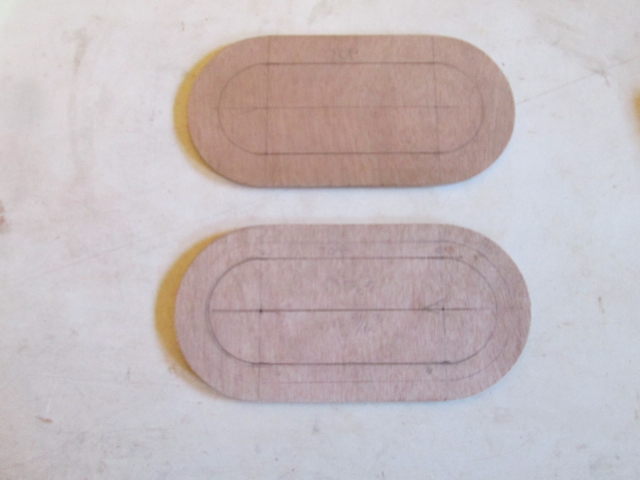
After ripping to width on the table saw and rough cutting the end radii on the band saw, I used Karl’s bench mount disc sander to sand to the lines. (This is one of the first tools he bought when he started the current business, but he seldom ever uses it anymore, tending to prefer the Bader belt sander. I scraped the rest down with a razor, buffed it with an abrasive pad and hit it with some paste wax before using it.)
Lather, rinse, repeat.
And that seemed to be a good stopping point for today (Saturday, er… technically yesterday).
And I can press the foam into the adhesive by hand and smooth the panels down easy enough. The hard part was holding the front panel everywhere long enough for the adhesive to grab and set. On the gently curved top of the roof with the foam fitting snugly between the spars it pretty much took care of itself. On the tighter curve at the front it was a different story, and presumably will be again on the hatch.
The problems with the traditional straps on the foam is that the foam is not stiff like plywood so it doesn’t transmit that strap load away from the point of application well. The strap could be pulled very tightly, but would (potentially) crush the foam under it while just a few inches away the foam would lift. Juggling wood under straps didn’t solve the problem; it just shifted where the point load was applied. With the stretcher it applies the force evenly and gently over a broader area, and it just doesn’t take that much force if it is applied correctly. A small force applied evenly does the job.
So to do the actual glue up of the front curb side panel I first traced the dry fit panel with a sharpie so I would know where to put the adhesive. Then I spread the adhesive and stuck the panel down. This is about the limit on what I am comfortable spreading with the PL300; it started to get a little draggy by the time I actually had the panel down. Part of that was because I tried to use some GS along the top of the locker (to fill the factory cove in the edge of the foam) and along the wall edge to fill the kerfs, but my can of GS wouldn’t cooperate; nothing would come out despite having cleaned the nozzle first. So I had to back track a bit and lay some more PL300 in those areas. Anyway, the stretcher clamp worked as advertised. This is after running a damp rag down the edge, mostly just to clean up where I painted outside the line, with just a thin bead of squeeze out.
The cord clamp method left room to install the second layer of foam next to the locker bump out on the street side where the shovel mount blocking is.
My math isn’t so good tho, the 2 layers of 3/4 inch foam are thicker than the 1-1/2 inch tall blocking and 1x2 rock guard "sparette".
There will be lots of sanding foam in my future.
While I was at it I put the second layer in the street side fan bay. Same thing; sticks up a bunch in the front. It looks like it sticks up less in the rear, but the foam there has a bit of a rolled or crushed edge, so it is actually higher than it looks.
Front edge.
Back edge.
Seeing a lot more sanding of big curved profile in my future, and having glued all of the pre-fit foam that I could, I found a drop of 1/2 inch ply that had a curve warped into it and another scrap of 1x with a curve warped into it, and banged together this sanding board that closely matches the roof radius.
I know what I have to do to finish the front and roof foam, so while that front panel was kicking off I started looking ahead to the hatch area foam again. I need to settle the locations for the lighting (galley, license plate and tail), and once and for all decide if I am putting blocking in for the handle or not. Inspired by Atomic77’s tail light work, I decided to zoom in on the tail light mounting nacelles. After all, it will help me figure out where the wire runs need to be in the foam.
The plan is to make 5 mm plywood mounting surfaces backed by some 1x1 maple blocks for the mounting screws. These will be set into foam blisters that hold the lens vertical, provide the necessary depth for the wire harness plug, and fair into the curve of the hatch. Here is one of the tail lights, the layout of the mounting surface, and the maple screw blocks.
Close up of the mounting layout. The inner oval is the cutout for the fixture; the middle oval is the footprint of the chrome flange; and the outer oval represents the edge of the mount giving a consistent margin.
After ripping to width on the table saw and rough cutting the end radii on the band saw, I used Karl’s bench mount disc sander to sand to the lines. (This is one of the first tools he bought when he started the current business, but he seldom ever uses it anymore, tending to prefer the Bader belt sander. I scraped the rest down with a razor, buffed it with an abrasive pad and hit it with some paste wax before using it.)
Lather, rinse, repeat.
And that seemed to be a good stopping point for today (Saturday, er… technically yesterday).
KC
My Build: The Poet Creek Express Hybrid Foamie
Poet Creek Or Bust
Engineering the TLAR way - "That Looks About Right"
TnTTT ORIGINAL 200A LANTERN CLUB = "The 200A Gang"
Green Lantern Corpsmen
My Build: The Poet Creek Express Hybrid Foamie
Poet Creek Or Bust
Engineering the TLAR way - "That Looks About Right"
TnTTT ORIGINAL 200A LANTERN CLUB = "The 200A Gang"
Green Lantern Corpsmen
-

KCStudly - Donating Member
- Posts: 9640
- Images: 8169
- Joined: Mon Feb 06, 2012 10:18 pm
- Location: Southeastern CT, USA

 ... rather than sanding everything else away ...

 )
)

