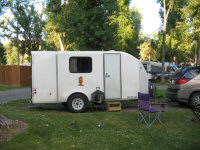
Well, here is my third attempt to document progress. Hope it goes through this time!
It has been an important planning feature that we canvas the foamie sides flat and glue them together with canvas strips at the end. We did rabbit ear cuts along the roof line so the roof edges would not be visible from the sides. Also, our fenders are notched pretty close to the actual fenders and it would be easier if we didn’t need to take the fenders off again. After committing ourselves to this process I found extensive discussion about canvas shrinking and foam boards warping if the foamie isn’t put together before the walls are canvassed. I pretty much read everything I could find about the subject and made some observations that informed my choice.
First, some people’s canvas shrank and some people’s didn’t. Some people pre-shrunk the canvas and others thought it took away from the overall tightness of the skin. While I am not an engineer, I do know a thing or 2 about fabric having sewn for years. Purchased garments that could shrink or lose shape have labels that read DRY CLEAN ONLY. The amount of water used seemed to be a determining factor for the amount of shrinkage. The less water used, the less the canvas shrank. Interesting! If someone was going to avoid shrinkage there were good suggestions, including skinning the inside before skinning the outside, weighing down the foam or doing things to provide structural support, and not gluing all the way to the edges.
After factoring in all this information, I took a deep breath and we dove in.

Here is what I decided to do:
1. Skin the inside walls with fiberglass screening and gripper. (we plan to finish the walls with cork later). The skinning really strengthened the inside walls so we decided to screen the outside walls too. (we did not want to deal with warped walls!)
2. I planned to stop gluing 3 inches from edges due to our rabbit ear cuts. I didn’t want those messed up.
3. We added ½ cup of water to the gallon of TBII. When we applied the TBII with a roller, we noticed the glue went on easily and pooled in the spaces in the screening. The canvas readily grabbed the texture of the screening. The canvas was applied with no air bubbles except around the metal contact pieces for the door that was somewhat raised. A putty knife took care of this. Canvassing took less than 2 hours a wall. Also, notable, the only place we didn’t have screening was under the wheel wells. When the glue was applied here, the canvas skated across the slick glue and I had to paint glue on top of the canvas to get it to stick. If that is what smooth foam is like to work with, I am so glad we happened upon using screening under the canvas. It was so much easier to work with!
4. Since we had no shrinkage, we went ahead and glued all the way to the edges with no shrinking, warping, or distortion of any kind. This process for applying canvas horizontally was simple and easy!
5. If all goes according to plan, the canvas parts will not get wet until it is all painted after the final assembly. Then hopefully we will achieve that tight like a drum skin all the way around.


 What am I doing wrong?


