
The Poet Creek Express - Foamie Hybrid
Moderator: eaglesdare
Re: The Poet Creek Express - Foamie Hybrid
![]() by KCStudly » Mon Aug 03, 2015 6:15 am
by KCStudly » Mon Aug 03, 2015 6:15 am
Thank you, LFH.
KC
My Build: The Poet Creek Express Hybrid Foamie
Poet Creek Or Bust
Engineering the TLAR way - "That Looks About Right"
TnTTT ORIGINAL 200A LANTERN CLUB = "The 200A Gang"
Green Lantern Corpsmen
My Build: The Poet Creek Express Hybrid Foamie
Poet Creek Or Bust
Engineering the TLAR way - "That Looks About Right"
TnTTT ORIGINAL 200A LANTERN CLUB = "The 200A Gang"
Green Lantern Corpsmen
-

KCStudly - Donating Member
- Posts: 9640
- Images: 8169
- Joined: Mon Feb 06, 2012 10:18 pm
- Location: Southeastern CT, USA
Re: The Poet Creek Express - Foamie Hybrid
![]() by KCStudly » Tue Aug 04, 2015 10:36 pm
by KCStudly » Tue Aug 04, 2015 10:36 pm
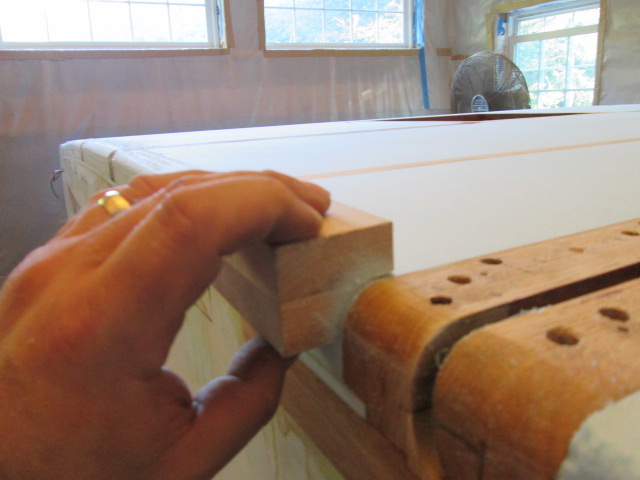
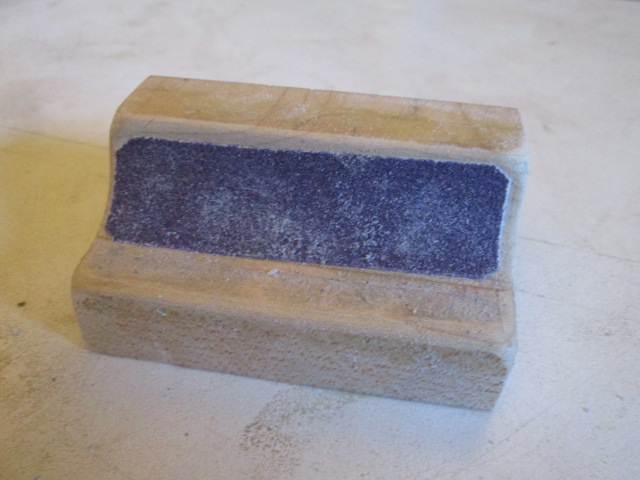
Yesterday I jumped ahead of myself a little and started rounding over the street side profile edge. I had a nice chunk of maple that was a cut off from the axe head mount glue up, and I figured that would make a nice solid sanding block. I chucked it in the mill on end hanging out of the vise and bored thru using Karl’s big 1-1/2 inch core boring bit. Rather than bore tangent to both corners, I milled inward a little leaving a little flat to act like a guide surface. (If I had been starting from scratch I probably would have allowed for even more of a guide surface.)

I had used the 3M spray adhesive to hold the sandpaper on the big curved long board, but had some issues with grain pulling out when attempting to change the paper. That probably wouldn't have been an issue with the maple, but I decided to try a little something different and just smeared a miniscule amount of TB2 on the back of the paper and stuck that down. Initial testing indicated that the 100 grit paper would take quite a while to get it down, so I started using the 36 grit on the medium board (...with some technique reminders from Karl...) working in an ‘X’ diagonal pattern; starting short of flat to the side wall working up and forward in a rolling motion up to but not all the way onto the flat of the roof, like in this series of pics.
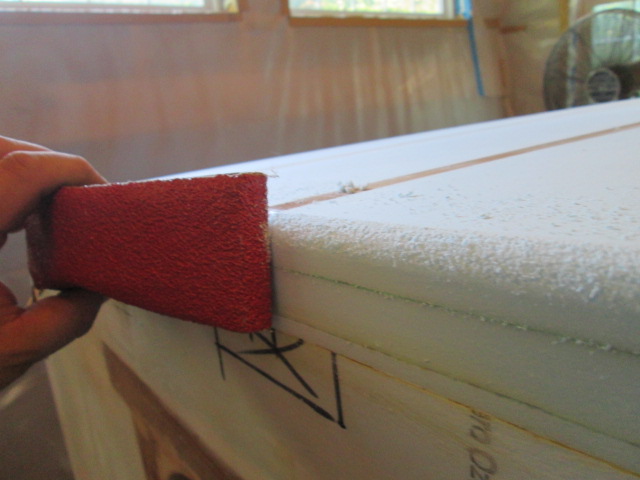
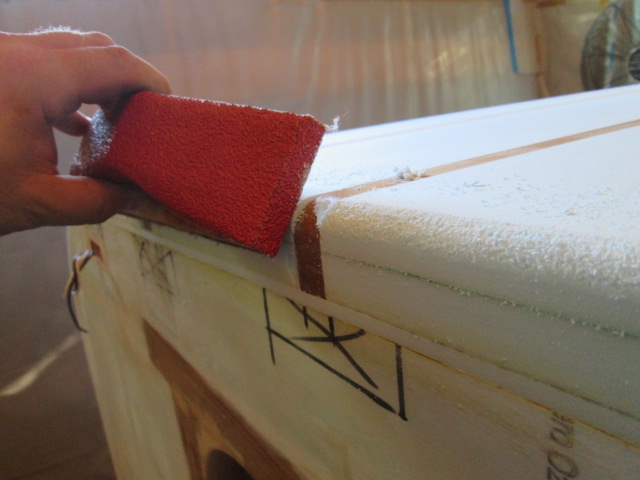
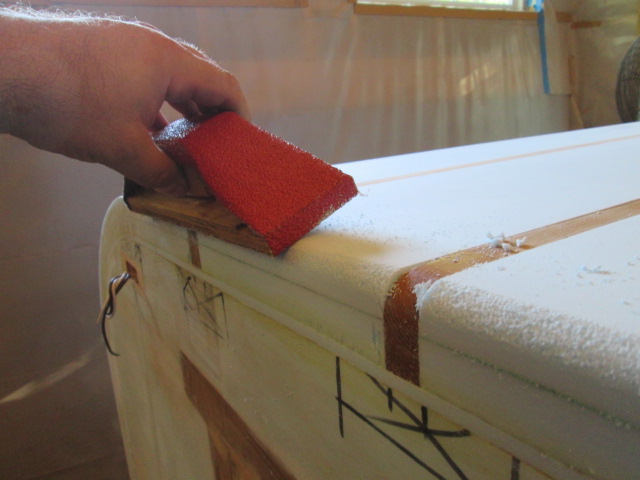
By staying away from the flats I avoided over sanding the areas that needed it the least.
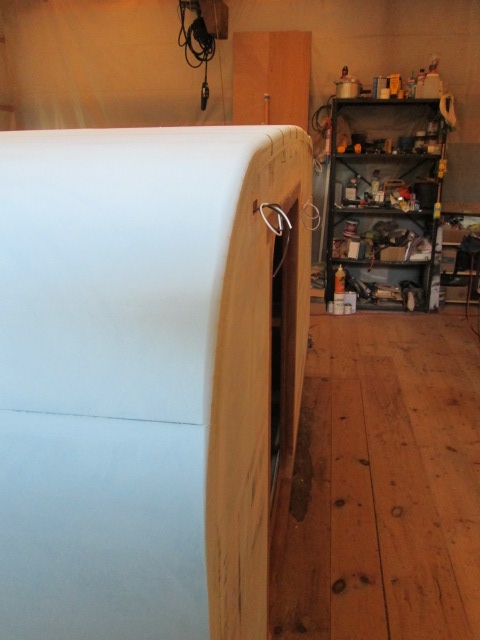
Then it was back to the radius block for the last 1/8 inch or so. In this pic you can see a couple of things that I ended up having to adjust for. I had trimmed the paper right to the edges of the block, which allowed it to catch a little and bunch up some. Also, this meant that I was sanding on the little guide flat as well as the curve.
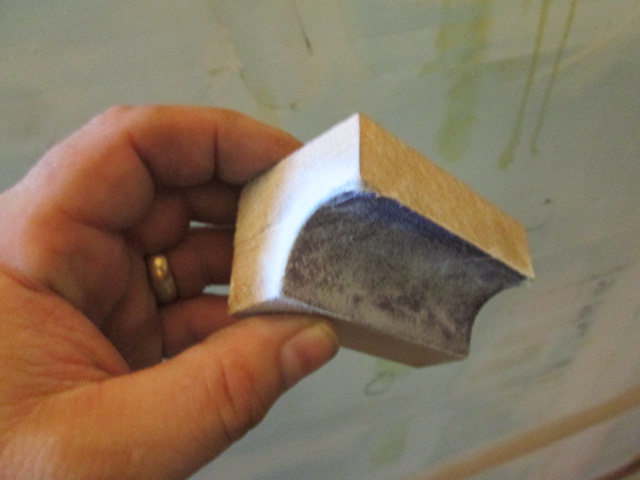
That and slight variations in the angle of how I was able to hold the block resulted in some undercutting gouges on the flats, but I was still pretty happy with the result so far.

Trying to make it a little better, I used the small oak sanding block to bevel the guide edges of the block slightly; rounded all of the edges a little; used a little more glue to stick a fresh piece of paper down; trimmed the paper back away from the edges; and nipped the corners off so they would be less likely to lift. Also, note how the segment of paper is less than 90 deg by about the same as the amount of rocking I was seeing.
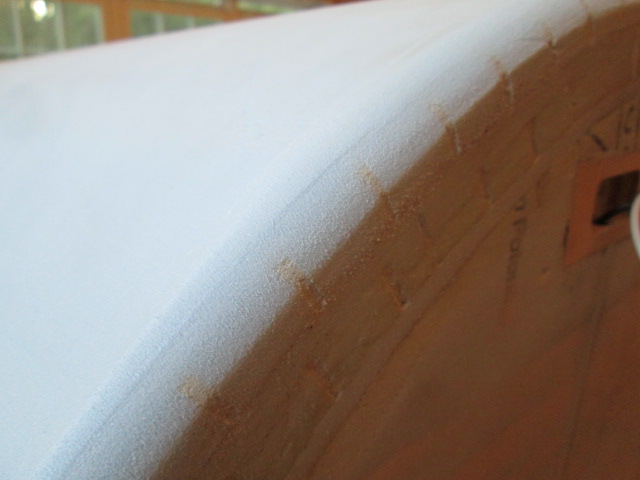
I had a little more time so I started in on the front profile radius. No spars to guide off, so all sanding was done with the radius block. The changes to the block seemed to help a bunch. I didn’t get it all the way there this session, but it’s headed in the right direction.
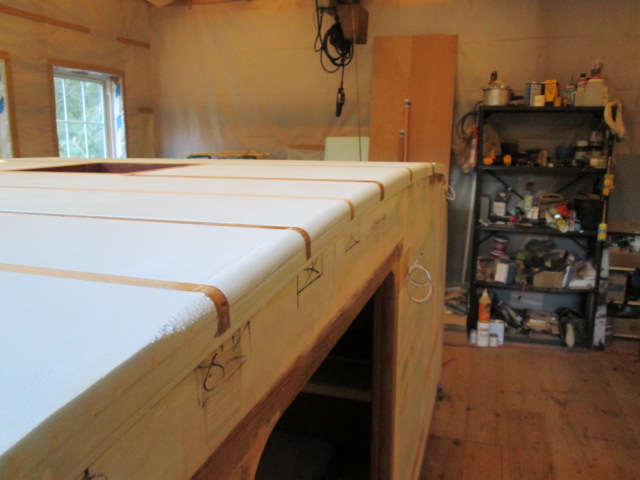
The spackle blend seemed to hold up really well and had a lot more toughness than just plain spackle, so that seemed to be worth the extra effort, at least from what I can see here.
I had used the 3M spray adhesive to hold the sandpaper on the big curved long board, but had some issues with grain pulling out when attempting to change the paper. That probably wouldn't have been an issue with the maple, but I decided to try a little something different and just smeared a miniscule amount of TB2 on the back of the paper and stuck that down. Initial testing indicated that the 100 grit paper would take quite a while to get it down, so I started using the 36 grit on the medium board (...with some technique reminders from Karl...) working in an ‘X’ diagonal pattern; starting short of flat to the side wall working up and forward in a rolling motion up to but not all the way onto the flat of the roof, like in this series of pics.
By staying away from the flats I avoided over sanding the areas that needed it the least.
Then it was back to the radius block for the last 1/8 inch or so. In this pic you can see a couple of things that I ended up having to adjust for. I had trimmed the paper right to the edges of the block, which allowed it to catch a little and bunch up some. Also, this meant that I was sanding on the little guide flat as well as the curve.
That and slight variations in the angle of how I was able to hold the block resulted in some undercutting gouges on the flats, but I was still pretty happy with the result so far.
Trying to make it a little better, I used the small oak sanding block to bevel the guide edges of the block slightly; rounded all of the edges a little; used a little more glue to stick a fresh piece of paper down; trimmed the paper back away from the edges; and nipped the corners off so they would be less likely to lift. Also, note how the segment of paper is less than 90 deg by about the same as the amount of rocking I was seeing.
I had a little more time so I started in on the front profile radius. No spars to guide off, so all sanding was done with the radius block. The changes to the block seemed to help a bunch. I didn’t get it all the way there this session, but it’s headed in the right direction.
The spackle blend seemed to hold up really well and had a lot more toughness than just plain spackle, so that seemed to be worth the extra effort, at least from what I can see here.
KC
My Build: The Poet Creek Express Hybrid Foamie
Poet Creek Or Bust
Engineering the TLAR way - "That Looks About Right"
TnTTT ORIGINAL 200A LANTERN CLUB = "The 200A Gang"
Green Lantern Corpsmen
My Build: The Poet Creek Express Hybrid Foamie
Poet Creek Or Bust
Engineering the TLAR way - "That Looks About Right"
TnTTT ORIGINAL 200A LANTERN CLUB = "The 200A Gang"
Green Lantern Corpsmen
-
KCStudly - Donating Member
- Posts: 9640
- Images: 8169
- Joined: Mon Feb 06, 2012 10:18 pm
- Location: Southeastern CT, USA