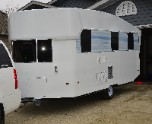
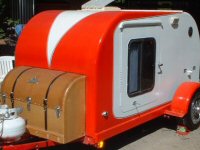
The Poet Creek Express - Foamie Hybrid
Moderator: eaglesdare
Re: The Poet Creek Express - Foamie Hybrid
KC, from info I can find online the vinyl spackle by DAP may be water-based on some vinyl-acetate glue with limestone and quartz powders as fillers. If I were you then I would do a test with coating a small spot of the fully dried vinyl spakle with plain epoxy and let it cure and then see if it peels off or sticks good and go from there. If epoxy impregnates and reinforces the spackle, ie. similar to wood, then it is a good sign. If it peels off from the spackle like from a PVA based glue, it is not good for epoxy coatings.
-

OP827 - Donating Member
- Posts: 1596
- Images: 414
- Joined: Fri Apr 25, 2014 7:27 pm
- Location: Bruce County Ontario
Re: The Poet Creek Express - Foamie Hybrid
I'll take a closer look at that tonight and compare how well the epoxy sticks to spackle vs. plain foam. I guess I thought my test coupon was an adequate test, but we shall see.
Push comes to shove I can do the "post hole" or razor scarring method to get a good keyed bond on the hatch and front radius. The edges and first couple inches of the underside of the floor may need to be sanded back, or at least significantly roughened up; shouldn't take too long with the palm sander and a course grit.
We'll see what she wants and go from there. Ain't nuthin' gonna stop this train now.
You know, GPW, I think it was Hodder (and maybe others) who asked why I wasn't just using epoxy adhesive for everything right from the get-go. Back then it seemed expensive. Now I am older and wiser, but I still don't know if I would have done anything differently... I still have canvas and glue... who knows?
Ooh La La - The Faces, w/ Rod Stewart and Ronnie Wood
Push comes to shove I can do the "post hole" or razor scarring method to get a good keyed bond on the hatch and front radius. The edges and first couple inches of the underside of the floor may need to be sanded back, or at least significantly roughened up; shouldn't take too long with the palm sander and a course grit.
We'll see what she wants and go from there. Ain't nuthin' gonna stop this train now.

You know, GPW, I think it was Hodder (and maybe others) who asked why I wasn't just using epoxy adhesive for everything right from the get-go. Back then it seemed expensive. Now I am older and wiser, but I still don't know if I would have done anything differently... I still have canvas and glue... who knows?

Ooh La La - The Faces, w/ Rod Stewart and Ronnie Wood
KC
My Build: The Poet Creek Express Hybrid Foamie
Poet Creek Or Bust
Engineering the TLAR way - "That Looks About Right"
TnTTT ORIGINAL 200A LANTERN CLUB = "The 200A Gang"
Green Lantern Corpsmen
My Build: The Poet Creek Express Hybrid Foamie
Poet Creek Or Bust
Engineering the TLAR way - "That Looks About Right"
TnTTT ORIGINAL 200A LANTERN CLUB = "The 200A Gang"
Green Lantern Corpsmen
-

KCStudly - Donating Member
- Posts: 9640
- Images: 8169
- Joined: Mon Feb 06, 2012 10:18 pm
- Location: Southeastern CT, USA


