
The Poet Creek Express - Foamie Hybrid
Moderator: eaglesdare
Re: The Poet Creek Express - Foamie Hybrid
![]() by KCStudly » Thu Feb 04, 2016 8:12 am
by KCStudly » Thu Feb 04, 2016 8:12 am
Thanks GPW.
KC
My Build: The Poet Creek Express Hybrid Foamie
Poet Creek Or Bust
Engineering the TLAR way - "That Looks About Right"
TnTTT ORIGINAL 200A LANTERN CLUB = "The 200A Gang"
Green Lantern Corpsmen
My Build: The Poet Creek Express Hybrid Foamie
Poet Creek Or Bust
Engineering the TLAR way - "That Looks About Right"
TnTTT ORIGINAL 200A LANTERN CLUB = "The 200A Gang"
Green Lantern Corpsmen
-

KCStudly - Donating Member
- Posts: 9640
- Images: 8169
- Joined: Mon Feb 06, 2012 10:18 pm
- Location: Southeastern CT, USA
Re: The Poet Creek Express - Foamie Hybrid
![]() by KCStudly » Sun Feb 07, 2016 10:22 pm
by KCStudly » Sun Feb 07, 2016 10:22 pm
Thursday I did some more touchup filler on the curb side door jamb and under the floor on the screw head holes on that side. It was dark so I had the floor lamp on the curb side, leaving the bench a bit dark; so I busted out the lanterns. Forgot to take a picture of then with them burning, but remembered today in the light.
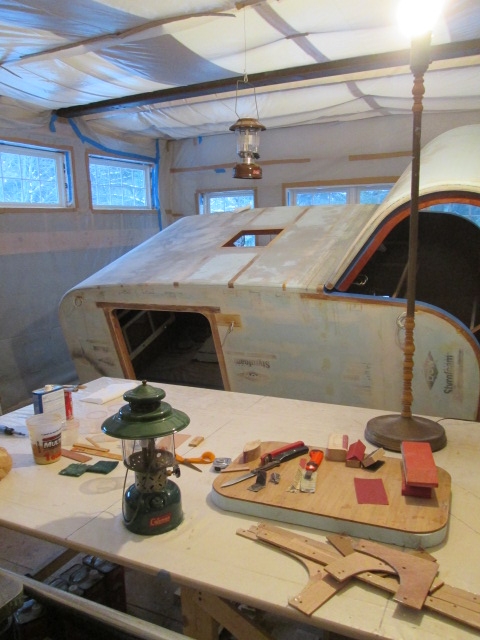
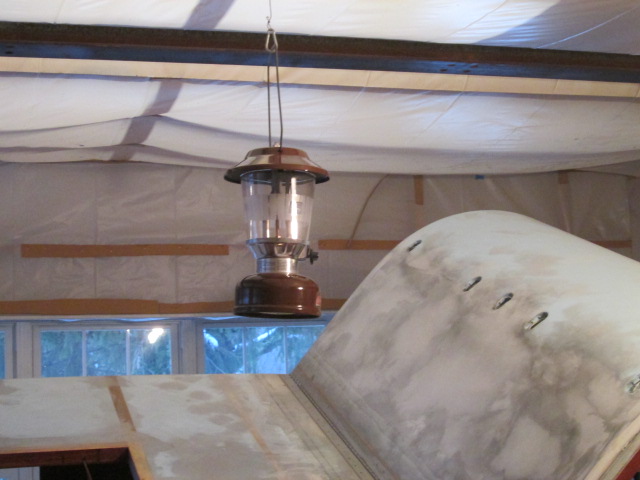
The hanging Turd (bah dump bump) still had fuel and pressure in it from last year, but the 228E big hat had none. Still haven’t tracked down the minor pressure leak on that one, but I suspect the valve stem Grafoil packing.
Thursday’s rain turned into Friday’s snow. A wet heavy snow with temps hovering just above freezing, it snowed heavily from early morning thru until quitting time leaving behind about 2 inches of wet packing slush with another 2 or 3 inches of fluff on top. Headed straight home to do removal chores; the snow blower clogged readily, but I managed to get thru it.
Saturday was colder again, but it warmed up enough today to get some work in. I started by sanding along the underside of the curb side floor and the few areas of the door surround that I had touched up. What a pain sanding overhead under the floor! No choice but to wear full goggles, but they fog up instantly so you can’t see a thing. I have a pair of dirt bike goggles with better vents somewhere that I need to dig up. Sanding by braille.
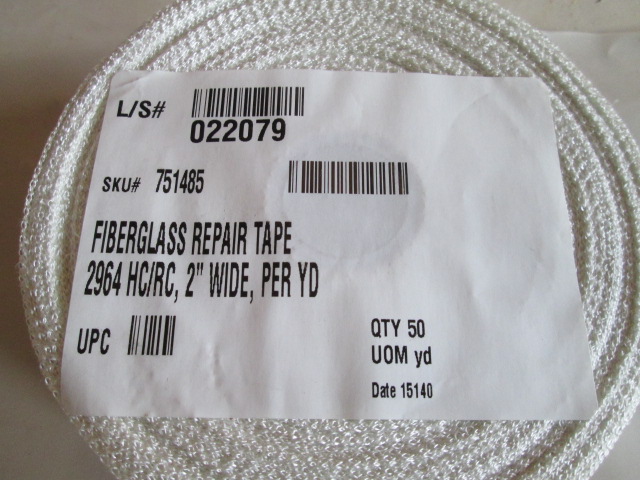
Despite the forecast for overnight lows around 29 deg F, it was about 44 deg F by 1pm, so I decided to go for it and glass the curb side door opening. Here’s that roll of 2x9oz tape.
Since the tape has a nice straight bound edge on it, I decided to try a variation on the PMPP technique. Rather than use oversized plastic on top and bottom and then cut the excess away, I cut a slightly wider piece to my 30 inch strip length, with one edge cut nice and straight. The plan was to lay each length of tape along this straight edge; wet it out; and then use the single ply of plastic to transport and place the strip into position, before peeling the backing plastic away. That way there would be no cutting of the wet layups (almost none), less use of plastic (I would be able to use the same piece over and over again), and I would still get the benefit of the control that the plastic brings in keeping the cloth in the desired shape while placing it.
Here you can just see the transfer piece of plastic (with black sharpie outline around three sides) taped to another sacrificial piece of plastic over the plastic covered bench.

From there I used the plastic as a gauge to cut 4 strips of the cloth tape at 30 inches long, and another for the sill piece a little longer than planned leaving an inch or so for trimming.
I mixed up a 3 pump batch, checking weights on the small digital scale and adjusting accordingly (the pumps had bled down and despite thinking that I had primed them, they burped on the first pump stroke). I brushed wet onto the first two sides of the header, the top corner radii, and the corresponding portion of the door seal flange with a 1 inch chip brush with full length bristles; then wetted out the first 30 inch strip doing the final stabbing with another 1 inch chip brush with the bristles cut down pretty far (about 1/3 of full length) so that they were nice and stiff.
Whereas on the hatch sealing edges I had done each side in one long strip, I had gravity working with me there; here I was glad that I had decided to do the shorter 30 inch strips. They were very manageable and the plastic made it relatively easy to lay the tape right into the inside corner of the seal flange. Once I had traces of wet on the bench plastic, the transfer piece would stay put in the tack well enough that I didn’t need to tape it down again, and the traces of wet on the transfer piece made it easy to lay the next strip of dry cloth down to where it stayed put along the edge well during the next wet out. After about the third strip I realized that one edge of the cloth tape was a lot crisper than the other, so from there on I took care to place the crisp edge against the plastic edge, getting a crisper edge in the corner. Also, by the time I got back to wetting the next two areas of the door jamb, what was left in the pot was starting to gel just a tad. I was still able to brush it onto the wood, and it was going to be fine for that, but I had a little bit left over that I did not feel comfortable trying to get to soak into the next piece of cloth; so 2 pump batches from there up to the last smaller piece that was a 1 pumper.
Here you can see the wet door seal flange and front jamb. The 2 inch wide tape was the perfect width leaving just a mere 1/4 inch or less to be trimmed off after the cure. Note how crisply this piece butts into the corner.
Compare that to the rear jamb where it looks a little bit more like a piece of welting built up in the corner. That’s the difference between the tight and loose edges of the tape. (The cloudy looking area under the wet near the sharpie mark is where there was cured filled epoxy underneath, not a dry patch or bubble.)
Here’s an example of where two of the strips butted, in this case up on the header. Some of the strands at the ends of the strips pulled out a little, and I trimmed some off with the scissors. There may be a slight ridge there that will need to be sanded, and others may need a bit of filler, but that will be easier to deal with after the cure. In hind sight I suppose I could have put a little patch of 6oz over these, but then I would have probably had to sand most of that off to get it fair again, so I think this will clean up better in the end. Again, I chose not to overlap these seams because I’m not looking for structural strength here, just armor against wear and tear, and binding and sealing of the wood grain.
This front jamb butt joint has a little separation out on the flox corner (but I think it will be okay after I glass the wall and ease the corner slightly). Again, easier to add a little filler latter after the cure, than it would be to get it on there now. It’s so easy to disturb these edges when they are wet and vulnerable. Also note how the butt seam didn’t land exactly on my reference mark. That’s why I left the last piece a little long and trimmed it to final length (along with the plastic) after placing it down.
Here’s the sill all wet and glassy.
There was about half a pump left in the cup so I mixed in a touch of the 403 filler and touched up some of the screw holes that I was not happy with under the curb side floor edge. (Sorry for the blurry pic.)
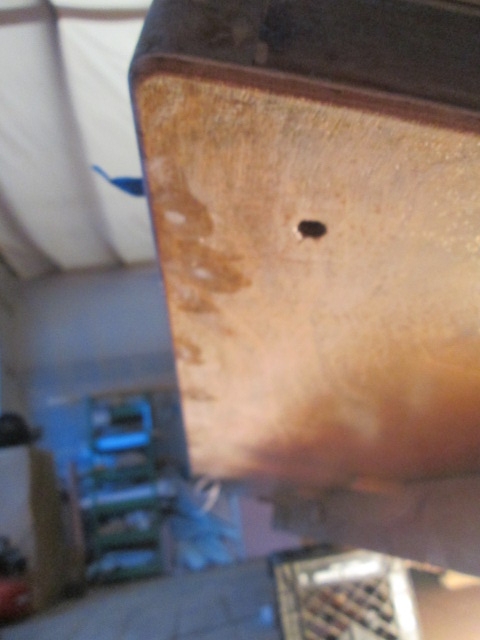
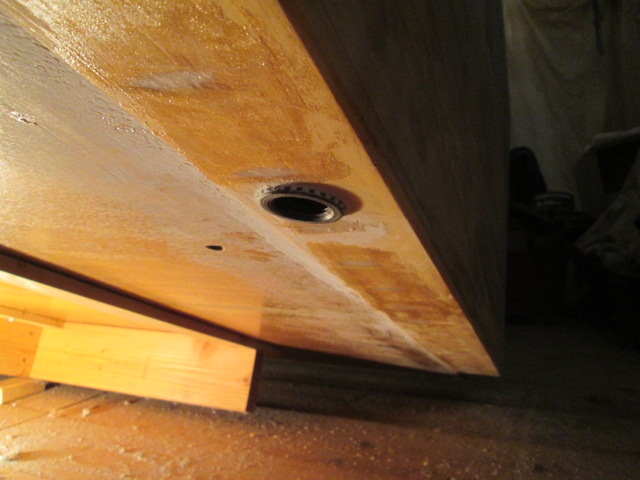
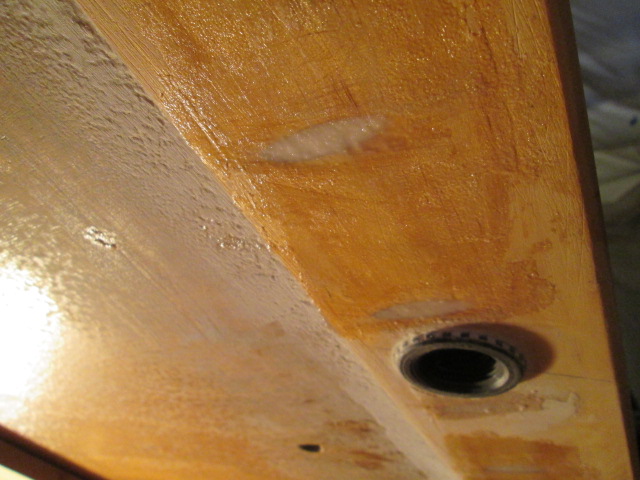
Managed to stretch that and do some make up filling of the pocket screw holes under the front locker bump out.
I’m happy with it and hope that it all cures properly before the temps drop again. More snow in the forecast for tomorrow morning and into the day.
The hanging Turd (bah dump bump) still had fuel and pressure in it from last year, but the 228E big hat had none. Still haven’t tracked down the minor pressure leak on that one, but I suspect the valve stem Grafoil packing.
Thursday’s rain turned into Friday’s snow. A wet heavy snow with temps hovering just above freezing, it snowed heavily from early morning thru until quitting time leaving behind about 2 inches of wet packing slush with another 2 or 3 inches of fluff on top. Headed straight home to do removal chores; the snow blower clogged readily, but I managed to get thru it.
Saturday was colder again, but it warmed up enough today to get some work in. I started by sanding along the underside of the curb side floor and the few areas of the door surround that I had touched up. What a pain sanding overhead under the floor! No choice but to wear full goggles, but they fog up instantly so you can’t see a thing. I have a pair of dirt bike goggles with better vents somewhere that I need to dig up. Sanding by braille.
Despite the forecast for overnight lows around 29 deg F, it was about 44 deg F by 1pm, so I decided to go for it and glass the curb side door opening. Here’s that roll of 2x9oz tape.
Since the tape has a nice straight bound edge on it, I decided to try a variation on the PMPP technique. Rather than use oversized plastic on top and bottom and then cut the excess away, I cut a slightly wider piece to my 30 inch strip length, with one edge cut nice and straight. The plan was to lay each length of tape along this straight edge; wet it out; and then use the single ply of plastic to transport and place the strip into position, before peeling the backing plastic away. That way there would be no cutting of the wet layups (almost none), less use of plastic (I would be able to use the same piece over and over again), and I would still get the benefit of the control that the plastic brings in keeping the cloth in the desired shape while placing it.
Here you can just see the transfer piece of plastic (with black sharpie outline around three sides) taped to another sacrificial piece of plastic over the plastic covered bench.
From there I used the plastic as a gauge to cut 4 strips of the cloth tape at 30 inches long, and another for the sill piece a little longer than planned leaving an inch or so for trimming.
I mixed up a 3 pump batch, checking weights on the small digital scale and adjusting accordingly (the pumps had bled down and despite thinking that I had primed them, they burped on the first pump stroke). I brushed wet onto the first two sides of the header, the top corner radii, and the corresponding portion of the door seal flange with a 1 inch chip brush with full length bristles; then wetted out the first 30 inch strip doing the final stabbing with another 1 inch chip brush with the bristles cut down pretty far (about 1/3 of full length) so that they were nice and stiff.
Whereas on the hatch sealing edges I had done each side in one long strip, I had gravity working with me there; here I was glad that I had decided to do the shorter 30 inch strips. They were very manageable and the plastic made it relatively easy to lay the tape right into the inside corner of the seal flange. Once I had traces of wet on the bench plastic, the transfer piece would stay put in the tack well enough that I didn’t need to tape it down again, and the traces of wet on the transfer piece made it easy to lay the next strip of dry cloth down to where it stayed put along the edge well during the next wet out. After about the third strip I realized that one edge of the cloth tape was a lot crisper than the other, so from there on I took care to place the crisp edge against the plastic edge, getting a crisper edge in the corner. Also, by the time I got back to wetting the next two areas of the door jamb, what was left in the pot was starting to gel just a tad. I was still able to brush it onto the wood, and it was going to be fine for that, but I had a little bit left over that I did not feel comfortable trying to get to soak into the next piece of cloth; so 2 pump batches from there up to the last smaller piece that was a 1 pumper.
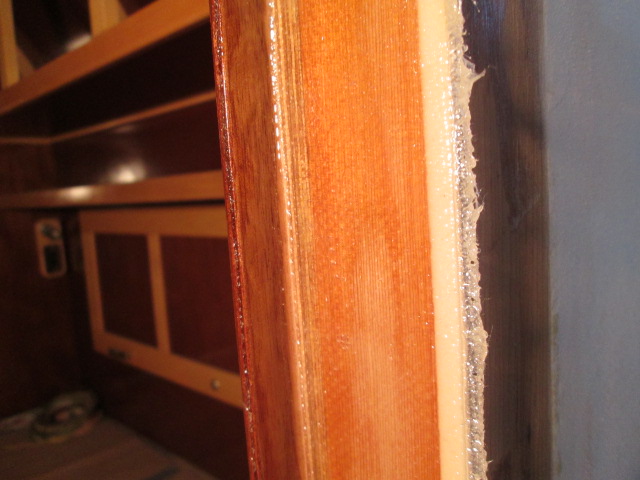
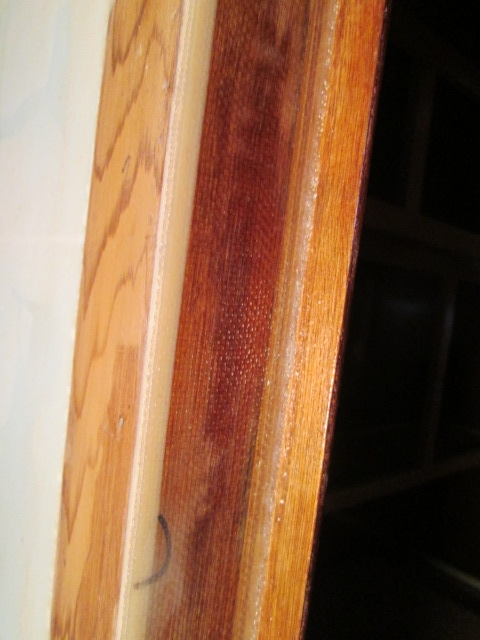
Here you can see the wet door seal flange and front jamb. The 2 inch wide tape was the perfect width leaving just a mere 1/4 inch or less to be trimmed off after the cure. Note how crisply this piece butts into the corner.
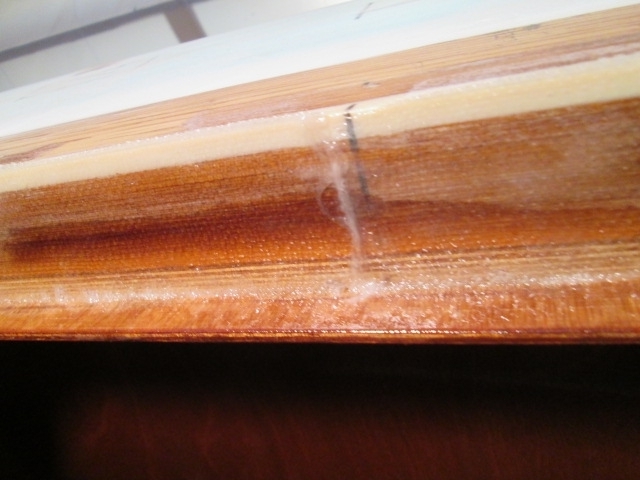
Compare that to the rear jamb where it looks a little bit more like a piece of welting built up in the corner. That’s the difference between the tight and loose edges of the tape. (The cloudy looking area under the wet near the sharpie mark is where there was cured filled epoxy underneath, not a dry patch or bubble.)
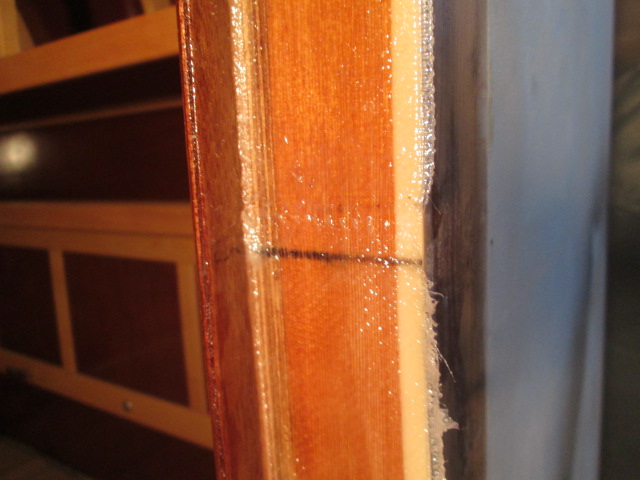
Here’s an example of where two of the strips butted, in this case up on the header. Some of the strands at the ends of the strips pulled out a little, and I trimmed some off with the scissors. There may be a slight ridge there that will need to be sanded, and others may need a bit of filler, but that will be easier to deal with after the cure. In hind sight I suppose I could have put a little patch of 6oz over these, but then I would have probably had to sand most of that off to get it fair again, so I think this will clean up better in the end. Again, I chose not to overlap these seams because I’m not looking for structural strength here, just armor against wear and tear, and binding and sealing of the wood grain.
This front jamb butt joint has a little separation out on the flox corner (but I think it will be okay after I glass the wall and ease the corner slightly). Again, easier to add a little filler latter after the cure, than it would be to get it on there now. It’s so easy to disturb these edges when they are wet and vulnerable. Also note how the butt seam didn’t land exactly on my reference mark. That’s why I left the last piece a little long and trimmed it to final length (along with the plastic) after placing it down.
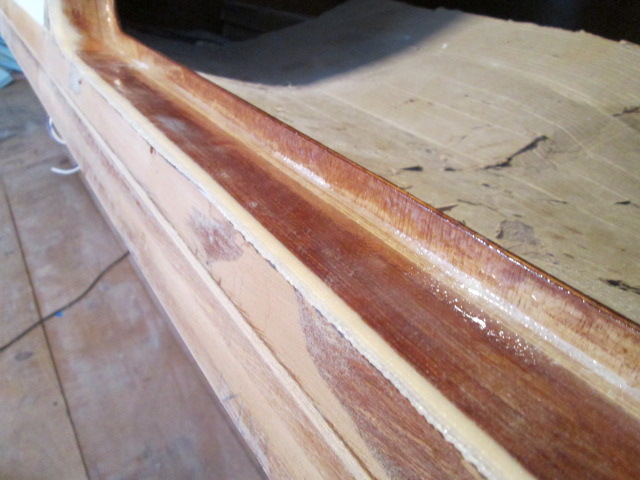
Here’s the sill all wet and glassy.
There was about half a pump left in the cup so I mixed in a touch of the 403 filler and touched up some of the screw holes that I was not happy with under the curb side floor edge. (Sorry for the blurry pic.)
Managed to stretch that and do some make up filling of the pocket screw holes under the front locker bump out.
I’m happy with it and hope that it all cures properly before the temps drop again. More snow in the forecast for tomorrow morning and into the day.
Last edited by KCStudly on Wed Apr 06, 2022 10:54 pm, edited 1 time in total.
KC
My Build: The Poet Creek Express Hybrid Foamie
Poet Creek Or Bust
Engineering the TLAR way - "That Looks About Right"
TnTTT ORIGINAL 200A LANTERN CLUB = "The 200A Gang"
Green Lantern Corpsmen
My Build: The Poet Creek Express Hybrid Foamie
Poet Creek Or Bust
Engineering the TLAR way - "That Looks About Right"
TnTTT ORIGINAL 200A LANTERN CLUB = "The 200A Gang"
Green Lantern Corpsmen
-
KCStudly - Donating Member
- Posts: 9640
- Images: 8169
- Joined: Mon Feb 06, 2012 10:18 pm
- Location: Southeastern CT, USA


 Here we have to wait till it gets above 70F to go outside without dressing like “Nanook of the North “ ...
  True eh !!!


 . No one cares what the weather is when there is a parade.


