The Poet Creek Express - Foamie Hybrid

Canvas covered foamies (Thrifty Alternatives...)

Moderator: eaglesdare

Re: The Poet Creek Express - Foamie Hybrid

Postby KCStudly » Sun Feb 21, 2016 12:16 pm

Thanks Dave. I really appreciate that you took the time to comment with such kind words of support. It really helps to motivate me to keep going, even thru some of the less glamorous stages of the build. Doing this kind of under floor work in less than ideal conditions is a motivational suck, but after your and GPW's kind words I'm eager to get back to work.

It's really not that bad. I'll get thru it, but it's not as much fun as some of the much cooler stuff or milestones. On the agenda for today; sand under the locker; trim and cleanup the street side door jamb; and final (!) fill of the street side floor to wall screw heads.
KC
My Build: The Poet Creek Express Hybrid Foamie

Poet Creek Or Bust
Engineering the TLAR way - "That Looks About Right"
TnTTT ORIGINAL 200A LANTERN CLUB = "The 200A Gang"
Green Lantern Corpsmen
User avatar
KCStudly
Donating Member
 
Posts: 9640
Images: 8169
Joined: Mon Feb 06, 2012 10:18 pm
Location: Southeastern CT, USA

Re: The Poet Creek Express - Foamie Hybrid

Postby Ned B » Sun Feb 21, 2016 1:59 pm

:applause: haven't said it lately... But always take inspiration from your build KC!
User avatar
Ned B
1000 Club
1000 Club
 
Posts: 1036
Joined: Sat Apr 16, 2011 10:25 am
Location: Syracuse NY (ish)

Re: The Poet Creek Express - Foamie Hybrid

Postby KCStudly » Sun Feb 21, 2016 11:51 pm

Thanks, Ned. I appreciate all of the encouragement I can get. :D
KC
My Build: The Poet Creek Express Hybrid Foamie

Poet Creek Or Bust
Engineering the TLAR way - "That Looks About Right"
TnTTT ORIGINAL 200A LANTERN CLUB = "The 200A Gang"
Green Lantern Corpsmen
User avatar
KCStudly
Donating Member
 
Posts: 9640
Images: 8169
Joined: Mon Feb 06, 2012 10:18 pm
Location: Southeastern CT, USA
Top

Re: The Poet Creek Express - Foamie Hybrid

Postby KCStudly » Sun Feb 21, 2016 11:55 pm

Tools used to trim the street side door jamb glass: serrated steak knife used to saw excess cloth; paint scrapper used to scrape standing edges, epoxy runs and raised areas; 60 grit board to knock down areas too thick for the scrapper; and small block with 100 grit for blocking overlap seams and scuffing high spots (after washing amine blush off).
Image

Glass/epoxy dust after sanding standing edge of jamb layup.
Image

Amine blush washed and scrubbed with greenie pad, wiped dry with paper shop towel.
Image

Door sill block sanded and scuffed with 100 grit. Improved technique resulted in a flatter layup. Leaner layup resulted in less pooling and undulations.
Image

Glass strand wad scraped and block sanded fair.
Image

Curb side patch consisting of two small swatches of 6oz filling gap at 9oz tape butt joint, covered with plastic patch (poor man’s peel ply).
Image

Plastic peels off easily leaving smooth texture, no amine, and slight flap of patch hanging off flox edge.
Image
Image

Excess patch trimmed, and block sanded fair.
Image
Image

Filled pocket screw holes under front locker sanded fair again. Still not 100/ct happy with these; too much filler used, not fluid enough; need to get Cabosil; need to get small spoon to better meter my scoop size on the fillers.
Image

Spent a few minutes stripping the brittle/faulty cord out of the old floor lamp I have been using as a work light. When I saw sparks flying out of the broken insulation I decided it would be better to replace the cord and plug than it would be to burn down Karl’s barn with TPCE inside. Stopped and got new cord and plug on the way home.
KC
My Build: The Poet Creek Express Hybrid Foamie

Poet Creek Or Bust
Engineering the TLAR way - "That Looks About Right"
TnTTT ORIGINAL 200A LANTERN CLUB = "The 200A Gang"
Green Lantern Corpsmen
User avatar
KCStudly
Donating Member
 
Posts: 9640
Images: 8169
Joined: Mon Feb 06, 2012 10:18 pm
Location: Southeastern CT, USA
Top

Re: The Poet Creek Express - Foamie Hybrid

Postby GPW » Mon Feb 22, 2016 1:19 pm

You’ve really ”taken” to that fiberglass business. :thumbsup: Some have trouble with it ... Amazing what you’ve got done in the cold weather when epoxies take longer to dry (cure really) ... Warm weather is forthcoming , the leaves are already growing on the trees here, getting ready to plant the spring garden ... 8)

Ps;. I just had a floor lamp in the house go out , so tried another bulb and that didn’t work .... So decided it must be the socket/switch since that and the wire was all there was ... bought a new socket at the store , came home replaced it , then plugged in the old bulb (the second known good bulb ) .. nothing ... :o tried another new (third) bulb and that worked .... Turned out the second bulb was bad too ... :roll: I felt like such an idiot ... :R :oops: :lol:
There’s no place like Foam !
User avatar
GPW
Gold Donating Member
 
Posts: 14920
Images: 546
Joined: Thu Feb 09, 2006 7:58 pm
Location: New Orleans
Top

Re: The Poet Creek Express - Foamie Hybrid

Postby KCStudly » Mon Feb 22, 2016 2:36 pm

GPW, I have been using the 'fast' hardener and my experience in the loft has been that it is good down to about 44 deg F working temp, so long as the overnight lows (outside) don't dip below freezing, it all turns out normal.

You bring up a good point though, the weather is changing and I need to run thru what I have of the fast hardener before it gets too warm. Potentially costly mistake prebuying, but I really thought I would have it skinned by now!

Above about 60 deg F I can switch back to the 'slow' hardener for longer working times, but then again I may be competent enough to use the fast stuff in moderate temperatures now that I have more experience. We shall see how it goes.

On my lamp it was clearly a case of the cord insulation cracking where it went into the plug. The light never quit, but when I accidentally kicked the end of the extension cord where the lamp was plugged in I saw a spark skitter across the floor. The ancient SPT-1 style cord had cracked and the two conductors were intermittently touching each other w/o popping the circuit breaker.

I'll get it put back together this evening with an upgrade to SPT-2 cord.
KC
My Build: The Poet Creek Express Hybrid Foamie

Poet Creek Or Bust
Engineering the TLAR way - "That Looks About Right"
TnTTT ORIGINAL 200A LANTERN CLUB = "The 200A Gang"
Green Lantern Corpsmen
User avatar
KCStudly
Donating Member
 
Posts: 9640
Images: 8169
Joined: Mon Feb 06, 2012 10:18 pm
Location: Southeastern CT, USA
Top

Re: The Poet Creek Express - Foamie Hybrid

Postby capnTelescope » Tue Feb 23, 2016 12:21 am

I haven't said much lately, cuz I've been watching and learning.

KCStudly wrote:... I really thought I would have it skinned by now!

Me, too. :lol: ;) You just keep on keepin' on. You're doing fine.
I'll burn that bridge when I come to it.

Brad
ImageImageImage

Building the Bed & Breakfast
User avatar
capnTelescope
Lifetime member
 
Posts: 1222
Images: 368
Joined: Sun Jun 27, 2004 3:44 pm
Location: Round Rock, TX
Top

Re: The Poet Creek Express - Foamie Hybrid

Postby KCStudly » Tue Feb 23, 2016 7:33 am

Thanks capn, I was starting to wonder if everyone had seen enough of me slogging thru these mundane glass prep issues, and yet that feeling that something big is about to happen is looming again.

I just need to decide how I am going to handle the hatch draw latch area while glassing the sides and wrapping onto the hatch edges. I want the hatch to be aligned and stable, but would like to do the areas under the latches all in one go with the side walls. Current thinking is to screw (or tape?) temporary links under the rear edge of the floor, perhaps using the trailer frame mounting bolt holes on the cabin side, freeing up the lower rear area where the draw latches mount. I might even rig up some sort of caul affair to clamp the lower edge of the hatch against shims, rather than screw thru the already glassed hatch bumper. Option B would be to just glass the area under the latches in a preliminary operation (or two, one per side) and then just use the normal draw latch locations to hold the hatch in position while glassing the rest of the sides.
KC
My Build: The Poet Creek Express Hybrid Foamie

Poet Creek Or Bust
Engineering the TLAR way - "That Looks About Right"
TnTTT ORIGINAL 200A LANTERN CLUB = "The 200A Gang"
Green Lantern Corpsmen
User avatar
KCStudly
Donating Member
 
Posts: 9640
Images: 8169
Joined: Mon Feb 06, 2012 10:18 pm
Location: Southeastern CT, USA
Top

Re: The Poet Creek Express - Foamie Hybrid

Postby KCStudly » Sun Feb 28, 2016 12:57 am

It has been a slow February.

On Monday I wanted to get some cabosil to try, but Defender was kind of out of the way. I stopped at a couple of marinas along the way, neither panned out; it would have been quicker to have just bitten the bullet and made the trip to Defender.

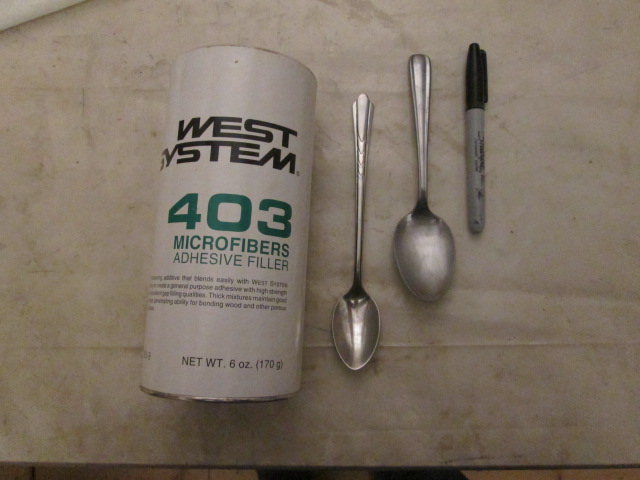
From there I stopped at the house to get the glues that I had forgotten. Then it was on to Goodwill to get a smaller spoon for dishing out fillers. The spoon I have been using is like a small serving spoon or a very large soup spoon, shown here with the new sundae spoon. I picked the sundae spoon because it is small, like a teaspoon, but has a long handle which should make it easier to get to the bottom of the filler canisters. Gave 25 cts. Should help keep me from adding too much filler per batch.
Image

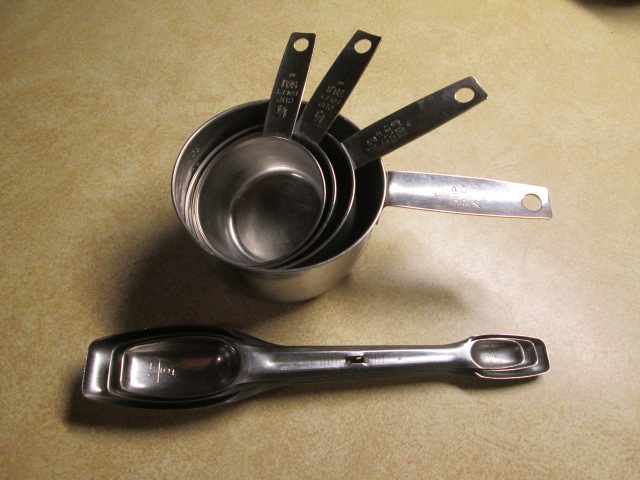
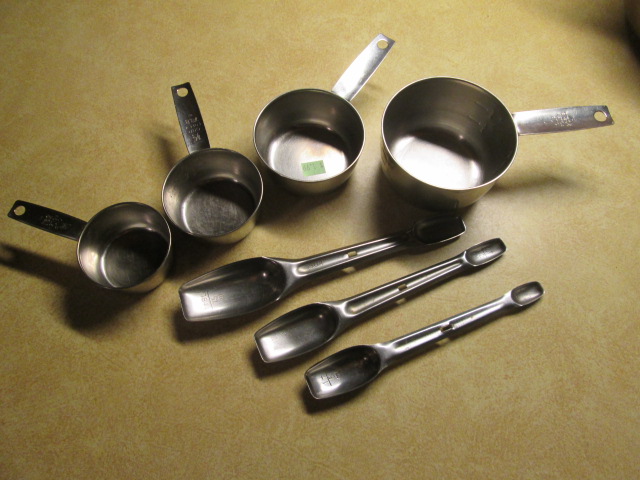
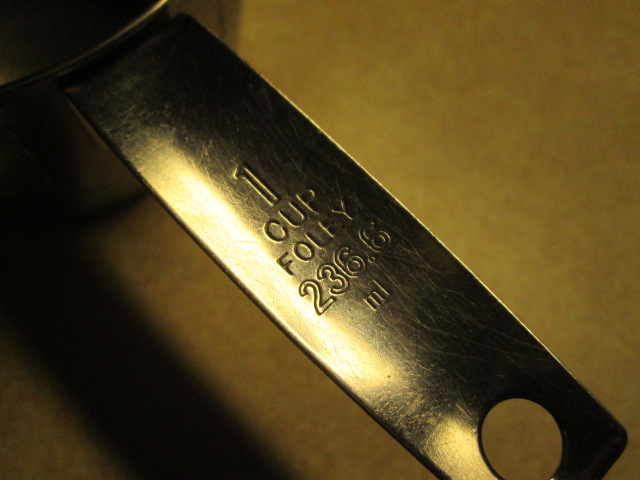
While there digging thru the spoon bin I found a good set of SS measuring cups, and a set of SS measuring spoons, just like mom’s old reliable ones. I prefer the SS over modern plastic because it doesn’t get scratched up and can’t melt. The long rectangular shaped spoons fit into herb and spice containers easier. I haven’t decided if I will include these in the trailer galley stuff because I won’t necessarily be doing the kind of cooking where careful measuring is called for, but the vintage nature of these appeals to me and I couldn’t pass them up for 99 cts each.
Image
Image
Image

Got to Mecca and ended up chit-chatting with Karl. Didn’t even make it up to the loft before heading back home.

Wednesday was a tiring day at work and I went home and took a nap; a long nap.

Thursday I didn’t get anything of note done. Friday Yvette and I went out after work and bought a new dishwasher.

So that brings us to today. At midday it was still only 34 deg F in the loft, despite forecasts in the 50’s. Inside did eventually reach that with solar gain, but outside was still pretty chilly. I figured the 5 minute epoxy would be fast enough (turns out that it is actually 3 min, but I’ve been calling it 5 min for so long I don’t see any reason to change), so I mixed up a small batch with some of the 410 fairing filler and did a final round of touch-up on the street side under floor screw heads. Karl gave me a little bit of a hard time for “body working” under the floor, but my argument is that if I leave dips and voids that the under wrap of glass from the side skins doesn’t want to suck into, then there would be a potential weak point that water could take advantage of.

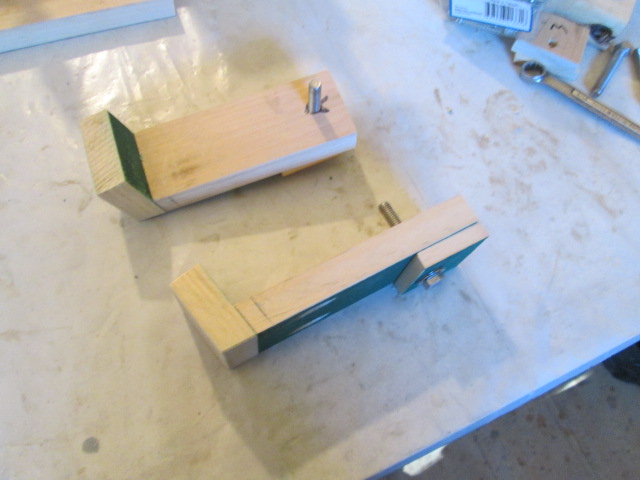
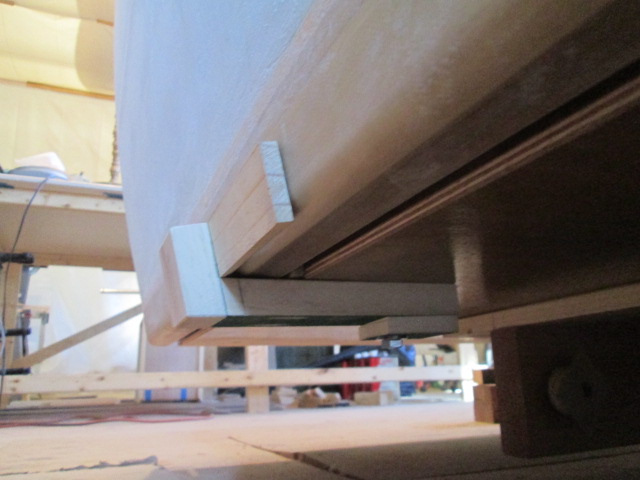
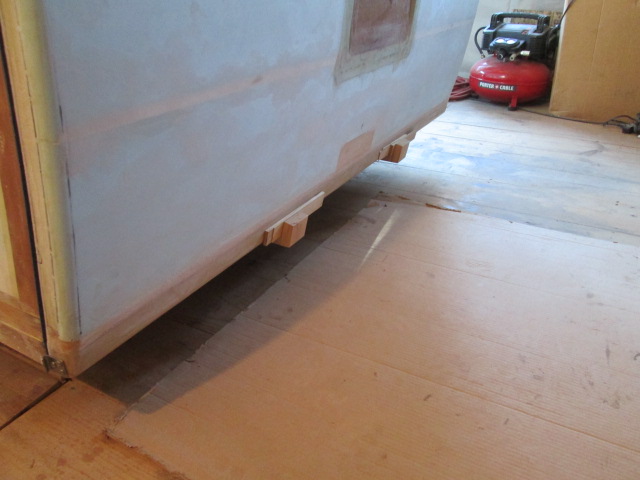
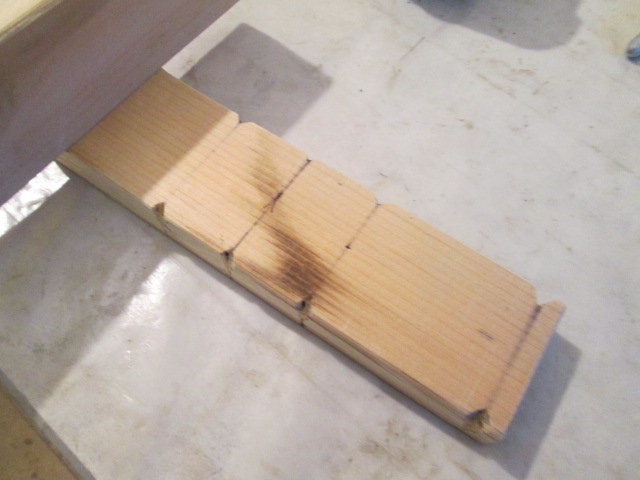
Once that was done I set about making a pair of caul style dogs that bolt to the middle pair of chassis mount holes under the rear of the galley floor. These will allow me to dog the hatch down tight against a pair of shims, locking it into the proper position and shape, and yet remove the draw latches so that I can glass under their location all in one go with the side walls. I ripped these from a scrap of pine barn board, about 7/8 inch thick rough on one side. The extra spacer accounts for the length of bolt that I was able to scrounge. I left the longer piece of wood a little long leaving room for wedge shims to tighten them up. The hook or tab for the wedge shim matches the angle of the bottom of the hatch (the “bumper”).
Image
Image
Image

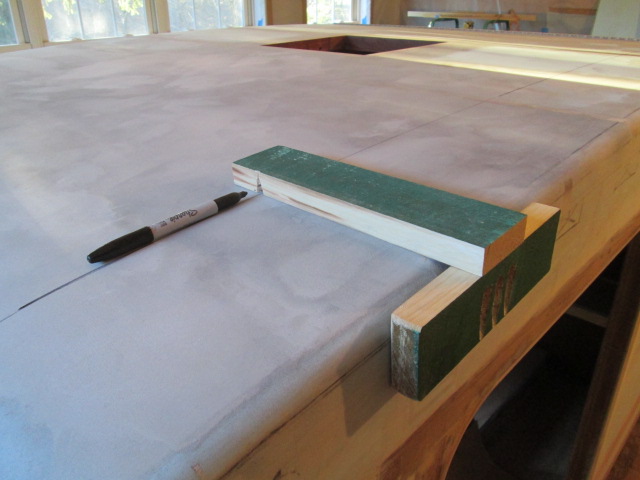
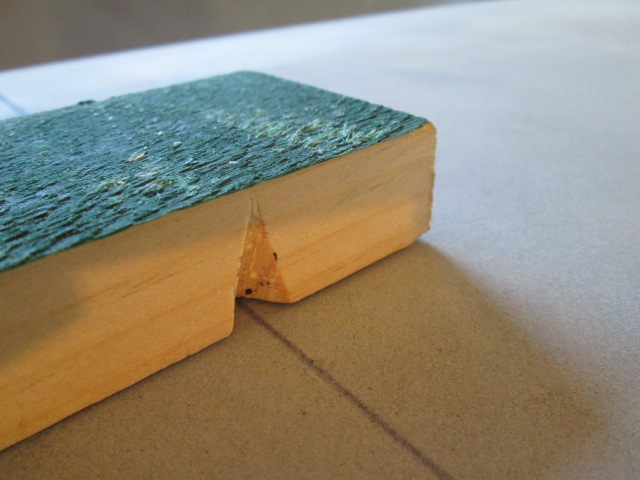
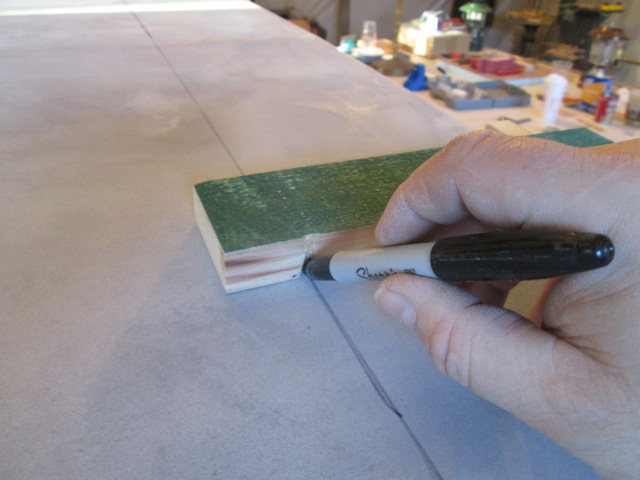
Next I wanted to mark guide lines along the front, roof and hatch to help line up the fiberglass overlaps and seams. I used some more of the barn board to make this marking guide. It squares off of the side wall and glides along as I hold a sharpie in one of the notches cut with the utility knife. I did a quick round over/bevel on all of the sharp edges so that it would glide over the foam more easily and not dig in.
Image
Image
Image
Image
Image
Image

We’ll come back to this in a second.

Next I masked off the hatch hinge. I had already glassed under it and on to the adjacent sides a bit, but I still don’t want to slop epoxy onto it.
Image

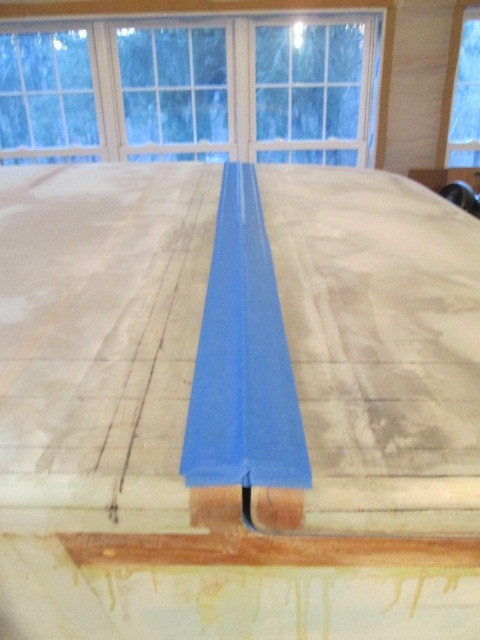
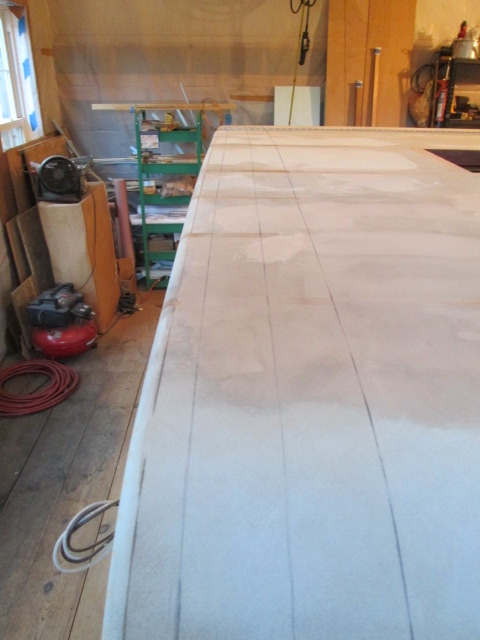
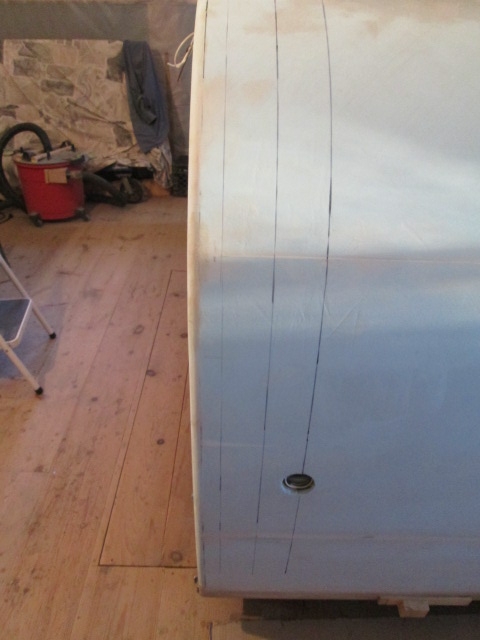
Back to the marking tool, I suddenly realized that I had screwed up, but “caught it in the audit”. I had hooked the measuring tape under the edge of the floor, strung it out and wrapped it up onto the roof at the crown of the big arc. I took 4 inches off for the under wrap and marked the roof at the 60 inch mark. Well, 64 inches is the width of the camper, not the width of the FG cloth. The cloth is only 60 inches wide. So I had to re-jigger it. By changing to a 3 inch under wrap I was able to reuse the second line, abandoning the inner most line on the roof, and made a new line between that and the outermost line. Even though I will layup the sides and roof separately, the idea I’m going with is to stagger the plies so that the first side ply ends where the first roof ply will end, which will in turn over lap the second side ply. The second roof ply will overlap all others. By doing it this way the total ply count at the seam will only be three, max, not four, so it should be easier to fair. By having the 2nd ply of each layup be the longer one it leaves only one rough edge, not two, and if I use the plastic peel ply trick it should make a nice transition with less sanding. Here is the corrected layout with about 1-1/2 inches of overlap per line; 3 inches total.
Image
Image

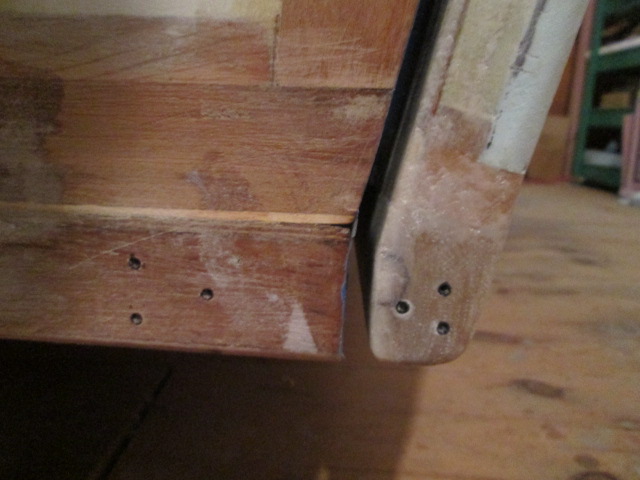
One last little detail, after removing the draw latch tabs from the ends of the hatch “bumper” I stuck the sharpie tip in each hole and gave it a little twist. The little bit of black ink surrounding the holes will make it easier to locate them when it comes time to drill thru the cured glass. You may also notice that I used a slightly thicker shim to increase the seal gap a little making it easier to get the steak knife in there to cut the hatch away later.
Image

Next move will be figuring out how I want to wrap the front locker bump out. I’m thinking I will start there with a single ply, since the locker is pine and the area around it will be armored up with aluminum rock guard.

Tomorrow doesn’t look good for doing a major layup. The weather might be okay, but in the morning I will help my BIL press some bearings into the trailing arms of their commuter car. I might have enough time to prep cloth for the front, and then we have an early evening dinner reservation to celebrate mom’s recent B-day. I’m looking forward to that (num-num-num).
KC
My Build: The Poet Creek Express Hybrid Foamie

Poet Creek Or Bust
Engineering the TLAR way - "That Looks About Right"
TnTTT ORIGINAL 200A LANTERN CLUB = "The 200A Gang"
Green Lantern Corpsmen
User avatar
KCStudly
Donating Member
 
Posts: 9640
Images: 8169
Joined: Mon Feb 06, 2012 10:18 pm
Location: Southeastern CT, USA
Top

Re: The Poet Creek Express - Foamie Hybrid

Postby Wobbly Wheels » Sun Feb 28, 2016 2:20 am

Do you remember at the beginning of this you weren't sure about using epoxy and glass ?
You're working it like a pro now. :thumbsup:

I'm curious about something that I'm sure you've already considered...
I picked up one of these heaters a while ago:
Image
My 12X20 carport is closed off on two sides with tarps and the 50K BTUs are enough to give me a gain of 30 degC over ambient. Once it's up to temp, I leave the man door open at anything above freezing and it holds the temp. With one of those windows open, it might make you a little less dependent on temp. This propane one doesn't leave the sooty residue that the kerosene ones do either.
It was well worth the $100 I spent, though that was $CAN so it's probably only about $60 in the US :lol: :lol:
User avatar
Wobbly Wheels
Donating Member
 
Posts: 1080
Joined: Tue Mar 15, 2011 9:51 am
Top

Re: The Poet Creek Express - Foamie Hybrid

Postby GPW » Sun Feb 28, 2016 7:24 am

WW’s right ... the fiberglassing is a good example and lesson for us all who may want to proceed in that manner :thinking: ... While we personally always considered the more thrifty skins, Just for the sake of the general public and level of skill needed , this is a Great alternative should one want to invest the time and effort into it ... 8)

KC, JMHO for the sake of posterity and the “Greater Good” , surely take all your information and pictures and make "the BOOK" .... We have invested information and plans in websites in the past , and when they shut down all that information is just LOST ... :o Would be great to go to the local bookstore and find a detailed written description of the process of not only trailer building , but how it is arrived at , the thinking behind the process... Educate the world !!! You’ve written about it already and taken the pictures .... Just put it together ...( cut and paste ) ... write a Preface ... Done !!! :thumbsup:
There’s no place like Foam !
User avatar
GPW
Gold Donating Member
 
Posts: 14920
Images: 546
Joined: Thu Feb 09, 2006 7:58 pm
Location: New Orleans
Top

Re: The Poet Creek Express - Foamie Hybrid

Postby KCStudly » Sun Feb 28, 2016 9:05 am

Thanks WW, Karl has a new propane burner like that that he uses downstairs to take the chill off while the wood stove is coming up, and he has offered to let me use it; but it burns a lot of propane and I don't see me leaving it running for the 8 hr cure times. Probably only the first couple of hours are critical to get the reaction going, but I can't really afford to experiment with that on any of these larger layups to come.

As far as being reluctant using the epoxy and glass, well I have certainly become much more comfortable with it, but all of those original arguments, pro and con, still apply... PPE, dusty, itchy, stinky, costly, a little more complicated, durable, water proof, etc.

GPW, does anybody still read books? :lol: (kidding) I have the files well organized and labelled by context, at least all of the ones with direct build progress and photos (e.g. I don't usually save follow-up postings like this one unless they include significant brain storming that has not already been covered by prior discussion). Still, to put it in book form I think it would require a large editing effort, though not implausible. Even I have a hard time understanding some of my babble when I go back and read some sections. I think an instructional book would want to be less of a diary and more of a 'how to'. I might cut out some of the errant thoughts and zero in on the final choices and redesign stuff right from the beginning. You know, making it look like I knew what I was doing right along. But then again, showing mistakes and the thought process evolution has been beneficial to me (and hopefully others) so I suppose it all has a place somewhere. What I should do is back up my files somewhere safe. If my net pad were to crash at the moment I would only have a small portion of it on a separate thumb drive. Though it would be nice to boil it down and make a nice coffee table picture book.
KC
My Build: The Poet Creek Express Hybrid Foamie

Poet Creek Or Bust
Engineering the TLAR way - "That Looks About Right"
TnTTT ORIGINAL 200A LANTERN CLUB = "The 200A Gang"
Green Lantern Corpsmen
User avatar
KCStudly
Donating Member
 
Posts: 9640
Images: 8169
Joined: Mon Feb 06, 2012 10:18 pm
Location: Southeastern CT, USA
Top

Re: The Poet Creek Express - Foamie Hybrid

Postby GPW » Sun Feb 28, 2016 1:49 pm

I believe a good many books start with “how to “ ... :thumbsup: 8) Your personal touches were/are very nice ,adding a human touch to otherwise technical descriptions... and of course a chance to throw in some food pictures ... each one of us creates our own little history ... best preserved in some way other than the “virtual" ... :roll:
There’s no place like Foam !
User avatar
GPW
Gold Donating Member
 
Posts: 14920
Images: 546
Joined: Thu Feb 09, 2006 7:58 pm
Location: New Orleans
Top

Re: The Poet Creek Express - Foamie Hybrid

Postby KCStudly » Mon Feb 29, 2016 11:14 am

I had to be out on time Sunday so I didn’t get into anything that I couldn’t walk away from. Took the time to plan out the rest of the fiberglass “schedule”. I started by making a rosin paper template for the front locker bump out, and then decided how to do the sides.

Rather than trying to mount the doors and do them with the sides in one big layup, I decided to break things down into smaller chunks, doing the section of the wall in front of the door opening, above the header, below the sill, and the rear of the wall as separate sections. This way I won’t waste the yardage for the door opening, and I can do the layups in more manageable sessions if I need to. It does mean there will likely be a bit more fairing and sanding, but I’m already well past worrying about that; it just comes with the territory.

Here is the template.
Image

Because of the sloped “shed” of the top of the bump out the darts at the top have a bit of a bevel to their outside edges. I hadn’t allowed for this in my initial layout, but was able to mark and trim during a dry fit.
Image

At the bottom the flap along the bottom runs long from the dart so that the under wrap will cover the bottom of the locker and reach back onto the underside of the floor past the trailer frame.
Image

Here’s an overview of the sketches and list I made of the glass requirements.
Image

This section looking thru the cabin from front to back (or vice versa) shows how I plan to lap between the side wall and roof. Note that the wall can be done as a separate layup; that the top ply of each layup is larger so that it overlaps and caps the frizzies from the edge of the bottom ply (rather than staggering the other way and having two frizzy edges to deal with), and that it will still have good overlaps without building up too many layers along the seam. The joggle steps at the overlaps are at an exaggerated scale, shown here for clarity.
Image

The wall in front of the door. I will make the darts at the front profile radius on the fly during dry layout; at least that is the plan for now.
Image

The door header.
Image

The door sill.
Image

The front wall along the side of the locker bump out.
Image

The roof is pretty straight forward with just a couple of snips at the top corners of the locker and a stagger onto the glass apron by the hatch hinge. The first ply will need to be cut lengthwise to drop down into the stagger from the sides.

The rear portions of the side walls and onto the hatch are pretty straight forward, again making darts for the profile curve on the fly. I realize now that I still have to add for the wrap onto the hatch at the very back; at least I need to double check that dimension.

For the main portion of the hatch the first ply will be pieced together from bias cut cloth, then the second/top ply will run longitudinally like the rest. One could argue that putting the bias ply on top would give a hair more stability against twisting, but with just two plies this seems moot to me, and I would rather have the top weave running all the same way. You know, in case I do such a good job with the weave pattern that I decide to leave it showing as texture. (No real expectation of that happening.)

Here is the master cut list as it stands right now.
Image

So the reality is that things are never as simple as we expect them to be… or maybe that is just the overly complicated way I see things. The temptation would be to just start slathering epoxy and cloth all over everything, but things can get out of hand quickly handling big pieces of cloth working (nearly) alone. Some of these will be the biggest layups that I have ever attempted, and out of position to boot.

You know my method by now. When nervous about a big milestone, plan, plan, plan, fit, fit, fit, do.

<edited to include revised side front glass sketch and cut list>
Last edited by KCStudly on Mon Feb 29, 2016 9:53 pm, edited 1 time in total.
KC
My Build: The Poet Creek Express Hybrid Foamie

Poet Creek Or Bust
Engineering the TLAR way - "That Looks About Right"
TnTTT ORIGINAL 200A LANTERN CLUB = "The 200A Gang"
Green Lantern Corpsmen
User avatar
KCStudly
Donating Member
 
Posts: 9640
Images: 8169
Joined: Mon Feb 06, 2012 10:18 pm
Location: Southeastern CT, USA
Top

Re: The Poet Creek Express - Foamie Hybrid

Postby GPW » Mon Feb 29, 2016 11:43 am

We’re sure you’ll have no trouble at all ... ;)
There’s no place like Foam !
User avatar
GPW
Gold Donating Member
 
Posts: 14920
Images: 546
Joined: Thu Feb 09, 2006 7:58 pm
Location: New Orleans
Top

PreviousNext

Return to Foamies

Who is online

Users browsing this forum: No registered users and 11 guests