That may (or may not) have saved some time on these parts, doing one at a time vs. 2 stage finishing. I suppose I may have been able to get them all in one bag set up, or multiple bags off the same pump (?), but I don't have a proper pump (although we do still have some of the perforated peel ply, breather membrane, rubber sheet and vacuum port fitting from when Karl used to make custom Corvette parts).
You make a point tho, they would have come out nearly finished if bagged.
These went quickly enough and should finish up fine; I have so much more body work to do just to fill the weave and make it semi presentable (let aside trying for a smooth finish) that these little parts are just a drop in the bucket.
The Poet Creek Express - Foamie Hybrid
Moderator: eaglesdare
Re: The Poet Creek Express - Foamie Hybrid
KC
My Build: The Poet Creek Express Hybrid Foamie
Poet Creek Or Bust
Engineering the TLAR way - "That Looks About Right"
TnTTT ORIGINAL 200A LANTERN CLUB = "The 200A Gang"
Green Lantern Corpsmen
My Build: The Poet Creek Express Hybrid Foamie
Poet Creek Or Bust
Engineering the TLAR way - "That Looks About Right"
TnTTT ORIGINAL 200A LANTERN CLUB = "The 200A Gang"
Green Lantern Corpsmen
-

KCStudly - Donating Member
- Posts: 9640
- Images: 8169
- Joined: Mon Feb 06, 2012 10:18 pm
- Location: Southeastern CT, USA
Re: The Poet Creek Express - Foamie Hybrid
Not too much time today, just a couple three hours or so, but still made some progress.
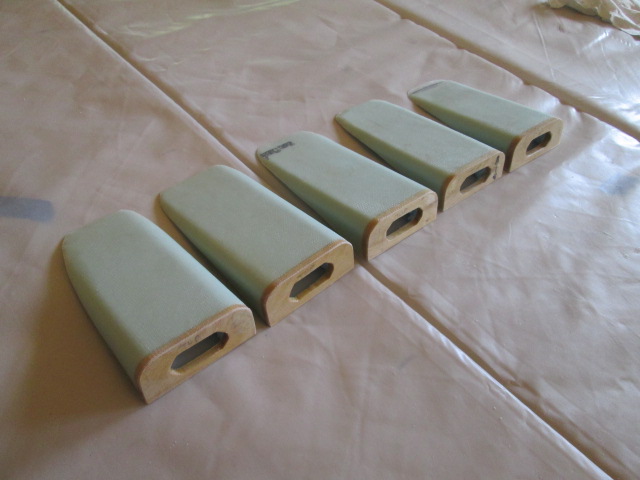
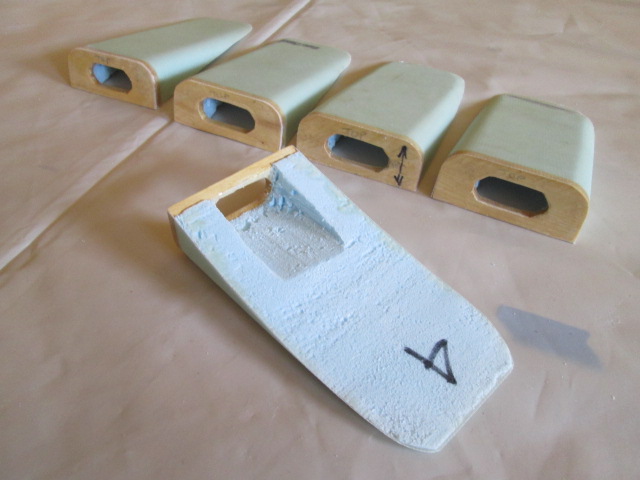
I started by trimming out the hatch clearance light nacelles from the bucks, sanding the rear faces flush, fairing the cut edges to the foam/hatch profile, knocking the sharp edges off of the rear light face perimeters, and washing amine.

From there I trimmed the wire openings out using the cheap steak knife, sanded the wire spaces a bit to remove loose foam bits, and trimmed any sharp edges of the epoxy that might otherwise chafe the wires. (I match labelled the nacelles and bucks 1 thru 5 just in case I find a need to pair them back up with the bucks for future operations… though I can’t think of any reason I might need to at the moment.)

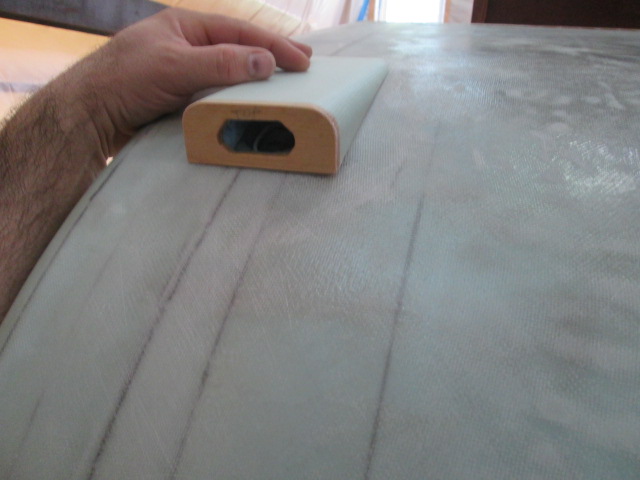
This kind of gives you an idea of how the nacelles will look on the hatch. (Kind of a wonky picture turned for perspective and with me holding on, as the hatch is currently standing on edge on the loft floor.)

Also washed amine on the galley wall edges, rear of floor, and other filled areas; scrapped and sanded some epoxy drips off of the underside of the floor; and sanded some of the filled/faired areas of the roof.
Rollin’.
The stars are aligning. My boat friend Dale and wife Tina are cruising into town tomorrow afternoon and my Punkin Chunkin buddy Dave and wife Andrea will be in town as well, so with Karl and wife Chris, all mutual friends, we are planning to get together for a nice dinner out… and maybe a boat ride.
Peace.
p.s. Take some time to look up an old friend that you haven’t had contact with in years; someone that you were close to, but for one reason or another lost contact with. It can be… I don’t know… it can be so many things… exciting, fun, settling, fulfilling, relaxing, and so much more. Just do it.
I started by trimming out the hatch clearance light nacelles from the bucks, sanding the rear faces flush, fairing the cut edges to the foam/hatch profile, knocking the sharp edges off of the rear light face perimeters, and washing amine.
From there I trimmed the wire openings out using the cheap steak knife, sanded the wire spaces a bit to remove loose foam bits, and trimmed any sharp edges of the epoxy that might otherwise chafe the wires. (I match labelled the nacelles and bucks 1 thru 5 just in case I find a need to pair them back up with the bucks for future operations… though I can’t think of any reason I might need to at the moment.)
This kind of gives you an idea of how the nacelles will look on the hatch. (Kind of a wonky picture turned for perspective and with me holding on, as the hatch is currently standing on edge on the loft floor.)
Also washed amine on the galley wall edges, rear of floor, and other filled areas; scrapped and sanded some epoxy drips off of the underside of the floor; and sanded some of the filled/faired areas of the roof.
Rollin’.
The stars are aligning. My boat friend Dale and wife Tina are cruising into town tomorrow afternoon and my Punkin Chunkin buddy Dave and wife Andrea will be in town as well, so with Karl and wife Chris, all mutual friends, we are planning to get together for a nice dinner out… and maybe a boat ride.
Peace.
p.s. Take some time to look up an old friend that you haven’t had contact with in years; someone that you were close to, but for one reason or another lost contact with. It can be… I don’t know… it can be so many things… exciting, fun, settling, fulfilling, relaxing, and so much more. Just do it.
KC
My Build: The Poet Creek Express Hybrid Foamie
Poet Creek Or Bust
Engineering the TLAR way - "That Looks About Right"
TnTTT ORIGINAL 200A LANTERN CLUB = "The 200A Gang"
Green Lantern Corpsmen
My Build: The Poet Creek Express Hybrid Foamie
Poet Creek Or Bust
Engineering the TLAR way - "That Looks About Right"
TnTTT ORIGINAL 200A LANTERN CLUB = "The 200A Gang"
Green Lantern Corpsmen
-

KCStudly - Donating Member
- Posts: 9640
- Images: 8169
- Joined: Mon Feb 06, 2012 10:18 pm
- Location: Southeastern CT, USA


 Streamline !!!


 )
) Maybe where you live, not so much ...


 Today I had to go back to the real world of the daily grind.
  ( apparently something common to the NE corridor, and most prominently displayed in New Jersey ... ) ... with a silly comparison to something