
I am not a body man. And yet I am already learning some techniques. They may not be the best or most efficient techniques, but I’m okay with the results so far. The cost is another thing. Epoxy is not inexpensive and the initial layup is not the end of things. I bought my 4th gallon of epoxy today, plus two more containers of the 410 filler; $179 more over budget. So with the two additional quarts and a partial quart I had left over from another project, that’s over 3-1/2 gallons so far, and I will probably get close to cracking that 4th gallon tomorrow.
I probably won’t use the full gallon to finish, but a quart of resin and hardener costs almost half of what a gallon costs, so it only makes sense to go with the gallons.
Before running down to Defender to resupply, I just about used up the first container of the 410.
But that's getting ahead of things. To start the day I worked on the doors. I used the small paint scrapper to remove any high drips, drops and beads that formed along the edges (the ones I hadn't wiped off sufficiently during application). Then amine wash. This time I spaced the doors up off of the bench using 4x4 cedar blocks wrapped in stretch wrap, so that any water dripping over the edges would fall away and not soak the rosin paper on the far side. Then, after letting the first door dry thoroughly in front of the fan while working on the second door, I used the long board just a bit, maybe two gentle passes over the whole thing. The doors aren’t flat enough, and I hadn’t applied enough filler to get them flat enough for that, but it was a starting point. Next was 100 grit on the medium block. This helped even out the local drag marks from the squeegee. Then it was the same grit on the felt pad of the palm sander. This deglossed/scuffed all of the general low areas that the block didn’t get into and prepped for the next round of fairing filler, except a few small creases/dips that I sanded by hand with a loose piece of 80 grit.
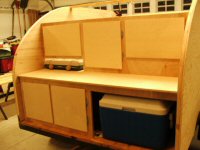
All in all they aren’t bad, and the effort to get them here wasn’t that bad either (it wasn’t as humid today as they had said it might be, but was still quite hot in the loft... I had my cooler with bottled water on ice, so was sure to hydrate frequently). The nuances are lost to the pics, but here’s a look anyway.
So the thing that I am learning is how to apply a thin layer but not so thin (like I did here). I have yet to master the squeegee; my biggest problem seems to be secondary strikes and creating ‘holes’ or creases where the squeegee sets down at the start of a stroke.
I’ll get back to the doors for another round, but was buoyed up enough be the partial success to move on to the roof in earnest. Even though I had done some preliminary fairing at the rear of the roof, I had tried to just fil the weave with no additional filler (except for the laps in the plies that I had tried to fair more evenly). So with Michael’s/Atomic’s mantra and Karl’s advice to add more filler than you think you need (within reason) and then sand back… hopefully in just one round… I started at the back and worked my way up the curb side with two 3-pump batches; this time switching back to the slow hardener, and then another 3-pump batch working across the back to the street side.
Basically if you can still see thru the filler it is probably too thin, so I started to get a feel for it by dragging the initial batch blob around to cover an area, squeegeeing much more lightly, but still working the mass down in places until I could see where I was at, and then back dragging and alternating directions to back fill the areas that were excavated too deeply. There is a happy place in the mix ratio of filler where it is just liquid enough to still spread easily, but is stiff enough that it doesn’t run away; not quite self-leveling.
And that’s where I got before realizing that if I wanted to continue this tomorrow (Sunday) I would need to run out and get more supplies; about 1/2 of the roof done.


