The Poet Creek Express - Foamie Hybrid

Canvas covered foamies (Thrifty Alternatives...)

Moderator: eaglesdare

Re: The Poet Creek Express - Foamie Hybrid

Postby GPW » Fri Sep 02, 2016 6:41 am

Those dang squirrels are so funny , and so smart too ... Whatever we tried , they Always got into the bird food ... :lol:
There’s no place like Foam !
User avatar
GPW
Gold Donating Member
 
Posts: 14912
Images: 546
Joined: Thu Feb 09, 2006 7:58 pm
Location: New Orleans

Re: The Poet Creek Express - Foamie Hybrid

Postby wagondude » Fri Sep 02, 2016 9:27 pm

You need a squirrel launcher. :twisted:

Bill

TnTTT ORIGIONAL 200A LANTERN CLUB
101137
User avatar
wagondude
1000 Club
1000 Club
 
Posts: 1535
Images: 35
Joined: Sun Jan 16, 2011 7:41 pm
Location: Land of the Jayhawks

Re: The Poet Creek Express - Foamie Hybrid

Postby Ned B » Sat Sep 03, 2016 5:21 pm

wagondude wrote:You need a squirrel launcher. :twisted:


Mean, but funny!
User avatar
Ned B
1000 Club
1000 Club
 
Posts: 1036
Joined: Sat Apr 16, 2011 10:25 am
Location: Syracuse NY (ish)
Top

Re: The Poet Creek Express - Foamie Hybrid

Postby KCStudly » Sun Sep 04, 2016 5:23 pm

Re: Squirrel launcher, reminds me of a setup I saw at a B&B in Maine. The owner had a squirrel shield attached to an electric fence rig powered by a 12v wet cell. I’ll use a more passive solution if necessary.

BTW, the new feeder is up and no signs of squirrels yet. I got lucky and was able to feed the new cord thru the top pulley by removing the screen and reaching thru the top window; no ladder needed!

Mom and Bill treated us to a nice belated B-day dinner out at Franks Gourmet Grille in Mystic; thanks again. Not sure if I linked to this before, but mentioned it last night to mom and she didn’t remember seeing it; so here it is again especially for her - TD Rubber Stamp thread.

As mentioned previously, the Saturday before officially starting our vacation the guys got together and built a new trailer frame for Mr. B (…our unofficial world record holding Punkin Chunkin competition ballista, Mista Ballista). Here’s where we got to. The main rails, axle xmbr’s and tongue are 8 inch channel, with intermediate xmbr’s of 6 inch channel set down to receive 2x deck planks, and a pair of 7k lb axles (only one installed for now).
Image

10k lb tongue jack. The small coupler is just temporarily tacked on for now just to move it around the yard; a much more beefy coupler will be added later.
Image


8-lug wheels and huge brake hubs.
Image

The rear frame rail extensions and bumper will be removable to improve access around the bow line winch when in firing mode. The small K-frame kickers will help stiffen the side rails where the big lifting feet will go, allowing them to be mounted behind the fenders while still allowing the tail end of the regulae (latin for ruler or rod… the long main ladder frame of the ballista that lifts up with the dump frame) to drop down lower than if the xmbr had been further rearward.
Image

At the start of our recent vacation, before going away, we took a ride up to the Ross Hill CG late Sunday morning to see who we might see leftover from that gathering. Unfortunately most had already pulled out, and the rest were packing up to leave, but we did talk to a few friendly folks and got a couple of pics. Most were members of vintage campers and/or Tearjerkers New England.

On the way in near the CG we passed under this narrow one lane stone arch. I assume it was an old trolley way back when they were used for public transportation in this region.
Image

I recognized this TD from the Hall of Fame... or perhaps pics from other gatherings, but didn’t get a chance to speak with the owner(s).
Image

Vintage Scotty, I think (I didn’t take notes, so….)
Image

The owner of this little gem was quite friendly and gave a nice tour. He had a friend help him line the floor in his galley with copper flash panels forming somewhat of a shingled pan. It had a nice patina on it.
Image

There was a Kamp Master woody (not sure if it was vintage or a recreation), another smaller Scotty, a couple of FG bubbles, and at least one or two other vintage TT's. The CG was in a great location situated on the Quinebaug River with plenty of shade. Most of the sites looked like they had elec. and they had located the gathering down in the first two rows from shore. There wasn't really much separation between sites, but with a friendly group that didn't seem to matter. I guess they had some excitement during the thunderstorm the evening before when lightning struck right near the fire ring taking out at least one extension cord.

Then we went away to upstate NY for a few days (trip report) - Northville and Sleepy Hollow NY.

Yesterday, after taking most of August off from the build, I got back into the loft in some relatively cool dry weather, and went back after the roof fairing task.

It felt good to get back at it, and after a couple of hours block sanding, vacuuming sanding dust, running the palm sander over it all, and vacuuming again, everything seems to be coming together. Yeah, I still have some low areas and small divots, but overall it is better than ever. (Okay, it doesn't look like it, but when you run your hand over it and disregard the patchwork look, it's pretty good.)
Image
Image
Image
Image

I know I said I wasn’t going to post a bunch more bodywork pics… oh well, progress is progress.
KC
My Build: The Poet Creek Express Hybrid Foamie

Poet Creek Or Bust
Engineering the TLAR way - "That Looks About Right"
TnTTT ORIGINAL 200A LANTERN CLUB = "The 200A Gang"
Green Lantern Corpsmen
User avatar
KCStudly
Donating Member
 
Posts: 9616
Images: 8169
Joined: Mon Feb 06, 2012 10:18 pm
Location: Southeastern CT, USA
Top

Re: The Poet Creek Express - Foamie Hybrid

Postby GPW » Wed Sep 07, 2016 6:55 am

Once you get a solid color coat of paint on there it’ll be easier to see what’s going on ....
There’s no place like Foam !
User avatar
GPW
Gold Donating Member
 
Posts: 14912
Images: 546
Joined: Thu Feb 09, 2006 7:58 pm
Location: New Orleans
Top

Re: The Poet Creek Express - Foamie Hybrid

Postby KCStudly » Wed Sep 07, 2016 7:54 am

Yeah, up until now there really wasn't a need for a guide coat because the "flaws" were still pretty substantial. Now they are much more subtle.

I think I need to progress the rest of it (walls, front and hatch) to this point, be it with filler or HBP, and then move on to the next stage.

Side wall ripple sanding next. Once I see how that repair goes, I will decide if I want to fix a minor soft spot on the curb side roof near the hinge, about 2 inch in diameter (you can see it in the above pic). There are a couple other smaller less noticeable, less soft spots, but those don't bother me as much. The dilemma is whether it is worth going so far backwards to fix something that may not be such a big deal ever. Hard to predict the future.
KC
My Build: The Poet Creek Express Hybrid Foamie

Poet Creek Or Bust
Engineering the TLAR way - "That Looks About Right"
TnTTT ORIGINAL 200A LANTERN CLUB = "The 200A Gang"
Green Lantern Corpsmen
User avatar
KCStudly
Donating Member
 
Posts: 9616
Images: 8169
Joined: Mon Feb 06, 2012 10:18 pm
Location: Southeastern CT, USA
Top

Re: The Poet Creek Express - Foamie Hybrid

Postby KCStudly » Thu Sep 15, 2016 9:30 pm

“Go into the arts. I’m not kidding. The arts are not a way to make a living. They are a very human way of making life more bearable. Practicing an art, no matter how well or badly, is a way to make your soul grow, for heaven’s sake. Sing in the shower. Dance to the radio. Tell stories. (Build a camper and blog about it. - KC) Tell Stories. Write a poem to a friend, even a lousy poem. Do it as well as you possibly can. You will get an enormous reward. You will have created something." - Kurt Vonnegut

He understood.

So this is a big reason why I am building this camper. Not so much to get it done. Not so much to be thrifty or just make something that will function for a time, but for the art of creating something to challenge my ability; to exercise my creative abilities, however challenging that may be.

I have been struggling with motivation lately, but feel that I have turned a corner as the weather has become milder.

Last night I started by sanding on the street side rear wall panel. At the top of the galley wall just ahead of the side clearance light pocket, there was an area about 6 or 8 inches along with some heavy epoxy saturation in the cloth and some runs. I was able to sand that down w/o ripping into the cloth.

For the ripples straight down the middle of this broader section of wall, I sanded them down at least to half height w/o causing any of them to go soft, so they must have been heavily soaked, too, not bubbles or blisters. I figured that was close enough to fair for the weave/fairing filler to cover up, so I didn’t risk scuffing them down any further (we are only talking about variations that are maybe 2 or 3 equivalent layers of 6oz cloth here, by my estimation, so not epic, but still, we are trying to do well).

Mea culpa, there was a soft spot, slightly less than palm sized that seemed like it may have been poorly adhered to the foam (maybe a spackle patch?), or perhaps a bubble between the plies of cloth. Monday I drilled a small hole at the top and bottom of the area, mixed up a single pump batch and injected it in. Unfortunately (?) it did not seem to take any epoxy, as if it wasn’t soaking in and all of it was just oozing back out. Again, when taping over the holes to try and keep the epoxy in, the tape just seemed to float in the wet epoxy and didn’t really seem to stick; but maybe still helped.

So last night (Wednesday) when I checked that, despite not seeming to take the epoxy, the suspect area now seemed to be solid and didn’t flex like it did before, so I’m calling that a success. Just have to fill the drill hole divots as they left a pocket in the foam.

In going over the whole wall with the palm and touching any high spots with the small block I found another sub palm sized area closer to the door header that seemed to also be a “bubble”. This time I drilled holes at the top, bottom and both “shoulders”, angling the drill downwards to create a small reservoir where the injected epoxy could sit and soak in small batches if needed (rather than ooze right back out). Another one pump batch injected and this time it took it just fine and started oozing out the shoulders in short order. Of course I have been out of it for a while and was ill prepared having no tape strips ready to seal up the holes. Try peeling an inch of tape off of the roll when you are wearing rubber gloves that are slightly soiled with wet epoxy! Anyway, I managed to peel up a couple of pieces of tape, even though they didn’t want to stick to the oozing epoxy; but with the relative success on the first bubble section I was fairly confident that it would still firm things up nicely.

From there I started in mixing 3 pump batches adding fairing filler to fill the drill hole sockets from the first bubble fix, to start filling the weave, and to hopefully fair out the remaining ripples (albeit now sanded down).

I used the big Bondo spreader for most of it and the faux credit card for around the galley edges. While I was spreading near the “bustle” at the back of the wall I felt another palm sized bubble area collapse and spring back under the pressure of the squeegee. Drat, somehow I had missed that during my previous inspections, so I had to wipe away the wet filler from that area so that I can do the drill and squirt fix next time (I didn’t want to switch gears right at the moment and kept going with the filler).

It felt good to get some real work done.

Here is a long shot showing progress, just to prove it really happened.
Image

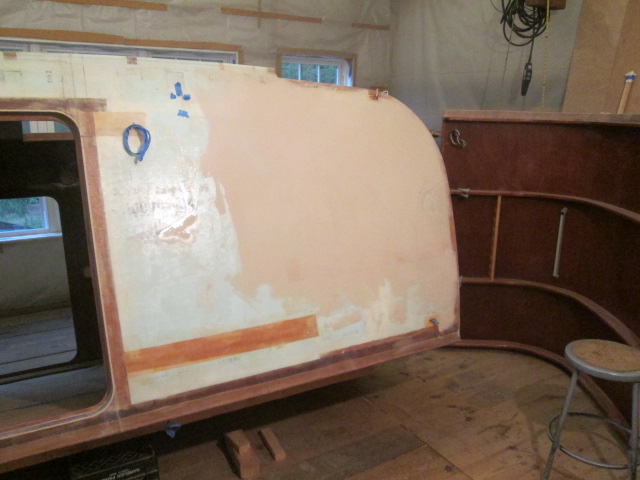
If you look closely at this shot you can see a couple of vertical waves (darker shadow lines) that kind of show where I built up to cover the sanded ripples. Hopefully I added enough to sand back to appear flat. When I first looked at this pic on the camera the lighter horizontal lines stood out and I was surprised that I could see the “scoreboard” lines telegraphing thru like that after all of the spackle and sanding prep; then I realized that it was just the reflection of the hatch ribs in the gloss of the wet epoxy. Funny thing was you could barely see it in person, but in the pic it stands out quite a bit.
Image

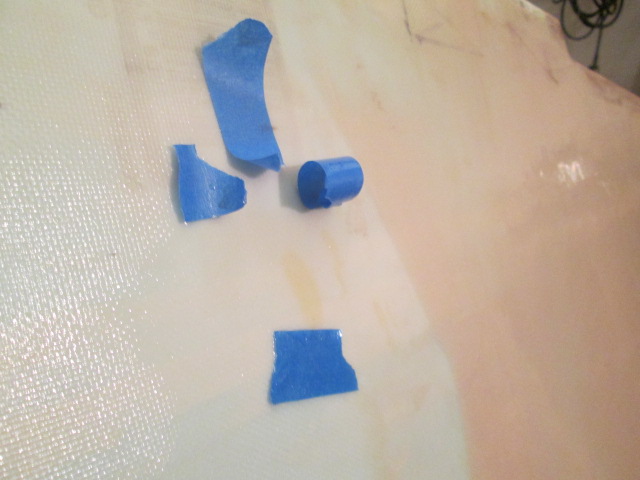
The white looking spot at the very rear dead center of the previous pic and shown here in close up is the blister area that I felt spring back under the spreader, which I subsequently wiped back off. This is a good example of why it doesn’t make sense to try and show pictures of bodywork; it looks like a blob and you can’t really see what’s going on. Can’t really see it in person much better; it is more of a ‘feel’ kind of thing.
Image

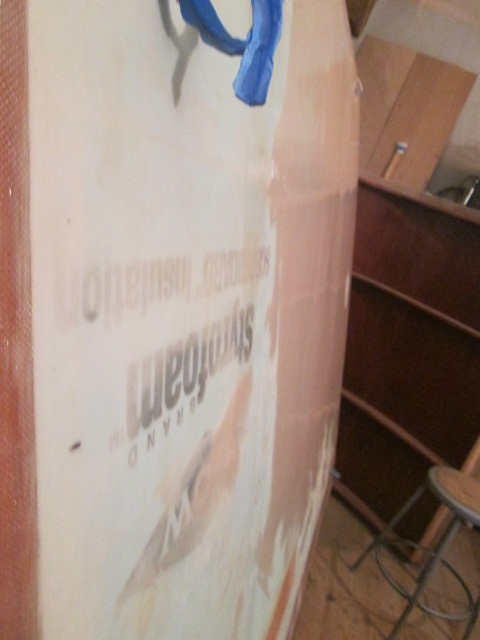
Here’s that injected area closer to the door header. This was still oozing wet so I didn’t want to try and fair over it until it has cured; and it was about time to head home, so was a good place to stop for the night.
Image

Tonight some of the guys from work and I went to a lobster/clam bake dinner put on by one of our local industrial suppliers (FW Webb), so no work on the camper. Boiled lobster with a couple of steamers, potatoes, corn on the cob and drawn butter. They had canned beer and soda on ice and about 100 bottles of Yellow Tail wine in different varieties. Can’t remember the last time I picked thru a lobster in the rough like that, but it was good! For land lubbers they had chicken breast and steaks, all you could eat. Pretty good deal.
KC
My Build: The Poet Creek Express Hybrid Foamie

Poet Creek Or Bust
Engineering the TLAR way - "That Looks About Right"
TnTTT ORIGINAL 200A LANTERN CLUB = "The 200A Gang"
Green Lantern Corpsmen
User avatar
KCStudly
Donating Member
 
Posts: 9616
Images: 8169
Joined: Mon Feb 06, 2012 10:18 pm
Location: Southeastern CT, USA
Top

Re: The Poet Creek Express - Foamie Hybrid

Postby bonnie » Fri Sep 16, 2016 3:31 pm

That filler makes all the difference! I really enjoy watching you and your craftsmanship. :)
Remember, the turtle won. :)
User avatar
bonnie
Donating Member
 
Posts: 1390
Images: 107
Joined: Sun Jul 24, 2011 4:14 pm
Location: Roxana, IL
Top

Re: The Poet Creek Express - Foamie Hybrid

Postby KCStudly » Fri Sep 16, 2016 10:36 pm

Thank you Bonnie, your kind words of support are much appreciated!

Although my B-day was last month and we already celebrated w/ Karl and Chris, they had forgotten to bring the card they got for me when we went out, so I just got it this evening. Cool vintage camper illustration, shown sitting on the quilt mom made for me previously.
Image

I made more progress today with the weave filler on the street side.
Image

Question: when using a squeegee or Bondo spreader to spread filler, do you drag with the flat sharp edge of the squeegee down or with the beveled side down? I have tried it both ways and it seems to work better with the sharp edge down for control, but maybe easier to load a little more material on using the beveled edge.

Before doing that I injected neat epoxy into that blister at the back of the galley wall. I didn’t want to create a big solid lump only to have to sand the weave off to make it flat again, so I wrapped a small scrap of plywood in stretch wrap and clamped it on after covering the drill holes with painters tape. I didn’t have a clamp with enough reach, so I set up this little trammel bar with an equally thick spacer taped on (as a second reaction point to keep the clamping force even). Of course I set this all up and had it ready to go before mixing the epoxy. It seemed to go well.
Image

I spent a little more time tonight working up to the edge of the galley, which helped me develop the technique to get a nice edge along the door opening on the first go. I had to tape the porch light wires to one side, and will flop that in the opposite direction before moving past it up onto the door header. I’ll also come back with a few smaller batches to work the lower edge down to the floor.

I like working with the 3-pump batches and about 6 heaping sundae spoon scoopfuls of the 410. The consistency of the mix is about the same as marshmallow fluff in the cup. I could probably do a slightly larger batch size, but getting it from the cup to the nearly vertical wall, when it is still bulky and not spread out yet it will still run down the wall. No need to rush, though; plenty of time to scrape the cup out and switch to the spreader; then once you strike the bulk of it down it stops running and stays put. Basically I just hold the cup up close to the top of the wall, scrape the bulk out, and while that runs down in a large trickle I scoop the rest of the cup out and ladle it on using the tongue depressor like stirring stick. That leaves a long thick streak running most of the way down plus a few smeared on dabs.

From there I have been using the spreader, first lifting the bulky streak back to the top, getting a god sized wad onto the spreader, and then moving that around in long strokes to spread it over a larger area and start to thin it down.

At the edges I found that if I drag toward the edge and then flatten the spreader angle down as I get closer, and run right past the edge, it tends to leave a nice even finish right up to the edge with very little left on the spreader. Whereas, if I kept the angle consistently higher it would scrape too much off close to the edge and drag a worm or large bead over the edge, making more of a mess past it.

Closer to the bottom edge I think I will need to do smaller batches and get it spread a little quicker since there will be less margin for letting it roll down out of the cup.

Tomorrow is another build day on the ballista, but I’m running low on the 410 filler so if I want to continue on Sunday I need to make a run to Defender and stock up tomorrow when they are open.
KC
My Build: The Poet Creek Express Hybrid Foamie

Poet Creek Or Bust
Engineering the TLAR way - "That Looks About Right"
TnTTT ORIGINAL 200A LANTERN CLUB = "The 200A Gang"
Green Lantern Corpsmen
User avatar
KCStudly
Donating Member
 
Posts: 9616
Images: 8169
Joined: Mon Feb 06, 2012 10:18 pm
Location: Southeastern CT, USA
Top

Re: The Poet Creek Express - Foamie Hybrid

Postby OP827 » Fri Sep 16, 2016 11:25 pm

Looking great KC!

"Question: when using a squeegee or Bondo spreader to spread filler, do you drag with the flat sharp edge of the squeegee down or with the beveled side down? I have tried it both ways and it seems to work better with the sharp edge down for control, but maybe easier to load a little more material on using the beveled edge."
My answer: I do not use plastic or bondo spreader for filling the weave. My weapon of choice with epoxy filler is Marshalltown 6" wide stainless steel taping knife, it does the job quicker and nicer for me.
User avatar
OP827
Donating Member
 
Posts: 1561
Images: 405
Joined: Fri Apr 25, 2014 7:27 pm
Location: Bruce County Ontario
Top

Re: The Poet Creek Express - Foamie Hybrid

Postby KCStudly » Sat Sep 24, 2016 8:36 pm

Sorry for such a delay in replying, we've been full on working on the new ballista trailer. We made and mounted the fenders today, as well as getting the cleats welded in that will support the wood decking.

Thanks for the nice comment and suggestion. I don't have a metal bladed spreader like that but may have a stiffer plastic one to try. My skills may have improved enough now that I can make it work better. The trouble I had on the spackle was digging in with the corners of the spreader on initial contact and at lift off. The flexible spreader is a little more forgiving that way... or maybe that is just because it isn't as wide.

We are making good progress on the ballista, but by my estimation, it will take Karl and me (with a little help from other team members) the better part of the time we have left to get 'er done. We leave for NH on Friday, 10/14, just 3 wks. :shock:

Weather forecast for tonight is down into the mid to low 40's. I hauled epoxy out of the loft for the first time this season. :NC
KC
My Build: The Poet Creek Express Hybrid Foamie

Poet Creek Or Bust
Engineering the TLAR way - "That Looks About Right"
TnTTT ORIGINAL 200A LANTERN CLUB = "The 200A Gang"
Green Lantern Corpsmen
User avatar
KCStudly
Donating Member
 
Posts: 9616
Images: 8169
Joined: Mon Feb 06, 2012 10:18 pm
Location: Southeastern CT, USA
Top

Re: The Poet Creek Express - Foamie Hybrid

Postby Philip » Sat Sep 24, 2016 10:30 pm

I use a mud spreader on the beveled side if I am trying to fill an area. For filling a weave I would use the sharp side. You can take most of the excess off.
Philip
Silver Donating Member
 
Posts: 498
Images: 323
Joined: Thu Jun 09, 2016 3:57 am
Location: Peru,Indiana
Top

Re: The Poet Creek Express - Foamie Hybrid

Postby KCStudly » Wed Oct 05, 2016 7:16 am

Thanks, Philip.

Still working on the ballista trailer. We have it painted and mostly put back together with lots of improvements. I started the wiring in earnest on Monday and will continue with same this evening.

Have been enjoying Felixx's New Zealand Adventures thread and appreciate him giving me the opportunity to share some of my NZ memories.
KC
My Build: The Poet Creek Express Hybrid Foamie

Poet Creek Or Bust
Engineering the TLAR way - "That Looks About Right"
TnTTT ORIGINAL 200A LANTERN CLUB = "The 200A Gang"
Green Lantern Corpsmen
User avatar
KCStudly
Donating Member
 
Posts: 9616
Images: 8169
Joined: Mon Feb 06, 2012 10:18 pm
Location: Southeastern CT, USA
Top

Re: The Poet Creek Express - Foamie Hybrid

Postby KCStudly » Fri Oct 07, 2016 8:17 am

In case anyone is interested, here is the latest on the ballista.
KC
My Build: The Poet Creek Express Hybrid Foamie

Poet Creek Or Bust
Engineering the TLAR way - "That Looks About Right"
TnTTT ORIGINAL 200A LANTERN CLUB = "The 200A Gang"
Green Lantern Corpsmen
User avatar
KCStudly
Donating Member
 
Posts: 9616
Images: 8169
Joined: Mon Feb 06, 2012 10:18 pm
Location: Southeastern CT, USA
Top

Re: The Poet Creek Express - Foamie Hybrid

Postby Atomic77 » Fri Oct 07, 2016 9:53 am

Just getting caught up on your build... lot's of progress since I last looked! Great work as always KC...
I also looked in on your Ballista blog. Looks like you guys are gearing up of some punkinchunkin good times! Good luck for the win!
Michael

"The Strength is in the Sum of the Parts..."

The Astroliner

Follow The Astroliner Blog Here!

Check out our YouTube video
User avatar
Atomic77
1000 Club
1000 Club
 
Posts: 1463
Images: 309
Joined: Tue Oct 08, 2013 5:29 pm
Location: Fort Wayne Indiana
Top

PreviousNext

Return to Foamies

Who is online

Users browsing this forum: No registered users and 9 guests