I didn’t take very many pics today, so I will try to narrate as best that I can.
Started early than lately, but still didn’t get to the shop until noon or so. Had a quick chat with Karl and then got right to it. Weather was nice, cool and dry.
Started by unscrewing the temporary dam from the back edge of the fridge lid, and prized it away using the straight edged steak knife.
Felt ambitious enough to hand sand all of the high stuff down using the small hand block with 60 grit.
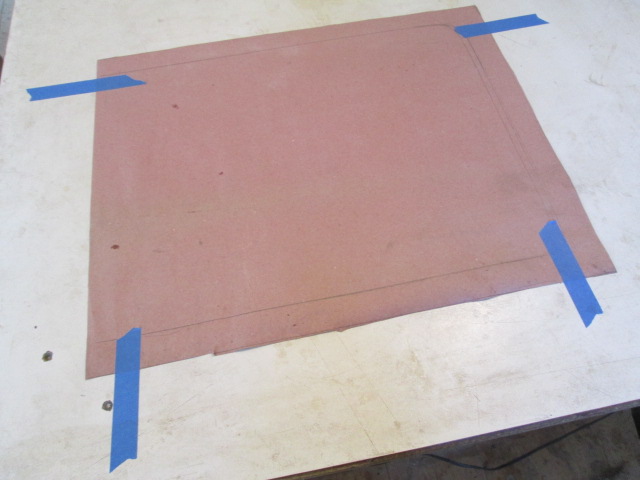
Next I traced around the lid onto some of the rosin paper to make a pattern. I figured that would enable me to get the glass cloth prepped while I was waiting for the 3-min epoxy filler for the screw holes to cure.
Then I mixed up a small batch (about 1-1/4 inch long squirts) of 3-min epoxy out of tubes, and thickened it slightly with the 410 West fairing filler.
Used that to fill all of the screw holes from the temporary flock dams… except, apparently one, that I missed.
While that was curing I pulled out my scraps of 6oz glass weave cut offs and found a piece large enough to cover the top and sides of the lid. There were a couple of triangular cut offs that were large enough to get a second ply, but I would have to be careful to not end up with a bulge at the diagonal seam.
Once the 3-min had cured I sanded that back and found that I had either missed a screw hole (most likely) or had not filled it well enough and it popped out when sanding (didn’t seem likely based on the lack of epoxy in the general area).
I shaved down a bamboo skewer using the utility knife to fit tight into the screw hole, and used the 1/4 wide chisel to trim the skewer almost flush. Then a little light sanding with the small hard block. I think that method was even easier than the 3-min epoxy!
I found a cardboard box the right size to hold the fridge lid up off of the bench so that I could drape the cloth over.
Then I taped the rosin paper pattern onto the bench.
Next I taped some of the 6 mil plastic sheet over that (no pic), and traced out the top edge of the lid on that using black sharpie to help me get the glass lined up on the lid during the transfer (no pic).
The glass cloth I had prepped ran right to the edge of the plastic, so I figured I would just wet the cloth out a bit farther than the rosin paper and not run off the edge of the plastic; it was a bit tighter than I have done in the past, but I was not interested in wasting material for perfection on this crude of a fridge.
Calculated the area of cloth vs. expected qty of resin (about 19 x 22 inches, by 2 layers of 6 oz cloth; times about 1.5 rich; 1x rich for the cloth and 1/2x for wetting out the wood and foam, divide by 36 twice for square yards, times 12oz for the weight of two plies and I got about a 5.8oz batch size). Six pumps each of resin and slow hardener is about 5.4 oz, so that is what I shot for.
I had arranged the cloth with the single full piece ply down on the poly so that it would be the homogeneous top ply when applied. Taped it down to the plastic, then placed the two triangular pieces down on top of that and taped them down. At first I forgot, but then remembered to fold the ends of the tape back on themselves to make it easier to pull them up while wearing disposable rubber gloves, while not disturbing the strands of glass. The tape helps keep the glass cloth from pulling out of skew while you are squeegeeing the initial epoxy down, but once most of it has been saturated it gets stable enough to pull the tape and wet out the rest of the corners where the tape had been. I was happy that it worked very well and the diagonal seam stayed nice and flat without pulling apart (no pic).
Next I mixed the epoxy, dumped it onto the glass and used a faux credit card to squeegee it into the cloth. Patience works here. Let it soak in. I ended up having to scrape some of the excess up back into the cup, but that would be put forward into wetting out the panel before transferring the glass. I used a cheap chip brush to paint the excess epoxy onto the panel, but didn’t quite have enough to get all the way around all of the edges; so I mixed up another one pump batch right in the same cup (which is ill advised, but I felt comfortable doing so in the cool weather using the ‘slow’). Turned out that this was more than enough.
From there I lifted the plastic “poor mans pre-preg” (glass laid up on plastic) off of the bench and positioned it onto the lid using the sharpie lines to help line it up (no pic). Squeegeed the top flat surface thru the plastic and then peeled the plastic off carefully.
Went back over the top with the squeegee drawing excess epoxy over the edges and sticking the sides down. Trimmed the rear crisp edge close using my swap meet scissors so that the weight of the excess glass would not “pucker” the edge.

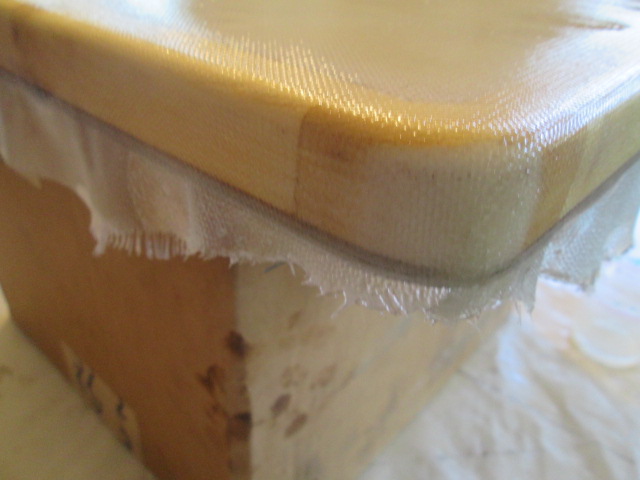
Around the front rounded corners I had to trim the excess glass close to the bottom edge so that it could warp nicely and not lift. Along the long side edges the excess glass helped pull straight down to stay tight and keep the top radius edge from lifting.
I went over it all again pulling any excess epoxy out (so that no strands would float) and used the chip brush (with bristles trimmed short) to poke around all of the edges until I was sure that they were all poked down and would not lift. Poked a few small bubbles off of the surface and cleaned up all of my tools with acetone.
With the little bit of resin I had left (about 3/4 of a squirt) I sucked up some into a syringe and squirted it into the bubble that I had prepped on the street side wall of the cabin. Palpitated the bubble to try and burp all of the air out and left a big puddle over each vent hole to see if it would seep in while a finished cleaning up. There was still a lot of resin floating around there, so I spooned a bit of fairing filler right onto the side (remember that my cabin is still laying on its curb side), stirred it around and squeegeed it around right into the two holes. What was left as excess I dragged onto some of the areas on the side wall that still needed to be faired better.
Here is the lid with the 2 plies applied. Note how the weave is well saturated (clear not white) and yet still clearly visible (not floating wet). That is the correct ‘lean’ application to get the maximum strength with minimum weight. Yeah, it doesn’t really matter for a refrigerator lid, but every opportunity to refine our skill is an opportunity to do better next time, so we strive to do so. (I have been watching Alec Steele’s blacksmithing videos on youtube and he inspires a very positive attitude about trial and error to learn to be better).
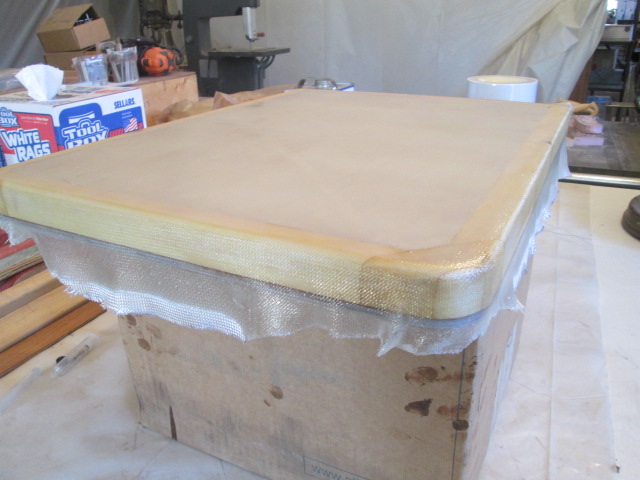
The front rounded corner with the filled epoxy patch (router bite) didn’t seem to lay down and saturate as easily, but I think it was just the fact that the patch was white in color and it was harder to tell that it had wet out nicely.
I was a little concerned because it had been a long time since I had laid up any glass, but I was thrilled at how well this seemed to go, with a nice lean look and no apparent lifting, fish eyes, or bubbles.
Next, after the cure, I will trim the bottom edge and glass the under side. Then I will decide if I need to add a thin registration profile (bump in) to the underside to help keep the lid aligned on the fridge. Might have to wait and do the hinges first to see how it behaves with just a flat bottom.
Still not sure this is worth all of the effort vs. the $150 cost of a replacement lid, but it is an experience.
Peace out.


 I have learned to look for signs of nervousness and/or frustration in my opponent. It boosts my confidence level and calms me down to know they are just as nervous as I am. I try all the time to help settle my teammates down when they are showing anger or frustration. Sometimes we can be our own worst enemy, making something happen in a negative way because we are being negative. Try to be positively confident, and don't let your opponent catch any whiff of nerves or frustration; it can only hurt you and help them.


 washed down with pure rain water