Page 30 of 51

Re: #1

PostPosted: Mon Aug 31, 2015 7:30 am
by KCStudly
That is probably what happened with my license plate area. :NC

Re: #1

PostPosted: Mon Aug 31, 2015 7:48 am
by GPW
KC, Try putting it on dry into the wet glue ... as if you were gluing on paper ...
If it was mine , I’d use some thin ( 2 oz.) fiberglass cloth and T2 for the license plate niche .... much easier to mould to shape and it’s not a high stress area anyway , free from the sock effect of the overall covering ... We found fiberglass and canvas play nicely together when used with T2 as the “resin” , which in reality it’s just a water based aliphatic “resin” ... same “glue” , different solvent ... :thinking:

Re: #1

PostPosted: Sat Sep 19, 2015 10:35 pm
by ghcoe
Another week off, hope to get some foamie work done.... :thumbsup:

Re: #1

PostPosted: Sun Sep 20, 2015 11:01 am
by Shar
Looking good, GH! Charge ahead...

Re: #1

PostPosted: Fri Sep 25, 2015 5:12 pm
by ghcoe
Well I was hoping to get started on the foamie earlier this week than I did. Well at least I finally got to it.

So in canvasing the other side of the trailer earlier I decided to improve on the technique. It is just me working so I needed a easy way to apply canvas solo. Last time I wound up using a 2"x4"x8' and a 1"x2"x8' and though it worked really well the 8' lengths were just a bit short and I did have to work with the ends a bit.

DSCF3697.JPG
Getting ready
DSCF3697.JPG (155.29 KiB) Viewed 7143 times


Inter the new technique. I purchased a 2"x4"x10' and a piece of 1 1/4" PVC pipe in a 10' length. I placed the 2"x4"x10' on top of the trailer along the side to be canvased.

DSCF3698.JPG
10' 2"x4" in place
DSCF3698.JPG (157.56 KiB) Viewed 7143 times


Then I draped the canvas over the 2"x4"x10' and marked 4" from the bottom for alignment marks.

DSCF3699.JPG
Alignment marks
Alignment marks
DSCF3699.JPG (158.65 KiB) Viewed 7143 times

Re: #1

PostPosted: Fri Sep 25, 2015 5:21 pm
by ghcoe
Now I aligned the alignment marks to the bottom of the trailer. I just played with the canvas until I got all the alignment marks even along the bottom and the canvas nicely laying down the side.

DSCF3700.JPG
Alignment mark lined up
DSCF3700.JPG (155.49 KiB) Viewed 7151 times


I used tacks to hold the canvas to the 2"x4"x10' once I got the alignment marks aligned. I tacked the ends first pulling just slightly so that the canvas was tight, but not stretched.

DSCF3705.JPG
Tacks
DSCF3705.JPG (156.03 KiB) Viewed 7151 times


Then I used masking tape to tape the canvas to the 1 1/4"x10' PVC pipe. Again starting at the ends and pulling slightly.

DSCF3706.JPG
1 1/4" x 10' PVC pipe
DSCF3706.JPG (157.22 KiB) Viewed 7151 times

Re: #1

PostPosted: Fri Sep 25, 2015 5:29 pm
by ghcoe
So now I just rolled up the canvas to the top and placed it on top of the trailer.

DSCF3707.JPG
Canvas rolled up and ready for deployment
DSCF3707.JPG (154.38 KiB) Viewed 7148 times


I used clamps and 1/4" rope to support and lower the canvas as needed. I tied to the 2"x4"x10' and then went around the PVC and back up to the camp, which was a anchor point for the rope.

DSCF3711.JPG
Clamps and rope used for deployment
DSCF3711.JPG (170.14 KiB) Viewed 7148 times


I then got my items ready and in easy reach.

DSCF3708.JPG
Needed items for deployment
DSCF3708.JPG (146.62 KiB) Viewed 7148 times

Re: #1

PostPosted: Fri Sep 25, 2015 5:47 pm
by ghcoe
I will go over the technique again here so it flows well.

I find that thinning the TBII 50/50 with water works really good for this technique. It allows the glue to get into the canvas and it dries slower, which in my case is good since I am working alone and it is a bit slow going. I find that by time I go through a complete cycle that the glue is getting tacky. When it is tacky it seems to grip and hold better once the two glued surfaces come together.

To get started I applied glue to the canvas as it was sitting on top of the trailer and then glue to the top portion on the side of the trailer. I am working with a 4" brush and I try to apply the glue two brush widths wide at one time. This applies enough glue to the side of the trailer to allow for how much glue I apply to the canvas. I also apply to the canvas first and then to the side of the trailer. This cuts down on glue running down the side and the glue getting too tacky. Then I just rolled the canvas of the top off the trailer. The rope should hold it now.

Now it is glue the canvas as far around the roll as I can.
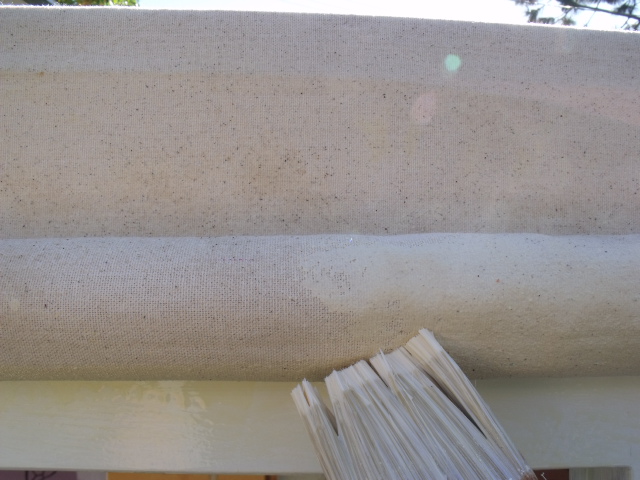
DSCF3709.JPG
Painting the canvas
DSCF3709.JPG (155.36 KiB) Viewed 7147 times


Once the canvas is glued it is time to apply glue to the wall.

DSCF3710.JPG
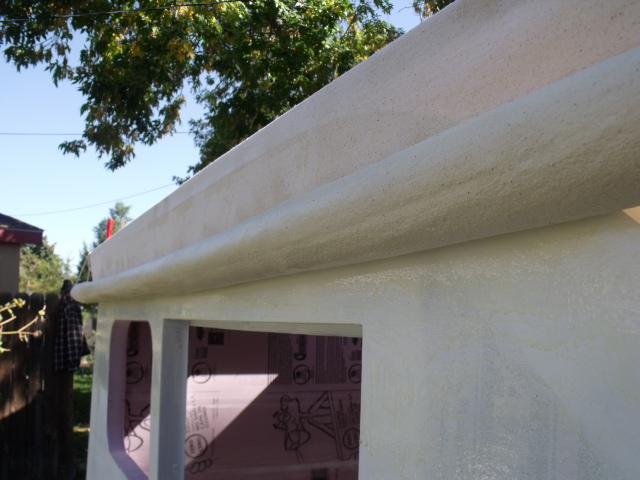
Wall and canvas painted
DSCF3710.JPG (152.61 KiB) Viewed 7147 times


I make sure that the canvas weave is filled with glue as pictured.
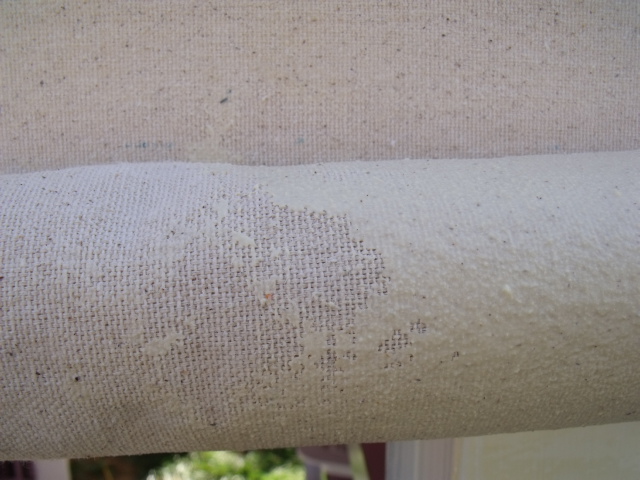
DSCF3715.JPG
Canvas saturated
DSCF3715.JPG (157.79 KiB) Viewed 7147 times

Re: #1

PostPosted: Fri Sep 25, 2015 5:56 pm
by ghcoe
Once I roll out the glued canvas onto the glued wall I then spray the canvas with water. This will help the canvas relax so you can roll the creases out.

DSCF3714.JPG
Spraying water
DSCF3714.JPG (156.92 KiB) Viewed 7147 times


Then I use a small paint roller to roll the canvas down. I start in the middle and roll in a downward 45 degree direction. The idea is to push canvas down and towards the edges. Then I roll from middle to ends and from top to bottom. Sometimes you can actually see the roller pushing bubbles and the canvas moving out as you approach the ends, especially once you get near the bottom.

DSCF3712.JPG
Rolling the canvas
DSCF3712.JPG (155.97 KiB) Viewed 7147 times


Then it is repeat the processes until I get to the bottom. It took me 2 1/2 hours from start to finish. So far I have only used a half gallon of TBII.

A shot of the process near done.

DSCF3717.JPG
Nearly done
DSCF3717.JPG (153.15 KiB) Viewed 7147 times

Re: #1

PostPosted: Fri Sep 25, 2015 6:02 pm
by ghcoe
This side came out even better than my first attempt.

DSCF3720.JPG
Finished
DSCF3720.JPG (153.65 KiB) Viewed 7146 times


DSCF3726.JPG
Finished #2
DSCF3726.JPG (163.39 KiB) Viewed 7146 times

Re: #1

PostPosted: Fri Sep 25, 2015 6:36 pm
by OP827
It is Perfect, George! :thumbsup: I like the roll down tube and rope system idea. It must made the work so much more controllable.

Re: #1

PostPosted: Fri Sep 25, 2015 6:56 pm
by ghcoe
OP827 wrote:It is Perfect, George! :thumbsup: I like the roll down tube and rope system idea. It must made the work so much more controllable.

Yes it worked out quite well. :thumbsup:

Re: #1

PostPosted: Sat Sep 26, 2015 7:19 pm
by ghcoe
Today was prepping the roof for canvas and finishing the edges on the side. Worked on the vent fairing during the day between other tasks. Spackle, sand, paint, spackle, sand, paint.

DSCF3728.JPG
Vent before
DSCF3728.JPG (138.16 KiB) Viewed 7086 times


DSCF3740.JPG
Vent after
DSCF3740.JPG (135.32 KiB) Viewed 7086 times

Re: #1

PostPosted: Sat Sep 26, 2015 7:23 pm
by ghcoe
Most of the day was cutting and gluing the edges down.

DSCF3729.JPG
Before gluing
DSCF3729.JPG (153.98 KiB) Viewed 7086 times


DSCF3739.JPG
After gluing
DSCF3739.JPG (149.94 KiB) Viewed 7086 times


DSCF3731.JPG
Hatch area
DSCF3731.JPG (169.26 KiB) Viewed 7086 times

Re: #1

PostPosted: Sat Sep 26, 2015 7:26 pm
by ghcoe
Door, window...

DSCF3734.JPG
Door
DSCF3734.JPG (171.05 KiB) Viewed 7085 times


DSCF3732.JPG
Window
DSCF3732.JPG (158.64 KiB) Viewed 7085 times