obviously I skipped a few steps in the pictures.
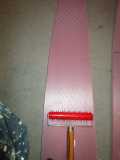
using the wallpaper tool I scored up all the foam panels, going over each one many times to get as much pattern into the foam as possible
then I used drywall screws to tack the sides to the frames, these work fine as long as the thread is coarse and you don't over torque them. I thought I would use tape or tywraps, but screws were fine (just like I use on all my wood projects)
and just like that a new mouse was born!

of course a few issues showed up right away. mouse plans are drawn for 1/4" plywood, not 1" foam. I had to trim 1" of each end of each frame, otherwise the bottom panels would be to narrow (by 2"!) this made my frames the wrong shape , and may have changed the shape of the hull slightly (oh well) a quick touch up with the sure form and everything meets up like it should.
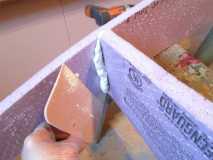
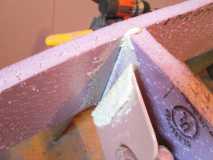
since the sides and frames are cut (sort of) square, but the bottom meets them all at a curve, I profiled the edges as best I could guess. (a really nice part about using a glue that is designed to fill gaps and cracks)
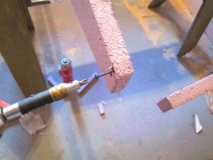
since it seems GG and GS (gorrila glue and great stuff) are about the same stuff, just different means of getting it out of the can, I used an idea from the big thrifty thread. work GS until it is in a marshmallow fluff/mustard consistency.
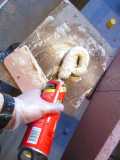
it doesn't take long to get it de-fluffed and ready to glue
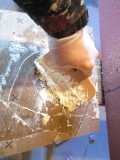
using the screws as alignment dowels I glued all the joints, making sure glue oozed out everywhere so I knew the joint was full of glue
then scraping the excess off to use on the next joint
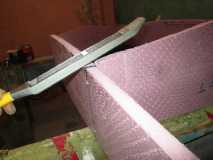
I added some duct tape to each outer corner to keep everything tight, then for the fun of it, I test fit the bottom panel.
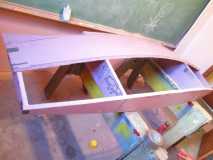
just enough width to make the panel (good thing I cut outside the lines on the bottom!)
I made sure to mark the centerline of each frame, this will ensure the boat is (mostly) straight, as the bottom seam will line up with these marks. (my first V bottom, original design mouse)


 Blame it on old age and bad eyes...


 A little fiberglass tape on the edges (TB2) wouldn’t hurt , and probably help eliminate a lot of “dock rash” ...
