10' Standie Foamie ... on hold

Canvas covered foamies (Thrifty Alternatives...)

Moderator: eaglesdare

Postby swampjeep » Fri Dec 30, 2011 12:43 pm

well, I live about 10 miles from Lake Orion MI (Where Mike has as his location)

it's about 38 here right now, not expecting much higher if any.
User avatar
swampjeep
Teardrop Master
 
Posts: 203
Images: 3
Joined: Mon Apr 04, 2011 7:51 pm
Location: waterford mi

Postby GPW » Fri Dec 30, 2011 1:20 pm

BRRR!!! :snowstorm:
There’s no place like Foam !
User avatar
GPW
Gold Donating Member
 
Posts: 14920
Images: 546
Joined: Thu Feb 09, 2006 7:58 pm
Location: New Orleans

Postby mikeschn » Fri Dec 30, 2011 7:59 pm

Eagle,

Tell me how you did it. Chell tried to hang a piece of canvas this morning, and gave up in frustration, ripping the canvas down and throwing it away.

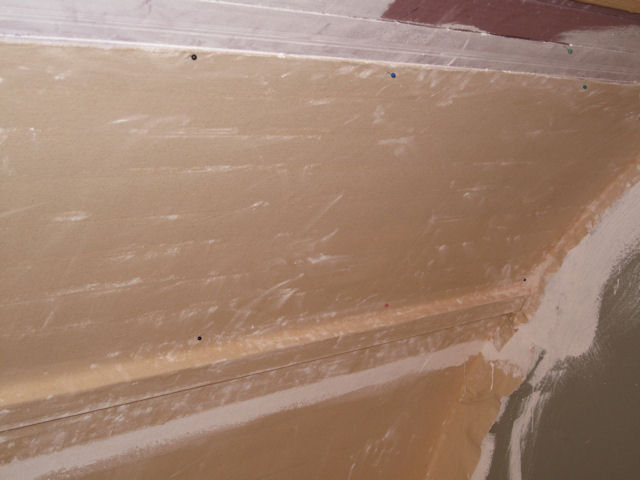
So I tried. I quickly realized that the latex enamel paint wasn't going to hold the canvas up without some help. So I dug up some stick pins. Relief! Using stick pins every 12 inches or so helped me keep the canvas in place until the paint dried sufficiently to hold the canvas in place!!! The stick pins became even more important, the more overhead we were.
Image

Nearing the home stretch. This morning I thought I could crank this out in a few hours or so. The reality. It took all day, many beers, dinner out... But I gotta tell you, once the paint dried, the canvas was definitely stuck to the foam. There was no pulling it down!
Image


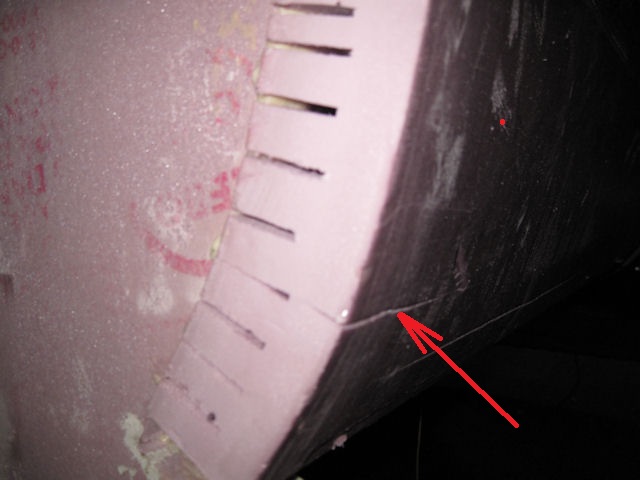
It was a royal pain in the a$$. I really had to get in there and work the paint. Here's the proof!!!
Image

Mike...

P.S. Again I ask you Eagle, how did you do it?

P.P.S. Chell has decided to paint the interior lavender. I'll have some pics for you in the next day or so...
The quality is remembered long after the price is forgotten, so build your teardrop with the best materials...
User avatar
mikeschn
Site Admin
 
Posts: 19202
Images: 475
Joined: Tue Apr 13, 2004 11:01 am
Location: MI
Top

Postby RAYVILLIAN » Fri Dec 30, 2011 8:59 pm

After the first day of my hands looking alot like that I started wearing rubber gloves. :lol: I never tried hanging the cloth on the inside though only the out side of the new WW.

Gary
Where ever we raise the hatch is home.
Darn blank states keep getting further away and we keep traveling slower ain't never gona get this map full.
111961Image
User avatar
RAYVILLIAN
Lifetime member
 
Posts: 1434
Images: 109
Joined: Thu Aug 05, 2004 9:33 pm
Location: Rayville MO
Top

Postby eaglesdare » Fri Dec 30, 2011 9:01 pm

your hands look like mine except mine was covered in tb2. :lol:

i'll tell you my secret. i used a staple gun. that and i had ratkity help. so 4 hands and a staple gun. the staples held it in place. i never did take them out either. still in there.

and that part is the hardest i found. canvasing the inside. a real pita!
Louella
May the foam be with you.
User avatar
eaglesdare
Donating Member
 
Posts: 3168
Images: 13
Joined: Tue Aug 26, 2008 7:06 pm
Top

Postby GPW » Sat Dec 31, 2011 6:34 am

I covered my inside panels before assembly (flat) ... Once put together , all I had to do was add the reinforcing strips ...

Lavender is a Nice color ... light enough it’s very Neutral (neither warm or cold color) , but looks gray in yellow sunlight ( complementary colors) ... I painted the inside of my Art Studio a very light purple (berry frost)... great for painting (neutral) and a restful color to the eyes ... Painted my bedroom the same color ... Great choice as it goes with almost anything ... :thumbsup:
There’s no place like Foam !
User avatar
GPW
Gold Donating Member
 
Posts: 14920
Images: 546
Joined: Thu Feb 09, 2006 7:58 pm
Location: New Orleans
Top

Postby millstone » Sat Dec 31, 2011 8:52 am

this has been a fantastic build.
User avatar
millstone
Silver Donating Member
 
Posts: 74
Images: 0
Joined: Tue Jul 05, 2011 3:53 pm
Location: Georgia
Top

Postby Ratkity » Sat Dec 31, 2011 9:49 am

eaglesdare wrote:your hands look like mine except mine was covered in tb2. :lol:

i'll tell you my secret. i used a staple gun. that and i had ratkity help. so 4 hands and a staple gun. the staples held it in place. i never did take them out either. still in there.

and that part is the hardest i found. canvasing the inside. a real pita!


Hands AND hair covered in TB2 (and clothes and shoes and um, ebrethin!).

Looks good!

Hugs,
Ratkity
Ratkity
Gold Donating Member
 
Posts: 1065
Images: 0
Joined: Wed May 26, 2010 1:01 pm
Top

Postby mikeschn » Sat Dec 31, 2011 9:57 am

Can anyone tell me what color gray is closest to aluminum? RGB values are fine.

I'm thinking about painting the outside of this foamie gray.

Mike...
The quality is remembered long after the price is forgotten, so build your teardrop with the best materials...
User avatar
mikeschn
Site Admin
 
Posts: 19202
Images: 475
Joined: Tue Apr 13, 2004 11:01 am
Location: MI
Top

Postby GPW » Sat Dec 31, 2011 10:04 am

Mike , why not just paint it Old timer style with the Aluminum paint ... a nice enamel wouldn’t (shouldn’t ? test first) cause any problems and would sure look “vintageâ€
There’s no place like Foam !
User avatar
GPW
Gold Donating Member
 
Posts: 14920
Images: 546
Joined: Thu Feb 09, 2006 7:58 pm
Location: New Orleans
Top

Postby Cliffmeister2000 » Sat Dec 31, 2011 10:05 am

Mike, I haven't seen where you posted what cracked? :thinking:
God Bless

Cliff

♥God. ♥People.
1 John 4:9-11

My Teardrop build pictures
User avatar
Cliffmeister2000
Titanium Donating Member
 
Posts: 3622
Images: 157
Joined: Thu Jul 26, 2007 10:18 pm
Location: Phoenix, AZ
Top

Postby mikeschn » Sat Dec 31, 2011 10:15 am

Cliffmeister2000 wrote:Mike, I haven't seen where you posted what cracked? :thinking:


Ah, you're right.

Here's the crack. I've since filled the crack in with gorilla glue, and it's just waiting to be sanded back down.

Mike...

Image
The quality is remembered long after the price is forgotten, so build your teardrop with the best materials...
User avatar
mikeschn
Site Admin
 
Posts: 19202
Images: 475
Joined: Tue Apr 13, 2004 11:01 am
Location: MI
Top

Postby mikeschn » Sat Dec 31, 2011 10:23 am

[quote="GPW"]Mike , why not just paint it Old timer style with the Aluminum paint ... a nice enamel wouldn’t (shouldn’t ? test first) cause any problems and would sure look “vintageâ€
The quality is remembered long after the price is forgotten, so build your teardrop with the best materials...
User avatar
mikeschn
Site Admin
 
Posts: 19202
Images: 475
Joined: Tue Apr 13, 2004 11:01 am
Location: MI
Top

Postby GPW » Sat Dec 31, 2011 10:25 am

Ouch !!! Tension crack ... :o
My 2 cents ... Kerfs could have ben cut a little deeper , the thinner material left to bend , under less stress... Or use some common package sealing tape on the outside surface as "tension bands" , especially on the edges... cracks rarely start from the middle ... once the glue is dry , remove the tape and cover...
Or , try using a heat gun to slightly soften the foam (190F ) surface under tension, and once cooled it will retain that shape naturally, no stress ... :thumbsup:

OK, 3 cents ... :oops:
There’s no place like Foam !
User avatar
GPW
Gold Donating Member
 
Posts: 14920
Images: 546
Joined: Thu Feb 09, 2006 7:58 pm
Location: New Orleans
Top

Postby GPW » Sat Dec 31, 2011 10:30 am

Al paint is a PIA to work with to achieve consistent results .... you have to stir it thoroughly and constantly to keep the particles in suspension .. Best sprayed on , and we used to throw a few marbles in the paint gun , and keep shaking it ... came out very even ...

Just thinking if you use that color and a coat of clear Gloss over it it will look more Al ... Schmaybe’ a nice Red lightning bolt trim stripe ... Old School ;)


The trick I use to determine the correct “valueâ€
There’s no place like Foam !
User avatar
GPW
Gold Donating Member
 
Posts: 14920
Images: 546
Joined: Thu Feb 09, 2006 7:58 pm
Location: New Orleans
Top

PreviousNext

Return to Foamies

Who is online

Users browsing this forum: No registered users and 11 guests