The Poet Creek Express - Foamie Hybrid

Canvas covered foamies (Thrifty Alternatives...)

Moderator: eaglesdare

Re: The Poet Creek Express - Foamie Hybrid

Postby RandyG » Thu Jul 19, 2012 11:15 am

I really appreciate you showing your mistakes, it helps me decide what I would do different to prevent it. As much as you post, have you thought about just setting up a web cam and we can all just watch you work? You could make it into a whole show, and at the end say tune in next time...:)
Randy
Aircraft fabricator, novice carpenter, electrical apprentice, audio engineer dropout.
Build thread - http://www.tnttt.com/viewtopic.php?f=50&t=54126
User avatar
RandyG
500 Club
 
Posts: 695
Images: 115
Joined: Thu May 10, 2012 6:52 pm

Re: The Poet Creek Express - Foamie Hybrid

Postby GPW » Thu Jul 19, 2012 2:14 pm

He could be the “Norm” of trailer making ... "New Yankee Trailer Works” 8)
There’s no place like Foam !
User avatar
GPW
Gold Donating Member
 
Posts: 14912
Images: 546
Joined: Thu Feb 09, 2006 7:58 pm
Location: New Orleans

Re: The Poet Creek Express - Foamie Hybrid

Postby KCStudly » Thu Jul 19, 2012 2:23 pm

Thanks for the complements on the doors, and my telling the story.

I am pretty sure that I am not photogenic enough to make the big time ranks up there with Norm (he's sort of grandfathered in from an earlier era ;) ).

I can't imagine what is involved in doing a webcam set up; old 'puter with a built in lipstick cam? I suppose Karl must have wifi at the house, but I'm not sure what kind of service package they have, probably cabletv piggyback access. Not my cup of tea, no time to learn, not interested... maybe as a retirement gig?
KC
My Build: The Poet Creek Express Hybrid Foamie

Poet Creek Or Bust
Engineering the TLAR way - "That Looks About Right"
TnTTT ORIGINAL 200A LANTERN CLUB = "The 200A Gang"
Green Lantern Corpsmen
User avatar
KCStudly
Donating Member
 
Posts: 9616
Images: 8169
Joined: Mon Feb 06, 2012 10:18 pm
Location: Southeastern CT, USA
Top

Re: The Poet Creek Express - Foamie Hybrid

Postby linuxmanxxx » Thu Jul 19, 2012 2:31 pm

Better would be start a blog you can upload to and use your phone video option to shoot progress at end of day while narrating and simply upload and put a link on here. Free you up from typing so much and easier to explain things.
User avatar
linuxmanxxx
500 Club
 
Posts: 798
Images: 10
Joined: Fri Sep 10, 2010 1:50 am
Location: Abilene TX
Top

Re: The Poet Creek Express - Foamie Hybrid

Postby KCStudly » Thu Jul 19, 2012 2:53 pm

Yeah, but by taking the editing off line, I can spend hours and hours polishing my posts so they make me look like a genius. :D 8) :lol: ;) :roll: :lol: :lol: :lol:

I would feel like a buffoon... and you would probably see a whole lot more of my bald spot (which I prefer to forget that I have). :lol:

I have a very simple phone with just camera (Tracfones are relatively thrifty... but I can't even figure out how to get those pics out of the phone... tried sending as an attachment in an e-mail). The digi-camera takes video, but not very long ones and I also have not had any luck downloading the few that I have tried to take (like one of Ashley Force's first funny car test runs at Maple Grove).

Okay, lets go cut some more door corners! :thumbsup:
KC
My Build: The Poet Creek Express Hybrid Foamie

Poet Creek Or Bust
Engineering the TLAR way - "That Looks About Right"
TnTTT ORIGINAL 200A LANTERN CLUB = "The 200A Gang"
Green Lantern Corpsmen
User avatar
KCStudly
Donating Member
 
Posts: 9616
Images: 8169
Joined: Mon Feb 06, 2012 10:18 pm
Location: Southeastern CT, USA
Top

Re: The Poet Creek Express - Foamie Hybrid

Postby KCStudly » Thu Jul 19, 2012 11:15 pm

This is Rocky's brother "Slacker" on top of Karl's hat as he walked around the shop. I couldn't get a good picture of Slacker's face because the camera kept wanting to be charging the flash rather than taking the picture.
Image

So tonight (Thursday) I used the same template, trace, jig saw, template route, sand methods to trim the corners on Door 1. While doing this there was a repetitive adjusting of the router depth for the first pass riding on the template and the second pass to trim the remainder. I have been frustrated in the past by my router's graduated wheel not staying fixed to the depth adjuster wheel, so in a wild fit of clarity of mind I realized that the solution was as simple as a piece of tape to lock the two together. This allowed me to return to the first critical depth setting where the router bearing still rode on the edge of the template very easily without feeling the need to check each and every time. So simple it was stupid.
Image
(Linky to where I posted this as a Construction Tip & Technique - http://www.tnttt.com/viewtopic.php?f=21&t=51470)

Nothing new about these techniques so I will jump to the end. Here is the first door with all of the inside and outside corners trimmed.
Image

May I offer you a dust pan full of our finest cedar saw dust? Aged to perfection with just a small amount of dregs. :lol:
Image

And a clean bench.
Image

The door fits the wall frames, but not as nicely as I would like.
Image
Image

I can make one corner look pretty decent,
Image
but I am having second thoughts about having decided to build the doors outside of the wall surrounds and getting them to have an even gap all around.

At some point when it makes sense I will put the CNC template on the wall and see if that can help true things up a bit.

The Pile-O-Parts continues to grow, shown here with the door frames resting inside of the door surround/wall frames.
Image
Image

Allow a few minutes to clean up after yourself. It makes for a more enjoyable and safer working environment!

Ta ta for now.
KC
My Build: The Poet Creek Express Hybrid Foamie

Poet Creek Or Bust
Engineering the TLAR way - "That Looks About Right"
TnTTT ORIGINAL 200A LANTERN CLUB = "The 200A Gang"
Green Lantern Corpsmen
User avatar
KCStudly
Donating Member
 
Posts: 9616
Images: 8169
Joined: Mon Feb 06, 2012 10:18 pm
Location: Southeastern CT, USA
Top

Re: The Poet Creek Express - Foamie Hybrid

Postby KCStudly » Mon Jul 23, 2012 4:10 pm

Friday I took a day off building to figure out what the heck we are going to do for our revised vacation plans; Hudson Valley NY region. Found a nice B&B and there is a lot to do in the area; horseback trail riding, vineyards, whiskey distilleries, hiking trails, lots of good restaurants, West Point, The Culinary Institute of America, there's even an old railroad bridge 221 feet over the Hudson that they have converted into a walking trail park. Hop skip and a jump to the city if we decide to spend a day eating pastrami in Manhattan.

Saturday I put in about 8 hrs. I finished cutting all of the radii on the second door.
Image

Then I tackled the door fit to the wall frame. I was nervous about this because when I first checked the fit of the doors to the walls they looked like they were all over the place. So I used Ben's table saw (man that thing is sweet, Steel City brand) to cut some 1/4 inch thick shims from a piece of 2x4 pine. Then I fit the door to the surround with a shim on each side at top and bottom, and another shim at the center of the header. It wasn't exact, but it wasn't near as bad as I had originally thought. I used a few scraps of thin cardboard box stock cut from the empty roll of waxed paper packaging added to the shims here and there. I suppose the cardboard was about 1/32 thick and the most I needed at any one spot was 2 pieces.

That left the bottom of the door to door sill with only about 1/16 inch clearance. Hmm... Oh yeah, I left that tight in the model so that I could bevel the sill and help water run out, rather than sit up against the seal and try to find a way in (I think that was a tip from GPW, thanks).

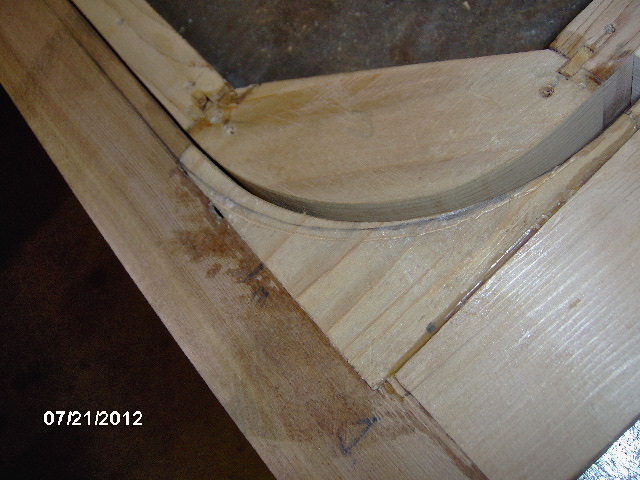
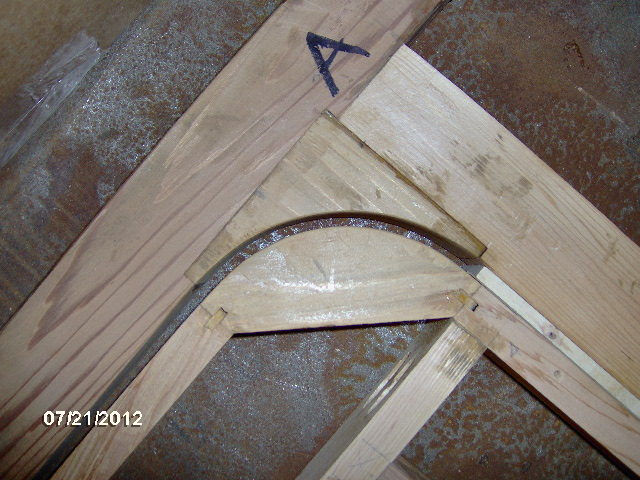
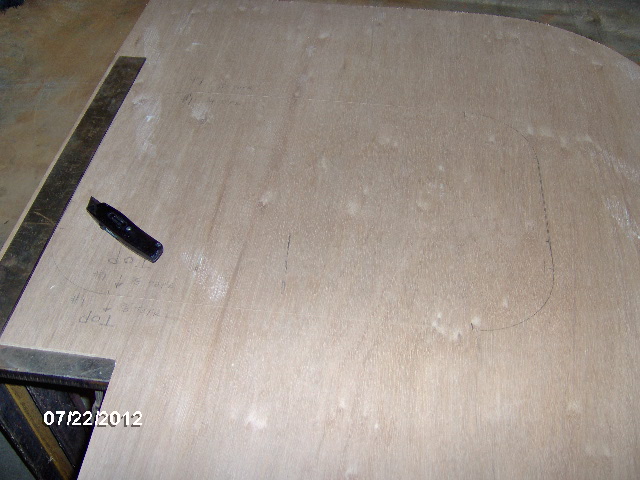
So I took a set of dividers and scored a line around the bottom of the door onto the door sill equal to the offset at the jambs. If you look closely in this pic you can see where I traced the score mark with a pencil.
Image

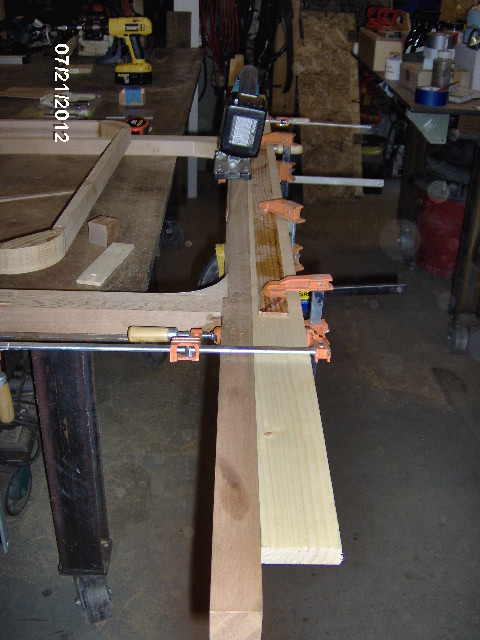
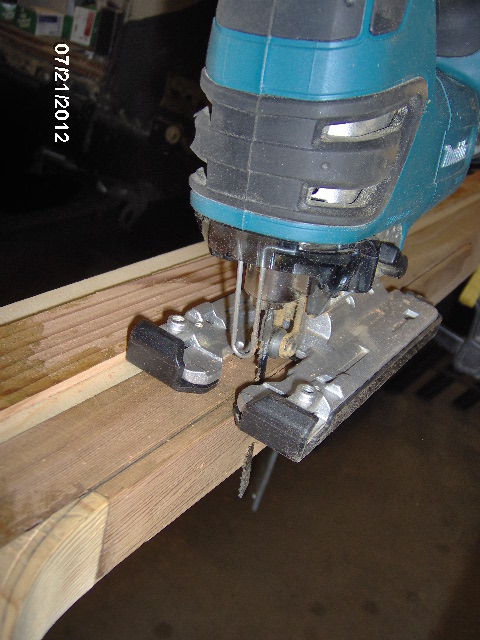
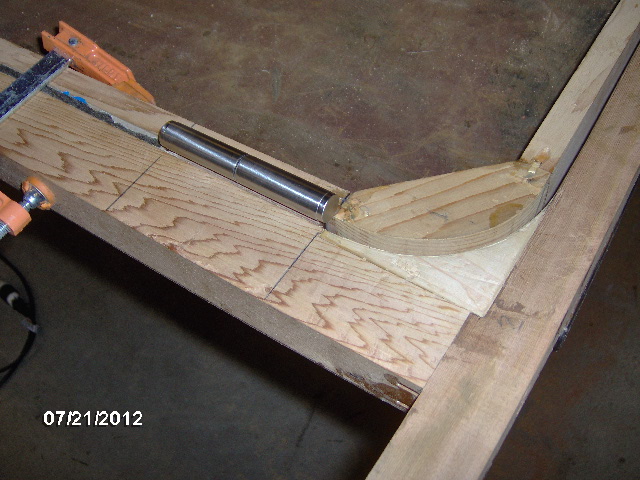
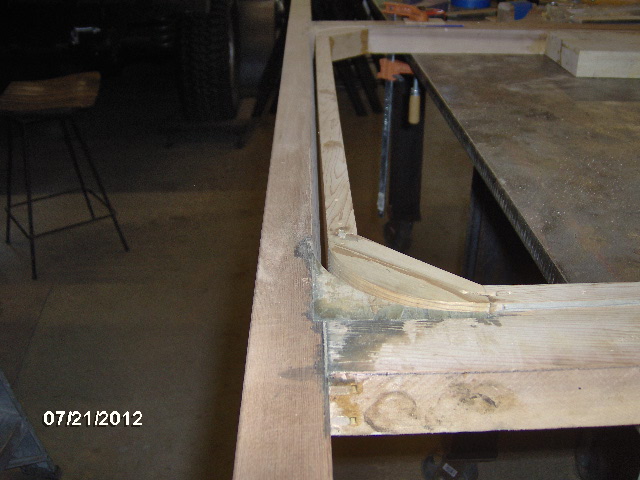
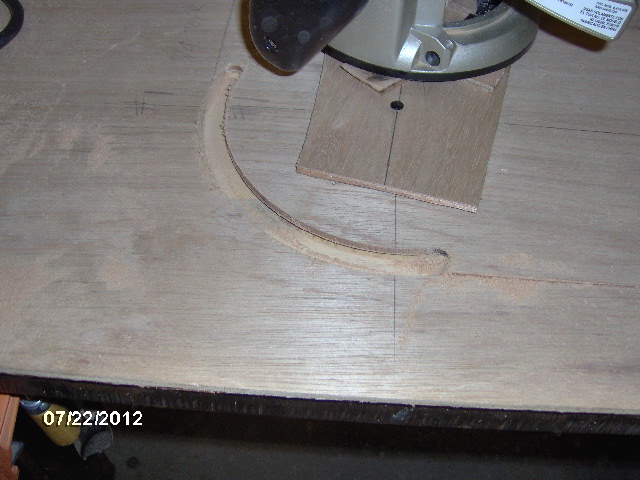
I wasn't too sure about the next step. It would be awfully easy to screw this up. Decided the best way to cut the bevel would be to use the jigsaw set at an angle. I used a small block of scrap cedar to set the angle of the saw from about 3/16 to zero over the 1-1/2 inch thickness. So starting along one jamb the blade just feathered into the corner block gradually until I had made the turn into the sill. Karl's cordless Makita with a fine wood blade and the oscillation feature turned off cut like a charm. The LED spot light makes it super easy to see your line and I was able to follow the curve very accurately. Once I had made the turn onto the sill I clamped a temporary board to the bottom of the wall to give the saw a wider base to run on and also made a place for me to clamp a guide fence (one of my glue sticker slats). Note the angle of the saw.
Image
Image
Image

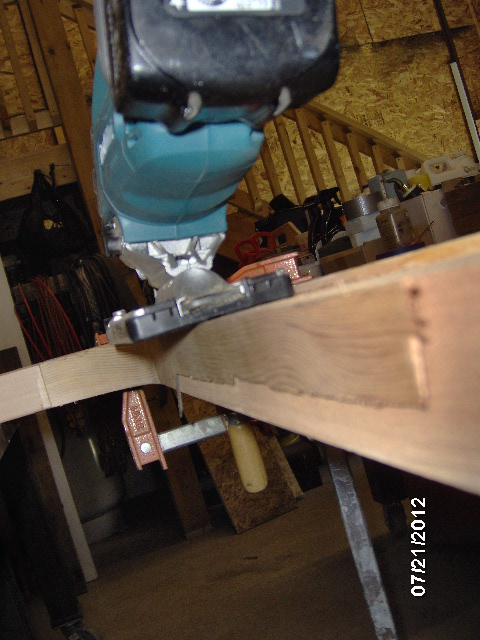
When I got to the other end of the sill I removed the fence so I could make the turn into the other corner block, but I left the shelf to help support the saw.

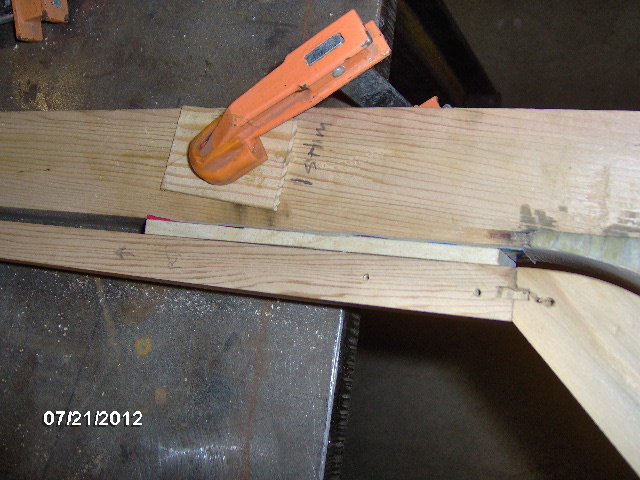
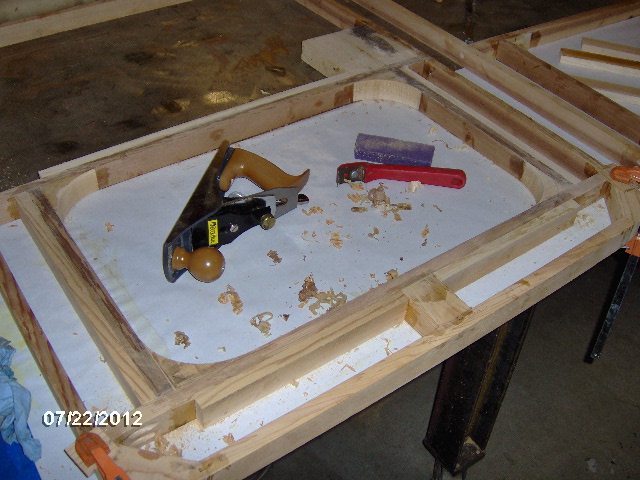
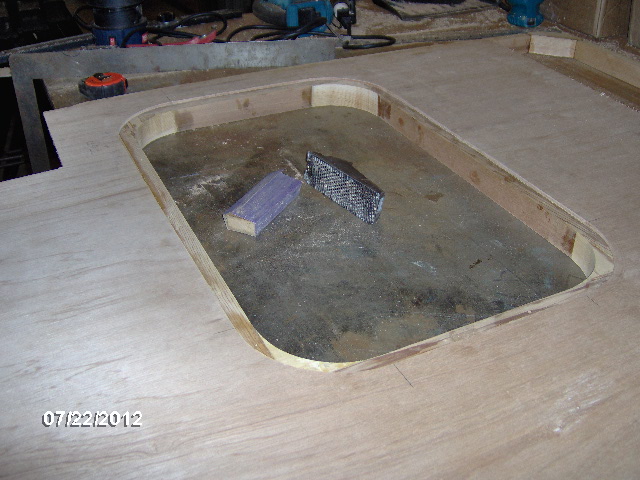
I thought the trimmings were pretty cool looking, like field hockey sticks. You can also see one of the wax paper box cardboard shims laying there on the bench.
Image

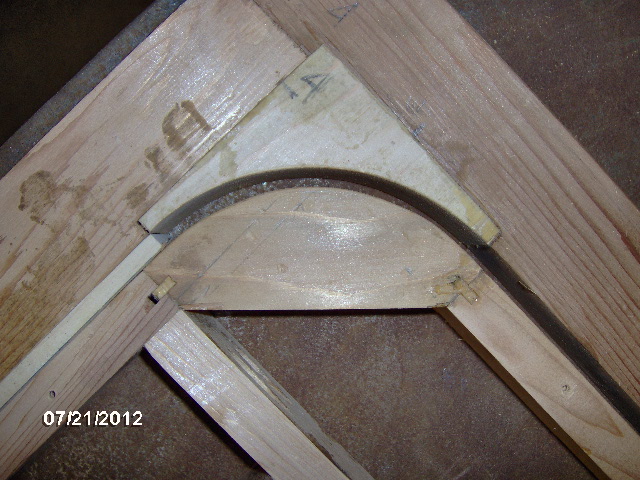
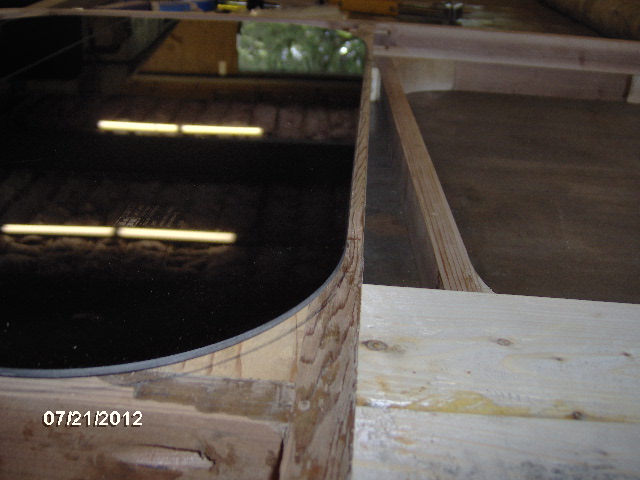
Here's a shot looking along the sill showing the bevel (bottom of wall is to the right).
Image

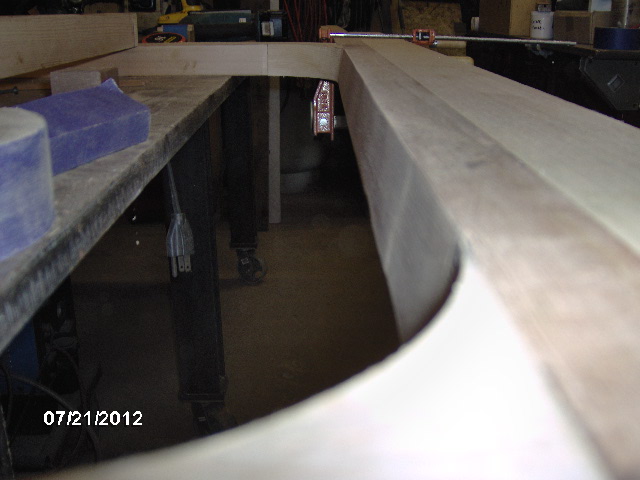
And here it is looking back the other way, bottom of wall on the left.
Image

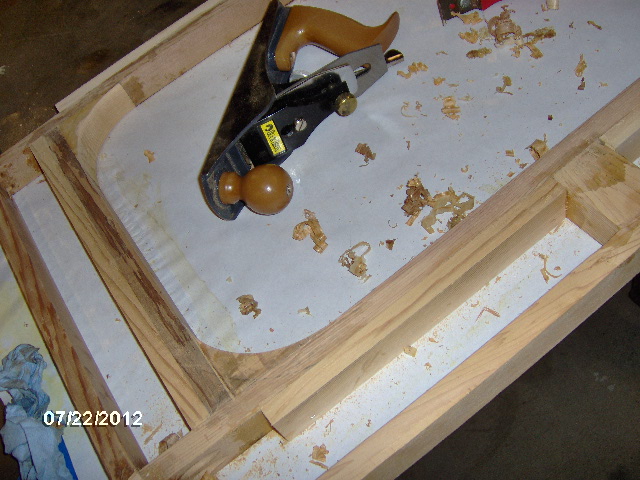
A little more work with the mini Surform plane and my small sanding block and those little dips you see were gone. The transition areas of the cuts in the corner blocks were surprisingly easy to hand sand fair using the little football shaped sanding block shown better in a previous post.

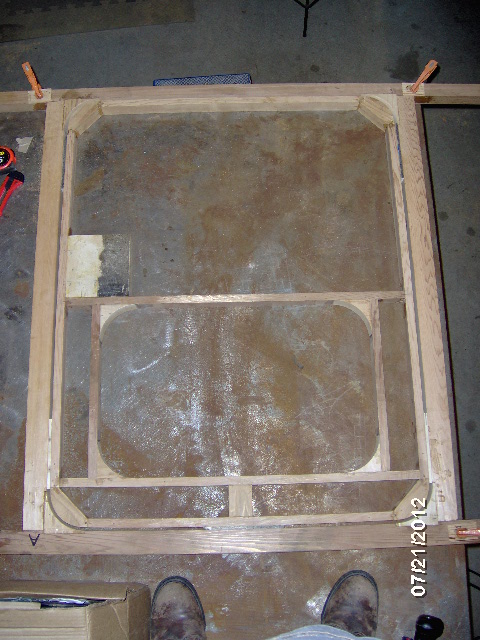
Then I put the door back in the surround, shimmed it up and checked fit again. The first pic is upside down because I climbed up and stood on the bench to take the photo.
Image

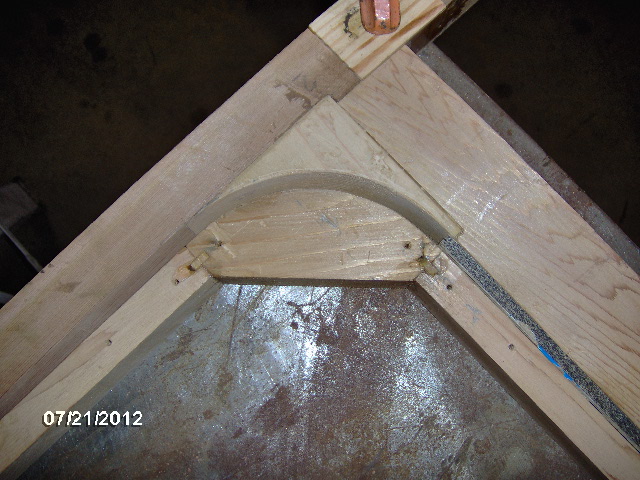
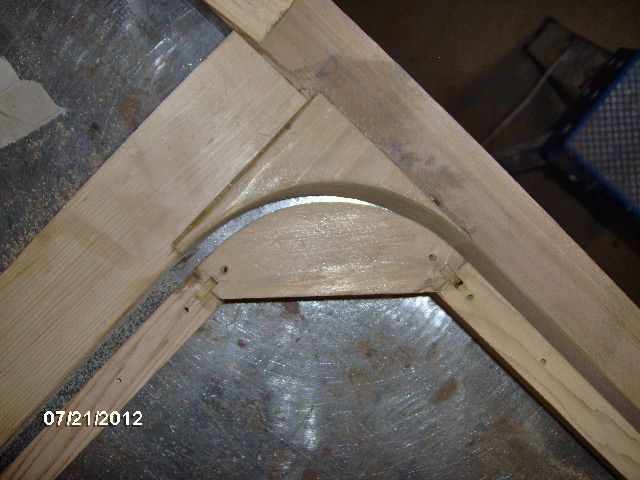
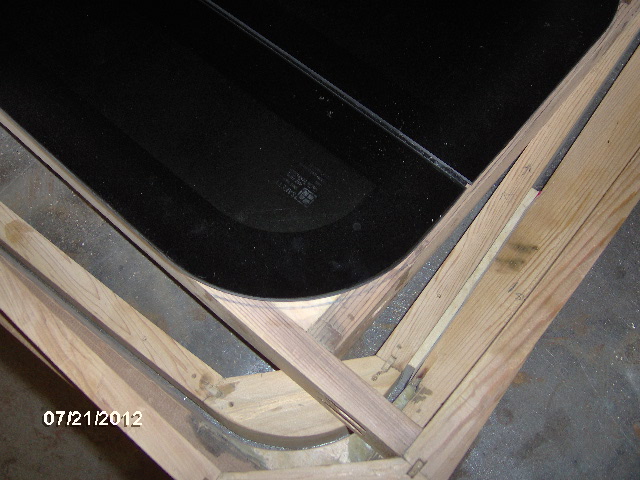
And some close ups of the corners. At the bottom it is a little deceiving because you can still see the beveled surface in the gap, but if you focus on the edge you can judge the gap. You can also see the shims in some of these next few pics.

This is the bottom front, with the bottom on the left and the front on the right.
Image

Bottom rear, bottom on right.
Image

Top rear, top at left.
Image

Top front, top at right.
Image

Up to this point I had labeled the wall frames 'A' and 'B' and I have been referring to the doors as 1 & 2. However, with the sill beveled this set now becomes the street side, and the other wall is the curb side. From here on out I need to be very mindful of handing.

Next I started to layout the hinges and check for fit, etc. The hinge is almost ideal for my walls. The leaves are almost exactly the same width as the wall thickness once the inner panel skin goes on. However, the outer most screw holes will end up very near the inner edge of the frame. I was a little worried about the screws breaking out so I decided to make a little test block with a scrap of the 5 mm glued up to a small block of 2x cedar.
Image
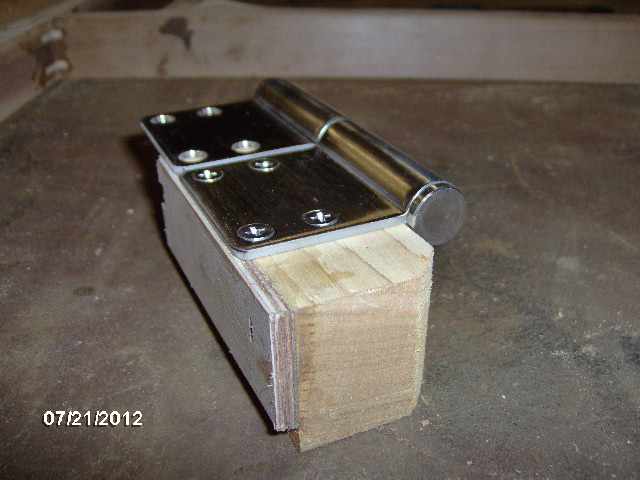
It worked out okay with careful drilling of the pilot holes. The cedar is soft in some places and the holes will need to be hardened up with some glue or something; perhaps run the screws in just snug, then remove, then a little drop of CA or epoxy in the hole, and then run the screw back in.

Here I have positioned the hinge and made reference marks on both the door and jamb. I positioned the hinges as low and high up on the frame as I thought would still look good (pretty much just out of the radii) so that the hinges and door latch (on the other side) would form the biggest triangle possible.
Image
Image
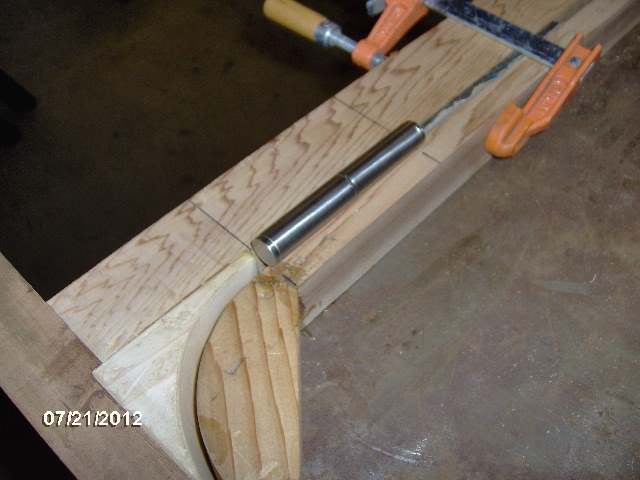
Had a scare for a moment when I realized that the screws I used in the door frame might interfere with the screws that will attach the hinge (did I mention that I love my biscuits?), but it looks like they will just squeak by at the top.

I purposely put the window as high up as I thought I could get away with aesthetically, so that the latch could be as close to the middle of the door frame as possible without looking silly. All of this to make the door as sturdy as possible when latched, both for security and in an attempt to ensure good even seal compression.

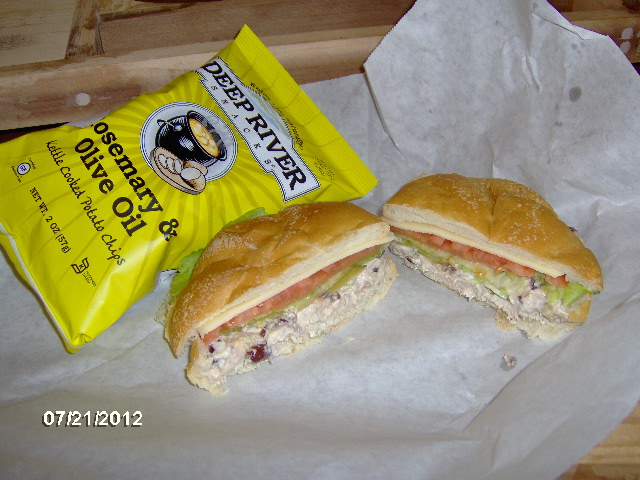
Chris treated Karl and me to another cranberry walnut chicken salad sandwich from the country store, accompanied by rosemary flavored gourmet potato chips.
Image

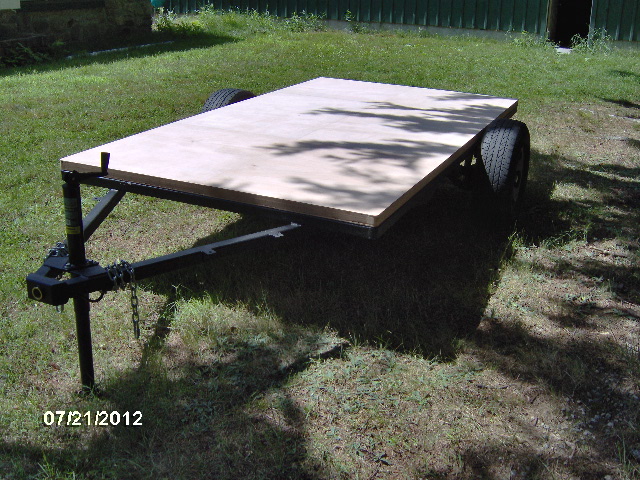
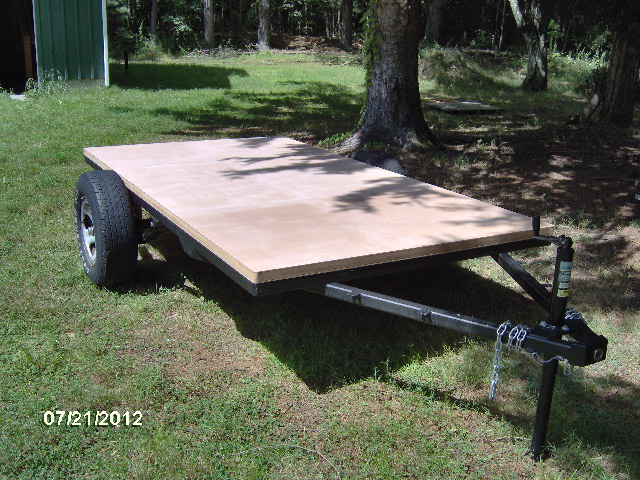
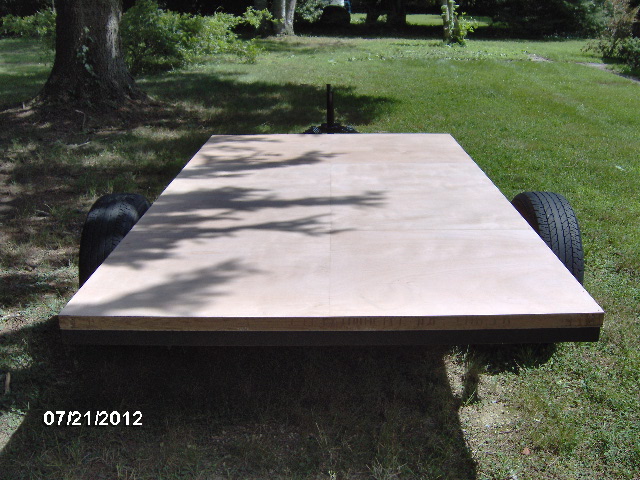
Punkin chunker buddy Dave (and faithful follower of this thread) came down from Mass. for some family business and brought along a VFD (Variable Frequency Drive) to try and get the big vertical band saw running. That meant that I had to move all of the camper parts that were leaning up against the saw out of the way. Everything but the floor was light enough for me to handle myself, and when Dave arrived he helped me move the floor out onto the trailer to get it out of the way temporarily.
Image
Image
Image

Then on to the curb side door fit. I'll skip the details on this one, pretty much the same as the first. Note the wall frame is facing the other way on the bench, opposite hand.
Image

Here you can see the beveled sill under the door.
Image

And a better shot of the shim with cardboard.
Image

These next few pics are a little confusing because I set the one door up on top of the other assembly to give some space between the window crank and bench while I was test fitting the window.
Image
Image
Image

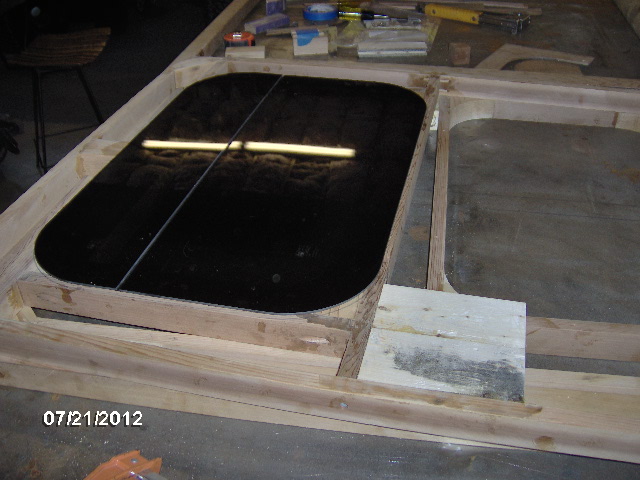
You can see where I traced the window; stepped off by the width of the carpenter's pencil. What I found was that the glass is biased to the top of the window frame (i.e. When the factory adhered the window glass on top of the aluminum window frame there is more glass sticking off of the top than there is at the bottom). This, and the fact that the corner radii for the rough opening is not the same as for the glass means I can't just step off of the window opening in the door to cut the rabbet to recess the flush mount window. I thought for a brief second that I could just set the window in the opening and let the frame and glass sit proud of the wall (about 5/16 inch or so), but I quickly dismissed that as an unacceptable compromise just to make things easier. No, the flush mount windows shall be mounted flush. It will look much better and will provide some protection for the edges of the glass that would otherwise be "hanging out in the wind". Besides, it will be much more complicated this way (sarcasm).

So looking back at those window dry fit pics, it is plain to see whoever designed this thing (Moi?) didn't make the door window frame pieces wide enough to recess the windows flush without busting into the foam. If I want the canvas to wrap under the edge of the window, I will most likely have to staple it into the window recess to get it to follow the contour, and I'm pretty sure that the foam won't take staples too well (...yes, that was sarcasm again).

Well, I have some cedar left over. Might as well rip some 5/8 inch wide x 2x and scab them on around the window frames. I tried using the pneumatic stapler to do the glue up, but even after shooting several staples along each piece I could squeeze the joints harder by hand and see the gap close up with additional glue squeezing out. So I clamped the whole thing up.
Image

Saturday night the three couples (Dave and Andrea, Karl and Chris, and me and Yvette) went out to a nice restaurant and had a good visit.
http://www.bravobravoct.com/olio/index.shtml
I had the coconut broth beef bourguignon soup app followed by house made linguini with lobster, scallops and shrimp in a cream sauce, then dessert coffee beverage splitting a piece of righteous carrot cake with Yvette. :thumbsup:

Sunday I put another 4 hrs in.

I started by unclamping the window frame additions, scraping the excess glue down and knocking the high spots down with the bench plane. I agree with Wolfarmer Randy; using the bench plane is therapeutic.
Image

Here you can get a better look at the pieces that I scabbed onto the outside of the window frame.
Image

Look closely and you might be able to see where I traced the outline of the window glass onto this piece of luan that I used previously for a template.
Image

Used the utility knife and framing square straight edge to cut through the straight lines by scoring repeatedly.

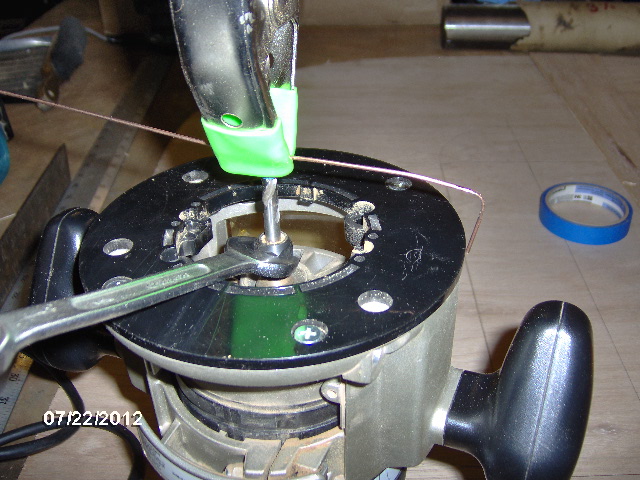
Then I took the shoe off of the router to transfer the mounting bolt pattern onto another scrap of luan to make a small radius/circle cutting jig. I had not been happy with the concentricity between the shoe and the router bit so when I went to screw it back down I took the time to check for concentricity using this little feeler gauge trick. Nothing but a piece of TIG wire spring clamped to a ¼ inch drill bit set in the chuck of the router. Spin the collet, tweak the length of the wire, and adjust the shoe until the wire skims evenly all the way around, kind of like the truing rig they use for building spoke wheels.
Image

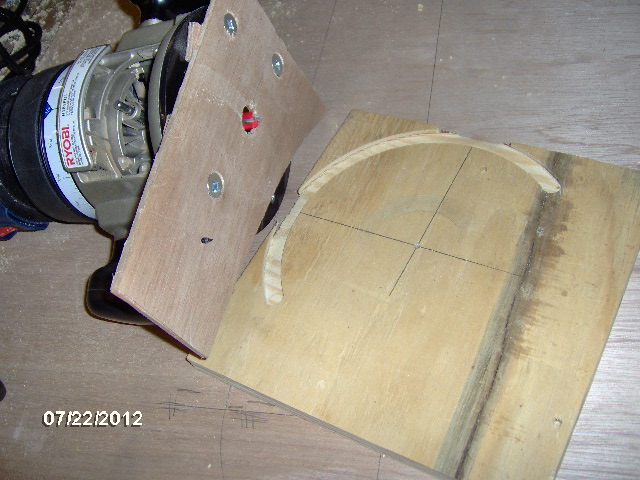
Here’s a test run with the circle cutter on a piece of scrap ply. The little black point is the screw sticking through that was used as the center pivot.
Image

And here is some sawdust filling the radius cut in the window template.
Image

I used the scrap block of ply underneath to back up the cut, minimizing chip out, preventing the router from hitting the steel table, and giving something more solid for the pivot screw to bite into.

And another with the sawdust brushed out.
Image

Almost done. I added the tape to hold the central drop from kicking out on the final couple of cuts.
Image

After a little touch up with the Surform and sanding block here’s a test fit.
Image

A couple of my corner radii ran a little wide (not sure why) so there is a bit more work to get it true, but that was all I had time for. Cleaned up the work area.

Ran home for a hair cut from the wife, then off to mom’s to celebrate my aunt’s birthday with a lovely dinner cookout on the back porch. For starters; roasted sweet potato wedges served cold with a curry/mayo dipping sauce, vegetable crudités platter with a mushroom and onion dipping sauce, and curried deviled eggs. For the main entrée Teriyaki grilled chicken, with a raw zucchini salad with chick peas, black olives and oil, a salad of Quinoa with cranberries and other goodies, and fresh corn on the cob. The curry sauce was such a big hit we were putting it on the Quinoa and corn, too. Then homemade peppermint stick ice cream with homemade fudge sauce. Mmmmmmmmmmm, good.

Wish you all could have been there!
KC
My Build: The Poet Creek Express Hybrid Foamie

Poet Creek Or Bust
Engineering the TLAR way - "That Looks About Right"
TnTTT ORIGINAL 200A LANTERN CLUB = "The 200A Gang"
Green Lantern Corpsmen
User avatar
KCStudly
Donating Member
 
Posts: 9616
Images: 8169
Joined: Mon Feb 06, 2012 10:18 pm
Location: Southeastern CT, USA
Top

Re: The Poet Creek Express - Foamie Hybrid

Postby KCStudly » Tue Jul 24, 2012 7:14 pm

Crickets?

Last night (Monday) I scraped and smoothed up the window frame additions to the second door. Then I trued up the window recess template. Tomorrow (Wednesday) I will work on the frame work for the template that will guide the shoe of the router. I don't have collars for my router and did not see them in the HoDePo.

I suppose I could look on-line for some tonight as I am likely to have a use for them in the future.

That's all there is for tonight.
KC
My Build: The Poet Creek Express Hybrid Foamie

Poet Creek Or Bust
Engineering the TLAR way - "That Looks About Right"
TnTTT ORIGINAL 200A LANTERN CLUB = "The 200A Gang"
Green Lantern Corpsmen
User avatar
KCStudly
Donating Member
 
Posts: 9616
Images: 8169
Joined: Mon Feb 06, 2012 10:18 pm
Location: Southeastern CT, USA
Top

Re: The Poet Creek Express - Foamie Hybrid

Postby wagondude » Tue Jul 24, 2012 7:36 pm

KCStudly wrote:Crickets?


We are al just trying to shake the picture of Grandpa Jones in the window(Yum, yum). And I can't believe you forgot the pictures! Food porn is always welcome.

Bill
Bill

TnTTT ORIGIONAL 200A LANTERN CLUB
101137
User avatar
wagondude
1000 Club
1000 Club
 
Posts: 1535
Images: 35
Joined: Sun Jan 16, 2011 7:41 pm
Location: Land of the Jayhawks
Top

Re: The Poet Creek Express - Foamie Hybrid

Postby KCStudly » Tue Jul 24, 2012 7:51 pm

wagondude wrote:I can't believe you forgot the pictures! Food porn is always welcome.


I did bring the camera to mom's, but set it in the house before getting pinned in around the back of the table out on the deck.
Kind of awkward to explain to people why you are taking pictures of their food... though not impossible. I will do better next time, I promise. :thumbsup: :D
KC
My Build: The Poet Creek Express Hybrid Foamie

Poet Creek Or Bust
Engineering the TLAR way - "That Looks About Right"
TnTTT ORIGINAL 200A LANTERN CLUB = "The 200A Gang"
Green Lantern Corpsmen
User avatar
KCStudly
Donating Member
 
Posts: 9616
Images: 8169
Joined: Mon Feb 06, 2012 10:18 pm
Location: Southeastern CT, USA
Top

Re: The Poet Creek Express - Foamie Hybrid

Postby KCStudly » Wed Jul 25, 2012 10:33 pm

Spent the evening fiddling with the window recess router template. Like Edison, I know how not to do it. The plan was to build a frame around the opening in the template, stepped off by the width of the router shoe and use that to guide the router while making the recess cut. The original opening in the luan (shown before) would just be used for alignment to the tracing of the window made onto the door frame at dry fit.

Seems like I worked for 3 hrs and didn't really make any forward progress. Hadn't left myself enough margin when I originally traced the window onto the luan, cut the battens for the shoe frame to the wrong length, didn't get them mounted square at first, need to make yet more corner radii for the router to follow, and my quickie circle cutting router fixture isn't long enough for this radius (lack of foresight).

Karl had an idea that might help. He thought I could use the window template with the flush cutting bit to make a new male template, then use that male template as a guide for the router shoe to make another larger female template in place of my built up frame idea. Would use more material and be less tedious. However, when I undid what I had done to take a closer look at his idea, it wasn't going to work the way he thought it would. The diameter of the bit would be lost on the male template and would not be given back on the larger female template. That's where I called it a night.

It did give me the idea that I could make the male template using a smaller cutter and then switch to the big rabbeting bit with flush bearing to get the difference back on the larger female template, so I will think about doing it that way tomorrow. Less chance for an accumulation of error that way vs. cutting and fastening a bunch of little frame parts and trying to get radii to be tangent.

Since it didn't really happen, I have no pics.
KC
My Build: The Poet Creek Express Hybrid Foamie

Poet Creek Or Bust
Engineering the TLAR way - "That Looks About Right"
TnTTT ORIGINAL 200A LANTERN CLUB = "The 200A Gang"
Green Lantern Corpsmen
User avatar
KCStudly
Donating Member
 
Posts: 9616
Images: 8169
Joined: Mon Feb 06, 2012 10:18 pm
Location: Southeastern CT, USA
Top

Re: The Poet Creek Express - Foamie Hybrid

Postby noncompusmentis » Thu Jul 26, 2012 2:59 pm

I've found this thread after scouring the internet for some help and ideas on how I can make my own teardrop door.

I'm astounded by the workmanship detailed in this thread... your work is amazing!

I've not read it all yet, I've sort of started at the end... but I certainly have some new ideas!

Thank you for the inspiration :D

Andy.
noncompusmentis
Teardrop Inspector
 
Posts: 4
Joined: Thu Jul 26, 2012 2:27 pm
Location: Yorkshire, UK
Top

Re: The Poet Creek Express - Foamie Hybrid

Postby KCStudly » Thu Jul 26, 2012 3:54 pm

Well I thank you, too, Andy. That's a generous complement.

It's true what everyone says, the doors are turning out to be one of the more complex items in the build.

I called Trimark today and asked about the availability of the 060-0251 style of door latches to suit my thicker doors. I also asked about matching keys and if they were available in right and left hand versions. They were very helpful. She said that they were only one hand (so I guess one will be mounted with the dead bolt up and one with it down :( ... guess you can't see both sides of the trailer at the same time anyway). On same keying she said I could order them with suffix 2001 and they would have a common key, but that also implied that they would have the same key as everyone else who ordered that way :NC. When I asked about that she said that if I just order a pair of the standard sets she would hand pick two with the same key codes for me, which implies that there are only so many key combinations, but at least it decreases the odds of someone in the same camp ground having the same key. She said that they would have a new shipment of these in at the end of the month and would get my order out the same day that they arrive.

I did a little more looking on their website afterwards and found that they offer a pass key fleet option, where a master key can be used to open many different lock sets, in addition to the unique key, so I figure that is what the 2001 code was for.

The difference between the standard door thickness and the thicker door is the lever bar that reaches thru and actuates the latch from the far side is longer on the thicker unit. I'll try to post a detail pic of this when I get them in hand.

So with the latch, paddle set, striker plates, keys and hardware they come to $86.07 each, OEM direct (I am assuming off of the boat from China, so maybe factory “indirect” would be more accurate). That's a bit more than the online pricing I was seeing for the standard units, but I couldn't see any sense in having to shop around and deal with someone else who may not be as familiar with the product, so I just whipped out the plastic and bit.

I was able to print a copy of the cutout dimensions from their website, so I will lay that out when I get a chance (maybe tonight), but won’t do any cutting until I get the parts in my hand and can confirm everything.

I certainly have a better understanding for why so many people say, “Never again, just buy your doors pre-built”, but I am happy to do the physical and mental exercise of building them myself. It is an engaging and challenging endeavor, and when it is all said and done they will be the way I intend them (or at least close) and I will be able to say, “Yes, I built it myself”.
Last edited by KCStudly on Thu Dec 27, 2012 10:51 pm, edited 1 time in total.
KC
My Build: The Poet Creek Express Hybrid Foamie

Poet Creek Or Bust
Engineering the TLAR way - "That Looks About Right"
TnTTT ORIGINAL 200A LANTERN CLUB = "The 200A Gang"
Green Lantern Corpsmen
User avatar
KCStudly
Donating Member
 
Posts: 9616
Images: 8169
Joined: Mon Feb 06, 2012 10:18 pm
Location: Southeastern CT, USA
Top

Re: The Poet Creek Express - Foamie Hybrid

Postby KCStudly » Sat Jul 28, 2012 10:34 am

Okay, so it seems like I’m back on the road to making progress instead of scratching my head on the window recessing router template.

Thursday Karl and I worked out the details of his idea and proved it to ourselves that his idea would work. I had a few minor nit things that I had to do, mostly because I was trying to conserve material and had made the original window template too close to the edge of the piece that I had cut my hatch rib template from. Here’s where we left off; this is the window template that matches the outline of the window with about 1/8 inch margin all the way around.
Image

Had to clean up the extra blocking added around the window frame on the second door.
Image

Bench plane therapy.
Image

For the next step I wanted to add a little spacer shoe the same thickness as the template to one side of the router base plate to help stabilize the router (I’ve been calling the router base plate the “shoe” all along, so try not to get confused). However, the flat head screws that are used to hold the router to the router table need something thicker to bite on. So I made this spacer for the base plate. Here it is shown upside down after the cut so you can see it better; still attached to the circle cutting jig.
Image

Here’s where it came from, the fall out piece from the window template. Note the waster block underneath.
Image

Here I have plunged the router straight down into a fresh piece of luan (not a plunge router, just held the router steady and adjusted depth down until through), then I put the window template on top and carefully lined the inside edge up exactly to the hole.
Image

Then I used my failed battens as blocks to screw the two thin sheets together securely, checking frequently to make sure that nothing had shifted.
Image

Jumping around a bit, here is the base plate spacer, with additional shims underneath, and the extra “shoe” spacer at the bolt location on the right.
Image

And here’s the point of the whole spacer shoe set up; it helps keep the router plumb while running the top bearing bit around the inside of the window template to cut out a male plug that is “exactly” 1/2 inch smaller all the way around.
Image
The two pieces of luan are supported up off of the bench by strategically located 2x’s, and are clamped to prevent the whole thing from moving around. Here I am part way through the cut while repositioning myself to the other side of the bench (the excess material sticking out made access and reaching tricky).
Image

Here you can see the completed cut and one of the blocks underneath that kept the part from drooping down. There was just a small nib to clean off with the Surform where the cuts matched up and did not complete before the plug fell away.
Image

Some sawdust for your consideration.
Image

Just a few hours work.
Image

On Friday I decided that there was no good reason to waste another big piece of luan, so I laid the male plug overlapping the hole it came out of and secured everything up on blocks with drywall screws. Here you can see where I have stopped the cut short of finishing so that I could screw a couple of more blocks spanning the cut joint so that the two pieces do not shift and kick into the bit when I break through.
Image
Image

Because of the skinny margins and weird overlaps in my ramshackle templates, I had to add this little shim carpet taped to the rim to firm that thin area up.
Image

And now we’re getting somewhere! Here is the door, with the window template aligned to the tracing made around the edge of the window glass during dry fit. On top is the female fence template that the base plate of the router will guide on while making the rabbet for the window frame and glass to recess into. The blocks are just there to give the screws holding the two templates in alignment with each other something solid to bite into.
Image

This is a close up showing the two layers of the template aligned to the pencil mark on the door.
Image

The template is screwed and clamped to the door, making sure to put screws anywhere that the template wanted to lift off of the door ever so slightly.

When I was dry fitting the window to make the pencil mark I also measured the height that it sat above the door frame using a dial caliper (.250 inch). As a dumb idiot check I also laid a scrap against the edge of the glass and made a pencil mark for a gauge. The pencil mark was just a touch high, but I figured that would account for sealant. The thickness of the canvas skin and paint is a wash because I intend that to be applied to the recess as well as the face of the door.

Here I am setting the depth of the router using the gauge stick. Note that it is sitting on top of a piece of ply that matches the thickness of the window template.
Image

Tough to see in the first pic, but here it is after rabbeting.
Image
Image

A generous helping of sawdust.
Image

And here is the window recess after removing the template, cleaning up the sawdust and kissing all of the little frayed bits away with the sanding blocks.
Image
Image
Image

And the moment of truth, she fits like a glove!
Image
Image
Image
Image
Image

The detail shots kind of make it look like the glass is high, but that’s just an effect of the camera. It’s ever so slightly below flush. Even if the sealant raises the glass out a touch, I’m okay with that.

I’ll have to do a sample test with the canvas and paint to make sure that I can get the canvas to staple down into the corner well enough, and to see just how much I may want to ease the edge, or back fillet the corner with some filler. Karl and I both had the same idea of using a piece of aluminum plate with release agent to clamp the canvas into the recess until set. Hmm…

It was a good day for sawdust; nice big dust pan full.
Image

I’m once again pleased with my work and progress. Time for a celebratory Dirty Penny Ale (http://www.oldeburnsidebrewing.com/ourbrews.html).

Today (Saturday) I have to fix a screen on the porch where a coon tried to intrude to get to our cat’s food, then it's wash, rinse, repeat on the second door.

Hope you enjoyed reading!
KC
My Build: The Poet Creek Express Hybrid Foamie

Poet Creek Or Bust
Engineering the TLAR way - "That Looks About Right"
TnTTT ORIGINAL 200A LANTERN CLUB = "The 200A Gang"
Green Lantern Corpsmen
User avatar
KCStudly
Donating Member
 
Posts: 9616
Images: 8169
Joined: Mon Feb 06, 2012 10:18 pm
Location: Southeastern CT, USA
Top

Re: The Poet Creek Express - Foamie Hybrid

Postby GPW » Sat Jul 28, 2012 11:08 am

Nice !!! :thumbsup: With tolerances like that you “could” just hinge the glass directly to the frame as was done on old Van rear windows (Dodge) ... fully opening .. :thinking:
There’s no place like Foam !
User avatar
GPW
Gold Donating Member
 
Posts: 14912
Images: 546
Joined: Thu Feb 09, 2006 7:58 pm
Location: New Orleans
Top

PreviousNext

Return to Foamies

Who is online

Users browsing this forum: No registered users and 4 guests