Thrifty Alternatives ..Building Foam Campers

Canvas covered foamies (Thrifty Alternatives...)

Moderator: eaglesdare

Postby eaglesdare » Mon Mar 28, 2011 8:45 am

yup love pictures. :lol:

now do you think it matters at all about how the canvas is laid? meaning, in your sketch, you have the side wall coming up as bottom layer, then the roof canvas over lapping that going down the side wall, top layer.

i was thinking of doing it in the reverse.

and i too was going with some reinforcing strips.

mine insides are going to be a patch work design. not by choice, but by necessity. those wood spars are going to be my obstacles. but work around and over them.
Louella
May the foam be with you.
User avatar
eaglesdare
Donating Member
 
Posts: 3168
Images: 13
Joined: Tue Aug 26, 2008 7:06 pm

Postby GPW » Mon Mar 28, 2011 9:05 am

Eagle , I just drew it that way because the seam faces down .. being an old builder , the seam down keeps the rain out, just a habit ... probably not critical with the ref. strip over that .. If you chose to put the reinforcing strip on the bottom , then the skin , it might be better to keep the seam down ... The pinked edges of the reinforcing strip underneath might just blend in nicely with the fabric on the outside ... On the outside , it'd have more a vintage aircraft look ....That would be a cool paint job too ... :thinking:
There’s no place like Foam !
User avatar
GPW
Gold Donating Member
 
Posts: 14920
Images: 546
Joined: Thu Feb 09, 2006 7:58 pm
Location: New Orleans

Postby eaglesdare » Mon Mar 28, 2011 9:52 am

hmmm...never gave that seam down, no rain..anythought. you have a point to that. but on the other hand, i don't see how rain is going to get in anyway when using this t2. espeically once the reinforcing strip is on.

but i suppose this skinning, which layer goes where may just be a matter of prefrence, or ease.

the only time i can see rain hitting the tear is while traveling. at camp i plan on a tarp, sitting here in the yard it will be tarped also.

as long as there is no strutural difference, i will continue on. my idea was the seam at top, so so one will notice it. although i did/do plan to cover it with a reinforcing strap.

i think we will both be ok then no matter which route we go.


one of the gals is coming down on friday, we plan on building the doors and attaching the blocks for the hinges.
..then a trip to lowes to get exactly what we need for latches/lockes. saturday we are plannning to lay the canvas. that looks like the only day we will have to do it.
..i have just slightly over 2 weeks to get to the "campable" stage.
Louella
May the foam be with you.
User avatar
eaglesdare
Donating Member
 
Posts: 3168
Images: 13
Joined: Tue Aug 26, 2008 7:06 pm
Top

Postby GPW » Mon Mar 28, 2011 10:53 am

Seam on the top is a good idea Eagle !! ... that way you won't be seeing another seam under the Ref. strip ... :thumbsup:
Here's a pic of my proposed reinforcement and what it will look like ... Image

And a possible color scheme.. Image

You can see how the LVF works with a minimum of detail to create an illusion of depth in the Paint ... figuring the distraction would "hide" the seams ... :thinking:

Too bad we don't live closer , I'd come over and paint that trailer in no time ... Lots of Happy trees .. :lol:
There’s no place like Foam !
User avatar
GPW
Gold Donating Member
 
Posts: 14920
Images: 546
Joined: Thu Feb 09, 2006 7:58 pm
Location: New Orleans
Top

Postby eaglesdare » Mon Mar 28, 2011 11:12 am

oh i have thought about that. it is a shame. we both have the same interests going on. would be nice to help each other.

and i am not so sure of those happy trees. i am too dark of a person, couldn't stand too much happy in my camper. :lol: maybe that is why i love the look of eagles. they never look happy. :roll:
Louella
May the foam be with you.
User avatar
eaglesdare
Donating Member
 
Posts: 3168
Images: 13
Joined: Tue Aug 26, 2008 7:06 pm
Top

Postby GPW » Mon Mar 28, 2011 12:15 pm

OK, skip the Happy trees , Paint it Black ... :o .... :lol: :lol: :lol:

You, dark .... Naaaaa!!! You seem pretty Happy !!! ;) You just need some good weather ... you'll feel much better !!! :thumbsup:
There’s no place like Foam !
User avatar
GPW
Gold Donating Member
 
Posts: 14920
Images: 546
Joined: Thu Feb 09, 2006 7:58 pm
Location: New Orleans
Top

Postby eaglesdare » Mon Mar 28, 2011 1:24 pm

black was actually my first choice of color :lol: but i was told it would end up being too hot. so i nixed that idea.
Louella
May the foam be with you.
User avatar
eaglesdare
Donating Member
 
Posts: 3168
Images: 13
Joined: Tue Aug 26, 2008 7:06 pm
Top

Postby GPW » Mon Mar 28, 2011 4:29 pm

Black would be unbearably HOT , especially around here... :o White would be Cool , or even the old school Aluminum paint ... But I believe a light blue holds up the best , as it heats up enough to drive out the moisture ... that was the legend in the old hot rod days ... :roll:
There’s no place like Foam !
User avatar
GPW
Gold Donating Member
 
Posts: 14920
Images: 546
Joined: Thu Feb 09, 2006 7:58 pm
Location: New Orleans
Top

Postby GPW » Tue Mar 29, 2011 9:10 am

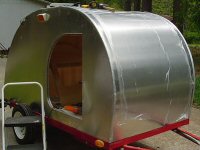
Now I'd just like to mention those "Hard Points " , which is a place to attach a screw to mount your gear ! I plan on hanging some lights , or hooks at least , a cargo net on one wall (very Handy) , and possibly some screw eyes to attach bungee cords over the gear for travel/towing security.
Before assembly might be the best time to plan and install these ... just small scrap wooden blocks inset into the foam , and secured with Gorilla glue. It's easy to slice around the block for the right size , and then just cut away the inside foam to the depth of the block ... and the Gorilla glue will most certainly fill in any gaps . Once the inside covering /skin is applied , these should be barely visible , so remember where you put them ... :roll:

Just a small insignificant item that will be much appreciated when you go to fit out your trailer with all the amenities that require an attachment point !!! :thumbsup:

And while we're talking about the inside skin ... It would be Very possible to do the inside sides with a thin paneling of some sort , instead of the cloth ...or at least a "wainscoting" up the wall a ways for a more traditional TD look . Since the wooden skins would be directly glued to the foam , and being on the inside of this "encapsulation", I doubt if water would ever get to it ... Would look cool , like a wooden TD .. inside anyway ... Maybe best/easiest to attach these too before assembly ... :thinking:
There’s no place like Foam !
User avatar
GPW
Gold Donating Member
 
Posts: 14920
Images: 546
Joined: Thu Feb 09, 2006 7:58 pm
Location: New Orleans
Top

Postby eaglesdare » Tue Mar 29, 2011 9:28 am

funny that you bring this up just now. i was sitting here thinking i may go out there and do some work on the inside. it is a nice sunny day. a little chilly, but should get into the 50's. thinking i can bring my heater out there and turn it on low. should give me enough warmth to start the canvas. i am sticking with that since it is what i have on hand now. don't want to spend anymore money than absoutely needed. i have too many bdays this month and a camping trip i need to budget for.

i think for my tear to add anything at this point is going to be seen. i do not think i have the skills to hide anything right now. but i can see where i can just add 2 wood strips on the sides, which will connect to one of the spars. that will give me a good foundation for hooks or netting.

again, though this will just be a work in progress thing. i don't need that for being "campable".

i don't forseen any problems with water getting in. the only place that may/will be a problem will come from the hinged areas. and i am working/thinking about how to fix that. thinking about a tire innertube and just stapling down. seems simple enough.
..at first i thought about a piece of canvas and t2 around it, but with all the opening and closing action, this will stretch and i bet destroy that t2 waterproofing. so i am not looking at that route. but i think the innertube might work. and we might already have a piece around here. ..
..or like you have mentioned before, a piece of water hose. i know we have those around here. simple and thrifty.

just not sure about that opening and closing action. will it be flexible enough to work.

how warm/hot will it take to start melting the foam?
Louella
May the foam be with you.
User avatar
eaglesdare
Donating Member
 
Posts: 3168
Images: 13
Joined: Tue Aug 26, 2008 7:06 pm
Top

Postby GPW » Tue Mar 29, 2011 10:30 am

I'm just going to use a piece of inner tube or rubberized fire hose canvas (which I have leftover from the last build) under the piano hinge and a drip rail made from a recycled truck Ventshade (passenger side) which I can attach with that really sticky tape.. and a couple screws in the upper door framing (or hard points provided for that) ... It's good to have a couple HPs on the outside too when you think about it .. more crumbs for thought ... :thinking:
There’s no place like Foam !
User avatar
GPW
Gold Donating Member
 
Posts: 14920
Images: 546
Joined: Thu Feb 09, 2006 7:58 pm
Location: New Orleans
Top

Postby Miriam C. » Tue Mar 29, 2011 12:51 pm

:thumbsup: I used a piece of pond liner to cover my hinge. You can get rubber roofing in small amounts and really you might be able to get a strip free for the asking. ;) That would give you more UV protection than a tire inner-tube.
“Forgiveness means giving up all hope for a better past.â€
User avatar
Miriam C.
our Aunti M
 
Posts: 19675
Images: 148
Joined: Wed Feb 15, 2006 3:14 pm
Location: Southwest MO
Top

Postby eaglesdare » Tue Mar 29, 2011 1:38 pm

well glueing and canvasing the inside of the tear wasn't the easiest thing in the world. i mean it is easy, but, a bit difficult for 1 person and that 1 person in the condition she is in. lol

its like lifting a huge box that is light but akward? its like that. i ended up having to staple the canvas down.

the heater works great out there, a little too great. it got hot out there and i just had to quit. i think you really need 2 people to do it right. you have to beable to strenght it out and hold it down. i only did a little bit, because the canvas starting to buckle. and i don't want to go any further and mess it up.
Louella
May the foam be with you.
User avatar
eaglesdare
Donating Member
 
Posts: 3168
Images: 13
Joined: Tue Aug 26, 2008 7:06 pm
Top

Postby GPW » Tue Mar 29, 2011 3:51 pm

The inside ceiling is probably the toughest part to canvas .... overhead work grrr!!! ( I use push pins for tough stretching jobs ) The outside will be very easy !!! :thumbsup: The trick of canvas is as it gets damp it stretches ... so you're always stretching and pulling it.. Best a 2 person job ... ;) Not to worry, once it gets skinned , you can paint it all by yourself .... and we know your insulation works eh !! :thumbsup:
There’s no place like Foam !
User avatar
GPW
Gold Donating Member
 
Posts: 14920
Images: 546
Joined: Thu Feb 09, 2006 7:58 pm
Location: New Orleans
Top

Postby eaglesdare » Tue Mar 29, 2011 4:03 pm

i agree, i think the outside will be much easier. i did not even start the roof work, i was working from the floor up. now i am thinking maybe i should have started from the top down.

and yes, i believe the insulation will work in my favor when it is cold outside. :lol: a nice mattress, warm blankys and i wont' want to get up in the mornings. lol

i hope i can get those staples out though, they look ugly. and if not, then i can just craft up some edges, you will never see the staples that way.
Louella
May the foam be with you.
User avatar
eaglesdare
Donating Member
 
Posts: 3168
Images: 13
Joined: Tue Aug 26, 2008 7:06 pm
Top

PreviousNext

Return to Foamies

Who is online

Users browsing this forum: No registered users and 14 guests