The Poet Creek Express - Foamie Hybrid

Canvas covered foamies (Thrifty Alternatives...)

Moderator: eaglesdare

Re: The Poet Creek Express - Foamie Hybrid

Postby KCStudly » Thu Mar 14, 2013 2:50 pm

Arrrgh! Lost another couple of build days. :cry:

When we got home from DC (...pouring rain most of the way) we arrived to no heat. :thumbdown:

Pulled the circulator pump out last night and it was seized up tight as a drum. I'm off to obtain another and get it installed this evening.

Will try to get back on the build tomorrow. :worship:
KC
My Build: The Poet Creek Express Hybrid Foamie

Poet Creek Or Bust
Engineering the TLAR way - "That Looks About Right"
TnTTT ORIGINAL 200A LANTERN CLUB = "The 200A Gang"
Green Lantern Corpsmen
User avatar
KCStudly
Donating Member
 
Posts: 9640
Images: 8169
Joined: Mon Feb 06, 2012 10:18 pm
Location: Southeastern CT, USA

Re: The Poet Creek Express - Foamie Hybrid

Postby KCStudly » Sun Mar 17, 2013 7:24 pm

Spring is springing (the crocus are coming up and have been snowed on, and the Red Breasted Robins are back and have been snowed on, too) and I am happy to see a bunch of activity starting back up here on the forum.

Well, things did not go easy with the furnace, a crusty old valve decided to leak profusely, and wiring the circulator got interesting when the old lead wouldn’t reach the new, much smaller pump.

Took a little longer than I would have liked, but I was able to save a few hundred bucks by doing the work myself, albeit at the cost of a few more building days.

Anyway, I finally made it back out to Mecca today and got some forward progress.

I should have started by gluing in a few wall blocks and let those cure while I worked on the wall edging, but the wall edging had my attention and I just couldn’t let it go. So I started by attempting to hand plane the sides of the edging smooth (despite my best efforts the slats all had a mind of their own when being glued up). That wasn’t working too well, so I dug out Ben’s bench planer. Super rugged Steel City 13 incher. Nice mill.
Image

Made piles of chips and sawdust.
Image

It was kind of fun steering the long curvy parts through the mill, once I had the bench all cleared off and got the technique down. Needed lots of space.

Here they are starting to shape up.
Image

As I have said before, if I were to do these over I would probably start with 2x3’s; rip them down to something like 1-3/4 or 1-7/8; then rip them into 1/8 inch slats the long way; glue them up in the jig; then plane them to the desired 1-1/2 thk.

As it is now I have taken them down so that a single layer of the 5 mm marine ply scraps added on one side will get them back to the desired 1-1/2 thk.

The one piece that I had left clamped over center onto the back side of the jig pegs did come back into shape some; about 1/4 inch out of the 3/4 inch that it was out.

A little dry mock-up.
Image
Image

The picture does not do this justice. There was a pile of curly chips at least 2 inches deep.
Image

Cleaned up with the shop-vac…
Image

… and glued in a few of the smaller wall blocks on the curb side wall.
Image

On the way out, I took a couple of minutes and cleaned off all of the leaves and small twigs/branches that had collected on the car hauler/flatbed trailer over the winter. Saw an Eastern Cottontail run out from underneath it.
KC
My Build: The Poet Creek Express Hybrid Foamie

Poet Creek Or Bust
Engineering the TLAR way - "That Looks About Right"
TnTTT ORIGINAL 200A LANTERN CLUB = "The 200A Gang"
Green Lantern Corpsmen
User avatar
KCStudly
Donating Member
 
Posts: 9640
Images: 8169
Joined: Mon Feb 06, 2012 10:18 pm
Location: Southeastern CT, USA

Re: The Poet Creek Express - Foamie Hybrid

Postby bonnie » Sun Mar 17, 2013 10:24 pm

Great progress there. I envy your skills and tool availability. Critters coming back here too. Today we got rain, sleet, snow and a pretty impressive thunderstorm. I bet the robins and black birds are wondering what's up.
Remember, the turtle won. :)
User avatar
bonnie
Donating Member
 
Posts: 1390
Images: 107
Joined: Sun Jul 24, 2011 4:14 pm
Location: Roxana, IL
Top

Re: The Poet Creek Express - Foamie Hybrid

Postby KCStudly » Sun Mar 17, 2013 11:00 pm

Thanks Bonnie.

Yeah, spring is sproinging. The cats are all acting nutty, too. Maggie, our big torty, is rolling on her back in the sunny spots and showing her belly like a fool.

In New England when you can't figure out what level of outerwear to wear, you know it is spring. One minute I'm in my heavy canvas Cabellas overcoat, and the next I'm in a short sleeved T.

I love the mild cool temps and low humidity of spring and fall, much like Poet Creek in season, but very much unlike NE in the 3H (hot, humid, hazy) summers or bitter dry winters.

Here we go again, the game is afoot.
KC
My Build: The Poet Creek Express Hybrid Foamie

Poet Creek Or Bust
Engineering the TLAR way - "That Looks About Right"
TnTTT ORIGINAL 200A LANTERN CLUB = "The 200A Gang"
Green Lantern Corpsmen
User avatar
KCStudly
Donating Member
 
Posts: 9640
Images: 8169
Joined: Mon Feb 06, 2012 10:18 pm
Location: Southeastern CT, USA
Top

Re: The Poet Creek Express - Foamie Hybrid

Postby Wolffarmer » Sun Mar 17, 2013 11:41 pm

Nice planing job. I have a planer that looks a lot like that one, not exactly but very close. several years ago I needed an oak beam about 12 foot long, 4 inches thick and about........10 inches wide. Hunks of oak like that are scarce here in Idaho. And very expensive no matter where you are these days so I glued up a huge amount of board feet of 4/4 stock. Hand planed one side so it was reasonably flat. Then I put the planer on the work table. Built a little trolley the height of the bed of the planner to catch the beam. Set up a table of my Shopsmith the height of the planner. Put hand planned side of the beam on the bottom side then on the shopsmith, other end on the planer. Turned it on and fed it in, guided it into the planner and onto the trolley so it rolled out with the beam balanced on it. Then I just rolled it back to the starting position and one end at a time put the beam back in the starting position for the next pass. Did that until the that side was smooth and flip the beam over and finished up the hand planned side. I made a whole lot of oak bits that day. I also had to have that trolley thing as I was still very careful with my shoulder that had been operated on and was not to good yet. Still not very good but better than it was.

Oh the beam was for a fire place mantel at my dad's house.

Randy
"these guys must be afraid of the dark"
User avatar
Wolffarmer
Donating Member
 
Posts: 4612
Images: 309
Joined: Wed May 02, 2007 1:32 pm
Location: Idaho Rupert
Top

Re: The Poet Creek Express - Foamie Hybrid

Postby KCStudly » Mon Mar 18, 2013 2:38 pm

Thank you. Sounds like you had a nice "little" project there, too.

Thanks for stopping by. Off to mecca now to glue some more blocks in.
KC
My Build: The Poet Creek Express Hybrid Foamie

Poet Creek Or Bust
Engineering the TLAR way - "That Looks About Right"
TnTTT ORIGINAL 200A LANTERN CLUB = "The 200A Gang"
Green Lantern Corpsmen
User avatar
KCStudly
Donating Member
 
Posts: 9640
Images: 8169
Joined: Mon Feb 06, 2012 10:18 pm
Location: Southeastern CT, USA
Top

Re: The Poet Creek Express - Foamie Hybrid

Postby KCStudly » Sat Mar 23, 2013 9:58 pm

Let’s get caught up.

Monday I pulled the weights and what naught from the first of the curb side wall interior blocking glue ups.
Image

Then I cleaned that up with the small Surform grater and the small hard block with 100 grit paper.
Image

Did another round of glue ups, sometimes jumping ahead to leave room for the weights where the blocks were close together.
Image

To recap, I used the spritzy water bottle to damp the wood blocks, wiping excess off with a paper shop towel. Made sure that the end grain was damp (it takes a bit more). Made sure that the recesses were dust free. Applied a bead of GG (about 1/8 inch) around four sides, and in an X through the middle of each recess. Used the fake credit card as a spreader wearing vinyl gloves to smear it into a thin layer on the bottom and four side walls. Push the block down in, damp side down, now paying attention to put the grain horizontal to the floor (seems less likely to split due to load that way). Top with plastic side of freezer paper down, add an equal size block to concentrate the weight, a tub of SS screws because they fit the block well, then a box of welding wire spool because it weighs enough to keep the GG from pushing the recessed block up. I have found that this schedule combats the hydraulic effect of the GG fairly well. Now that I am mostly done with these standard 1 x 4 x 4 nominal (3/4 x 3-1/2 x 3-1/2 actual) blocks I have found that my developed technique has gotten them to stay down in the holes about the same amount as I had set the router depth over the 3/4 inch desired depth. So knowing what I know now I would probably either set the depth truer, or use a slightly larger block for the spacer so that they don’t hold the recessed blocks down in the hole. No worry. Just a quick few passes with the hand sanding block and everything is fairly fair.

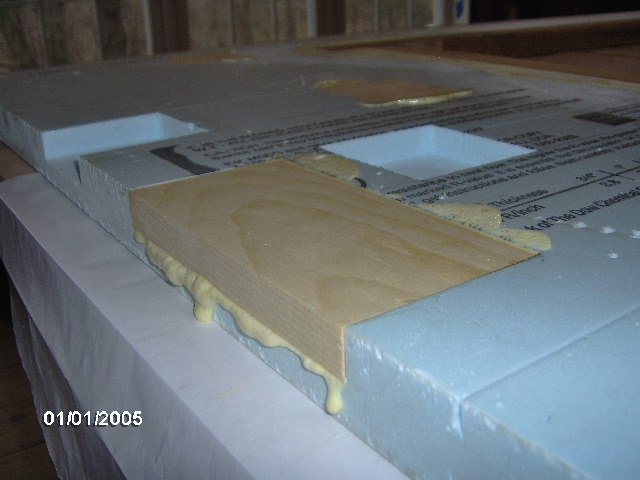
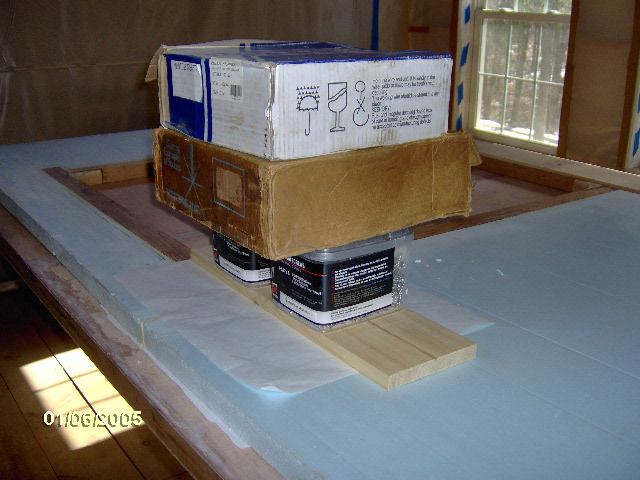
On this 2-fer in the galley I used a wider 1x6 plank for the weighted block and my drinking water supply and finish nailer (in case) for the weight, and it held the recessed blocks nice and flush.
Image

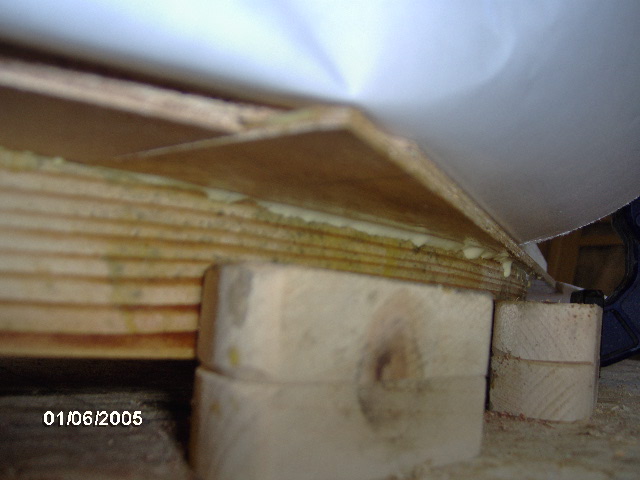
On Wednesday I pulled the weights and paper off and found that the front block had been pushed out forward due to the open side of the recess not constraining it; about 1/8 inch.
Image
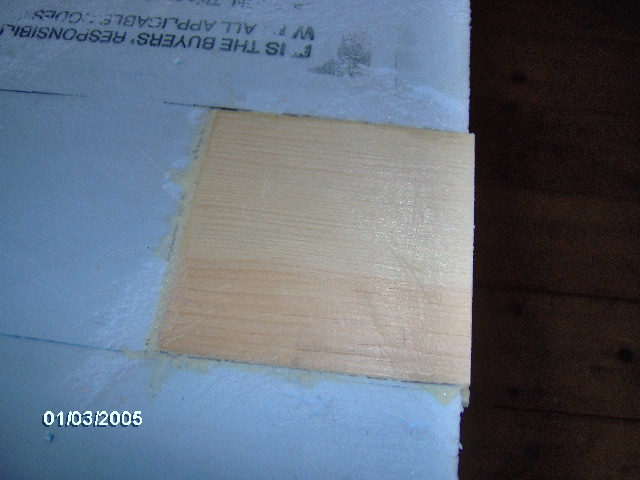
If you look closely at the previous pic you can see the expanded line of GG at the back of the block (on left seam in pic) and the corresponding unevenness between the block and the front edge of the blue foam (on right side of pic).

What I have found is that the consistency (or lack thereof) of the environment has a big effect on the performance of the GG. On moderate days where I left my glue bottles in the car it reacted much less than on colder days when I brought it in to work with me to keep it from freezing. Same thing when I was leaving the heat on in the loft overnight vs. bringing the glue home with me and shutting the heat down. Even the moisture that I put into the wood and how long I leave it sit, what the conditions are in the shop, whether I set the block damp side up or damp side down while I am prepping before actually setting the block in the recess can all have an effect on how the GG behaves. I don’t have any concern at all about the strength or integrity of the joints (they all kicked off eventually); it is more an issue of consistency, accuracy of placement, and amount of glue squeeze out so as to minimize the amount of clean up and maximize the fit. The more stable you can keep the environmental conditions the better.

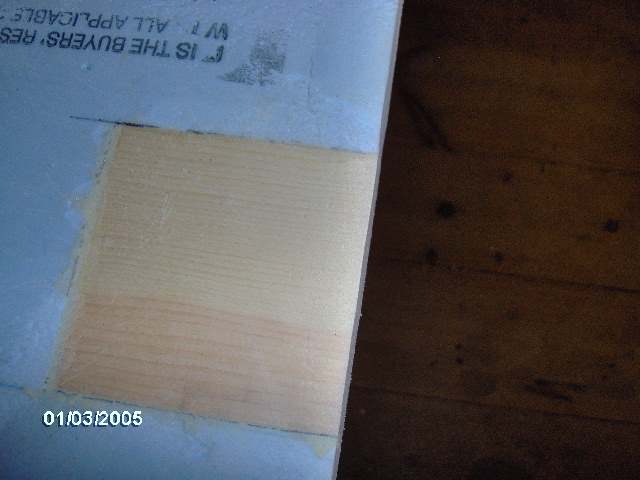
Here it is after fairing the face of the wall.
Image

Here I have used the belt sander to fair the block back to the front edge of the wall. Glad I left plenty of margin around the screw location.
Image

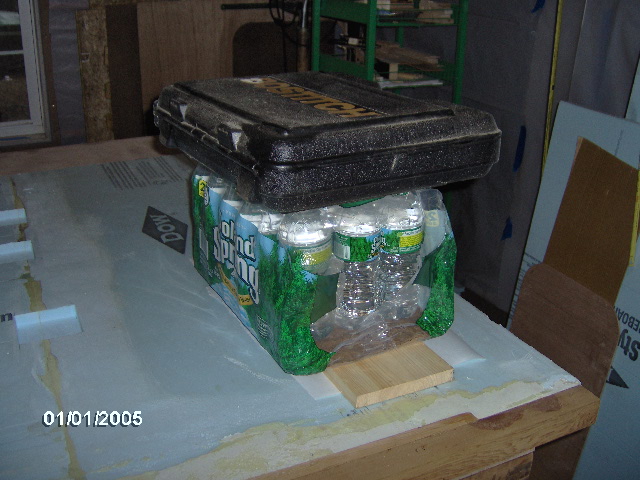
Here are the ones in the galley from under the water bottles; not bad.
Image
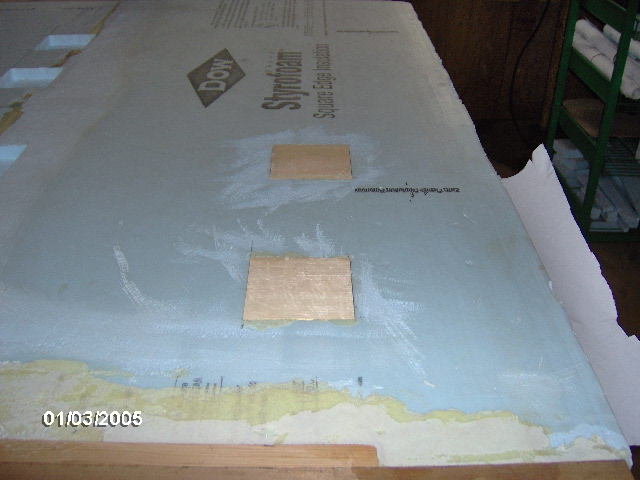
Note that I put freezer paper under the wall to protect the floor from any glue that might sneak through the seams or factory score lines in the foam. It did happen, so I am glad I took this extra precaution.

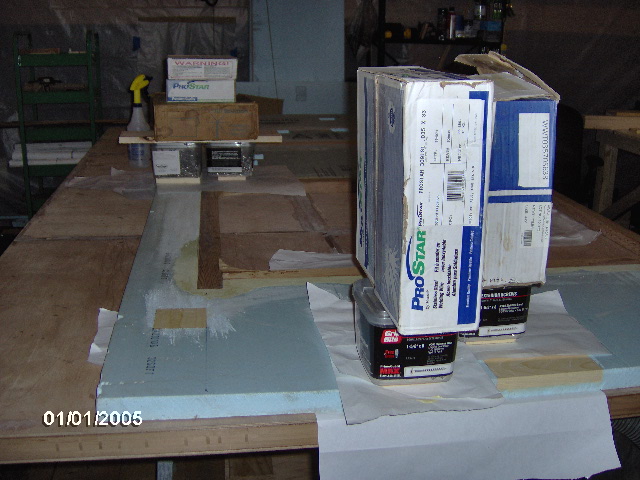
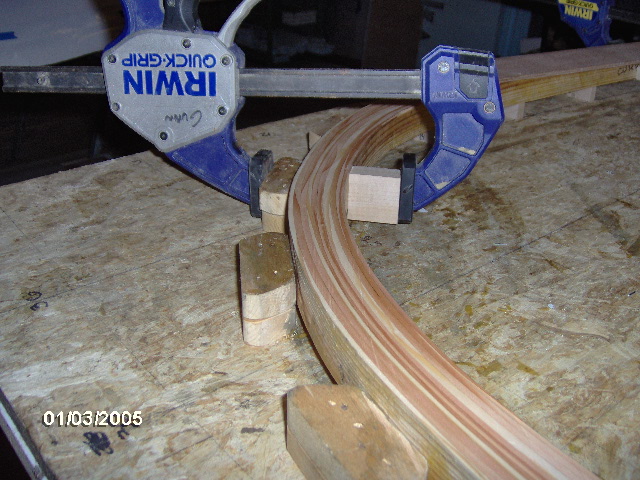
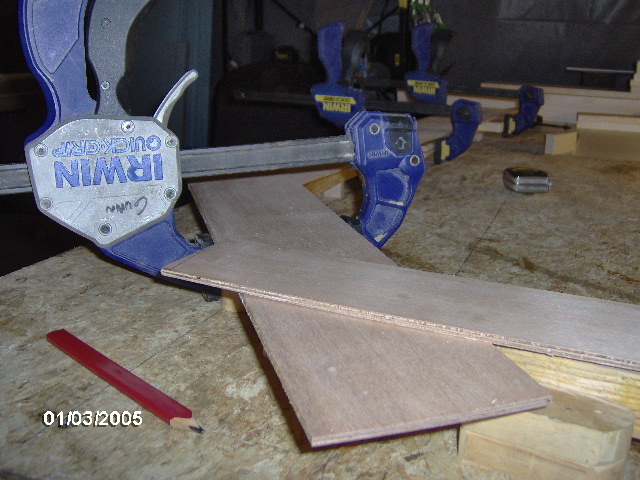
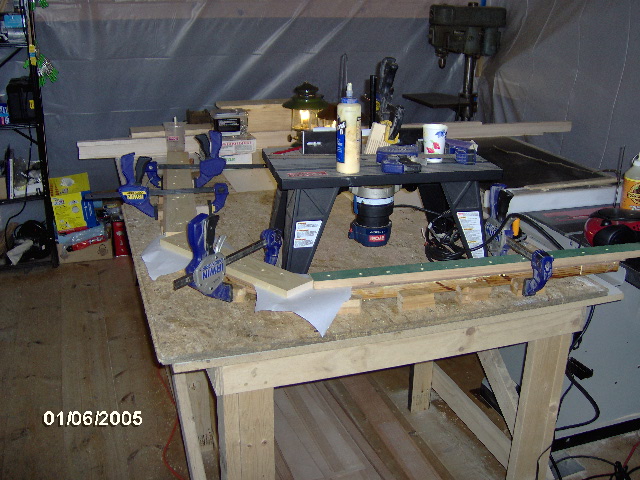
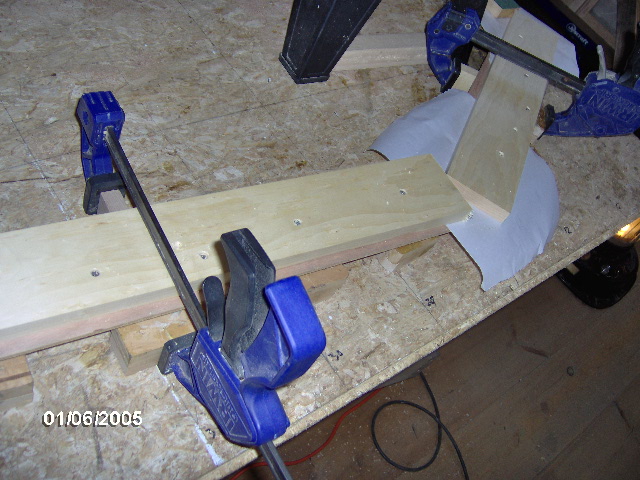
In the mean time I have been working to get my laminated galley wall edge pieces into a useable state. In order to be able to clamp the edges into the jig, maintain clearance with the clamps, and get the side of the edge above the jig blocks, I had to space the edge piece up off of the jig board and use spacers between the clamps and the part, as shown here.
Image
Image

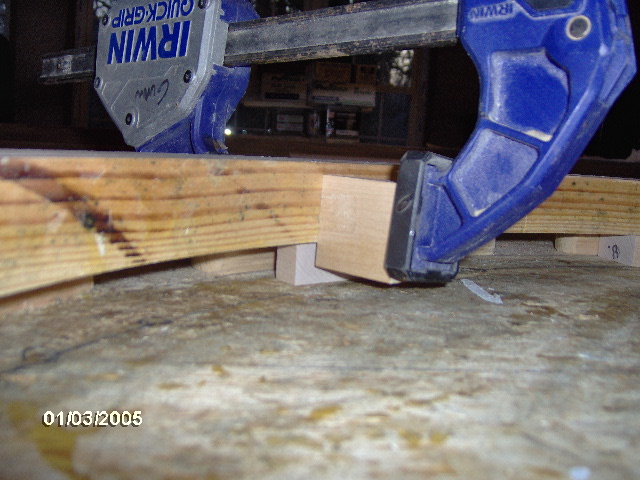
And here you can see why I needed to make the clearance, so that the rough ply skin lays flat on the laminated part and the clamps don’t get in the way of gluing them on flat.
Image

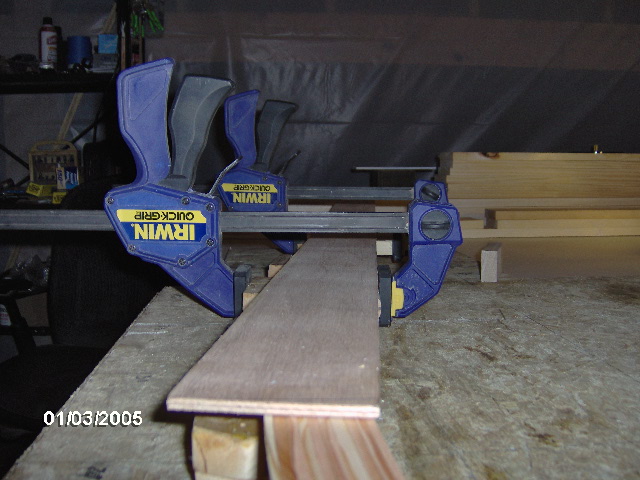
And a rough layout of the ply skins on the wall edging.
Image
Image

As it stands right now, I am considering this to be the piece for the curb side wall because I would rather have the ply spacer be on the inside off the wall, rather than on the outside where it will get routed out for the hatch seal. But I might change my mind on that before it is done.

One thing I learned is that the jig will only work for one side as is. If I want the ply spacer skin to go on the opposite hand for the street side wall the jig will need to be inverted. Maybe I will end up putting the curb side ply on the inside, and the street side ply on the outside. Does it really matter? I plan to seal and paint the edge any way.

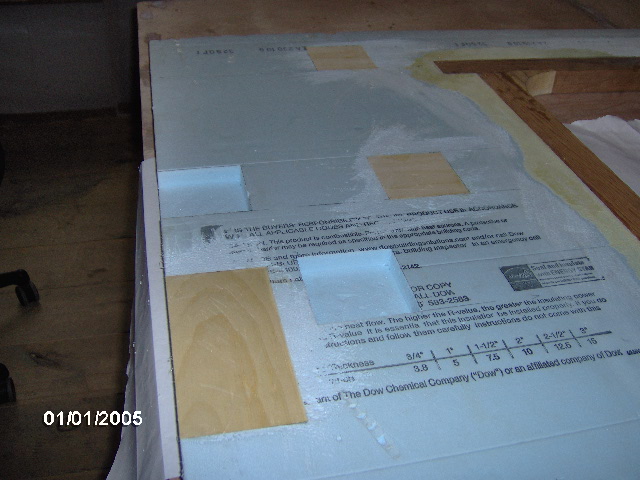
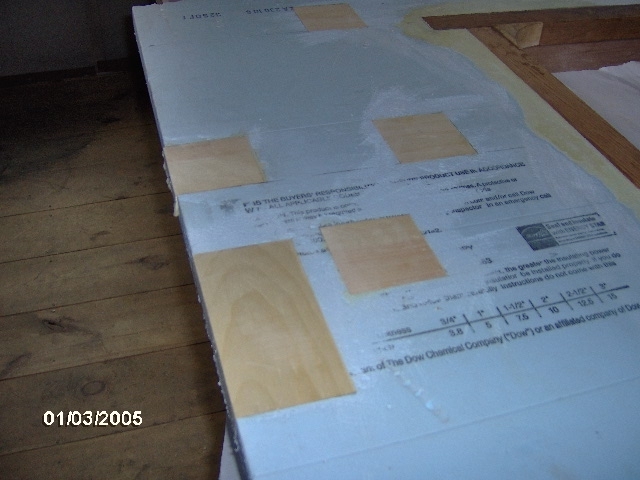
I think we are into Thursday now. Back to the wall cores: I removed the weights, trimmed the excess GG, and hand sanded a bit to get closer to fair. These are the blocks for the cabinets at the back of the cabin over our feet.
Image

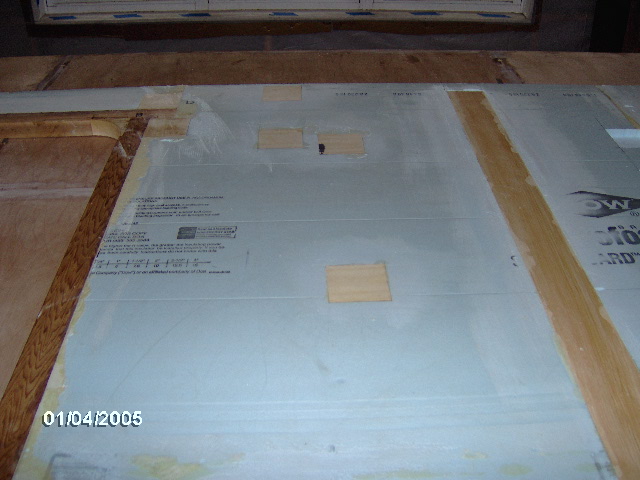
Same thing from the top looking down. The dark spot is marking dye from the lumber yard.
Image


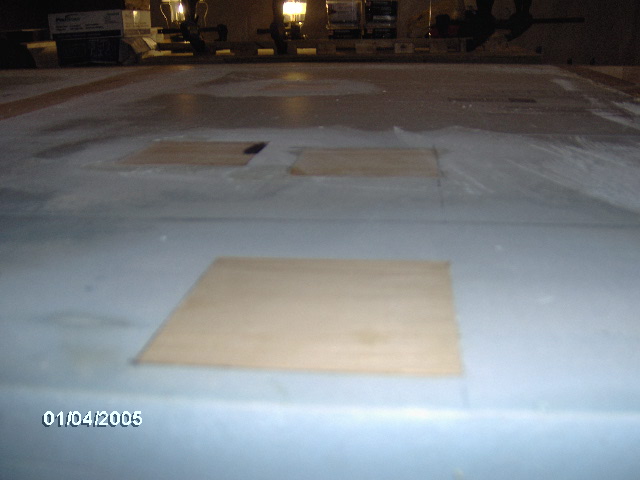
Got the last of the previously cut recesses filled, the ones in the galley.
Image

So what’s left for blocking? I have the hatch struts worked out in the model but, at this point had not translated those into useful dimensions. The fender mounting locations are planned out, but I want to verify those with a test fit of the fenders before committing to the cuts. I think I am going to put some cleats on the outsides to attach wing tables to, but I may want these to be lower than the galley counter, so I want to check that with a final ride height further along in the build. I thought about putting something in for my thermometer/hygrometer, but I think I will just use double backed tape for that instead of screws.

Had rain on top of snow with flurries later in the day (flurries didn’t show up in the pic).
Image

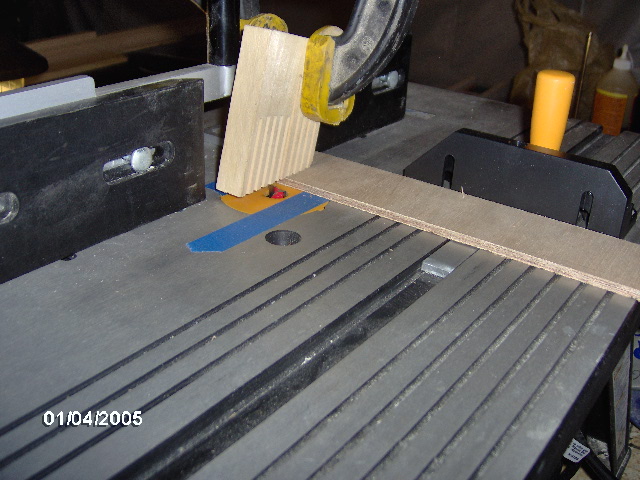
Set up the router to make half laps in the mitered scab pieces of 5mm ply that will get laminated onto the side of the galley wall edges. This is just a scrap piece of 5mm luan underlay used for setup.
Image

Friday I stayed after work and added the hatch strut block locations onto the wall drawing, and printed that out on the big plotter. Also made another copy of the wall edge profile, although I will probably use the outline from the CNC profile templates and fit the edge pieces to these to determine where to trim them.

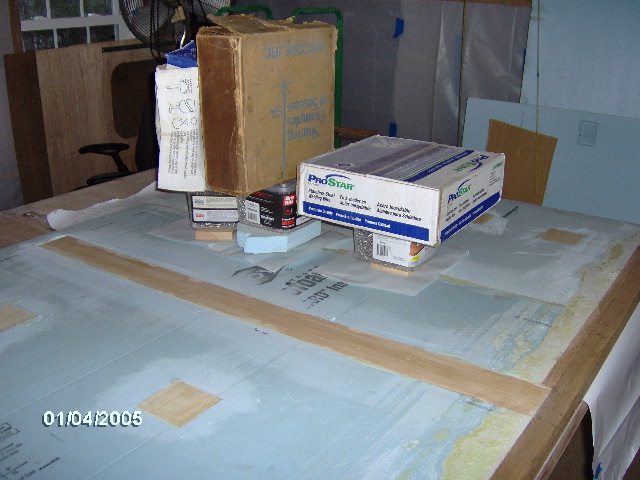
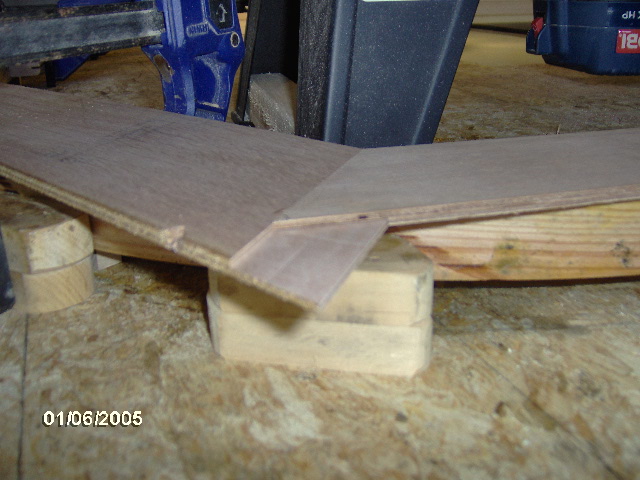
That brings us to today, Saturday. I started by mitering the scab pieces of okoume and making the lap joints. Here is a shot of the dry fit.
Image

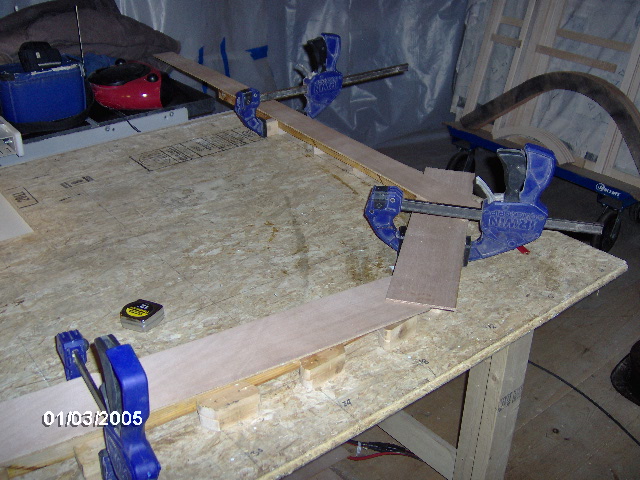
And here it is after gluing; sticking a couple of countersunk drywall screws thru the okoume into edge piece to pin them into location; adding a couple of scraps of the freezer paper over the miter joints; then screwing some random pine boards down over the whole length to clamp the skins down seriously.
Image

The clamping boards gave really even glue squeeze out.
Image

I only put glue in the lap joints where they sat over the edge piece, so that’s why, although a little blurry, you can see a little separation and no glue on the excess in the foreground of this next pic. Not to worry, the critical section under the wood plank clamp is good and tight.
Image

Here’s a better look at the pine I used as a clamp. Screws were placed every 4 to 6 inches or so.
Image

Then I moved back to the curb side wall, pulled the weights from the “last” of the blocks, trimmed, knocked down, and sanded to fair them out.

Next I set the CNC profiles up, got them into their exact positions, and traced out the outline with a black sharpie. Same deal as before, moving the center section around to get all of the big radius in the main part of the roof.
Image
Image
Image
Image

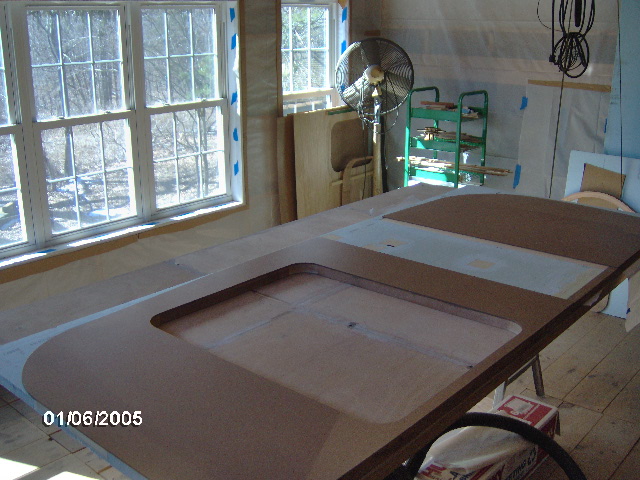
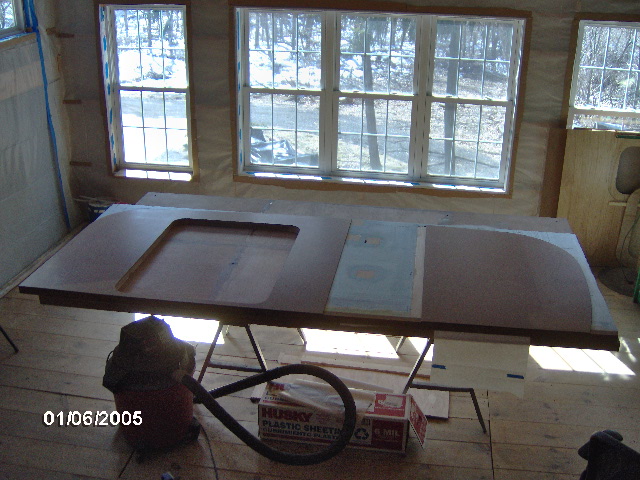
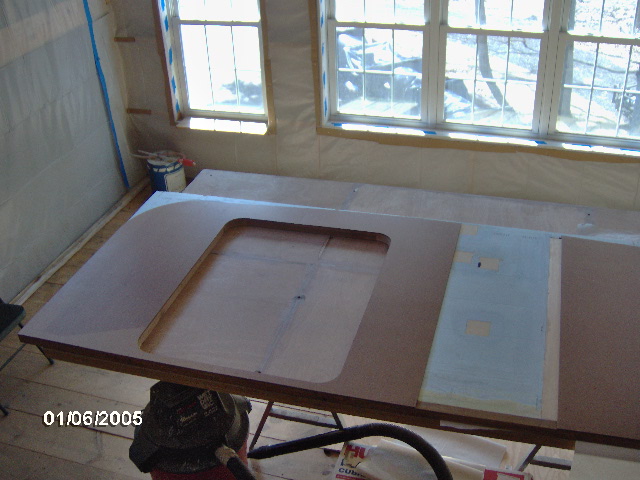
This is looking from the front along the top of the wall (top to left of pic, floor to right).
Image

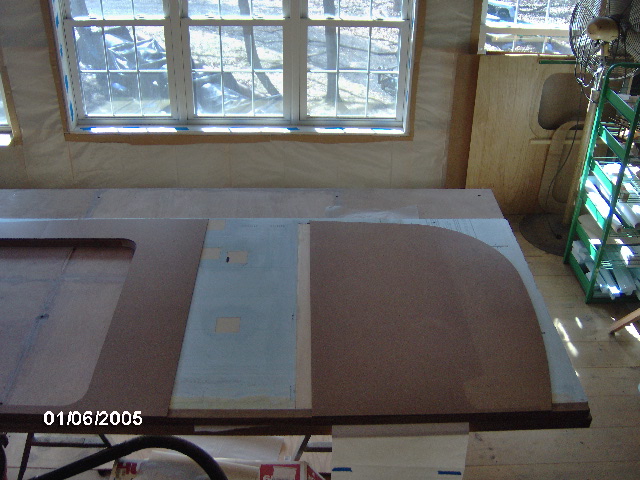
Here is the galley hatch section (shown with the floor to the left, the back to the lower right, and the top to the upper right). Image
Image
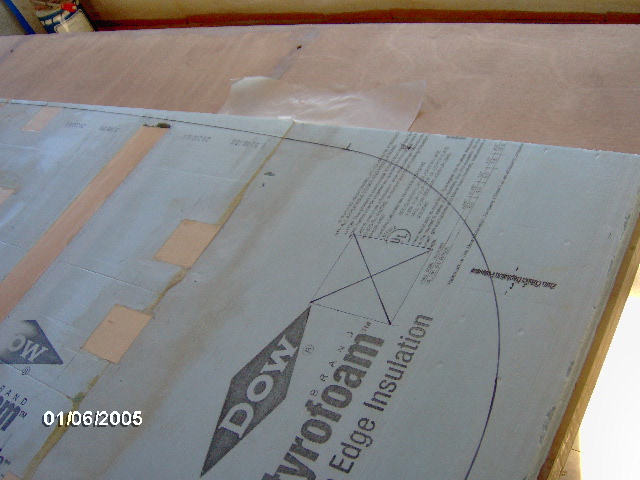
In the above pics, also note the larger square marked off for the tentative hatch strut blocking location. I’m not sure I want to commit to this location just yet based on the advice that having the struts anchor way out on the unsupported part of the wall can sometimes result in the struts bowing the walls out and affecting how the hatch fits when it is closed. I’m going to take another run at the design and figure out where the blocks would be if I were to keep the struts more in line with the hatch when opened. Then I can try either location, and if one doesn’t work out, the other will be there as a fall back. Still haven’t given up on the linear actuators, either. Note also that the layout (the big X) is for a bigger 3/4 x 5 x 5 block, and I will use some of the left over Red Grandis from the hatch ribs instead of the 1 x 4 pine that I have been using for the lower stress applications I have been using elsewhere.

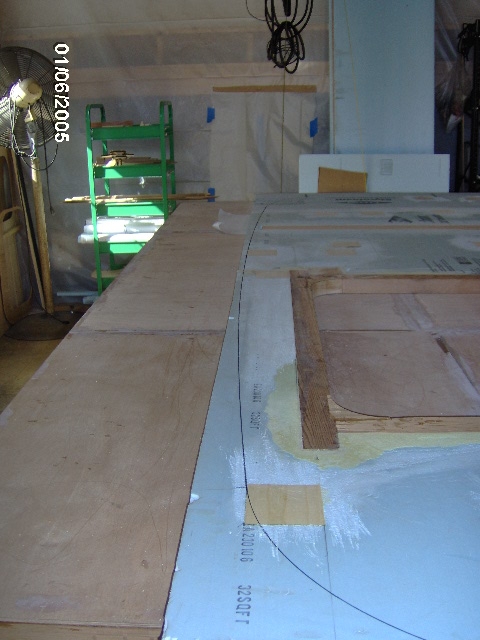
From there I flipped the wall over and routed out the recess for the porch light blocking, shown here upside down with the top of the wall at the bottom of the pic.
Image

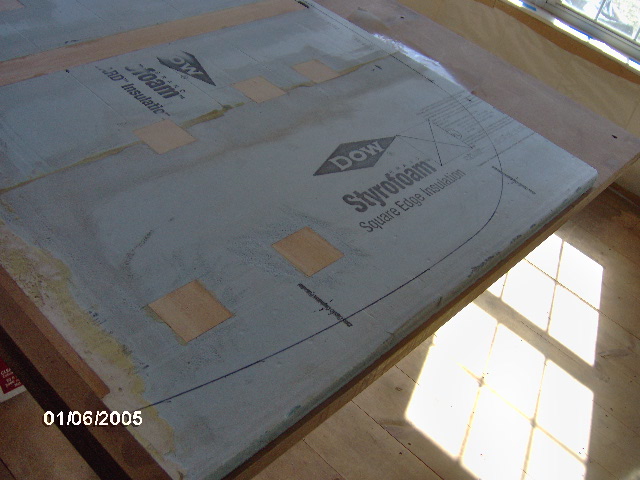
Then, after a little fitting, I glued that in and loaded on the freezer paper, weight spreader block, and weights.
Image

When I arrived at the shop at midday the outside temp was about 41F and the loft was only 39 or so. With the sun coming in it only took a couple of hours before I started shutting off the lanterns and heaters with the temp at about 55F (nice and comfortable for me wearing an over shirt and keeping moving.

Home early to clean up and get ready to take mom out and celebrate her B-day dinner (we had postponed from her actual B-day for various reasons). I had a wonderful osso bucco over risotto that I could not finish; mom had veal Marsala over pasta with a side of the asparagus and Parmesan risotto; Bill had the seafood shepherd’s pie (one of my favorites); and Yvette had the Italian salmon special with sauteed greens, sun dried tomatoes, etc. piled on top, the risotto on the side.

It's starting to feel like the "good ole days" of TPCE where I am putting in the time and getting things done. I’ll put a few more hours in on the build tomorrow.
KC
My Build: The Poet Creek Express Hybrid Foamie

Poet Creek Or Bust
Engineering the TLAR way - "That Looks About Right"
TnTTT ORIGINAL 200A LANTERN CLUB = "The 200A Gang"
Green Lantern Corpsmen
User avatar
KCStudly
Donating Member
 
Posts: 9640
Images: 8169
Joined: Mon Feb 06, 2012 10:18 pm
Location: Southeastern CT, USA
Top

Re: The Poet Creek Express - Foamie Hybrid

Postby KCStudly » Wed Mar 27, 2013 11:20 pm

More progress.

Here’s the curb side porch light block after GG.
Image
Some sanding and it cleaned up pretty decent (no pic).

Back to the wall edging fix. I unscrewed the extra clamp blocks (you can see the countersunk drywall screws used to “tack” the ply skins in place here… they came out next).
Image
Image

I was hopeful that the stability of the ply layer would help lock the profile back into place, but when released from the jig it still sprang about 1/2 inch, or about 1/4 inch less than before.

Bonus pics: I flipped it over on the wall table while I cleaned off the layout table and moved the jig board.
Image
Image
Image

Traced the rough cut on the underside, same technique that was used on the floor skins.
Image

Rough cut with jigsaw in this position to minimize splintering on the other side.
Image

On the trimmed off scrap piece I could see that the butt portion of the joint had a hair line gap, but could not see the seam at the face of the lap. It would not budge when trying to bend it within the flat plane, but could easily snap it at the butts when flexing it against the flat. It was encouraging that it split through one of the plies, not at my, nor the factory glue line.
Image

Here is the edge piece turned back up after the rough cut.
Image

Next I’m going to flush route both the inside and outside profiles.
Image

I had the bottom bearing bit adjusted down to about the middle of the piece, trying to avoid having the bearing riding on the glue squeeze out near the ply, but I started getting this strange undercutting.
Image

The faces and sides weren’t perfectly square, but not too bad to account for what I was seeing, and the bearing seemed to be in good shape without any play. Seemed like a good place to stop for the night and ponder.

Monday I had to pick Saphron (the orange tabby) up at the vet (she’s not doing very well, kidney troubles).

Tonight I screwed a chunk of 2x to the bottom of the router shoe. While there was a little bit of mismatch in height, it made everything stable and eliminated the small undercut.
Image

Ran that around and with just a little sanding I ended up with this.
Image
Image
Image

For efficiency I probably should have moved on to the second wall edge piece and repeated these steps, but I decided to push forward on the curb side.

I used the edge piece to help transfer the profile tracing to the inside. Because the piece is sprung out I had to sort of roll it around the outer tracing while tracing the inside; close enough, I hope.
Bottom first then top.
Image
Image

I used one of the faux credit card/squeegee’s (one of the thinner ones) to make a tracing template for the bottom cut detail.
Image
Image
(The little rounded bump-in was part of the card and has nothing to do with anything.)

Then I aligned the edge piece again and made a few reference marks that I transferred around.
Front.
Image
..and rear.
Image

Then I used the template to add the vertical cut line.
Image

Then I made the cuts.
Image

The trim cut at the top was just a straight line transferred between two points, then I laid it back on the wall for a dry fit and photo op.
Image

This one shows the difference between the trimmed curb side edge and the untrimmed street side one.
Image

Then I bit the bullet and started to make the cut out for the edge piece. I did it in two steps because if I hung too much of the wall off of the floor (work table) the unsupported corner of the foam would droop.
Here’s the first cut.
Image
(No pic of the second cut.)

Then I dry fit the piece again. It’s kind of hard to see in the first pic because the color of the upper segment blends in with the color of the floor.
Image

This is looking from the rear along the top, with the top to the right.
Image

There’s still a gap in the middle, and I will have to do some creative clamping to pull it in for glue up, but am hopeful that it will work itself out. Starting to think that it would have been easier to adjust the profile and rework the already made hatch ribs to match, but then the edges didn’t stay the same as each other, either, so I guess it is 6 of 1, half dozen of the other.

A little bit of art to close for tonight. This is the end of the cut off piece of the wall edging. I liked the way the grain looked kind of zebra or zig-zag like.
Image
KC
My Build: The Poet Creek Express Hybrid Foamie

Poet Creek Or Bust
Engineering the TLAR way - "That Looks About Right"
TnTTT ORIGINAL 200A LANTERN CLUB = "The 200A Gang"
Green Lantern Corpsmen
User avatar
KCStudly
Donating Member
 
Posts: 9640
Images: 8169
Joined: Mon Feb 06, 2012 10:18 pm
Location: Southeastern CT, USA
Top

Re: The Poet Creek Express - Foamie Hybrid

Postby GPW » Thu Mar 28, 2013 5:00 am

Looking Good KC , getting close to assembly now , and with the promise of better weather , you should be done soon ..... camping season is right around the corner... :thumbsup: :applause: 8)
There’s no place like Foam !
User avatar
GPW
Gold Donating Member
 
Posts: 14920
Images: 546
Joined: Thu Feb 09, 2006 7:58 pm
Location: New Orleans
Top

Re: The Poet Creek Express - Foamie Hybrid

Postby KCStudly » Thu Mar 28, 2013 2:35 pm

Thanks GPW.

Yeah last night was about 55F in the loft. No heater needed and only one lantern going. Saw bugs flying around on the drive home.

Gotta' get this together, for sure!
KC
My Build: The Poet Creek Express Hybrid Foamie

Poet Creek Or Bust
Engineering the TLAR way - "That Looks About Right"
TnTTT ORIGINAL 200A LANTERN CLUB = "The 200A Gang"
Green Lantern Corpsmen
User avatar
KCStudly
Donating Member
 
Posts: 9640
Images: 8169
Joined: Mon Feb 06, 2012 10:18 pm
Location: Southeastern CT, USA
Top

Re: The Poet Creek Express - Foamie Hybrid

Postby ghcoe » Thu Mar 28, 2013 9:02 pm

GPW wrote:Looking Good KC , getting close to assembly now , and with the promise of better weather , you should be done soon ..... camping season is right around the corner... :thumbsup: :applause: 8)


I just got back from camping. Beautiful weather for the 2 days I was out. :thumbsup:
George.

Gorrilla Glue, Great Stuff and Gripper. The three G's of foamie construction.

My build viewtopic.php?t=54099
Working with flashing for foamie construction viewtopic.php?f=55&t=60303
Making a hot wire http://tnttt.com/viewtopic.php?f=55&t=55323
User avatar
ghcoe
1000 Club
1000 Club
 
Posts: 1982
Joined: Fri Dec 11, 2009 11:20 pm
Location: SW Idaho
Top

Re: The Poet Creek Express - Foamie Hybrid

Postby KCStudly » Thu Mar 28, 2013 9:08 pm

ghcoe wrote:I just got back from camping. Beautiful weather for the 2 days I was out. :thumbsup:


Where did you go? North?

I'm thinking there must be many feet of snow still at Poet Creek.
KC
My Build: The Poet Creek Express Hybrid Foamie

Poet Creek Or Bust
Engineering the TLAR way - "That Looks About Right"
TnTTT ORIGINAL 200A LANTERN CLUB = "The 200A Gang"
Green Lantern Corpsmen
User avatar
KCStudly
Donating Member
 
Posts: 9640
Images: 8169
Joined: Mon Feb 06, 2012 10:18 pm
Location: Southeastern CT, USA
Top

Re: The Poet Creek Express - Foamie Hybrid

Postby ghcoe » Thu Mar 28, 2013 9:21 pm

KCStudly wrote:Where did you go? North?


We try and take this trip every spring break. The weather this year was the best we had in a long time. http://parksandrecreation.idaho.gov/parks/bruneau-dunes
George.

Gorrilla Glue, Great Stuff and Gripper. The three G's of foamie construction.

My build viewtopic.php?t=54099
Working with flashing for foamie construction viewtopic.php?f=55&t=60303
Making a hot wire http://tnttt.com/viewtopic.php?f=55&t=55323
User avatar
ghcoe
1000 Club
1000 Club
 
Posts: 1982
Joined: Fri Dec 11, 2009 11:20 pm
Location: SW Idaho
Top

Re: The Poet Creek Express - Foamie Hybrid

Postby KCStudly » Thu Mar 28, 2013 9:39 pm

Thanks, George. That looks great. Glad you had a good time. :thumbsup:
KC
My Build: The Poet Creek Express Hybrid Foamie

Poet Creek Or Bust
Engineering the TLAR way - "That Looks About Right"
TnTTT ORIGINAL 200A LANTERN CLUB = "The 200A Gang"
Green Lantern Corpsmen
User avatar
KCStudly
Donating Member
 
Posts: 9640
Images: 8169
Joined: Mon Feb 06, 2012 10:18 pm
Location: Southeastern CT, USA
Top

Re: The Poet Creek Express - Foamie Hybrid

Postby GPW » Fri Mar 29, 2013 6:12 am

Getting above 70F every day now , so we can finally go outside and bask in the sun , like an old dog 8) ... Below 70F here is officially “freezing” , requiring more clothing than the usual t-shirt and flip flops ... :roll: :lol:
KC , just thinking you need to start on your second trailer soon , because this one , after all the work/thought/expense you’ve gone through... it needs to be finished , signed and rolled out of the shop and directly into a Museum... :thumbsup: 8) :applause: :applause: :applause: More Art than trailer !!! You’ve managed to raise the bar so high , the rest of us are left far below :oops:
There’s no place like Foam !
User avatar
GPW
Gold Donating Member
 
Posts: 14920
Images: 546
Joined: Thu Feb 09, 2006 7:58 pm
Location: New Orleans
Top

PreviousNext

Return to Foamies

Who is online

Users browsing this forum: DrAlvarez and 11 guests