The Poet Creek Express - Foamie Hybrid

Canvas covered foamies (Thrifty Alternatives...)

Moderator: eaglesdare

Re: The Poet Creek Express - Foamie Hybrid

Postby KCStudly » Fri Apr 12, 2013 3:26 pm

Wolffarmer wrote:Knock these out like "Liberty Trailers". :D


If only! Thanks for sticking with me, Randy. :thumbsup:

bonnie wrote:Love watching your progress. Great work. :thumbsup:


Thank you so much, Bonnie. Positive feedback is like "wheels on the bus", keeps me going around and around! :D

GPW wrote:KC, your wiring is so Well engineered !!! :thumbsup: 8) :applause:

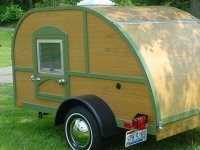
KC... just hypothetically speaking ... If someone came to you and asked you to reproduce a trailer like yours for them .. what do you think the price tag would be ??? Just Curious ... it is , for lack of a better word , “Perfect !!! "


Geep, thank you for the glowing praise. It really makes the extra effort that it takes to document things worthwhile, and on top of trying to do a good job building in the first place, it takes about the same amount of time, if not more to document (at least for me and my anally retentive methods :? :lol: :roll: ). So the fact that you are enjoying it is a big reward for me.

As to cost... the direct material cost is currently at $5281 and the indirect cost (tools, certain consumables like sandpaper, tape, etc.) are at $532. I'm not keeping strict track of labor hours, but you guys can all see the time that I am putting in. Figure two hours +/- for each weekday worked, and at least an average of six (6) hours for each weekend/holiday "full day" worked. Aside from our 2 week vacation last year I have worked on it at least one day a week for over a year, and many more days than that most weeks. That doesn't even take into consideration the hundreds of hours spent researching and designing, and just generally soaking things in here on the forums. Most of that is leisure, but it counts as research, too. :D

The real answer is, I wouldn't do this for anyone but myself because I don't think people would be willing to pay what it would cost. I'm now hoping that my direct out of pocket expenses stay below $6k by the time it's done, that would be the standard 20/ct overrun that most people claim.

If I were to decide to sell TPCE within a year or two, and assuming that it comes out the way I envision it, I would have to start at an asking price of $10k. That's maybe a labor rate of $2/hr or something ridiculous like that.

So let’s get back to the plan. You all have reminded me that I don’t need the full lighting install to be complete before camping. So I just need to get the wire channels, switch blocking and hatch strut blocks into the walls before the skins can go on. I can stick synthetic pull tape into the channels, or even blow (or vacuum) them through later.

I have also been kicking around the idea of adding a positive ventilation case fan located at the floor level under the back (vehicle front) of the galley counter that would draw cool air from under the cabin, pushing it up a chase to a register under the rear cabinets. This would provide a low power, low flow, and low noise method of ventilation for when the planned roof vent fan would be too much. I think I even have a fan that I had planned to use on a car amplifier install, but ended up not needing (gee… I wonder where it is right now?), but it can be added later.

Okay, I gotta’ run. Catch you on the flip side… after taxes.
KC
My Build: The Poet Creek Express Hybrid Foamie

Poet Creek Or Bust
Engineering the TLAR way - "That Looks About Right"
TnTTT ORIGINAL 200A LANTERN CLUB = "The 200A Gang"
Green Lantern Corpsmen
User avatar
KCStudly
Donating Member
 
Posts: 9640
Images: 8169
Joined: Mon Feb 06, 2012 10:18 pm
Location: Southeastern CT, USA

Re: The Poet Creek Express - Foamie Hybrid

Postby KCStudly » Mon Apr 15, 2013 9:49 pm

Guess I stunned you all with that last post. :o

Anyway, taxes are done… I hate doing them so I always wait until the last minute. Oh well. It’s not so much that I hate doing them, it’s more that I hate to see how much of what we make goes in to taxes. The percentage seems to grow every year and I am just not seeing the return in services. Where does it all go?

That’s my “rant”.

Put in a couple of hours at Mecca. Started by laying out the wall switch blocking and switch recess location on the street side wall. Just sort of winged it; no modeling. The blocks are shown and go on the ends where the vertical X’s are. The middle horizontal X section is where I need to clear for the depth of the switches, and the outside border represents the footprint of the switch plate making sure that the cutout for the switches is overlapped all the way around.
Image

Then I repeated the layout on a scrap of 5mm underlayment adding 1/16 inch all around to allow for the router collar guide.
Image

Then I used the back of the hand saw as a straight edge, and the razor knife to score out the template.
Image

Got wrapped up in my work and forgot to take a picture of the template installed and the router operation, but here is one of dry fitting the switch blocks after a little trimming with the chisel and extending razor knife.
Image

Then I used my smaller square template for the wall blocking to cut out the “optional” hatch strut anchor block. I had to relocate the template a few times to cover the larger block for the hatch strut.
Image

Double checked the resulting recess dim’s and cut a scrap of Red Grandis down to fit. It was a tad loose on the fit, but I went ahead and GG’d it and the switch blocks in.
Image

That’ll get me to where I can move back to the curbside wall and do the same.

Sharon posted a link to some wing table cleats in another thread that had a really great price, and while the shipping was more than the part, I went ahead and ordered one of them. It comes in 30 inch lengths and I figure I can cheat and use half of it, 15 inches on each side, even if I make the tables a bit wider. Already have the wooden crutches to use for a strut triangulating from the end of the tables back to the base of the walls so that I don’t have to worry about uneven ground.
KC
My Build: The Poet Creek Express Hybrid Foamie

Poet Creek Or Bust
Engineering the TLAR way - "That Looks About Right"
TnTTT ORIGINAL 200A LANTERN CLUB = "The 200A Gang"
Green Lantern Corpsmen
User avatar
KCStudly
Donating Member
 
Posts: 9640
Images: 8169
Joined: Mon Feb 06, 2012 10:18 pm
Location: Southeastern CT, USA

Re: The Poet Creek Express - Foamie Hybrid

Postby ghcoe » Tue Apr 16, 2013 5:59 pm

Prototypes always cost more and take more time to make. When/if you build another it will go faster and be cheaper. :thumbsup:

I am looking to stay under $1000.00 material cost with my build. Right now it looks like I have a good margin to work with. I think once I get all the bugs worked out of mine the build time will be pretty small too. I hope anyway, may build some to sell if I like it enough.
George.

Gorrilla Glue, Great Stuff and Gripper. The three G's of foamie construction.

My build viewtopic.php?t=54099
Working with flashing for foamie construction viewtopic.php?f=55&t=60303
Making a hot wire http://tnttt.com/viewtopic.php?f=55&t=55323
User avatar
ghcoe
1000 Club
1000 Club
 
Posts: 1982
Joined: Fri Dec 11, 2009 11:20 pm
Location: SW Idaho
Top

Re: The Poet Creek Express - Foamie Hybrid

Postby Wobbly Wheels » Tue Apr 16, 2013 8:27 pm

Good call on the Blue Sea gear. Dunno if you're dead set on using those switches or not, but Blue Sea makes boxes to surface mount their 8220/8230 series switches that might help with the backspacing. You can also get actuators that have different icons and LEDs. Just a thought...
User avatar
Wobbly Wheels
Donating Member
 
Posts: 1080
Joined: Tue Mar 15, 2011 9:51 am
Top

Re: The Poet Creek Express - Foamie Hybrid

Postby _Ryan_ » Tue Apr 16, 2013 10:13 pm

As far as cost goes, here is a few words of wisdom from someone you might know. :-)

"The best way to build an inexpensive trailer is to not keep track."

This really summed up my build, you can't put a price tag on fun and the sense of accomplishment you get from building one of these trailers.

I've been trying to read through your build and I can see that you are very detail oriented. This will be one heck of a trailer on the end! I'm looking forward to seeing everything come together! Well done!

Cheers,
Ryan
User avatar
_Ryan_
Teardrop Master
 
Posts: 241
Images: 356
Joined: Fri Nov 16, 2012 6:24 pm
Top

Re: The Poet Creek Express - Foamie Hybrid

Postby KCStudly » Wed Apr 17, 2013 11:41 pm

Ghcoe, you made me laugh. My wheels, tires and axle w/ brakes are about equal to your 1k budget.

WW, yeah, I am happy with the panel, and thanks for the info on those switches. I’m happy with these and am looking forward to making the switch plates to match the rest of my wood finishes (I hope I have enough scraps of the Red Grandis to tie some of that into the cabin from the galley hatch ribs).

Ryan, Yeah I wrote that. Kind of tongue in cheek because I feel that most people who say they only have this much or that much (usually unbelievably low numbers) into their trailers probably have not kept very good track of their costs. The big reason that I have been keeping very close track is to show others what to expect if they decide to take on a build of their own. It can be done for a lot less, but you have to be realistic in what method you chose to build and what features you “need”. I have an expensive suspension and have used very high quality materials, but other than all 12v LED lighting and a planned vent fan (that is not in the tally yet) there really aren’t any built in appliances or features (no AC, microwave, fridge, solar, etc.) and I am building my own doors, albeit with new manufactured windows. My message is to not underestimate the cost. Your attitude is great! Have fun, the money will pay for itself, so to speak.

On to Mecca:
Karl got a 100 ton press break at auction. It’s in really good condition. Capacity is 1/4 thk x 8 ft long, IIRC.
Image
Image

There’s a hydraulic ram at each end that act on the big rocker arms at the top. Behind the round aluminum disk there is an 8 inch diameter tube that links the two rockers together like the anti-roll bar in a car. The aluminum disc connects a bar that passes through the tube, fixed at this end but connected to a differential sensor at the other end. If there is any twist in the big tube the sensor makes a correction to the amount of hydraulic pressure being applied so that the upper plate or die always travels parallel to the lower. Pretty nifty. Karl has already started building an upgrade to the 3 phase generator (from 5 to 20 hp) and is keeping an eye out for some of the more common types of die sets.

Temperatures and humidity are on the rise and the GG is a good barometer for that. Lots of expansion on the street side hatch strut wall blocking, with some stuck on freezer paper to boot.
Image

The street side light switch blocking and recess had a little GG expand into the wire channel.
Image

Trimmed those both with the steak knife and hit them with the small 100 grit hard block.
Image
Image

By the way, the loft was up to 75 deg F when I arrived (hotter than outside) so I opened all of the windows to get it to come down to 73. Outside was 55F after the sun went down. Now leaving the glues daily.

Switched back to the curbside wall. Here is a sun streaked pic of the router setup for the wall switch. Had to countersink another set of holes into the templates from the opposite side to do opposite hand work.
Image
Image

On the street side wall, in order to make a climbing cut, I started at the top and worked my way down. Since the router is still turning in the same direction, the curb side wall had to be run from the bottom up. In this case I just used a piece of tape to mark the end of the cut referencing at the shoe for easier visibility.

Here is the curb side pillow light wire channel router set-up, similar to before.
Image

Rather than plunge into the cedar, I plunged into the foam just above and back fed up to the ‘J’ shaped stop.
Image

Here is a better look at how I set up the tape as a stopping reference. Held the guide collar against the template, eyeballed the center of the collar over the ‘X’ I had marked through the center of the block, and stuck the piece of tape next to the shoe. I suppose this is all rudimentary to many of you, but we all like pics, so…
Image

Routed and cleaned up.
Image
Image

Laid out the curb side wire chase for mounting and pass through holes.
Image
Image
Image

Next I positioned the switch block template for the curbside wall.
Image

About this time Karl and Simon came out and we had a visit. Conversation turned to the next steps in the build, including gluing the wall panels, and we got on to talking about whether I should stick to the 3M 30NF adhesive (which I will need to buy more of… $$$) or if I can use TB2 (which I have a lot of… $). So I took the opportunity to have Karl take a picture of me “testing” the TB2 test block I mentioned earlier.

Here I am with my right foot about 2 feet away from the table edge, my left foot lifted off of the floor leaning on the foam with all I have and the wood block jammed onto the edge of the table.
Image
You can see me starting to turn red from exertion waiting for the camera to go off.

Hope to hit it again tomorrow evening. Thanks for watching and the encouragement!
KC
My Build: The Poet Creek Express Hybrid Foamie

Poet Creek Or Bust
Engineering the TLAR way - "That Looks About Right"
TnTTT ORIGINAL 200A LANTERN CLUB = "The 200A Gang"
Green Lantern Corpsmen
User avatar
KCStudly
Donating Member
 
Posts: 9640
Images: 8169
Joined: Mon Feb 06, 2012 10:18 pm
Location: Southeastern CT, USA
Top

Re: The Poet Creek Express - Foamie Hybrid

Postby bonnie » Thu Apr 18, 2013 6:14 am

It's raining and I'm reading again. :) Had to do some outside stuff while the sun was shining. :) Did get one small thing done on BUB, but that's another thread. KC, I am following along on the wiring stuff pretty closely. Are you planning on lining the switch cut outs? Electric is one of those areas where I really over think things. Cost is one of those things that can cause some debate. I already owned a lot of what I'm using in the build; left from another trailer project, I didn't complete. It's exciting to see your walls standing up. So well done and precise.
Remember, the turtle won. :)
User avatar
bonnie
Donating Member
 
Posts: 1390
Images: 107
Joined: Sun Jul 24, 2011 4:14 pm
Location: Roxana, IL
Top

Re: The Poet Creek Express - Foamie Hybrid

Postby GPW » Thu Apr 18, 2013 6:54 am

KC does set a rather High standard for us all !!! :thumbsup: 8) :applause: (high drool factor !!! ) The rest of us can only dream ... and cut foam ... :D
There’s no place like Foam !
User avatar
GPW
Gold Donating Member
 
Posts: 14920
Images: 546
Joined: Thu Feb 09, 2006 7:58 pm
Location: New Orleans
Top

Re: The Poet Creek Express - Foamie Hybrid

Postby KCStudly » Thu Apr 18, 2013 3:10 pm

bonnie wrote:Are you planning on lining the switch cut outs?

It had occurred to me to line the pockets and channels with foil duct tape as a fire stop against the foam, and I suppose I would need to run a strip of it in the corresponding location on the back side of the inner wall panels before gluing them down, but I just don't know if it is even necessary. We are only talking 12v here. I do plan to use the shielded spade connectors and all of the wire connectors will be shrink wrapped. Tough to decide between what is prudent and what is over thinking. What I do not want to have is a bunch of clunky juction boxes mounted everywhere.

Oh, and I probably should mention that the PVC Wiremold product is technically only rated for properly jacketed cords (it is not rated for 110v individual conductor conduit). So long as no one tells them that I am using it for 12v conduit I think I will be safe.

GPW wrote:The rest of us can only dream ...

Quit dreaming and start building!!! :o :lol: :D 8) :R I can practically see those hurricanes lining up off the coast right now!!! :frightened: :frightened: :frightened:

Anyone who can build a guitar or an RC plane that flies can do what I am doing. You just have to be nutty enough to spend too much time doing it!

Thank you both for the enthusiasm! Now off to build.
Last edited by KCStudly on Sat May 11, 2013 9:13 pm, edited 1 time in total.
KC
My Build: The Poet Creek Express Hybrid Foamie

Poet Creek Or Bust
Engineering the TLAR way - "That Looks About Right"
TnTTT ORIGINAL 200A LANTERN CLUB = "The 200A Gang"
Green Lantern Corpsmen
User avatar
KCStudly
Donating Member
 
Posts: 9640
Images: 8169
Joined: Mon Feb 06, 2012 10:18 pm
Location: Southeastern CT, USA
Top

Re: The Poet Creek Express - Foamie Hybrid

Postby Wobbly Wheels » Thu Apr 18, 2013 7:37 pm

...but I just don't know if it is even necessary. We are only talking 12v here.


FWIW, ABYC ('code' for boats) doesn't require it. If anything, you could create a short if one of your terminals vibrates off or breaks and contacts your conductive shielding...but then your fusing will kill the circuit long before there's a danger of fire.
If you were running halogens your switches might be carrying enough current to warm up but LEDs don't take anywhere that kind of current: I presume those switches are rated to at least 5A ?
User avatar
Wobbly Wheels
Donating Member
 
Posts: 1080
Joined: Tue Mar 15, 2011 9:51 am
Top

Re: The Poet Creek Express - Foamie Hybrid

Postby KCStudly » Thu Apr 18, 2013 9:20 pm

Switches are 15a at 12v and 10a at 24v. Tons for the LED loads.

http://www.superbrightleds.com/moreinfo/switches/spst-round-rocker-switch/714/1920/

Yeah, my first thought was to just do the obvious and leave all of the hidden stuff raw and let the wire connector boots protect me against shorts. Then the engineer in me took over and I had the thought of using the foil tape. Then the reality of that being complicated and not really working as good as I can imagine it set in (like trying to get the tape to stick to the foam, or getting it to follow the curves in the wire channels... not likely).

On the curb side wall where I only have two switches, I plan on running the roof vent fan power thru that channel, then on up into the roof, and I assume that the fan is going to be the biggest draw, at least out of the basic items so far. On a guess, if I do go with the stereo that could get close to or exceed the fan in power draw (IIRC the head unit is 25w/ch and the amp is 35-40w/ch, I would bridge the 3rd and 4th channels for an 8 inch bazooka bass). Don't know the fantastic vent spec.'s off the top of my head.

Glad to hear that a responsible authority (ABYC) is not too concerned, so that backs up my first instinct. Thanks for that WW.

On the subject of build progress, tonight I did to the curbside wall some of the steps that I had done recently to the street side. Routed out the main light switch blocking pockets and recess. Routed out the hatch strut blocking location and trimmed the corners. Sized the hatch strut block out of Red Grandis, and glued them all in.

I'll post pics at the next camera dump and weekend update, but they are substantially similar to what is shown above.
KC
My Build: The Poet Creek Express Hybrid Foamie

Poet Creek Or Bust
Engineering the TLAR way - "That Looks About Right"
TnTTT ORIGINAL 200A LANTERN CLUB = "The 200A Gang"
Green Lantern Corpsmen
User avatar
KCStudly
Donating Member
 
Posts: 9640
Images: 8169
Joined: Mon Feb 06, 2012 10:18 pm
Location: Southeastern CT, USA
Top

Re: The Poet Creek Express - Foamie Hybrid

Postby GPW » Fri Apr 19, 2013 7:30 am

I believe Code specifies running wiring in conduit ... on non Studly walls
There’s no place like Foam !
User avatar
GPW
Gold Donating Member
 
Posts: 14920
Images: 546
Joined: Thu Feb 09, 2006 7:58 pm
Location: New Orleans
Top

Re: The Poet Creek Express - Foamie Hybrid

Postby Wobbly Wheels » Fri Apr 19, 2013 8:24 am

That's only for line voltage in your house where it's it's exposed (unless you use BX). Inside the walls (like KC's doing with the routed channels?) you run Romex and just staple it down.
User avatar
Wobbly Wheels
Donating Member
 
Posts: 1080
Joined: Tue Mar 15, 2011 9:51 am
Top

Re: The Poet Creek Express - Foamie Hybrid

Postby GPW » Fri Apr 19, 2013 8:53 am

W2 , Thanks !!! I’ve got block walls in the Studio and have some exposed BX .. and some conduit ...
"Then the engineer in me took over” ... this was the part I was worried about !!! :frightened: :roll: :lol:
There’s no place like Foam !
User avatar
GPW
Gold Donating Member
 
Posts: 14920
Images: 546
Joined: Thu Feb 09, 2006 7:58 pm
Location: New Orleans
Top

Re: The Poet Creek Express - Foamie Hybrid

Postby KCStudly » Fri Apr 19, 2013 2:27 pm

I'm looking at it more like a 12v car or boat install.

In cars the wires don't run in conduits, per se (although they do sometimes run in split loom for management and to help prevent chaffing).

The key thing is to route and secure it all well to protect the wires from damage and vibration.
KC
My Build: The Poet Creek Express Hybrid Foamie

Poet Creek Or Bust
Engineering the TLAR way - "That Looks About Right"
TnTTT ORIGINAL 200A LANTERN CLUB = "The 200A Gang"
Green Lantern Corpsmen
User avatar
KCStudly
Donating Member
 
Posts: 9640
Images: 8169
Joined: Mon Feb 06, 2012 10:18 pm
Location: Southeastern CT, USA
Top

PreviousNext

Return to Foamies

Who is online

Users browsing this forum: No registered users and 12 guests