That's what I was thinking, Bogo.
Randy,
Inheriting stuff is something we all have to deal with at some time. It is best to keep a positive note and rely on your friends when you need to. Even though we have never met in person, I consider you to be a friend, and can only consider that you feel the same, at least I hope that you do.
Same goes for all of the great people that I have had the pleasure to have interacted with that contribute to this forum.
And now to the bounty. I was on the lookout for a 15/16 inch combination wrench that I could cut in half (making 2 shorty wrenches) and keep in the trailer to spin the self-locking nut for the swivel coupling pin. There were lots of tools at the swap meet and I eventually found a decent Armstrong “Armorloy” made in USA wrench for $4. There were a lot of hand planes for sale. The Miller’s Falls No. 8 sort of jumped out at me as a good intermediate size, of good quality, in not too bad of shape, for only $8 (talked down from $15). There were a couple of vendors that had boxes of computer case fans. The first one I came across wanted $4 each (I passed). Tucked back in the woods, towards the end of our trek I found another box of large 12v fans and the guy only wanted $0.50 each. I tendered a dollar and he said he had no change, so I should just go ahead and take it for free! I suppose I should have given him the dollar, but he was trying to explain the issue to his incredulous young tot, so I felt obliged to comply so that the kid could learn a lesson in generosity.
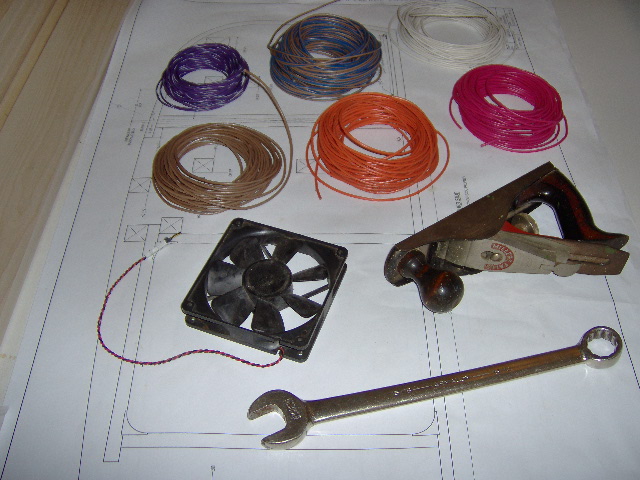
The coils of mostly 18 ga automotive grade wire I just sort of picked up along the way. The purple wire with white trace is unmarked, probably 20 ga, so I will only use that for single runs to single LED lamps.
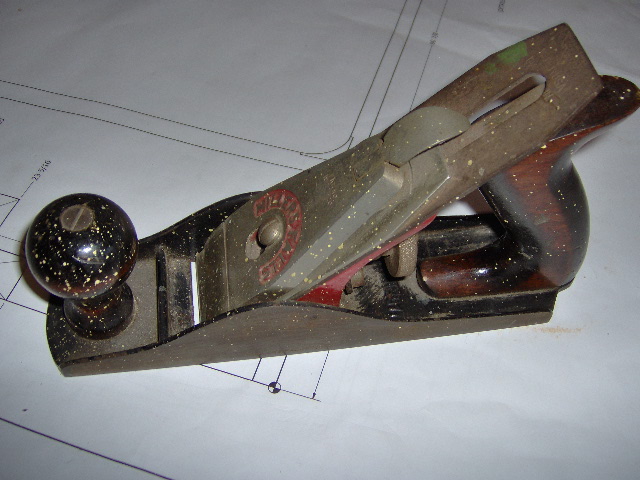
The plane was a little rusty on the exposed nonworking surfaces, and had splattered dots of yellow paint all over it.
Here it is after I could not resist spending a good part of the afternoon shaving the rust off with the razor knife, scrapping yellow paint dots, sanding and scrubbing the rust off with a synthetic abrasive pad, and sharpening the blade to remove a minor/medium knick out of the left side of the blade.
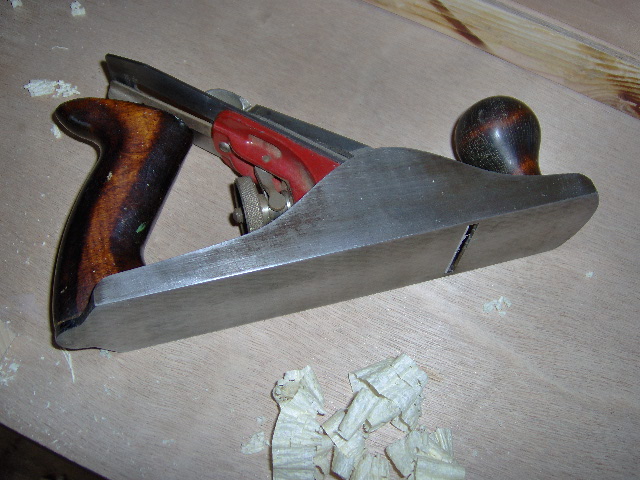
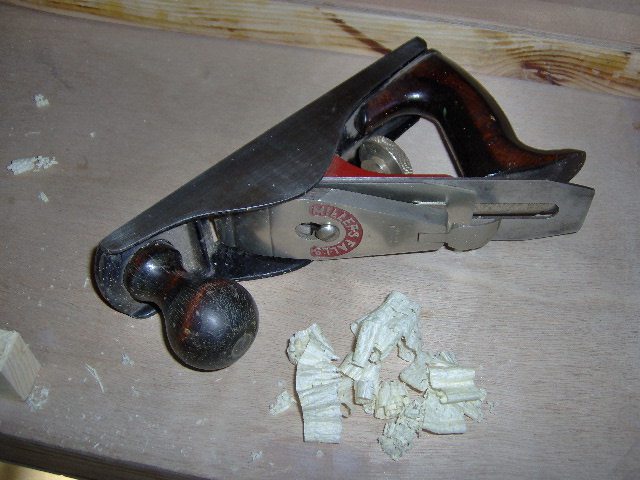
I spent a little more time on it Sunday getting rid of some more of the yellow paint dots, oiling it, etc., but the blade still needs some tuning (kind of cutting a rough chip). I am having trouble getting the chip breaker/support plate (I have no idea what the proper designations are) to fit right, and the clamp (clap?) iron had a slightly uneven leading edge with a slight rough texture, but I was able to tune this all up pretty well. The only difficulty I had was getting the chip breaker piece adjusted so that the blade could be adjusted to a fine cut without the chip breaker piece being too close to the edge of the blade so as not to block the cut. It seems like there is no adjustment margin. If I put the chip breaker up on the bevel of the blade, I cannot adjust the depth of cut small enough. If I put the chip breaker down on the bevel of the blade, when I clamp it down with the clamp dog it takes away the little bit of clearance and leaves not enough of the blade exposed under the chip breaker. There is a ton of adjustment left in the threaded nut to where I could feed way more than 1/8 inch of blade below the shoe, so I suspect that I just do not know what I am doing enough to figure out what is wrong (except the rough cut can probably be improved by honing the blade down past the 320 grit dry paper that I used). It was sharp enough to scrap a few hairs off of the back of my hand, but I would not call it a clean shave.
I took a look at a battery box that I had picked up years ago with the plan of moving the battery in the chopped truck out of the engine compartment and back under the bed (for better weight transfer… old hot rod trick).
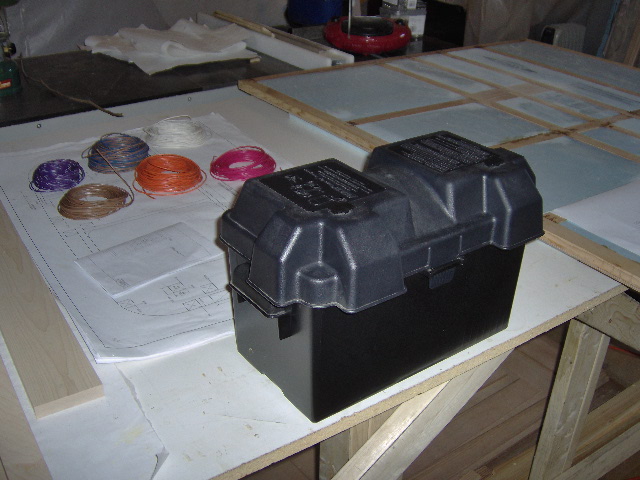
The battery box is pretty big, much larger than the battery that I have, and would take up a lot of extra room in the tongue box. It is also not sealed, so I will probably not use it. Included in the relocation kit was also a battery tie down bracket with J-hooks and hardware that I probably will use. I took the base of the tongue box and the battery box out to the trailer and considered for a minute putting the battery box in front of the tongue box, but it was pretty tight between the jack and tongue box (no pic).
Next I got the street side wall back out and duplicated the wire chase for the rear side marker light.
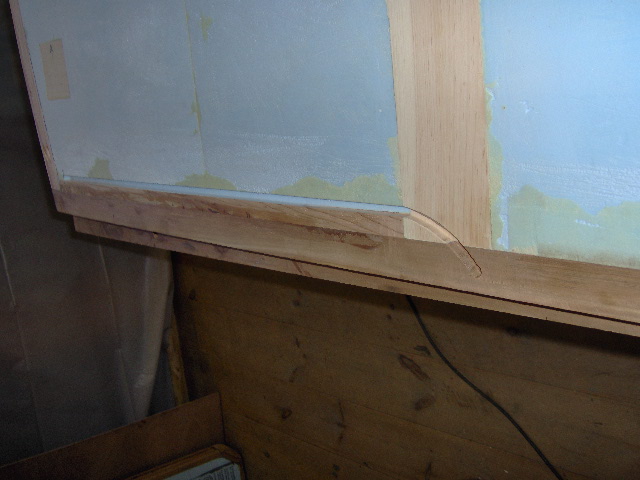
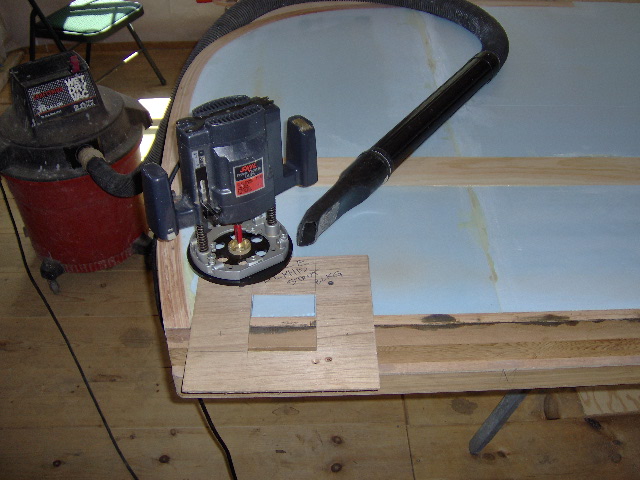
Then I cut another piece of the Wiremold track to length, laid out, and drilled the wire and mounting screw holes (shown here turned over to display the holes lining up).
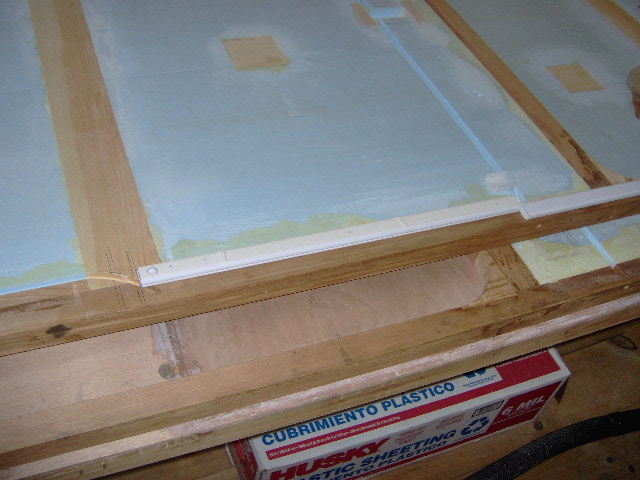
The pen lines represent the bulkhead skins and frame.
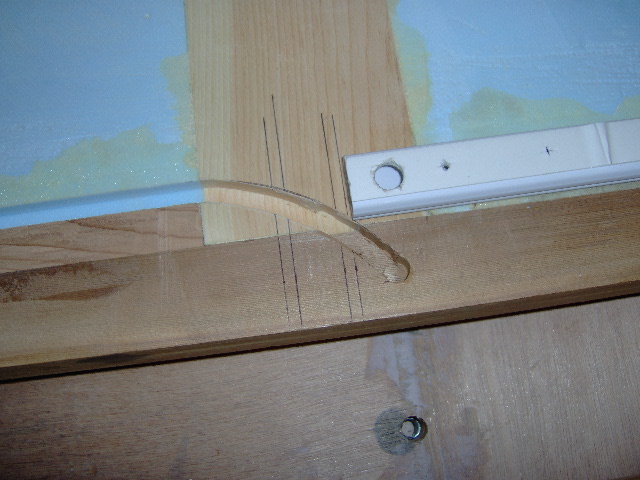
To allow the rear marker lights to sit above and a little forward of the hatch draw latches (away from the draw latch lock and so the wire chase does not land where the floor to wall, or galley drawer slide screws might go) I repurposed the router jig for the hatch actuator lower mount blocks.
I trimmed down the drop piece that I had cut out to make this jig, and just dropped it back in the hole to fill it back in some, so that the resulting recess for the marker light blocks would only be about 1x2 nominal x 3-1/2 long.

Here it is routed out with the block fit and ready to be glued in.
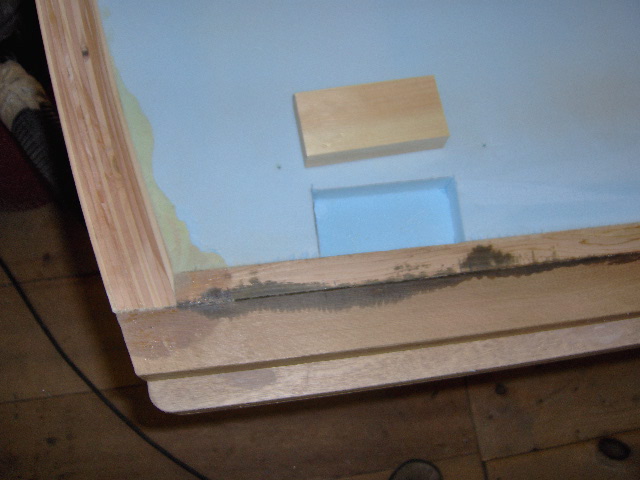
Gluing blocks in is getting very, very old.
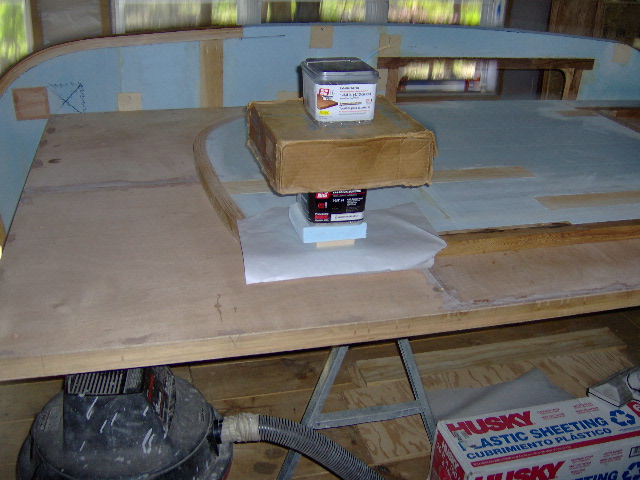
During all this, I had shuffled the walls and didn’t stuff the street side wall back in behind the rest of the parts. I just left it leaning against the plastic drape wall. I kind of knew better, but every time I handle any part I risk damaging something just by banging them into something.
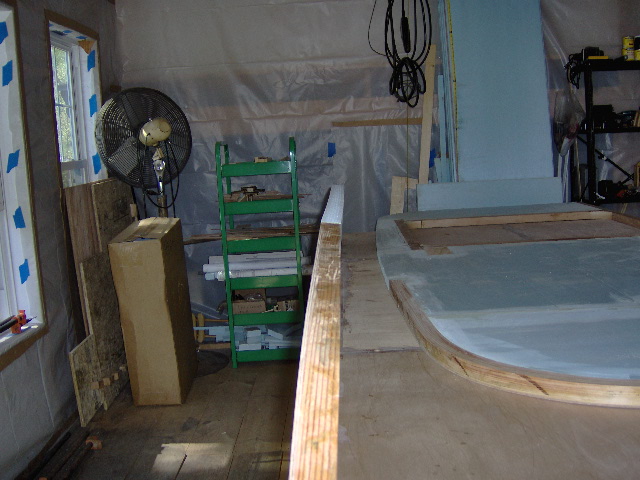
Here is the scene of the mini disaster; almost a catastrophe.
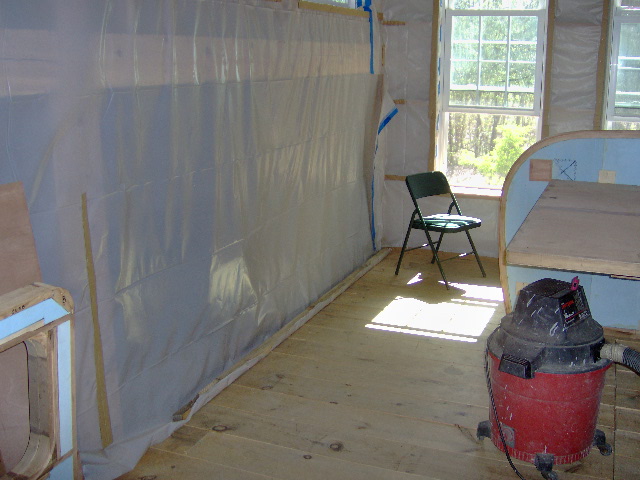
Note the plastic drape wall on the left and the shop vac sort of tucked under the work table/floor on the right. Imagine the camper wall leaning against that plastic sheeting. Now imagine a big gust of wind blowing up thru the eaves of the roof over that crawl space and the plastic sheeting billowing out into the room. The wall tipped in and if it had only landed flat on the floor it would have been no big deal. I have flopped the walls onto the table plenty of times and what usually happens is that they are so light that the cushion of air that they displace slows the fall down enough that they just sort of decelerate as they land, and they fall nice and flat with no harm done.
Unfortunately, in this case, the galley wall edging landed on the caster of the shop vac which held it up off of the floor. The forward part of the wall continued to the floor and snapped a crack on the foam about 4 to 6 inches down the wall just ahead of the front of the wall edging. Poop. Double poop. Cuss words. Frustration. Crooked wall.
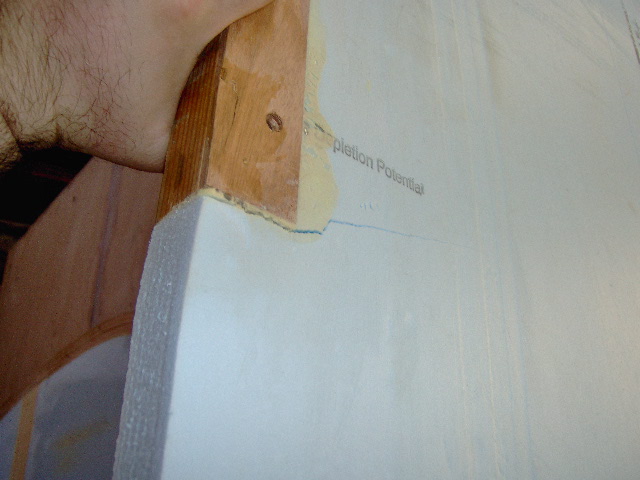
It’s not the end of the world. In fact, I could probably just continue on skinning it as planned and not have any trouble at all, but I will probably try to flex the crack open a bit (like I did for the pic of the crack), trowel some GG down in there, lay it flat with some weights and see if I can get it to stick back together. Poop.
I spent a little time cutting some blanks for the light switch mounting blocks out of the little bit of Red Grandis I had left over, mostly just to check and see if I would be able to get what I needed out of what was left, or if I would have to source some more. I might be able to squeeze it out of that cracked piece the guy thru in way back when; but that is getting distracted by the finishing details. I can go camping with a flashlight and add the wiring later. For now I just need to plan the details and get the wire chases in, making sure that they are adequate to get all of the wires thru later.
Today (Monday) I stayed after work and figured out the information I needed from the computer model so that I can lay the wire channels into the bulkhead for the hatch actuators, red light, and computer case fan ventilator. I also looked for an appropriate sized drill bit for the light switches. Made a few minor detail changes to the wiring diagram and added the routing for the optional computer case fan ventilator.
Mostly progress, with only a minor setback.


 ).
).


