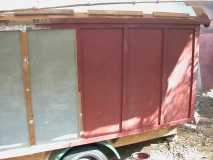
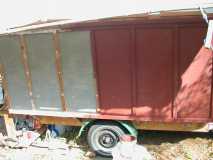
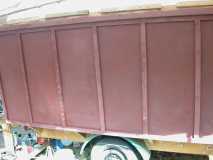
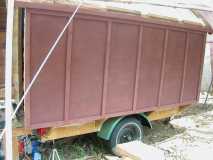
Was Foam Conestoga Now Stick Built Vardo

Canvas covered foamies (Thrifty Alternatives...)

Moderator: eaglesdare

Re: Foam Conestoga

Postby razzer » Sat Feb 23, 2013 3:59 pm

Darn , I hope you haven't given up on this idea cause it's so cool . It's really inspired me .
Live the adventure , embrace the confusion . " Ray "
User avatar
razzer
Teardrop Advisor
 
Posts: 78
Images: 20
Joined: Tue Jul 15, 2008 5:52 pm
Location: north of Philadelphia , Pa., USA

Re: Foam Conestoga

Postby depatty » Mon Nov 18, 2013 9:50 pm

YEARS later.... Ended up finishing this one up as a Vardo and finally camping in it last month (Oct 2013). Still not completely done with it but life got in the way as it seems to have a bad habit of doing. Ended up using much more wood than I had planned on. Couldn't get the foam to bend the way I wanted on the roof but did use the conduit as the ribs. Will post some pix as soon as I figure out how to do so.
User avatar
depatty
Teardrop Master
 
Posts: 280
Images: 175
Joined: Thu Oct 04, 2007 10:39 am
Location: Weaver, Alabama

Re: Foam Conestoga

Postby GPW » Tue Nov 19, 2013 7:35 am

Dave, pictures Please !!! :pictures: :D
There’s no place like Foam !
User avatar
GPW
Gold Donating Member
 
Posts: 14915
Images: 546
Joined: Thu Feb 09, 2006 7:58 pm
Location: New Orleans
Top

Re: Foam Conestoga

Postby depatty » Tue Nov 19, 2013 11:41 am

Okay, here's some of the finished(???) or at least camp-able critter. Have got to get to the other computer to get the older pix of the build.

114420

This was at about 4 miles from home into the first camping venture. Street side (dark) view. Stopped to check for bearing and tire heat and folks wanted to look at and in the Vardo or barn on wheels as one lady called it. :lol:

114421

Same place with picture taken from the back. Door is off an old camper that I put on to make the trip. Am going to build a dutch style 2 section door to replace it as time allows.

114422

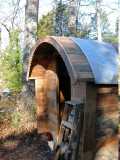
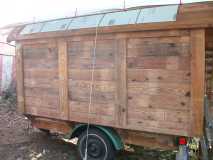
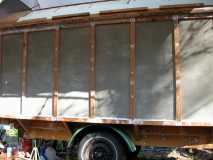
And a curbside view, showing the dirty metal I used on the roof. Side wall is canvas over foam with wood battens to hold everything tight and add to the vardo look. Bamboo poles are supports for the tarp that attaches to a curved piece of conduit under the overhang. Steps are visible behind the door in their travel position.

114423

And one of the messy inside. Bed is in couch mode. It pulls out at night and the futon unfolds to cover it. At the height I built it we've got around 75 inches from side to side. Pulls out to 52 inches. Closed about 32 inches. Table (in center) pulls out under it with a leg that drops down for support. Table seats have storage under them. Brown things hanging down on each side of the table are leather straps for pulling the bed out with. Gotta get the wax out and work on the movable slats.

114425

Front view. Window is off of an old camper shell. Front wall is wood. Due to job changes and lack of funds to buy any more foam I ended up stick building most of the Vardo out of salvaged lumber so it ended up LOTS heaver than I had planned.

114426

Here's the problem with this design - major drag. :cry: With the Tacoma as TV my fuel mileage went from 27 to just over 14. And any hill called for down shift and crawl. I'm thinking about trying a wing of some kind on the camper shell. Also looking at taking the metal off the roof and replacing it with painted canvas, both to save weight and get rid of the 2 inch overhang at the front.

114424

But here's the good part. Camping on the bank of the Tennessee river 150 miles from home. :D

More details and pix of the build soon.

Later,
Dave
User avatar
depatty
Teardrop Master
 
Posts: 280
Images: 175
Joined: Thu Oct 04, 2007 10:39 am
Location: Weaver, Alabama
Top

Re: Foam Conestoga

Postby GPW » Tue Nov 19, 2013 11:47 am

That is very Nice and the R-panel on the roof is really a cool idea !!! Strong stuff!!! :thumbsup: 8) :D
There’s no place like Foam !
User avatar
GPW
Gold Donating Member
 
Posts: 14915
Images: 546
Joined: Thu Feb 09, 2006 7:58 pm
Location: New Orleans
Top

Re: Foam Conestoga

Postby depatty » Fri Nov 22, 2013 3:42 pm

Got to digging around on the other computer and found a bunch of build pictures. As much wood is in this thing not sure it really fits in the Foamies category so if it needs to move will make another thread elsewhere.

Anyway, here's the build sequence up until the camera died. :(

114495
In the beginning...

114496
Front view of the trailer as I got it.

114497
Warts and all.

114498
Needs seals at the very least.

114499
Deconstruction started.

114500
Getting the fenders ready to paint.

114501
My high tech portable tool bench. :lol:

114502
Bottom edges of the fenders trimmed.

114503
Closer look at the fenders.

114504
First coat of paint on the fenders.

114505
Little rough but lots better than they were.

114506
A couple of coats later looking pretty good.

114507
Raw materials.

114508
And some longer raw materials. All recycled and saved from the dump.

114509
And even more.

114510
Shelter from the elements.

114511
Getting started on the build.

114512
Adding a bit of width.

114513
From the front.

114514
Restacked raw materials.

114515
Inside view of attaching the side supports.

114516
Taller shelter.

114517
Front view of the ledges and sub flooring.

114518
Well bolted and caulked.

114519
Another inside view.

114520
Hand cranked grinder that I use to keep things sharp. 8)

114521
Back view of sub floor.

114522
One of the top emt bows getting used as a towel holder.

114523
Plywood floor going in.

114524
Floor in and seams sealed.

114525
Front wall being test fitted.

Will continue in another post.
User avatar
depatty
Teardrop Master
 
Posts: 280
Images: 175
Joined: Thu Oct 04, 2007 10:39 am
Location: Weaver, Alabama
Top

Re: Was Foam Conestoga Now Stick Built Vardo

Postby depatty » Fri Nov 22, 2013 8:59 pm

Ok, continuing the pictures from the previous post on the build.

114527
More test fitting to get the side wall angles so the bed would fit crosswise.

114528
Front wall going up.

114529
Bed support test fitting.

114530
Inside side walls going in.

114531
More of the front wall up.

114532
Front wall from the tongue.

114533
Closeup of the front bed support. Recycled redwood 2x4.

114534
Side wall.

114535
Side wall stud.

114536
Other wall going up.

114537
2x12 chair. Much more comfortable than it looks. :thumbsup:

114538
Side wall as tall as it's gonna get.

114539
More of the front wall done.

114540
Starting on the back wall.

114541
Another view of the back wall.

114542
Front wall from the side.

114543
Much further along.

114544
Back wall mostly done.

114545
View through the door.

114546
Front wall with window in place.

114547
Side wall waiting for foam.

114548
EMT rafters with tarp covering.

114549
Rafters other side.

114550
And from the inside of the corner by the door.

Taking a supper break. Will post the rest of the construction pictures either later tonight or tomorrow.
User avatar
depatty
Teardrop Master
 
Posts: 280
Images: 175
Joined: Thu Oct 04, 2007 10:39 am
Location: Weaver, Alabama
Top

Re: Was Foam Conestoga Now Stick Built Vardo

Postby GPW » Sun Nov 24, 2013 7:00 am

Thanks Dave !!! love the pictures ... and who could forget that original trailer ... 8)
There’s no place like Foam !
User avatar
GPW
Gold Donating Member
 
Posts: 14915
Images: 546
Joined: Thu Feb 09, 2006 7:58 pm
Location: New Orleans
Top

Re: Was Foam Conestoga Now Stick Built Vardo

Postby depatty » Sun Nov 24, 2013 10:43 am

Yea, it were ugly weren't it. :lol: And I know I reposted some of the pix but wanted to keep all of the build sequence together. Got a bunch more to post today that actually have some FOAM shown in them. :)
User avatar
depatty
Teardrop Master
 
Posts: 280
Images: 175
Joined: Thu Oct 04, 2007 10:39 am
Location: Weaver, Alabama
Top

Re: Was Foam Conestoga Now Stick Built Vardo

Postby GPW » Sun Nov 24, 2013 11:32 am

It were, but now it aint' !!! :thumbsup: 8) And that’s all re-cycled huh? :applause:
There’s no place like Foam !
User avatar
GPW
Gold Donating Member
 
Posts: 14915
Images: 546
Joined: Thu Feb 09, 2006 7:58 pm
Location: New Orleans
Top

Re: Was Foam Conestoga Now Stick Built Vardo

Postby depatty » Sun Nov 24, 2013 11:49 am

Was toward the end of this next batch of pix that my cam started acting up so there are some gaps and then no more of the build finish. :( But here they are FWIW...

114551
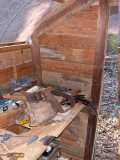
Other corner by the door showing the temp workbench.
114552
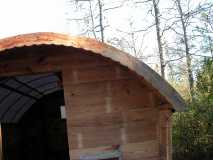
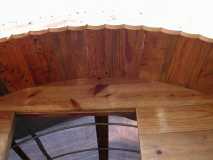
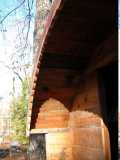
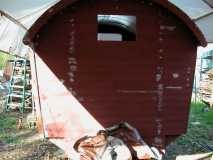
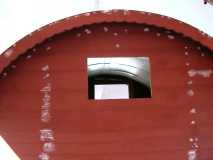
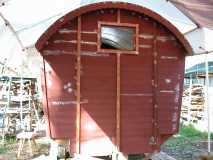
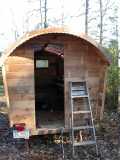
Back (door) end about finished. I think this is the first view of the scalloped facade boards. Each end facade board is made up of 4 pieces cut from a section of 1x6. Half lap joints between them. Scallops drawn with a compass and cut with a jigsaw. Was interesting getting the top (and bottom) curvature to match the ribs and ends. Used a pencil in a hole in a long 1x1 with a screw as a pivot to draw the arc. Same tool I used to get the arc and the top of the ends and form the ribs from. Harder to describe than to make.
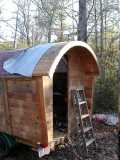
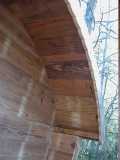
114553
A shot of the rear overhang showing the boards. They only span from the back wall to the facade board. Planed the tops and edges to they fit like a barrel. Don't think I have any pix of that part of the build.
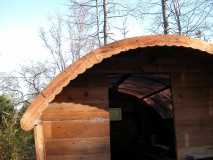
114554
Closer view right side.

114555
And left side.

114556
Overhang from the other side.

114557
Overhang right.

114558
Center.

114559
And left.

114560
Unfinished side.

114561
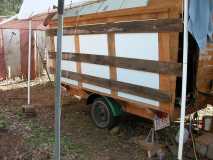
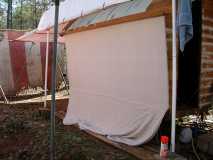
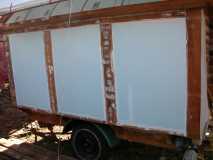
Drivers side foam glued and clamped in place. Used 1x??? screwed into the studs to hold it while it dried. Glue was an adhesive caulk that I will NOT use again. Should have used GS or GG but hindsight is always 20-20 and all of that...
114562
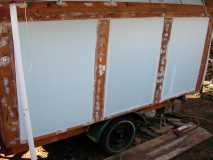
Next day cured with the 1x's off and seams caulked.
114563
And from another angle.

114564
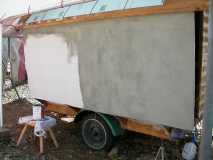
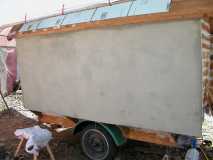
Canvas going on. Painters drop cloth, cut along the seams. I stretched it dry, stapled the edges and under where the outer ribs were going and then slathered paint on the outside. Should have painted underneath first but its pretty well bonded and the ribs aren't going to let it go anywhere anyway.
114565
Bottom edge trimmed off and about half painted.
114566
Seal coat done. Really hardened it up.
114567
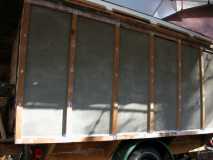
Ribs and trim on drivers side.

114568
And passengers side.

114569
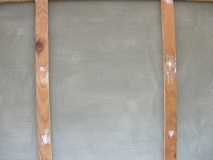
Closeup of the painted canvas.

114570
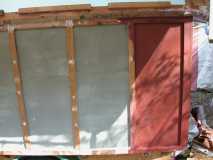
Color coat going on.

114571
About half way through.

114572
Different angle.

114573
First coat on.

114574
Dried overnight.

114575
Hitch view.

114576
Closeup.

114577
Trim going on.

114578
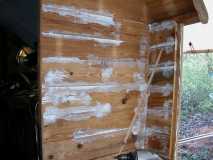
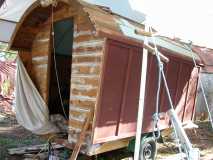
Lotta caulking going on. And am very unhappy that I spent as much as I did on the crap Wally World stuff. Still have cracks everywhere I used it when the temp/humidity changes. Should have spent more and gotten a better grade caulk that would have shrunk and expanded with the wood.
114579
Back about half caulked.

114580
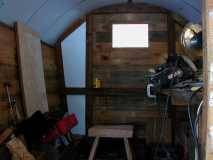
Inside. Sorry it's so dark.

And unless I find some more pix I have forgotten about that's it. I thought I had some of the roof foam, both inside and outside, going on but so far haven't found them.

Later,
Dave
User avatar
depatty
Teardrop Master
 
Posts: 280
Images: 175
Joined: Thu Oct 04, 2007 10:39 am
Location: Weaver, Alabama
Top

Re: Was Foam Conestoga Now Stick Built Vardo

Postby GPW » Sun Nov 24, 2013 12:09 pm

Oh Yeah !!! That’s really NICE !!! :thumbsup: 8) Close up all the trim’s COOL... makes it look so "old school” Gypsy -ish’ 8) ... Nice details ... :D Lots of Work there... Glad you included a modicum of foam ... :lol:

Dave, please update us as you continue !!! more :pictures: too ...
There’s no place like Foam !
User avatar
GPW
Gold Donating Member
 
Posts: 14915
Images: 546
Joined: Thu Feb 09, 2006 7:58 pm
Location: New Orleans
Top

Re: Was Foam Conestoga Now Stick Built Vardo

Postby depatty » Wed Jan 29, 2014 12:09 pm

Checking out the insulation on the vardo. Fired up a little 1500 watt electric heater at about 10:40 am. Below are some pictures from that time. Gonna see how long it takes to melt the snow on the roof which has 3 layers of 3/4 inch blueboard under the metal.

116314

Note the little heater sitting on the table to the right of the door (little white blog :) )

116315

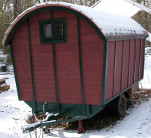
Hitch end. About an inch of snow on the roof.

116316

Bit closer view of the snow.

116317

And a jug of water I had left inside. It was liquid about mid afternoon yesterday. Frozen solid this morning. WAY too COLD for central Alabama! :snowstorm:
User avatar
depatty
Teardrop Master
 
Posts: 280
Images: 175
Joined: Thu Oct 04, 2007 10:39 am
Location: Weaver, Alabama
Top

Re: Was Foam Conestoga Now Stick Built Vardo

Postby GPW » Wed Jan 29, 2014 12:56 pm

Dave , while it makes a really pretty picture of vardo in the snow (like a calendar pic) , it is a bit TOO COLD to be here down South ... :o All back to more normal by the weekend ...Thankfully !!! :thumbsup:
There’s no place like Foam !
User avatar
GPW
Gold Donating Member
 
Posts: 14915
Images: 546
Joined: Thu Feb 09, 2006 7:58 pm
Location: New Orleans
Top

Re: Was Foam Conestoga Now Stick Built Vardo

Postby depatty » Wed Jan 29, 2014 1:04 pm

Yep, I'd rather have see snow in pictures rather than on the ground and on my boots.

Local forecast calling for low 60's by Saturday then 50's and rain Sunday. Guess I'd rather have the rain than the snow though.
User avatar
depatty
Teardrop Master
 
Posts: 280
Images: 175
Joined: Thu Oct 04, 2007 10:39 am
Location: Weaver, Alabama
Top

PreviousNext

Return to Foamies

Who is online

Users browsing this forum: No registered users and 1 guest