Nookery Updates -- 25 Oct Update. Working on the galley
So, I decided to do some mock ups while it was raining yesterday. Had a fabulous time moving things around and trying different configurations. Here's some 
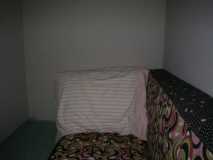
First up, the two large cushions from the prior teardrop project, fit nicely as both a bench and bed. I will be able to stack them to keep them clean when other stuff is in the trailer.
 and
and 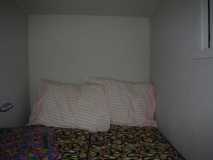
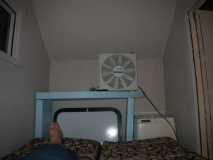
Then I played around with a shelf for the foot of the bed. I needed to see if I could make one that would allow the AC to work. The hatch isn't mounted yet and will be a couple of inches higher in the wall. It doesn't have a trim ring and it doesn't have any mounting holes in the flange. Wondering if something like PL300? would work to mount it into the foam. I will be painting the door skins to match the wall colors inside and out. The shelf legs are 18" and there's room up top for the Endless Breeze and my laptop (entertainment center).
As you can also see. I have indoor plumbing. The porta pot fits nicely in the corner and I can actually sit on it comfortably inside the Nookery. I do have to stack the bed cushions, so it will most likely get an outside the tear tent.
Finally, I started working on the curtain hardware, or in this case plasticware. The rail is meant for ceiling mounting, but I thought it would work on the edges of the window framing. It will keep the curtain close to the wall and allow the curtain to be pushed open to either end.
 and
and 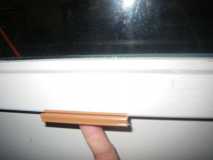
First up, the two large cushions from the prior teardrop project, fit nicely as both a bench and bed. I will be able to stack them to keep them clean when other stuff is in the trailer.
Then I played around with a shelf for the foot of the bed. I needed to see if I could make one that would allow the AC to work. The hatch isn't mounted yet and will be a couple of inches higher in the wall. It doesn't have a trim ring and it doesn't have any mounting holes in the flange. Wondering if something like PL300? would work to mount it into the foam. I will be painting the door skins to match the wall colors inside and out. The shelf legs are 18" and there's room up top for the Endless Breeze and my laptop (entertainment center).
As you can also see. I have indoor plumbing. The porta pot fits nicely in the corner and I can actually sit on it comfortably inside the Nookery. I do have to stack the bed cushions, so it will most likely get an outside the tear tent.
Finally, I started working on the curtain hardware, or in this case plasticware.
The rail is meant for ceiling mounting, but I thought it would work on the edges of the window framing. It will keep the curtain close to the wall and allow the curtain to be pushed open to either end. 


 before I could make those first cuts. I want to canp, darn it.
 He kindly cut the alum. to the correct size and beveled the edges. And it was a perfect fit!
 Sorry Bonnie ... I never got around to that
  Removed and re-installed the door several times .... turns out it was the thin Al piano hinges that were bending /distorting ... still rubs “slightly” and closes Tight ...makes a funny little whistling noise when you open the door (vacuum) ... The handle had wood provided for , but we still had to measure everything several times , and then finally “got it” ...
 Was worried till you posted your arrival home ...