My "Cooler improvement" project
Folks here said "PMF a cooler" to get the gist of how to apply canvas to foam. Good suggestion, and what I have been doing for the past couple of weeks. I do agree with what many have said...that patience is king, when trying to PMF foam.
Started with this 'donor cooler':
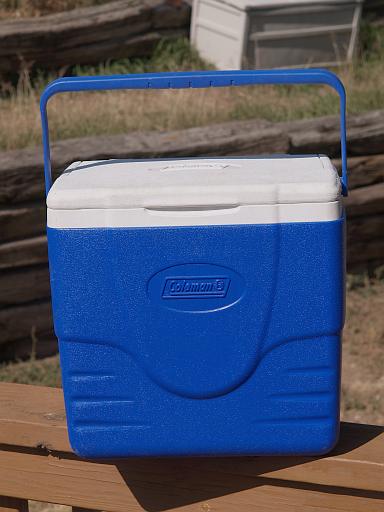
It was bought years ago, when the family wanted to go on a "leaf peeping" trip one fall day. We wanted cold soft drinks avail in the car.
The cooler worked for an afternoon of coldness, but we also saw that you had about 3/4 of one day before your drinks were swimming in water...ice all melted.
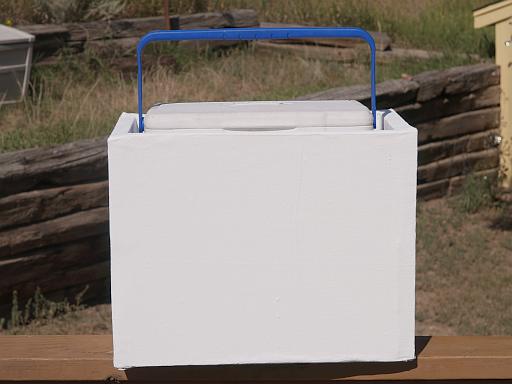
So, decided to build an XPS Foam box around it...added great stuff inside the lid, and PMF'd the outsides to practice the 'art'...
We tested this on Labor Day Weekend (before finished) and the ice lasted an amazing 4.5 days! Easy to say we were very pleased!!
It is an open top box of 1 inch (R value 5) XPS foam, that was glued together with the "caulk-like" Gorilla Construction Adhesive. Holds great!! Really like that flavour of Gorilla glue.
After glued, I did some lightweight spackling and sanding, and did the "rubbing alcohol wipe down" then primed the exterior of the foam. Let that dry a couple days, then applied the canvas via 50/50 TB2/Water mix. I definitely agree with ghcoe, that use of the water spray bottle to "relax" the weave to be more agreeable to smoothing is the way to go. Immediately noticeable, the reaction to the added water to the top of the weave.
Let that dry a couple of days, then went over the canvas again with 50/50 TB2. Let that dry a couple days, then used exterior primer, let that dry a couple days, then used latex "primer/paint", three coats, couple days dry time between coats. It is in dry mode now, after the third coat.
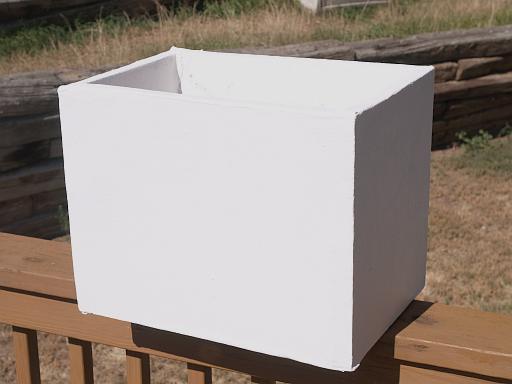
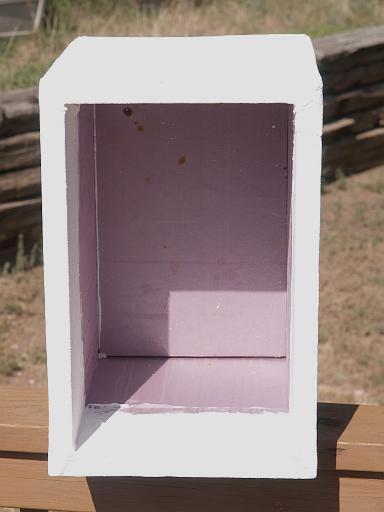
Here is my seam...not too bad:
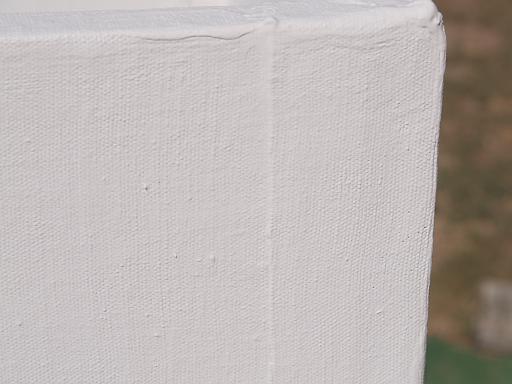
The PMF process went well, but does require that healthy dose of patience!! Don't be in a hurry!
Not quite done, yet, when the last coat of primer/paint fully dries, will glue in the cooler to it's foam wrap via the Gorilla Construction Adhesive, then use Great stuff to fill in the small gap between cooler/foam wrap and will glue on a piece of 'space blanket' on top of the lid, to reflect off solar warmth. Will post more photos, when completely done.
As I said, been tested, and wowzers, does it ever "work"!!
Cheers!!
.
Started with this 'donor cooler':
It was bought years ago, when the family wanted to go on a "leaf peeping" trip one fall day. We wanted cold soft drinks avail in the car.
The cooler worked for an afternoon of coldness, but we also saw that you had about 3/4 of one day before your drinks were swimming in water...ice all melted.
So, decided to build an XPS Foam box around it...added great stuff inside the lid, and PMF'd the outsides to practice the 'art'...
We tested this on Labor Day Weekend (before finished) and the ice lasted an amazing 4.5 days! Easy to say we were very pleased!!
It is an open top box of 1 inch (R value 5) XPS foam, that was glued together with the "caulk-like" Gorilla Construction Adhesive. Holds great!! Really like that flavour of Gorilla glue.
After glued, I did some lightweight spackling and sanding, and did the "rubbing alcohol wipe down" then primed the exterior of the foam. Let that dry a couple days, then applied the canvas via 50/50 TB2/Water mix. I definitely agree with ghcoe, that use of the water spray bottle to "relax" the weave to be more agreeable to smoothing is the way to go. Immediately noticeable, the reaction to the added water to the top of the weave.
Let that dry a couple of days, then went over the canvas again with 50/50 TB2. Let that dry a couple days, then used exterior primer, let that dry a couple days, then used latex "primer/paint", three coats, couple days dry time between coats. It is in dry mode now, after the third coat.
Here is my seam...not too bad:
The PMF process went well, but does require that healthy dose of patience!! Don't be in a hurry!
Not quite done, yet, when the last coat of primer/paint fully dries, will glue in the cooler to it's foam wrap via the Gorilla Construction Adhesive, then use Great stuff to fill in the small gap between cooler/foam wrap and will glue on a piece of 'space blanket' on top of the lid, to reflect off solar warmth. Will post more photos, when completely done.
As I said, been tested, and wowzers, does it ever "work"!!
Cheers!!
.
 Thought practicing on the seams (enforcing them) was going to be good enough. Then doing the tough to reach flats.. I used bedsheet for this. I'll tell ya, good practice but... What a difference working canvas vs. bedsheet!

