Kim's "Puff" the magic dragon 4Hx7.5WX12L foamie camper

Canvas covered foamies (Thrifty Alternatives...)

Moderator: eaglesdare

Kim's "Puff" the magic dragon 4Hx7.5WX12L foamie camper

Postby kimphan » Thu May 06, 2021 6:13 pm

Hi,

Thank you all for your help the last week as I'm starting out and currently trying to figure out what to do.

A little about me, I'm in tech and always been fascinated by home building (I was the architect that draw and design my house, the site engineer for water run off, site planner and handling permits for our current house, all self-learn and on the fly with lots of luck and help from kind and awesome people). I've been dreaming of constructing my tiny house for a while now, this trailer will be a great challenge for me to get my feet wet and build my tiny house in the future.

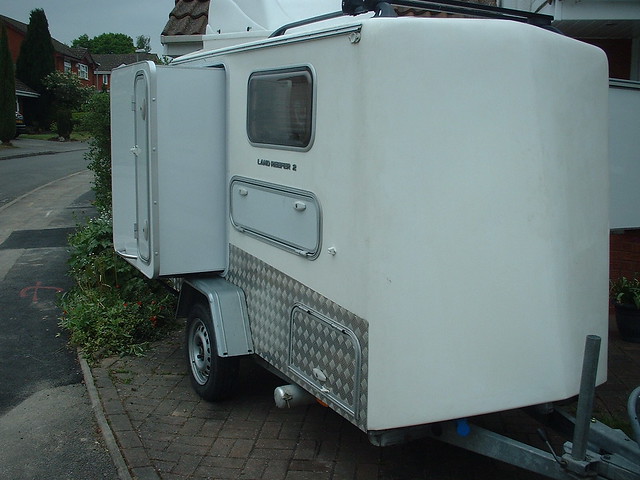
"Puff" 4Hx7.5WX11L (the magic dragon) trailer is supposed to be barebone, no hatch, no shelves, no roof racks.

It's meant to be our warm portable bed for family camping trips perhaps twice a year to about 1 hour to 2 hours away. There is a lake 20 minutes near by local road that we could take this too "all the time" if works out. I want to build a camper that can take 4 hours driving on a free way though just in case.
I have already gotten a flat bed trailer and hence design is based on whatever the flatbed is given me as I do not want to spend money and effort rebuilding the floor.
Image

I'm looking for consultant that can help me go over this plan over the phone (will compensate, please email [email protected] or message me here).
Any help, comments will be greatly appreciated.

Here is the plan:
Image
https://drive.google.com/file/d/1Ntqapu ... SR/preview

1) Water proofing:
All bottom of trailer (Elastomeric Roof coating)
Top of 1/2 plywood floor (The "mix", this will be the trailer floor with Ava foam on top)
2) Preparing Foam walls:
XPS rigid foams, side walls are 3" and roof is 2".
Cutting the foam: hotwire foam cutter on amazon
Glueing the foam walls together:
- rolled on using Warner Wallcovering Perforator, 250
- Gorilla Construction glue(?)
3) Prepping the Foam walls:
- Sand the foam and clean with Isopropyl Alcohol
- Fill cracks and holes with Lightweight spackling.
4) Windows, door, load bearing stud cut out.
- Add Load bearing 2x2 stud on top of the side foam wall (could I get away with less stud?)
- 18X30 flush mount shed fiberglass windows (11lbs) with 2X2 frame embedded in the 3" foam.

- 20X30 cargo door with bottom 2X4 frame embedded in the 3" foam.

§ Not sure about this one, do I need wrap around frame or cut to shape is fine and glue it to the foam?
5) Canvas the interial walls.
- Mix Titebond II with 50% water
- Roll it on foam, then stretch canvas.
- I will not trim them and let overlap (unglued canvas) flapping around
6) Canvas the exterial walls.
- I want to do this because I think canvasing the wall lying down is a lot easier then waiting for it to go up.
- But worried that the trip will be flapping and affect the stability of the walls when trying to glue them down. So not sure about this, any thoughts?
7) Glueing the side foam wall on to the floor:
- Since the floor is quite old, I'm cutting strip of 3 inches 1/2" plywood to glue the foam to.
- Gorilla "brown" glue?
- Which option should I do
+ Option 1 (X No good): The 3" foam wall will be sandwiched between the outter wood frame and 3" of 1/2" plywood strip.
+ Option 2 (X No good): Flush the 3" foam all the way to the edge
+ Option 3: Clamp the outer skin with existing wood (Remove the 2 X 6, complete the PMF skin, and screw them back in at the end)
Image

8) Put the 2X2 load bearing stud on top of the side wall, glue them.
9) Glue the roof 2" foam on top of the 2 side walls.
10) Finish canvasing the whole camper.
11) Cut out canvas for windows and door
- For windows, I will wrap the fabric overlapping the interior and exterior canvas.
- For door, it will be a trim cut to the door's shape.
12) Screw and install the windows.
13) Glue the door?
14) Go camping.
Last edited by kimphan on Fri May 07, 2021 12:09 pm, edited 8 times in total.
165114
"Puff" (the magic dragon) build log - viewtopic.php?f=55&t=73766
User avatar
kimphan
Teardrop Builder
 
Posts: 36
Images: 18
Joined: Fri Apr 30, 2021 3:27 am

Re: Kim's "Puff" the magic dragon 4Hx8WX12L foamie camper

Postby linuxmanxxx » Thu May 06, 2021 8:15 pm

For simplicities sake since your not doing anything but a skeleton build, would be make it a rectangle squared corners. Only difference is turn roof spars up and down to prevent sagging. The roof of a teardrop shape is much more difficult. The box gives you much more options to add roof rack or other things later.

It also gives much more room to sit up with 2 people in it.
Steve

Sent from my Pixel 4a (5G) using Tapatalk
User avatar
linuxmanxxx
500 Club
 
Posts: 798
Images: 10
Joined: Fri Sep 10, 2010 1:50 am
Location: Abilene TX

Re: Kim's "Puff" the magic dragon 4Hx8WX12L foamie camper

Postby TimC » Thu May 06, 2021 10:04 pm

kimphan wrote:Hi,

... 2) Preparing Foam walls:
XPS rigid foams, side walls are 3" and roof is 2".


3" rigid foam on the walls and 2" on the roof seems a bit over sized. 2" walls should be strong enough. And with your roof profile (teardrop shape) you will have a lot of work to bend the rigid foam. Lots of saw kerfs or hot knifing to get a profile like that. Two layers of 1" rigid or even 3/4" rigid foam will make the forming of your profile much easier. In the roof's rounded areas you may not need any spars in the roof. The curve adds a lot of rigidity to the surface. Flat areas should have one maybe every 16" or less. That all depends on your overall roof width. Five feet or under you should be OK. Over five feet wide and I would add more structural support.

I don't see any ventilation fan. It would be a good idea to incorporate at least one large fan or a couple computer case fans to pull air in through your windows (assuming they open).

Tim
Tim
Niagara, WI
My First Benroy Teardrop Build Thread - A 5x8 Woodie - http://www.tnttt.com/viewtopic.php?f=50&t=63575
My Second Teardrop (partial) Build Thread - Started August '16 - http://www.tnttt.com/viewtopic.php?f=50&t=66939
#3 My son's Benroy Foamie team build - Started July '20 - http://www.tnttt.com/viewtopic.php?f=50&t=72877

Image
User avatar
TimC
Gold Donating Member
 
Posts: 1369
Images: 732
Joined: Sat May 23, 2015 4:15 am
Location: WI/MI border
Top

Re: Kim's "Puff" the magic dragon 4Hx8WX12L foamie camper

Postby QueticoBill » Fri May 07, 2021 4:43 am

Most tear drops are a little shorter and have a "bulkhead" behind hatch compartment. It could be considered a wall across the cabin. This adds a lot of bracing of the walls and roof, resisting the tendency for walls to parallelogram.

The 3" walls and 2" roof seem a little backward. More depth or in this case thickness is what resists bending as a span gets longer. Your roof not only is a longer span between walls than the wall from floor to ceiling, but also has more load. Think of a typical house with 2x4 walls and 2 x 8 or 10 or 12 ceiling or roof framing. The 2 x 2s will compensate some but more suitable for a typical 5' wide tear, and iirc yours is 7'.

In the sketch of the bottom of the wall, i think it would be much better if that trim on outside was beveled at top and the pmf was over the wood. I would not trust the silicone to keep water from penetrating between wall and trim.

Still intrigued by wood trailer frame.

And your progress and enthusiasm is wonderful! Very much enjoying your posts.
QB
A tear with no name: viewtopic.php?f=50&t=67624
QueticoBill
Silver Donating Member
 
Posts: 1184
Images: 22
Joined: Sun Apr 14, 2013 7:22 am
Location: Clayton NY
Top

Re: Kim's "Puff" the magic dragon 4Hx8WX12L foamie camper

Postby TimC » Fri May 07, 2021 6:08 am

QBill has a very good point that I overlooked in my previous reply. Without a bulkhead in your design the stability of your structure is compromised. Especially if it is 7' wide as he mentions. What is the width? I don't see a reference to width?
Tim
Niagara, WI
My First Benroy Teardrop Build Thread - A 5x8 Woodie - http://www.tnttt.com/viewtopic.php?f=50&t=63575
My Second Teardrop (partial) Build Thread - Started August '16 - http://www.tnttt.com/viewtopic.php?f=50&t=66939
#3 My son's Benroy Foamie team build - Started July '20 - http://www.tnttt.com/viewtopic.php?f=50&t=72877

Image
User avatar
TimC
Gold Donating Member
 
Posts: 1369
Images: 732
Joined: Sat May 23, 2015 4:15 am
Location: WI/MI border
Top

Re: Kim's "Puff" the magic dragon 4Hx8WX12L foamie camper

Postby Pmullen503 » Fri May 07, 2021 9:29 am

One detail I would add is angling the top of that side skirt or remove it completely. Try to avoid any place were water can pool. You can't depend on silicone caulk over the long haul and it interferes with paint. Once you put silicone on PMF, you'll have paint adherence problems in that area forever.

Silicone caulk should be avoided in favor of a marine bedding compound like Sikaflex.

It looks like there's a gap for a portion of the wall and floor; you should fill that with strip of wood. Don't float the PMF over an unsupported area.

Unless you plan no rear hatch, the addition of a bulk head wall near the hatch will stiffen the structure.
Pmullen503
1000 Club
1000 Club
 
Posts: 1108
Images: 67
Joined: Sun Nov 23, 2014 1:33 pm
Location: Fond du Lac, WI
Top

Re: Kim's "Puff" the magic dragon 4Hx8WX12L foamie camper

Postby QueticoBill » Fri May 07, 2021 10:33 am

TimC wrote:QBill has a very good point that I overlooked in my previous reply. Without a bulkhead in your design the stability of your structure is compromised. Especially if it is 7' wide as he mentions. What is the width? I don't see a reference to width?


I thought I saw 7' in another thread but look at this thread title: 4' x 8' (not 7') x 12'. I'm sure foamies can be strong but this seems to push at the size limits of my comfort zone, especially with no internal bracing and a lot of flat, square, roof. But I adore the enthusiasm!
QB
A tear with no name: viewtopic.php?f=50&t=67624
QueticoBill
Silver Donating Member
 
Posts: 1184
Images: 22
Joined: Sun Apr 14, 2013 7:22 am
Location: Clayton NY
Top

Re: Kim's "Puff" the magic dragon 4Hx8WX12L foamie camper

Postby QueticoBill » Fri May 07, 2021 10:51 am

Another thought, not knowing dimensions of trailer, set 1 1/2" foam walls on top of that 2x8 (?) and bring pmf canvas over it. And use wheel wells to brace walls. Maybe around wheel wells a stiffener, like a 12" wide vertical strip of foam perpendicular to wall, and tied to ceiling via pmf.

The 8' flat roof span still looks like a trouble spot, with sags that result in ponding. I don't have a solution in mind that quite fits. Maybe slope it to rear, 1/4" per foot. And curves are your friend to 8' roof span, but too long I think for sufficient continuous curve unless you go much taller.
QB
A tear with no name: viewtopic.php?f=50&t=67624
QueticoBill
Silver Donating Member
 
Posts: 1184
Images: 22
Joined: Sun Apr 14, 2013 7:22 am
Location: Clayton NY
Top

Re: Kim's "Puff" the magic dragon 4Hx8WX12L foamie camper

Postby TimC » Fri May 07, 2021 11:09 am

Good points Qbill. With 8' exterior width that leaves quite an interior width. Sleeping position could be flipped 90 degrees with head and feet next to side walls. Maybe that's what you were thinking Kim? If so, the possibility of at least one bulkhead wall with a door or passage hole could really firm up the structure. Maybe an "n" shaped bulkhead that would support the roof and sidewalls at the wheel wells allowing access to the back sleeping quarters.

Am I thinking correctly? This camper will be around 7 1/2' wide inside? I'm still confused as one of your drawings show 8' height but that is not in proportion to the drawing. So I'm assuming 8' is the width.

Tim
Tim
Niagara, WI
My First Benroy Teardrop Build Thread - A 5x8 Woodie - http://www.tnttt.com/viewtopic.php?f=50&t=63575
My Second Teardrop (partial) Build Thread - Started August '16 - http://www.tnttt.com/viewtopic.php?f=50&t=66939
#3 My son's Benroy Foamie team build - Started July '20 - http://www.tnttt.com/viewtopic.php?f=50&t=72877

Image
User avatar
TimC
Gold Donating Member
 
Posts: 1369
Images: 732
Joined: Sat May 23, 2015 4:15 am
Location: WI/MI border
Top

Re: Kim's "Puff" the magic dragon 4Hx7.5WX11L foamie camper

Postby kimphan » Fri May 07, 2021 12:18 pm

The dimension is 7.5 feet (including the 2 x 3" walls)

3" roof is definitely within budget.

Exactly, we're sleeping sideways and invert the door/windows on both side walls.
I can add a bulk head wall, where the wheel wells are and move the windows closer to the tail, this will not screw up our sleeping arrangement.
What kind of material should the wall be? foam ok or I need framing (need to make it light)

I figured I got 2 windows and don't need the fan, right? I mean we only will use it during the spring/summer months.

Need more time to digest what's being discussed. Trying to answer asap, but I gotta work to bring home the foamies :)
165114
"Puff" (the magic dragon) build log - viewtopic.php?f=55&t=73766
User avatar
kimphan
Teardrop Builder
 
Posts: 36
Images: 18
Joined: Fri Apr 30, 2021 3:27 am
Top

Re: Kim's "Puff" the magic dragon 4Hx7.5WX12L foamie camper

Postby QueticoBill » Fri May 07, 2021 1:56 pm

As far as light weight, the trailer looks like a behemoth. It looks like it alone could weigh more than the average teardrop. Do you know? Can it be registered? And pretty sure you need at least marker lights if its 8' wide. I'm nit an expert on DMV trailer rules.

I think your walls could be thinner. Only 4' tall, probably 1 1/2" foam will do if braced by front and back and roof AND mid ship bulkhead, even if that he as a 6' x 3' opening in it. And all foam joints are covered with pmf in side and out. All the fiam dies structurally is keep the skins apart and not letting them move differently, just like the paper honeycomb keeps the thin skins of a hollow core door apart.

The roof span and it deflecting - sagging under its own weight let alone ponding water - is not solved by thicker foam. Curving front to back or side to side like a vardo would be options, or a ridge the long way, or a slope. Even a shallow slope maybe with ridge crosswise. I do not know what appeals you or what the "smartest" or mist elegant solution is. Just pretty certain you won't be pleased with current roof after a while.

Go to Home Depot/Lowes/Menards/other with someone, and hold a 4 x 8 piece of thickest foam at ends, and I think you'll see the sag. Put any weight on it and I'm sure you will. 20 pounds in the middle would be about same as just 1/4" of water over entire 4 x 8. Hold both ends of a 2x2 and see how little pushing at center it takes to sag.

Not trying to be difficult but look at other trailers here - few near 8' wide except maybe the conversions.

And don't rush so much that it seems like work. Should be fun!
QB
A tear with no name: viewtopic.php?f=50&t=67624
QueticoBill
Silver Donating Member
 
Posts: 1184
Images: 22
Joined: Sun Apr 14, 2013 7:22 am
Location: Clayton NY
Top

Re: Kim's "Puff" the magic dragon 4Hx7.5WX12L foamie camper

Postby TimC » Fri May 07, 2021 2:40 pm

I think foam works for a bulkhead. Though I would go with 1/2" or 5/8" plywood myself. Either way there's some fiddling to do to anchor it to the floor, walls and roof.

How many bodies to you intend to sleep in there? Kids and adults? If little kids bunks might be possible.
Tim
Niagara, WI
My First Benroy Teardrop Build Thread - A 5x8 Woodie - http://www.tnttt.com/viewtopic.php?f=50&t=63575
My Second Teardrop (partial) Build Thread - Started August '16 - http://www.tnttt.com/viewtopic.php?f=50&t=66939
#3 My son's Benroy Foamie team build - Started July '20 - http://www.tnttt.com/viewtopic.php?f=50&t=72877

Image
User avatar
TimC
Gold Donating Member
 
Posts: 1369
Images: 732
Joined: Sat May 23, 2015 4:15 am
Location: WI/MI border
Top

Re: Kim's "Puff" the magic dragon 4Hx7.5WX12L foamie camper

Postby kimphan » Fri May 07, 2021 7:06 pm

Yah, it is beefy :_( 3500 lbs Axl, currently at 600-700 lbs. Still trying to get it inspected, covid is delaying inspection schedule big time.

It's ok, I will take my time, learning and doing everything right.

Worst case scenario Washington state has a "no questions ask" temporary permit that cost $33 for 3 consecutive days up to twice a year for camper. We can have a happy camping haul twice a year and use it as a get a way cabin at the quiet "in the middle of nowhere" end of our property near a creek.
165114
"Puff" (the magic dragon) build log - viewtopic.php?f=55&t=73766
User avatar
kimphan
Teardrop Builder
 
Posts: 36
Images: 18
Joined: Fri Apr 30, 2021 3:27 am
Top

Re: Kim's "Puff" the magic dragon 4Hx7.5WX12L foamie camper

Postby ghcoe » Sat May 08, 2021 11:14 am

Glancing through this thread I think you may be better off getting rid of the floor. Looks to be quite heavy, unless you don't care about weight. Also, you will need to get the floor off the trailer enough to overlap the canvas under the floor. If you overlap the canvas under the floor, and you should, you will not want the canvas in contact with the trailer frame. this will create a rub point on the trailer and canvas which will cause issues down the road.

Here are some insulated floor ideas. Not sure if you really need insulation in the floor though since heat rises up and the trailer acts as a upside down cup to hold the heat in.

Insulated Floor Ideas.png
Ideas
Insulated Floor Ideas.png (79.72 KiB) Viewed 2109 times
George.

Gorrilla Glue, Great Stuff and Gripper. The three G's of foamie construction.

My build viewtopic.php?t=54099
Working with flashing for foamie construction viewtopic.php?f=55&t=60303
Making a hot wire http://tnttt.com/viewtopic.php?f=55&t=55323
User avatar
ghcoe
1000 Club
1000 Club
 
Posts: 1943
Joined: Fri Dec 11, 2009 11:20 pm
Location: SW Idaho
Top

Re: Kim's "Puff" the magic dragon 4Hx7.5WX12L foamie camper

Postby kimphan » Sat May 08, 2021 3:15 pm

ghcoe wrote:Glancing through this thread I think you may be better off getting rid of the floor. Looks to be quite heavy, unless you don't care about weight. Also, you will need to get the floor off the trailer enough to overlap the canvas under the floor. If you overlap the canvas under the floor, and you should, you will not want the canvas in contact with the trailer frame. this will create a rub point on the trailer and canvas which will cause issues down the road.
]


I've been thinking about getting rid of the old 1/2 inches wood floor all night and just go with method similar to what you describe.

Looking at the picture and what you describe, I do have a couple of questions...
1. How to do keep the outter PMF skin at the bottom from slipping and peeling off the OSB board? Do you staple them (after glueing and before painting)? or drill them (after they're dried and hard) and clamp them with more wood? Or are we thinking that the hard "L" PMF skin wrapped around is enough for it to not slip off.
2. How many inches should the canvas be overlapping under the floor? The standard 4 inches?
3. I don't see an inner PMF skin, would that compromise the load and it could collapse the foam body inward?

Thanks,
Kim.
Last edited by kimphan on Sat May 08, 2021 3:58 pm, edited 3 times in total.
165114
"Puff" (the magic dragon) build log - viewtopic.php?f=55&t=73766
User avatar
kimphan
Teardrop Builder
 
Posts: 36
Images: 18
Joined: Fri Apr 30, 2021 3:27 am
Top

Next

Return to Foamies

Who is online

Users browsing this forum: No registered users and 25 guests