Eriba Puck

This includes traditional teardrop shapes and styles

Postby AZSpyder » Sun Jun 14, 2009 9:45 pm

Judy

That is a clean looking tail light conversion. Are those surface mount LED units?

My originals are a bit different.

Image

Mine are a Hella unit. I wouldn't mind keeping them except they are faded and I haven't found replacement lens. When running the part number on the net I did find in the early 60's they were deemed a standard for a few European countries. At some point they must have been real common. If I can find some in the states I'll use them but otherwise I'm looking at LEDs or possibly 60's VW bus units. I do still need to measure just how deep the bus parts would be. They may be too deep for the wall thickness.

If I do change them I also need to figure out what to do about license plate lights. The current left one has the usual clear lens on the bottom to light up the plate. I haven't found any LED lamps that do that.

Jerry
AZSpyder
Teardrop Master
 
Posts: 127
Joined: Fri Aug 08, 2008 10:49 am

Postby rebapuck » Sun Jun 14, 2009 10:09 pm

My post from another forum.


Brought the Puck home today to replace the taillights. Immediately realized the new ones would not work. There was no room behind them for the wires. I guess they were for when you can do the wiring on the backside of the mounting surface.

But I really liked them and I'm so bad about sending stuff back and I'd already thrown the receipt away. What I needed was a gasket. Autozone did not have anything 1/4" thick and I didn't want to stack layers. What I needed was a mousepad. So, off to Staples. Did you know that new mousepads are only 1/8"? So I bought a new one so I could cut up my old 1/4" pad. Hated to do it, but the cause was good. (And I hate this new mousepad. It's going in the trash)

Made the gaskets and started the wiring. I'm afraid the Puck had too many wires. So a couple were taped off and left hanging. Drilled new holes and screwed those things down. THEY WORK!!

I ordered the lights from... www.etrailer.com ... They are LED and sealed.
Judy
1966 VW camper
1967 VW singlecab
Image
User avatar
rebapuck
.
 
Posts: 2243
Images: 1
Joined: Thu May 14, 2009 1:55 pm
Location: Chapel Hill NC

Postby rebapuck » Sun Jun 14, 2009 10:11 pm

The taillights in my '66 bus are too deep for a Puck. The hole is quite large too.
Judy
1966 VW camper
1967 VW singlecab
Image
User avatar
rebapuck
.
 
Posts: 2243
Images: 1
Joined: Thu May 14, 2009 1:55 pm
Location: Chapel Hill NC
Top

Postby H@nk » Sat Jul 11, 2009 2:16 am

rebapuck wrote:The old..
Image

The useless..
Image

The new..
Image


So I see you bought a Dutch RV?
There are lots more over here in my country.
Love those little ones.
Old bread isn't hard, no bread, that's hard.
User avatar
H@nk
The 300 Club
 
Posts: 491
Images: 81
Joined: Tue Oct 02, 2007 2:46 pm
Location: Nieuwerkerk aan den IJssel, Nederland
Top

Postby rebapuck » Sat Jul 11, 2009 5:11 pm

Yes I did. I wasn't really looking to buy. Isn't that how it goes? But found this one on the BBT4VW.com site. It was in great shape. All the ones I had seen in the USA were on the west coast and most looked bad. Something about this one spoke to me, and I figured ship from Belgium or ship from California. Same difference. I'm very happy with it. I did have to rewire for 110v.
Judy
1966 VW camper
1967 VW singlecab
Image
User avatar
rebapuck
.
 
Posts: 2243
Images: 1
Joined: Thu May 14, 2009 1:55 pm
Location: Chapel Hill NC
Top

More Progress

Postby AZSpyder » Mon Jul 20, 2009 7:33 pm

I have managed some more progress on the Puck. So far I didn't discover more ways to not do something.

I tried holding the 4 foot by 10 foot skins up against the frame for marking. Working by myself they were just to unmanageable. So I got the idea of laying the frame on its side. It was real easy to clamp the skin down and trace the cutting line. They actually even fit when it came time to install them later. There is one issue with 10 foot skins on the Puck. They should have overlaped at the front center vertical post. The bottom work out but the top needed to be 10 foor and 2 inches to fit. I moved the lap seam to the outside edge of the front window to make it fit. Not original seam point but with a couple more screw strips it will work.

Image

Next was the floor. Nothing special, I used the idea of tar on the bottom. I had so much fun playing with the tar I also put it on the frame where the floor contacted it. Then used it to seal my AC unit enclosure.

Image

Now a little clean up on the fiberglass roof. It had a bit of some sort of old hardened and crack sealer that cleaned of pretty easy. Sure glad I didn't need to do much for repairs. It is a very light and tight fitting assembly.

Image

Next the pre cut skins clamped in place and just a few pop rivets. The tail section traced and cut in place. The door and windows were cut after the skin was on..

Image

That has been it so far. I was thinking about just painting the fiberglass. I tried a sample painting of a scrap piece. Half white and the other half not painted. I was really surprised on how much cooler the painted side is when left in the sun. We have had a few days that got over 105 degrees lately so cooler has been on my mind. Since there would be more maintenance keeping the aluminum simi polished compared to maintaing the paint made the decision. I now need to paint it to move on. After the paint I can get all the screw strips on and call the outside done.

Jerry
AZSpyder
Teardrop Master
 
Posts: 127
Joined: Fri Aug 08, 2008 10:49 am
Top

Postby rebapuck » Mon Jul 20, 2009 10:26 pm

Will you use a special paint for the fiberglass?

It's neat to see what's underneath everything. Thanks for the pictures. Keep them coming. Could be of help down the road.
Judy
1966 VW camper
1967 VW singlecab
Image
User avatar
rebapuck
.
 
Posts: 2243
Images: 1
Joined: Thu May 14, 2009 1:55 pm
Location: Chapel Hill NC
Top

Postby AZSpyder » Mon Jul 20, 2009 10:58 pm

Judy

I started the thread hoping someone would find it interesting or helpful in the future. I had seen some talk about the Puck when no one was sure about what it was made of. Hopefully I can cover the basics of how it was made.

I have dabbled with a couple of car paint jobs. I have a lot to learn and finally found a local paint supplier that will talk me through anything I want to know. The Puck didn't have any primer on the fiberglass or aluminum. Whatever it is painted with seemed to stay on the aluminum pretty well. Very little of it was on the fiberglass. From what I have been reading about painting aluminum I would have thought it would have been the other way around.

The fiberglass shouldn't be any trouble. A standard primer should work there. The aluminum may be another matter. From what I have read lately I need to use a primer compatible with the aluminum oxide layer that will be there to some extent now matter how much prep is done. On aircraft there is a couple of prep coatings that are used before painting. I talked to some guys on aluminum and composite painting at work. I'm not to worried about the paint staying on at Mach 0.9 and it sounds like there are simpler methods used in the auto industry. I should find an automotive primer for aluminum available. I figure when I start picking out the stuff I'll let the gent know what I am going to shoot it on and I'm sure he'll have some ideas.

Jerry
AZSpyder
Teardrop Master
 
Posts: 127
Joined: Fri Aug 08, 2008 10:49 am
Top

Postby H@nk » Tue Jul 21, 2009 1:37 am

When you continiue, you make the smallest Airstream ever. Good job.
If you need information, just send a message and I'll look over here and send it to you. There is a lot of information at the dealers.
Old bread isn't hard, no bread, that's hard.
User avatar
H@nk
The 300 Club
 
Posts: 491
Images: 81
Joined: Tue Oct 02, 2007 2:46 pm
Location: Nieuwerkerk aan den IJssel, Nederland
Top

Postby AZSpyder » Wed Jul 22, 2009 7:11 pm

I had just realized that out of curiosity i should have been seeing what different parts weigh. To late to wonder about things like the bare frame and such but i did weigh it as it sits today.

This is the frame. 7/16 hardwood ply floor (with lots of tar), a 2000 pound pair of Northern Airborne torsion stub axel set, wheels, the aluminum skin and the roof. No paint, insulation or any interior. The condition as pictured.
Image

On a uncalibrated bathroom scale it came up as 409 pounds.
The individual breakdown is:
Right 168 pounds
Left 176 pounds
Tongue jack 65 pounds

8 pounds heaver on the left may be the structure I added for the window type AC unit but I would expect there would be some difference anyway. Maybe thats where the most tar went. I was hoping for lighter since I can pick up a side easy but I guess it's still not too bad.

Jerry
AZSpyder
Teardrop Master
 
Posts: 127
Joined: Fri Aug 08, 2008 10:49 am
Top

Postby rebapuck » Wed Jul 22, 2009 9:47 pm

My scales only go to 320 lbs(analog). Will that be enough? And did you use a little ramp or anything to roll it up onto the scale? I have visions of it scittering away everytime the tire hits the edge of the scale.
Judy
1966 VW camper
1967 VW singlecab
Image
User avatar
rebapuck
.
 
Posts: 2243
Images: 1
Joined: Thu May 14, 2009 1:55 pm
Location: Chapel Hill NC
Top

Postby AZSpyder » Thu Jul 23, 2009 12:40 am

I got to thinking after we swapped information on weighing before that you may need one in the 350 to 400 pound range for even a slightly overweight Puck. You may get by with a smaller one if you lighten as much as possible, remove everything loose. You can weigh anything removed separately, usually holding it and standing on a scale. Then lower the front as much as possible to transfer some weigh off the main wheels onto the jack/tongue. The trailer originally was advertised as weighing 770 pounds (350 Kilos) with I think a 70 pound tongue weight. That would put each tire right at 350 pounds. I suspect that 350 Kilo weight was rounded out a bit but no telling which way.

When I did this to a light car I placed two paving stones at each wheel. Used a jack to get the wheel on one and place the other in front of that one. Then you just replace one of the forward paving stones with the scale. When you roll the trailer forward you end up with one wheel on the scale and the others on the second set of paving stones. Get the weight at one wheel then roll back replacing the scale with a stone on move on to the next wheel. When weighing you always have one wheel on the scale and the others on the stones keeping everything at about the same height. You could use boards or whatever is hand. What you are going for is something about the same thickness as the scale. If you try this with a scale under a tire and nothing under the others it will be leaning away from the scale which would move some of the weight away from the scale getting an error in the measurements. Since you are only jacking two wheel you could go back and forth moving the scale and spacers around without rolling back and forth on a second set of pavers.

For mine I had two points on the stones and lifted the trailer by hand and kicked the scale under it. I think that will get a bit harder to do as more parts get added.

Jerry
AZSpyder
Teardrop Master
 
Posts: 127
Joined: Fri Aug 08, 2008 10:49 am
Top

Postby rebapuck » Thu Jul 23, 2009 9:32 pm

Already too much trouble. I don't stow much in it. Just the 5# tank, plastic dishes, two down comforters and one small pillow.

On the UK Eriba forum, a very knowledgeable person told me that the 350kg and 500kg were the unladen and laden? weight. So 770lbs unloaded is about right then. Just doesn't seem possible when you look at all the room a Puck has.
Judy
1966 VW camper
1967 VW singlecab
Image
User avatar
rebapuck
.
 
Posts: 2243
Images: 1
Joined: Thu May 14, 2009 1:55 pm
Location: Chapel Hill NC
Top

Postby rebapuck » Thu Jul 23, 2009 9:35 pm

Jerry, Are you going to change your closet since you will have the AC? I have the Trumatic in that spot and my closet is different to accomodate it.
Judy
1966 VW camper
1967 VW singlecab
Image
User avatar
rebapuck
.
 
Posts: 2243
Images: 1
Joined: Thu May 14, 2009 1:55 pm
Location: Chapel Hill NC
Top

Postby AZSpyder » Thu Jul 23, 2009 11:28 pm

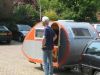
During the AC fitting stage I trimmed the cabinet to clear the unit.
Image

You can sort of see the difference in fading of the finish where the rest of the cabinet joined up. A 16 inch wide Frigidaire just fit without interfering with the ice box area. The side of the tall cabinet is water damaged at the bottom. I planned to replace that skin and add a new frame around the cutout at the edge of the AC. There is still some space between the top of the AC enclosure and the door of the tall cabinet. I thought I would top that area with an open top storage box.

Now there are some more major changes being worked out. My wife doesn't like even just the slightest whiff of cooking gas. We decided the stove must go, the galley layout of the tear drop would have been perfect for us but can't get there from here. She does have a RV microwave coming but that will only work with a camp site hook up, like the AC. We are also thinking about a AC/DC refrigerator to replace the ice box. And to add to the trouble a portable toilet to save me having to walk her to the bathroom in the middle of the night, if there is a bathroom.

So far I removed the propane bottle mount from the tongue and added a battery box. It looks like a portable toilet could fit in the forward cabinets but the doors are to small to go through. I want to mount the microwave as low as possible to keep the center of gravity low but have to take into account heat and steam venting. I am going to have some work to do.

Its starting to look like the forward cabinets will have to be all new. I'm just mulling over possible layouts at the moment. I hope to keep the same number of doors and use all the original hardware but it looks like things are going to be very much different. I do plan to stick with the same method of construction. Those original cabinets are simple, light and something that maybe even I can reproduce. And since the holes for the stove vent and water fill aren't cut yet I can place them anywhere I want or not install so there is some help there.

I get myself in more trouble with some of the projects I drag home! :duh:

Jerry
AZSpyder
Teardrop Master
 
Posts: 127
Joined: Fri Aug 08, 2008 10:49 am
Top

PreviousNext

Return to Traditional Designs

Who is online

Users browsing this forum: No registered users and 2 guests