Thanks, Tim! I have definitely had a long while to tinker with it in my head, waiting for good weather and some extended building time. It's amazing all of the different ways I've thought up to put it together, virtual pre-assembly, I guess! The order in which I put it together makes a difference to a successful outcome, I think.
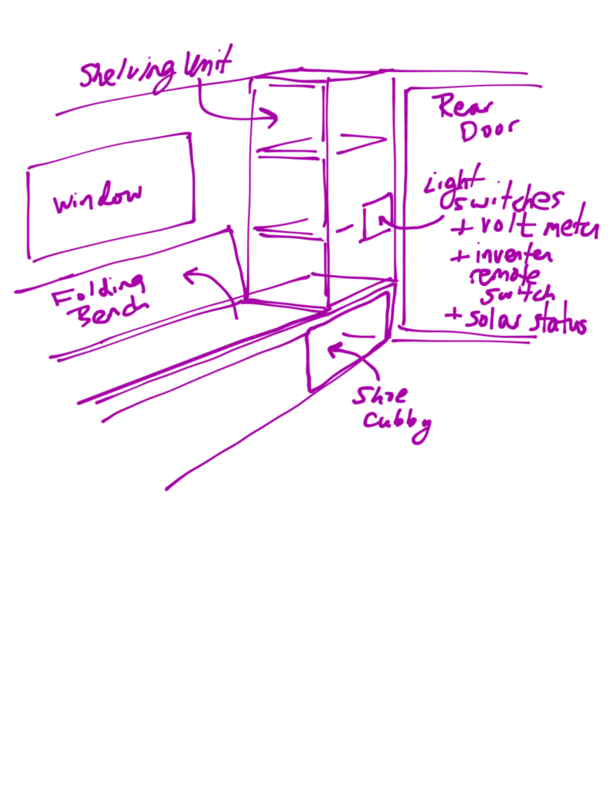
Last night I dreamed up a folding shelf/closet design for the interior that can be stowed against the rear corner walls when I need more cargo space inside the trailer. When deployed, it would give me two to three shelves in each corner next to the back door, which would be useful for storing clothes, towels, and other odds and ends. I haven't worked out all the bugs, but it was a fun mental exercise.
We have another scorcher here in the Philly area today, 92* and humid. I'm working in the shop this morning on the tongue box, but will have a go with the roof panels this afternoon when my neighbor is available to help.
Teardrops n Tiny Travel Trailersor t n ttt for short (tnttt.com) |
M116A3 Build
Re: M116A3 Build
![]() by lfhoward » Sat May 28, 2016 10:19 am
by lfhoward » Sat May 28, 2016 10:19 am
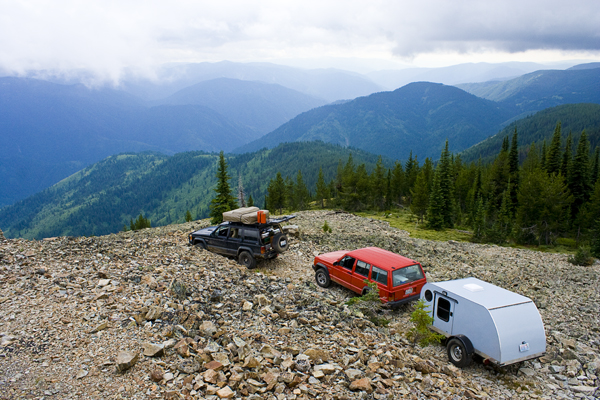
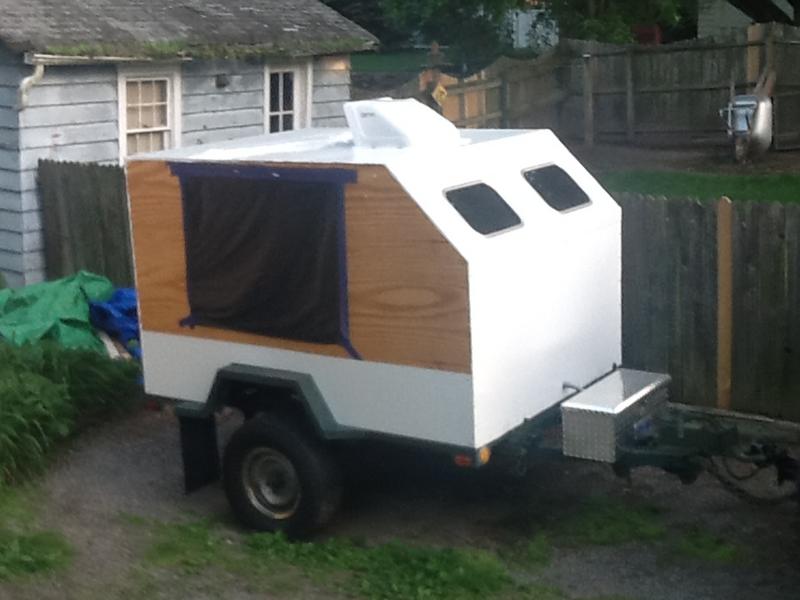
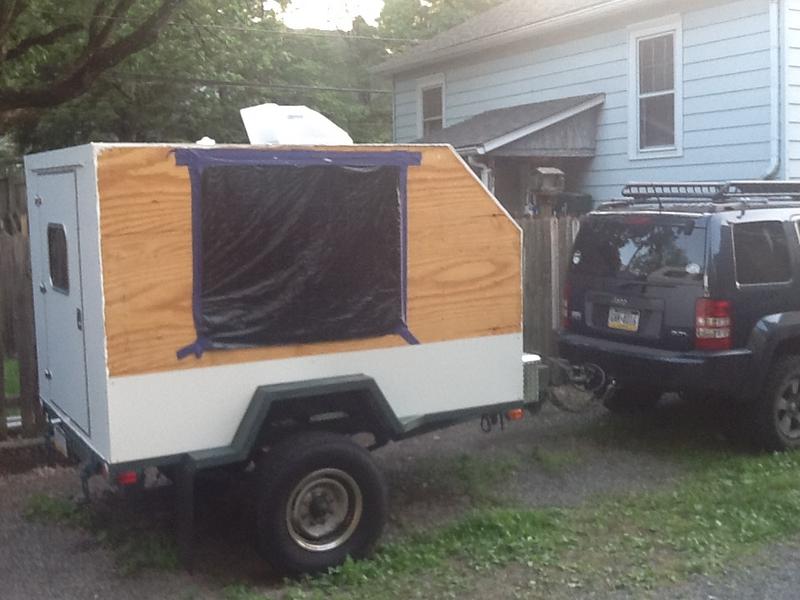
My off-road camper build on an M116A3 military chassis:
http://www.tnttt.com/viewtopic.php?f=50&t=62581
Tow vehicle: 2008 Jeep Liberty with a 4 inch lift.
http://www.tnttt.com/viewtopic.php?f=50&t=62581
Tow vehicle: 2008 Jeep Liberty with a 4 inch lift.
-

lfhoward - 1000 Club

- Posts: 1370
- Joined: Wed Jan 22, 2014 6:10 pm
- Location: Philadelphia, PA
Re: M116A3 Build
![]() by lfhoward » Sat May 28, 2016 8:23 pm
by lfhoward » Sat May 28, 2016 8:23 pm
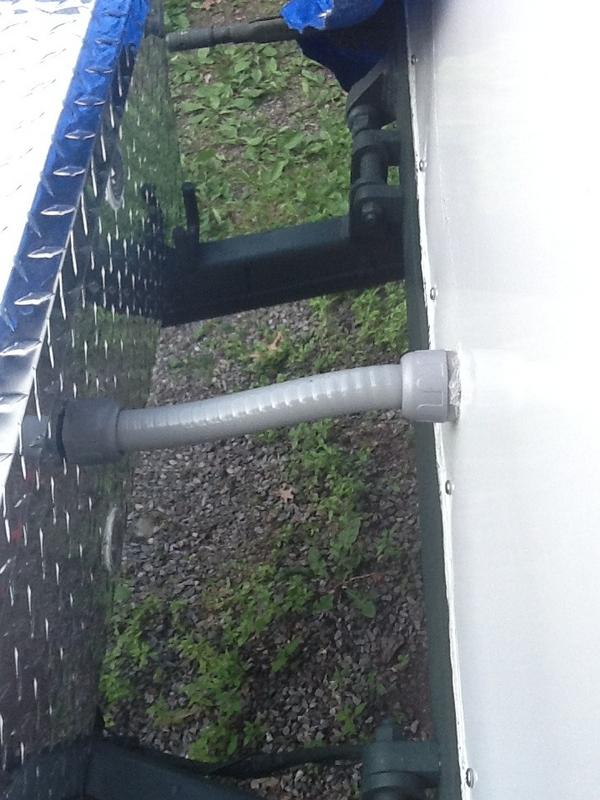
Today I focused on the electrical power center (aka the tongue box). I got it mounted in place using Grade 8 bolts and lock nuts, so it isn't going anywhere. I also installed the waterproof flexible conduit between the box and the cabin for the main power wires.
Here is a look inside the box. I have 3 deep cycle marine batteries wired in parallel (12 volts total). Each battery has its own compartment and they are secured to keep them from bouncing up and shorting out on the aluminum box lid.
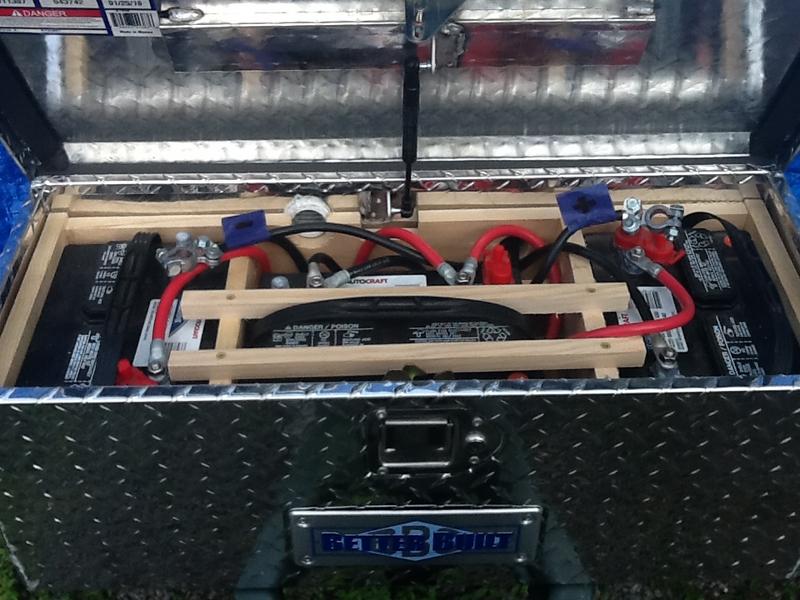
The compartmentalization will also make battery removal and replacement a lengthy process, because the dividing walls must be removed to get at the side batteries. Hopefully I'll get a good number of years of service from these before I need new ones. I have a voltage meter in the cabin to make sure I won't draw them down to more than 50% charge, which should prolong their life.
Here is a look inside the box. I have 3 deep cycle marine batteries wired in parallel (12 volts total). Each battery has its own compartment and they are secured to keep them from bouncing up and shorting out on the aluminum box lid.
The compartmentalization will also make battery removal and replacement a lengthy process, because the dividing walls must be removed to get at the side batteries. Hopefully I'll get a good number of years of service from these before I need new ones. I have a voltage meter in the cabin to make sure I won't draw them down to more than 50% charge, which should prolong their life.
Last edited by lfhoward on Sun May 13, 2018 3:03 pm, edited 2 times in total.
My off-road camper build on an M116A3 military chassis:
http://www.tnttt.com/viewtopic.php?f=50&t=62581
Tow vehicle: 2008 Jeep Liberty with a 4 inch lift.
http://www.tnttt.com/viewtopic.php?f=50&t=62581
Tow vehicle: 2008 Jeep Liberty with a 4 inch lift.
-
lfhoward - 1000 Club
- Posts: 1370
- Joined: Wed Jan 22, 2014 6:10 pm
- Location: Philadelphia, PA
 We're still watching your progress & you're doing good!


 It's all gonna be worth it! You'll see.
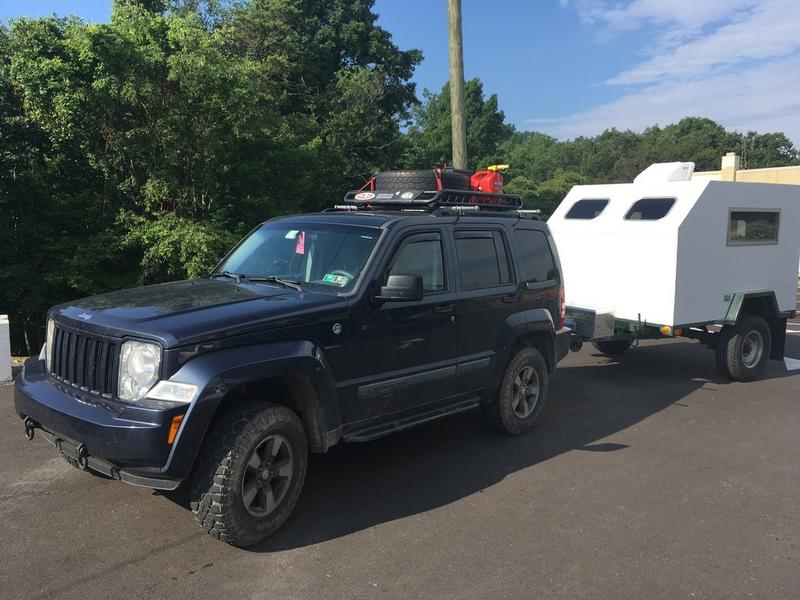
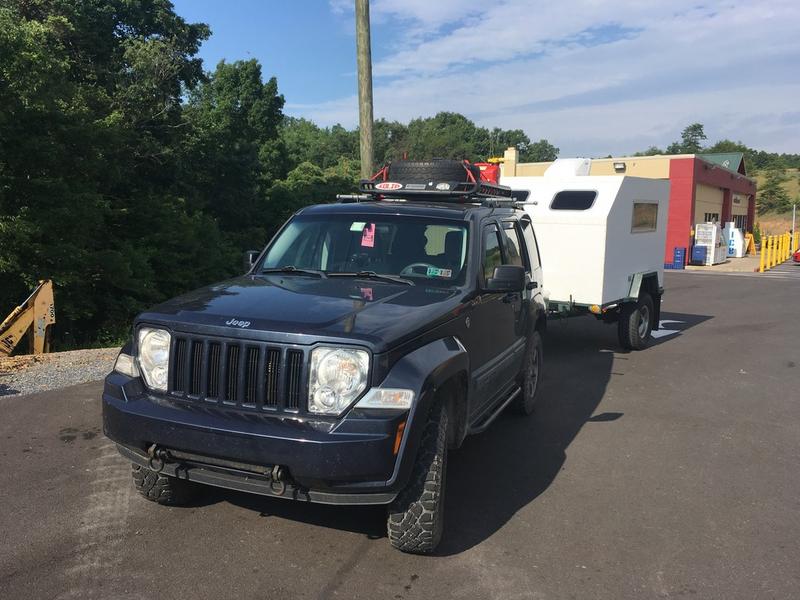
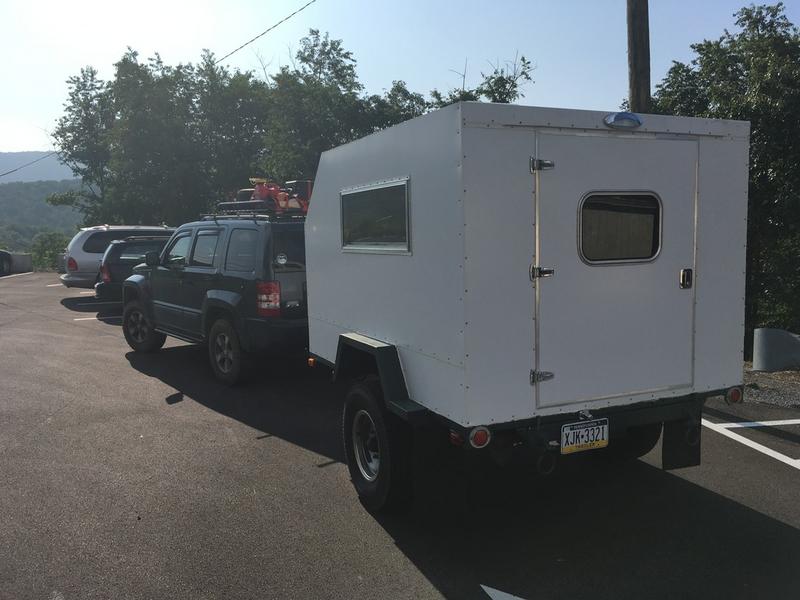

 Congratulations on getting your M11643 camp-able. She looks good behind your Jeep.