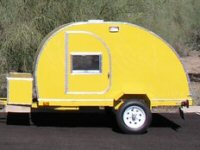
my truck camper

...ask your questions in the appropriate forums BUT document your build here...preferably in a single thread...dates for updates, are appreciated....

Re: my truck camper

Postby KCStudly » Mon Nov 14, 2016 12:10 am

Fair enough, and thanks for the explanation. :thumbsup:

It makes sense in context. I have to tell you, tho, that I am in about the same position. I had no real prior experience before starting my build and now that I am at the external body working stage... it is still bodywork. There really is no way around it. If you want a smooth fair surface to paint, you will have to do body work, filler, sand, sand, sand and more sanding. There's really no way around it if you want a smooth finish.
KC
My Build: The Poet Creek Express Hybrid Foamie

Poet Creek Or Bust
Engineering the TLAR way - "That Looks About Right"
TnTTT ORIGINAL 200A LANTERN CLUB = "The 200A Gang"
Green Lantern Corpsmen
User avatar
KCStudly
Donating Member
 
Posts: 9633
Images: 8169
Joined: Mon Feb 06, 2012 10:18 pm
Location: Southeastern CT, USA

Re: my truck camper

Postby Philip » Mon Nov 14, 2016 9:05 am

KCStudly wrote:Fair enough, and thanks for the explanation. :thumbsup:

It makes sense in context. I have to tell you, tho, that I am in about the same position. I had no real prior experience before starting my build and now that I am at the external body working stage... it is still bodywork. There really is no way around it. If you want a smooth fair surface to paint, you will have to do body work, filler, sand, sand, sand and more sanding. There's really no way around it if you want a smooth finish.


Oh I know that. I just want the first layer as close to workable as I can. I have all the body sanders needed to do body work and a large compressor. Auto body work I have experience in and I see this job as the same thing. Start with a good base. It doesn't matter if its metal or glass.

Yesterday I got about half of the unfinished side done. I'll work on the rest today.
Philip
Silver Donating Member
 
Posts: 498
Images: 323
Joined: Thu Jun 09, 2016 3:57 am
Location: Peru,Indiana

Re: my truck camper

Postby Philip » Mon Nov 14, 2016 7:08 pm

I went as far as I could today on doing the corner layups. I ran out of epoxy on the next to last bay. The bay with the glass tape in the pic is the one I have left to do.

Image

I have more epoxy ordered. Should be here in a couple of days. I guess I'll find something else to amuse myself with till it comes in. :lol:
Last edited by Philip on Sun May 06, 2018 1:12 pm, edited 1 time in total.
Philip
Silver Donating Member
 
Posts: 498
Images: 323
Joined: Thu Jun 09, 2016 3:57 am
Location: Peru,Indiana
Top

Re: my truck camper

Postby Philip » Tue Nov 15, 2016 3:02 pm

Today I made the table I am going to use for cutting ply and foam. Still need a couple of items finished. I'll do that tomorrow.

Image

Image

Sorry about the second pic. I didn't feel like walking back out to the office to resnap it. :lol:
Last edited by Philip on Sun May 06, 2018 1:13 pm, edited 1 time in total.
Philip
Silver Donating Member
 
Posts: 498
Images: 323
Joined: Thu Jun 09, 2016 3:57 am
Location: Peru,Indiana
Top

Re: my truck camper

Postby Philip » Wed Nov 16, 2016 6:58 pm

Today I finished the two items on the fold down table. Then I put the hot wire cutter on it.

Image

In this pic it shows how I am adjusting and holding the hot wire cutter in place for width of cuts. There is a 1x2 screwed to the bottom of the center board the cutter rests on. I need to stiffen the cutter up a little. It had a little to much side flex to my liking. If you notice in the next pic I had a T squre slide clamp in between the upper and lower section to control the flex some.

Image

This pic shows where I knocked off today. If you notice the pile of debris on the far corner of the frame work. That is the remains of my adjustable power supply. Gotta do something about that tomorrow. :lol:

Image
Last edited by Philip on Sun May 06, 2018 1:20 pm, edited 1 time in total.
Philip
Silver Donating Member
 
Posts: 498
Images: 323
Joined: Thu Jun 09, 2016 3:57 am
Location: Peru,Indiana
Top

Re: my truck camper

Postby KCStudly » Thu Nov 17, 2016 11:18 am

Your foam looks to be a little thicker than your pockets are deep. You should be able to skim cut them fair using the hot knife, if not, be sure to block sand them flush before skinning. The foam will not crush enough to get a good glue bond with the wood.
KC
My Build: The Poet Creek Express Hybrid Foamie

Poet Creek Or Bust
Engineering the TLAR way - "That Looks About Right"
TnTTT ORIGINAL 200A LANTERN CLUB = "The 200A Gang"
Green Lantern Corpsmen
User avatar
KCStudly
Donating Member
 
Posts: 9633
Images: 8169
Joined: Mon Feb 06, 2012 10:18 pm
Location: Southeastern CT, USA
Top

Re: my truck camper

Postby Philip » Thu Nov 17, 2016 5:52 pm

The glass work I did is holding the panels up just a little. I do plan on doing some sanding. When I get a power source going for the hot cutter I had planed on trying that first. I can always use the belt sander also.
Philip
Silver Donating Member
 
Posts: 498
Images: 323
Joined: Thu Jun 09, 2016 3:57 am
Location: Peru,Indiana
Top

Re: my truck camper

Postby KCStudly » Thu Nov 17, 2016 11:08 pm

:thumbsup:
KC
My Build: The Poet Creek Express Hybrid Foamie

Poet Creek Or Bust
Engineering the TLAR way - "That Looks About Right"
TnTTT ORIGINAL 200A LANTERN CLUB = "The 200A Gang"
Green Lantern Corpsmen
User avatar
KCStudly
Donating Member
 
Posts: 9633
Images: 8169
Joined: Mon Feb 06, 2012 10:18 pm
Location: Southeastern CT, USA
Top

Re: my truck camper

Postby Philip » Mon Nov 21, 2016 7:25 pm

I took a couple of days off waiting for the parts to redo my power supply for the hot cutter. So on Saturday I made up an adjustable hot cutter to use on the panels.

Image


Then yesterday I decided to try my battery charger like OP827 mentioned he used. It worked good enough to get the rest of the foam cut and layed down on Sunday. I skinned off the top of about half the panels. (This pic was today after I had finished off all the panels).

Image


Today I finished off the rest of the panels. Then made a run to the local lumber yard to get more 3/8"s ply. I installed that. Then had to make a run to HD for a router bit and some other lumber. After that run I routed off the excess ply from the deck.

Image
Last edited by Philip on Sun May 06, 2018 1:23 pm, edited 1 time in total.
Philip
Silver Donating Member
 
Posts: 498
Images: 323
Joined: Thu Jun 09, 2016 3:57 am
Location: Peru,Indiana
Top

Re: my truck camper

Postby KCStudly » Tue Nov 22, 2016 9:24 am

Looking good! :thumbsup:
KC
My Build: The Poet Creek Express Hybrid Foamie

Poet Creek Or Bust
Engineering the TLAR way - "That Looks About Right"
TnTTT ORIGINAL 200A LANTERN CLUB = "The 200A Gang"
Green Lantern Corpsmen
User avatar
KCStudly
Donating Member
 
Posts: 9633
Images: 8169
Joined: Mon Feb 06, 2012 10:18 pm
Location: Southeastern CT, USA
Top

Re: my truck camper

Postby OP827 » Tue Nov 22, 2016 7:50 pm

Philip, the hot wire foam cutting flash with wood looks pretty good and flat from here.
I may steel the idea for the future. Anything you recommend I should be watching for when doing the cut, any lessons learned?
Thanks,
Oleg
User avatar
OP827
Donating Member
 
Posts: 1570
Images: 406
Joined: Fri Apr 25, 2014 7:27 pm
Location: Bruce County Ontario
Top

Re: my truck camper

Postby Philip » Tue Nov 22, 2016 10:19 pm

OP827 wrote:Philip, the hot wire foam cutting flash with wood looks pretty good and flat from here.
I may steel the idea for the future. Anything you recommend I should be watching for when doing the cut, any lessons learned?
Thanks,
Oleg


You need to maintain a steady speed threw the cut. If you slow down it will leave a divot. If you look at the foam in the pic any dark lines in it was a slow down point.

A good power supply helps. My charger only supplied 12 volts with maybe one amp. There wasn't enough resistance to fully turn on my charger. It was only giving me voltage and no amperage. So it was slow cutting. My power supply that died was giving me three amp's.

Rig a spring up on the cutter wire to hold tension. I didn't on that adjustable setup I made. NI-chrome wires stretches a lot when hot even at the low amp's I was feeding it. With the wire tight at the start of the cut. By the end of a cut the center of the wire was about 2" behind in the center of the span. A larger power source would have helped there. If I slowed down to keep the wire straight it caused divots on the outer edges.

It was a flush cut with top of wood. On the alumin ears I added to the clamp. I put a notch just deep enough in the rounded corner to just hold the wire in position. I'll get a better pic of the working end tomorrow. I wasn't quite done with it when I took that one.
Philip
Silver Donating Member
 
Posts: 498
Images: 323
Joined: Thu Jun 09, 2016 3:57 am
Location: Peru,Indiana
Top

Re: my truck camper

Postby noseoil » Wed Nov 23, 2016 8:47 am

Looking very nice. Should be a good camper when it's finished! I like the planning & workmanship, first rate.
Build log: viewtopic.php?f=50&t=60248
The time you spend planning is more important than the time you spend building.........

137905
User avatar
noseoil
1000 Club
1000 Club
 
Posts: 1821
Images: 669
Joined: Sun Apr 27, 2014 8:46 am
Location: Raton, New Mexico, living the good life!
Top

Re: my truck camper

Postby Philip » Wed Nov 23, 2016 5:09 pm

OP here is the close up pic's of the cutter. At the position I have the wire notched in. You need to hold the clamp at a 45 degree angle to the foam your cutting.

Image

In this pic you can see I just wrapped the Ni-chrome around that machine screw. The clip is just to keep the end from unwinding.

Image
Last edited by Philip on Sun May 06, 2018 1:25 pm, edited 2 times in total.
Philip
Silver Donating Member
 
Posts: 498
Images: 323
Joined: Thu Jun 09, 2016 3:57 am
Location: Peru,Indiana
Top

Re: my truck camper

Postby Philip » Wed Nov 23, 2016 5:16 pm

Now onto yesterday and todays work.

I started on the end wall. I got most of it framed in yesterday. This morning I finished it off.

Image

Image

Then I started cutting foam to fit into the spaces. When I got the upper section foamed. I threw down epoxy and weighted them down.

Image

After the epoxy had set I did the other half of the wall. I didn't have enough jugs to do all three sections at once. :lol:

Image
Last edited by Philip on Sun May 06, 2018 1:42 pm, edited 2 times in total.
Philip
Silver Donating Member
 
Posts: 498
Images: 323
Joined: Thu Jun 09, 2016 3:57 am
Location: Peru,Indiana
Top

PreviousNext

Return to Build Journals

Who is online

Users browsing this forum: No registered users and 6 guests