Teardrop/Cycle Hauler Back Underway

Anything to do with mechanical, construction etc

Postby sandman » Mon Jun 18, 2007 8:51 pm

Thanks a million, Elmo. You rock, Bro!!! :D

I got back to work today as soon as the rain had passed through the area. It cooled things off pretty good so I could work in some small degree of comfort on the Teardrop/Cycle Hauler. I managed to cut most of my roof spars to length of 76". I carefully laid out the roof spar locations on 12" centers. I made a marking gauge out of a block of wood and pencil and stuck a line 3/4" down from the top of the profile from front to back on both walls. I measured my way up the line and dryfit all the roof spars making sure they were square and even. I managed to get 4 of the front spars screwed and glued before I ran out of steam for the day. After the 5th spar is installed, I can get to framing for the Fantastic Fan than I have bought several months ago. I bought the most expensive one with the rain sensor so the inside of the tear wouldn't flood in the event of rain. I am finally starting to have fun with the build now. Going slow and reading tips here on the site have made this build so much easier than the first 3 attempts. My wife is actually starting to believe I am not so much of an idiot but of coarse she won't be convinced until she gets to sleep in it. :lol:

Here's some pics of today's progress:
Image
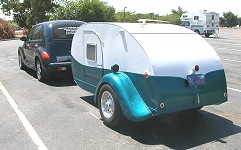
Here's a shot from the rear of the Teardrop showing the roof spars in place.

Image
Here's the front of the teardrop now that 4 spars are holding the walls square to the floor. with the installation of just 2 spars, the walls became very rigid and solid. They would no longer flex when I pushed in or out on the walls.

Image
The spars are really starting to make this sucker look big. At 76" width, I can sleep vertically or horizontally.

As you can see, I chose wider than lumber for the roof spars. I figured since this tear is so wide, I could use all the lateral stiffness I can get to keep it from flexing and bowing. For the spars, I am using 2x2 White Lumber from Home Depot. The true size is 1 1/2" x 1 1/2".

The next thing after framing in the roof spars is to put in a floor partition. Little Guy Teardrops do not have a partition wall but I would like to enclose the sleeping area for warmth plus the fact I plan on installing the battery in the gallery area close to the power panel. I understand that batterys can give off fumes when charging so I want to isolate the sleeping area totally from the back storage area. I have no clue how high to build a partition wall...most teardrops appear to have about 18" to 20" of height. I will be looking to all you guys for advice when I get to that step. :twisted:
User avatar
sandman
Donating Member
 
Posts: 326
Images: 154
Joined: Sat Oct 28, 2006 6:29 pm
Location: Bartlett, TN

Postby sandman » Tue Jun 19, 2007 6:54 pm

Well, It was another hot but productive day in my teardrop shop. I began the day finishing up dry fitting some more roof spars. I got all the way to the spar for the roof vent and decided that was enough for now...Let's glue these puppies in and make them permanant. I took a few last minute measurements making sure I stayed on 12" centers on both sides and to my suprise, I managed to get off barely 1/32 of an inch on 1 spar only so overall I was pretty happy to have another good day.

The demons did try to attack when I went back to retorq my screws on the single lower spar that I glued up yesterday. As soon as I back out the screw, the spar fell. The Liquid Nails Adhesive failed and did not hold it. I got panicky and quickly ran up to my computer and jumped on the forum for some quick help. Sure enough, within a few minutes, MadJack had come to my rescue and answered my question within literally a few minutes. You can't get better service!!!! MadJack told me to go with Gorilla Glue and told me to wet down the wood so it would activate. MadJack's reply had helped calm my nerves and peel me off the ceiling. With a quick thank you back, I signed off, marched into the garage with authority and began prepping the spars for a nice slathering of Gorilla Glue followed by a quick dowsing of water from my trusty water bottle and then I coated the screw with Gorilla GLue and began driving them into the wall into the spar one by one. Within 2 hours, I had gotten all the spars screwed and glued all the way up to the spar for the Fantastic Fan. When I hit that point, I patted myself on the back, smoke a cig, grabbed my camera and snapped a few pics before calling it a day while the glue sets up. Here is the fruits of today's labor in pics....

Image
A shot of the rear of the teardrop after the last spar was screwed and glued in place for the day. I still have 2 more then it's time to install the carpet on the walls.

Image
Here she is from the front and looking mighty fine. The walls have really stiffened up with the few spars installed. Nothing like good ol' American Craftsmanship! :lol:

Image
A nice shot of the top looking down onto the freshly installed 2x2 whitewood spars. Looking Good. :thumbsup:

I have used Gorilla Glue before on my previous builds and thankfully MadJack told me to sit by with a rag and mineral spirits and be prepared to wipe off the foamy squeeze out. Sure enough, as soon as I grabbed the rag, all the spars looked like rabid dogs drueling and frothing at the joints.

I dedicate today's build to my two teardrop hero's MadJack for the invaulable advice as always and Elmo for finishing up his tear and making me get into gear. Cheers to you both, mates. :applause:
User avatar
sandman
Donating Member
 
Posts: 326
Images: 154
Joined: Sat Oct 28, 2006 6:29 pm
Location: Bartlett, TN

Postby sandman » Fri Jun 22, 2007 1:41 pm

After 2 days off to let the Gorilla Glue cure on the thus far installed spars, I decided to get back to work this morning and see how far I could get before the heat got unbearable. I managed to get ALL the roof spars installed back to the last one which is where the hatch will mount to. For durability and structural strength for the hatch lid, I installed a full 2x4. That should give it something to bite down on when the hatch gets ready to install.

Just to let you guys know, this is THE FARTHEST I have ever gotten in 3 attempts of trying to build the Teardrop/Cycle Hauler. I never thought I would make it this far but the proof is in my garage for all to see. As I posted on the forum earlier today, I have NO PLANS to work off of and essentially kind of at a loss as what to do next. I am not trying to do anything fancy or break new ground. I am just trying to make it look like a Little Guy Sport Clone complete with the carpeted walls, white ceiling, simple internal cabinets, etc... I wished there was a Little Guy Dealer here where I could go take measurements but there is no dealers in Tennessee yet. The idea of the Teardrop has really not caught on here yet...we're kind of hillbillys in that respect. Anyway, until I get some ideas as to how to proceed with my build, here's pics from today's session.

Image
Here's a shot I took right after installing the very last roof spar which is a full 2x4 for strength for the hatch.

Image
And the front of the teardrop in all it's wooden glory.

Image
Another angle of the rear with the last top roof spar installed. I have to install 3 more on the lower part of the body but not sure where they should go yet.
User avatar
sandman
Donating Member
 
Posts: 326
Images: 154
Joined: Sat Oct 28, 2006 6:29 pm
Location: Bartlett, TN
Top

Postby SaGR » Fri Jun 22, 2007 3:57 pm

You could take the ideas from the Generic Benroy plans and just expand the measurements.

I'm excited to watch yours go up! We still don't have power in the garage after last week so I'm living vicariously through others right now.
Building a small bowtop Vardo
Build thread: http://tinyurl.com/yk4hnmd

Generic Benroy: Sold to FIL/MIL
User avatar
SaGR
The 300 Club
 
Posts: 487
Images: 21
Joined: Fri May 25, 2007 9:29 am
Location: Illinois, Lisle
Top

Postby madjack » Fri Jun 22, 2007 4:12 pm

SM...a question...what size opening didja frame for the Fantastic Fan...it needs to be at least 14.25x14.25 inches(you can go to 14.5"s) and the framing should be doubled to 1.5r2 inches for plenty of meat for the mounting screws to bite into...
madjack 8)
...I have come to believe that, conflict resolution, through violence, is never acceptable.....................mj
User avatar
madjack
Site Admin
 
Posts: 15128
Images: 177
Joined: Thu Dec 02, 2004 5:27 pm
Location: Central Louisiana
Top

Postby Miriam C. » Fri Jun 22, 2007 4:16 pm

:applause: :applause: :thumbsup:

Lookin beautiful Sandman.

Image
“Forgiveness means giving up all hope for a better past.â€
User avatar
Miriam C.
our Aunti M
 
Posts: 19675
Images: 148
Joined: Wed Feb 15, 2006 3:14 pm
Location: Southwest MO
Top

Postby sandman » Fri Jun 22, 2007 5:56 pm

madjack wrote:SM...a question...what size opening didja frame for the Fantastic Fan...it needs to be at least 14.25x14.25 inches(you can go to 14.5"s) and the framing should be doubled to 1.5r2 inches for plenty of meat for the mounting screws to bite into...
madjack 8)


Madjack-I went 14 1/4" spacing for the Fantastic Fan. I have the two small pieces cut but haven't put them in place yet. They are also 14 1/4" long. I am using 2x2's so there really is no need to double up, correct?

Thanks For the Kudos, MiriamC. I am trying hard to Git R' Done! I am even starting to make a believer out of my wife. She is getting impressed day by day. :lol:
User avatar
sandman
Donating Member
 
Posts: 326
Images: 154
Joined: Sat Oct 28, 2006 6:29 pm
Location: Bartlett, TN
Top

Postby madjack » Fri Jun 22, 2007 11:51 pm

sandman wrote:
madjack wrote:SM...a question...what size opening didja frame for the Fantastic Fan...it needs to be at least 14.25x14.25 inches(you can go to 14.5"s) and the framing should be doubled to 1.5r2 inches for plenty of meat for the mounting screws to bite into...
madjack 8)


Madjack-I went 14 1/4" spacing for the Fantastic Fan. I have the two small pieces cut but haven't put them in place yet. They are also 14 1/4" long. I am using 2x2's so there really is no need to double up, correct?

Thanks For the Kudos, MiriamC. I am trying hard to Git R' Done! I am even starting to make a believer out of my wife. She is getting impressed day by day. :lol:


...2x2's should be fine............................. 8)
...I have come to believe that, conflict resolution, through violence, is never acceptable.....................mj
User avatar
madjack
Site Admin
 
Posts: 15128
Images: 177
Joined: Thu Dec 02, 2004 5:27 pm
Location: Central Louisiana
Top

Postby sandman » Mon Jul 02, 2007 4:16 pm

Well, after hitting a snag and running into some major issues on my build. I took a few days off and let cooler heads prevail. As stated in my other post on the General Section of the forum, I had given up and decided to just go buy a Little Guy. After letting some wounds heal and getting some great advice here on the forum, I decided to forge ahead and finish this thing.

I was able to salvage one wall and all the roof spars during my mishap. I decided to remove the floor from the trailer and rework the subfloor system. I took the subfloor apart and decided to redo everything. I decided to shorten the subfloor and make it even with the edges of the angle iron. I took the original subfloor members and ripped them to 2 7/8" tall which put it just even with the top lip of the trailer's outer rail. I found 2 cross members that were twisted and bowed and replaced them with fresh 2x4's. I spent the whole morning rebuilding the sublfoor joist system. This time, I used PL400 at all the joints and drive in screws to stiffen up the subfloor system. Satisfied with the progress, I finished up on the subfloor and lowered the Teardrop floor back into place on top of the freshly designed subfloor. As soon as I laid the floor down, things felt different....and when I say different I mean GOOD. The floor did not teeter toter at all and laid flat everywhere. I got the floor lined up and even got a step further than I did before, I drilled through the floor out the bottom of the trailer rail. I used 3/8" carriage bolts with a washer and nylon lock nut to secure the floor to the trailer. I decided on using a quantity of 6 carriage bolts to hold the teardrop down to the trailer. As soon as all 6 carriage bolts were in place, I drilled a 3/8" hole in the very center of the floor 3/4" from the front lip and pulled my tail light wires up through the floor.

After finishing up the floor, I pulled out my good wall and laid it down on the sawhorses and laid the newly bought Sandel Plywood down onto the other wall and routed out a fresh new wall. I went back with the belt sander and got both walls sanded smooth and even.

So, I am back in the game with 2 walls ready to glue and screw back to the floor. I am changing a few things about the way the walls will mount up. I will explain more in my next post. The good news is the Teardrop/Cycle Hauler is back underway once again. Hopefully within the next day or two, I will have BOTH walls back in place and the roof spars back in place. A small setback, but I am once again filled with resolve to Git-R-Done!!!
The heat started to kick my butt so I have stopped for the day.
User avatar
sandman
Donating Member
 
Posts: 326
Images: 154
Joined: Sat Oct 28, 2006 6:29 pm
Location: Bartlett, TN
Top

Postby martha24 » Mon Jul 02, 2007 4:29 pm

Way to go Sandman! :applause:
Glad to hear the floor feels nice & solid. A good foundation to build on. :thumbsup:
Martha ;)
Martha ;)

Image
User avatar
martha24
1000 Club
1000 Club
 
Posts: 1353
Images: 237
Joined: Thu Aug 03, 2006 4:32 am
Location: Calif., Goleta
Top

Postby Mary K » Mon Jul 02, 2007 4:52 pm

ALRIGHT SANDMAN!!!!

I am so HAPPY you are not giving up! Make it Happen Dude!!

Mk
Mary K

I don't know half of you half as well as I should like; and I like less than half of you half as well as you deserve. Bilbo Baggins
User avatar
Mary K
6000 Club
6000 Club
 
Posts: 6425
Images: 44
Joined: Wed Aug 02, 2006 3:07 pm
Location: Florida, Pensacola
Top

Postby jdarkoregon » Mon Jul 02, 2007 5:53 pm

Sandman,

We're here to cheer you on! I bet this time it is easier! Don't forget the braces (of who knows what design) to give it some rigidity

Like Auntie M's says, get'r done

John
Innovation is essential
The world can be better
ImageImage
User avatar
jdarkoregon
Donating Member
 
Posts: 1237
Images: 47
Joined: Mon Aug 22, 2005 7:07 pm
Location: Oregon, Sublimity
Top

Postby Roly Nelson » Mon Jul 02, 2007 6:01 pm

Glad you're back to building once again. Thanks for posting the pics, looking forward to future progress shots. As many others have done, when I got mine as far along as yours, I threw down a mattress inside. and the sweet wife and I checked to see it it was Sleep-Worthy, right there in the garage.

Perhaps you should do the same, to let her know you really know what you are doing. and how nice it's gonna be. We could snuggle up spoon-style so it was wide enough for me. Keep up the good work.

Roly.....(Yes, after 54 years, we still snuggle). :thumbsup:
See the little 1/2 Nelson Woody constructions pics at: http://gages-56.com/roly.html
User avatar
Roly Nelson
L'il Ol' Woody Builder
 
Posts: 2971
Images: 13
Joined: Sun Jan 30, 2005 12:45 pm
Location: Wildomar, Calif
Top

Postby kiacker » Mon Jul 02, 2007 9:25 pm

:applause: :applause: :applause: :applause: :applause: Glad yer back!!! :thumbsup: :thumbsup: :thumbsup: :thumbsup: :thumbsup:
Lisa

My life's work is to be my dog's servant, pay his rent, drive him to the park, and keep his food bowl full!
User avatar
kiacker
Teardrop Advisor
 
Posts: 78
Images: 26
Joined: Sat Jul 01, 2006 9:13 pm
Location: Des Moines, Iowa
Top

Postby sandman » Wed Jul 04, 2007 8:42 pm

Got some progress made on the Teardrop today. Spent much of the morning recutting the doors. I decided to go ahead and redo both walls so I bought one more piece of Sandel Ply at Home Depot yesterday. I am going to use the other damaged wall piece for my inside cabinets so at least I won't waste it. After I routed out the new replacement wall, I decided to go ahead route another new wall.

After routing the new wall, I cut out the doors and final sanded the overall profile. After that, I went and drilled all the holes for the roof spars and floor mounting. For some reason, when I temporarily attached the new walls to the floor for dry fitting, I found that the newly cut walls fit the floor much better..hard to explain. I reshaped the rear of the teardrop profile where it meets the floor so in messing up the last walls, I actually improved the new walls. I am actually much happier with the fit and finish of the new pair of walls. I'll post some pics of the progress shortly.

Tomrrow, I will lay out both walls, spread out the carpet adhesive on each wall, and then install the carpet on the walls. So far so good.

You guys all have neat names for your teardrops. I guess I need to come up with one rather than just calling it "The Teardrop/Cycle Hauler" which is pretty boring. Ok, you guys give me some ideas for names......I thought about calling it "The Phoenix" since it has risen from the ashes for the 4th time...lol. :lol: :lol: :lol: :?
User avatar
sandman
Donating Member
 
Posts: 326
Images: 154
Joined: Sat Oct 28, 2006 6:29 pm
Location: Bartlett, TN
Top

PreviousNext

Return to Teardrop Construction Tips & Techniques

Who is online

Users browsing this forum: No registered users and 7 guests