First, a word of thanks to the great people on this forum. Many have asked questions about this build and at first I didn't have any type of detailed plans. I have created them in Sketchup (free -for now program offered by Google) Now i share them with you - have fun
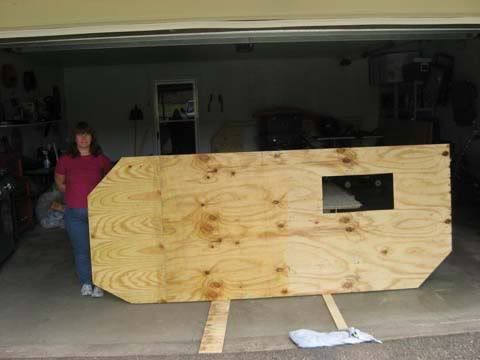
This is our third build. We wanted a door on the passenger side rather than the rear and needed more floor area. If we needed to sleep four people - now we can - two on the bed and two on the floor (and depending on how you configure the interior – even five, but you better be good friends!) This new design will have angled front and lower rear panels and be based upon a 4’x 8’ utility trailer with no flooring purchased from Tractor Supply Company. The Weekender II is two feet longer than the original with the bed (queen size) now in the rear. Again the same criteria will be followed: would fit on the trailer, light weight, carry all our gear, sleep the three of us (with the capacity for one more - total of four), and built on a budget. We hope this design will inspire others.
When I did the concept drawings I was thinking of using 1/ 2 ply. This is what I used on the Tiny trailer build and it was overkill to the max. The trailer was extremely heavy. I used full dimension lumber (full 1X4 s, 2X8 s etc,) before I realized that half dimensions would work just as well. So came the Weekender build. The dimension of the weekend is such that minimal seams need to addressed. The sides are 10’ foot and 6’, so the sides are well with the dimensions of a 4X8 sheet of plywood and seams between the panels are kept to a minimum. The plas that follow are not meant to be exhaustive, but rather allow for creativity among builders
Construction technique:
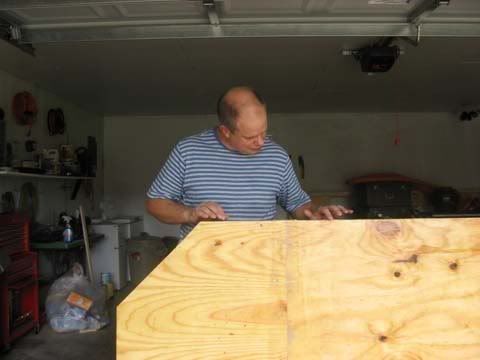
Plywood owes its strength to the plys that are laid and glued bi-directionally. I take advantage of this tendency to use it for the exterior walls; However 3/8 ply alone is too thin and will bow and warp. To counter this, I added framing strips to the walls at all connection point and at various intervals. This allows for stiffness and extra surfaces to attach to – You simply cannot screw into the end grain of plywood and expect a solid joint. All joints are glued with construction adhesive and screwed for strength (I used about 8 tubes). The adhesive increases the contact area for a good mechanical/chemical bond. I did a test on this construction/ gluing method and literally ripped the first two layers of plywood trying to separate the pieces. The construction adhesive I used was liquid nails along with course thread drywall screws. Use rough thread screws instead of fine thread drywall screws. Rough threads will grip the wood better, will countersink themselves, and are less likely to strip out. The wood strips were cut from a 2x4 on the small side measuring ¾ X 1 ½ . This created a ¾ in cavity which I filled with ¾ closed cell foam insulation. The foam insulation is about ¾ in. I bought it at Lowes. Tried the regular pink home fiberglass insulation but found it to hard to work with and if it become wet it retains the water (plus the itch factor). Not a problem with closed cell foam. I then added the interior ply – again with adhesive – but using finishing nails instead if screws (much easier to hide). Remember –use the structural strength of the plywood and adhesive to your advantage. When the construction first begins the trailer will seem flimsy, however as more pieces are added and box becomes complete, it becomes more rigid – and when the entire frame is bolted to the trailer – well “it ain’t goin’ nowhere”.
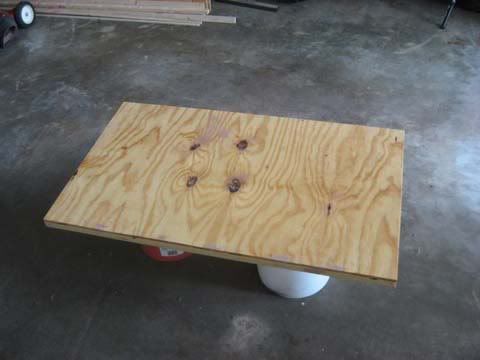
Floor: ¾ inch plywood – very sturdy and no need for framing beyond the actual trailer it self. I used a sub frame constructed out of 2x3 s to support the camper floor over the trailer (A 4x8 no floor purchased from tractor supply company) Both sides of the floor were painted to seal the plywood. I applied sheet metal to the underside of the floor to protect it from road debris and water spray. Bolted the entire structure to the trailer.
Screws and sealing: The screws will vary in length the most common will be the 1 ½ . These are used to hold the strips to the plywood while the adhesive sets – also provides a mechanical bond. However you will need 2 1/3 and even 3 inch screws to fasten the walls and flooring to each other. One the last page of the small details shots on the website, there is a picture of the sealant tape – peel & stick butyl tape. After I painted all the exterior with two coats, which seals the plywood, then I cut the tape and used it to seal the edges which are then covered with flashing. Believe me, once this stuff is stuck in place, it isn’t going anywhere. It is the same stuff used to seal gutters and roofs. Attached the flashing with some self-tapping screws (1 1/2 x 1 1/2 drip cap metal flashing bought from Lowes). The peel & stick butyl tape seals the screw. I did not use any silicone on my project – just hate the stuff. The are many other forms of sealers that do the job just as well and are easier to clean off in case you make and mistake and need a redo.
Also the seams on the roof are placed so that a 2X3 roof support falls underneath. Remember how I mentioned about the use of adhesive on all joints? This has an added benefit of sealing the joint (liquid nail is what I used – it is waterproof and holds like hell!) Apply a generous amount. I made sure every crack was sealed and then painted the joint with a liberal coat of paint.
Subfloor
Floor construction 3/4 plywood for floor
Floor attached to subfloor
Floor mounted to trailer
Door Side
Framing of door side
Street side
Framing of street side
Door construction
3d views
Final notes:
* I learned the hard way that flat roofs tend to have low spots. However this can be eliminated by adding a slight bow in the center – about ¾ to 1 inch. This slight bow will allow the water to run off and still allow for flat edges. No need to cut complicated shapes. Also I capped the roof with sheet metal and sealed the seams with peel & stick butyl tape.
* I did not run any of the electrical inside the walls. I wanted the build to be simple and easy to maintain. a tip: if you plan on using 120 AC 30 amp power, then make sure that the power cord outlet is on the driver’s side of the trailer (when hooked up to the vehicle). Most RV and state parks have the power distribution on this side of the pull in. It just makes sense not to have to turn the trailer or have extra cord
* Please note that the drawings were for concept to allow for changes as the build went along. However you can place the windows and AC anywhere. Just make sure that they surrounded by framing strips.
* Flush mount windows - normally found on mobile homes - work better than what I used. I found mine at a salvage yard new for a low cost.
* Very light weight, I can move it around the yard by myself fully loaded. Weight: 1025 lbs fully equipped. Tongue weight as built 135 lbs
Tip: the trailer tongue mounts to the trailer at only two points with hardened bolts. When I built my camper using this trailer, it became oblivious that these two bolts were the only things holding the tongue bar to the trailer assembly. I guess this was a design feature to allow for a tilt bed feature. Upon the completion of the camper and the first trial run, I noticed that there was considerable movement between the two bolts and pivoting within the joint. The 2X2 angle iron on the frame was also flexing. Every movement of the camper made the two joints jump and pivot like a see-saw. To remedy this, I welded the points were the bolts passed through the tongue and angle iron connections. BE SURE TO REMOVER THE TRAILER WIRING HARNESS FROM THE TUBING BEFORE WELDING! Also you may want to put a few bolts from the floor to the second cross piece where the end of the square tow tube is welded. At first I did not, thinking that it wasn’t a big deal until it cracked and had to be repaired on the road. The welder mentioned that IF I had put two bolts in to the second cross member, that it would have prevented any oscillation. This eliminated the problem.
Hope this helps
Best wishes for your build


 Is, that a refrigerator next to the bed?