Square vs rounded doors

Anything to do with mechanical, construction etc

Square vs rounded doors

Postby bennelson » Wed Jul 20, 2005 9:48 pm

Hello!

I am working on the walls of my cubby build.

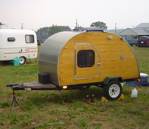
This is my first project. I am trying to decide to do a completely rectangular vs a rounded corner door.

I figure rectangular would be much easier to build the actual door. It only has right angles. A rounded corner door would mean more jig-sawing and making curved plywood for the framing.

I think curved would look nicer, but rectangular easier to build.

Any comments for me? Anyone build more than one trailer, one with a square door, one with a rounded?

What do you like about your square or rounded doors?

Thanks,

-Ben
still no idea what i'm doing...
User avatar
bennelson
Teardrop Master
 
Posts: 141
Images: 53
Joined: Sun May 01, 2005 5:49 pm
Location: Oconomowoc, Wisconsin, USA

Postby doug hodder » Wed Jul 20, 2005 10:09 pm

For me...I like the rounded door as it goes with the lines of the tear...either way I'm sure your project will turn out great....If you want the round door, get a piece of scrap and practice, make a trial door, see if it's something you can learn...I think that is one of the fun things on a project like this, find something you haven't done and learn how to do it....think it through....the fact that you are building one puts you miles ahead of a lot of other people out there in the camping world. This was covered in a couple of other threads earlier this month, but the message from a number of people was "build for the look you want" ..Just my opinion....Doug Hodder :)
doug hodder
*Snoop Dougie Doug
 
Posts: 12625
Images: 562
Joined: Tue Dec 14, 2004 11:20 pm

Postby Guest » Thu Jul 21, 2005 12:10 am

Doors are next month. However they will be rounded. I've chosen this style not only because of looks. I'd bet the farm that I catch myself often and painfully on those nice neat square corners. This way I might be able to slide off. Steve Fredricks has a really good series of photos on his site showing how he did it. The key point is "the router is your friend."

Enjoy and good luck
Guest
 
Top

Postby asianflava » Thu Jul 21, 2005 6:46 am

My doors are rectangular but has a rounded top. Not too much of a curve to deal with.
User avatar
asianflava
8000 Club
8000 Club
 
Posts: 8412
Images: 45
Joined: Mon Aug 02, 2004 5:11 am
Location: CO, Longmont
Top

Postby Denny Unfried » Thu Jul 21, 2005 7:22 am

Some builders have said that rectangular doors are harder to seal out the water at the top corners.

Denny
aka - "Uncle Denny"
<img src="http://www.uncledennyscorner.com/teardrop/photos/Linux.gif">
User avatar
Denny Unfried
sprint car builder/racer & all that jazz
 
Posts: 411
Joined: Mon Jun 21, 2004 8:54 am
Location: So Bay, CA
Top

Postby norm perkiss » Thu Jul 21, 2005 8:22 am

Ben,
My 2ยข. Rounded door will have fewer angle cuts to make. As Denny mentioned, rounded should be easier to weather proof. Although next time I will make the lower curves of a larger radius. Bending the alum. angle around a tight radius was a challenge. But I learned alot about metalsmithing. Which in retrospect is part of the fun, maybe not at the time, but now I have a new skill. Maybe compromise, a rounded top and squared bottom corners?

As mentioned above, there is no right or wrong way, just your way...

Norm
User avatar
norm perkiss
Gold Donating Member
 
Posts: 161
Images: 62
Joined: Sat Oct 23, 2004 9:30 am
Location: milwaukie, oregon
Top

Postby Roly Nelson » Thu Jul 21, 2005 10:21 pm

Hi Ben, I guess I am one of the rectangular shaped door-guys. I did it that way, 1, because it was easier, 2, it seemed to blend with the other trim members of the tear, 3, it made for the largest opening I could get (a big plus for the sweet wife) and 4, I found I could weatherproof it much better than using rounded, bandsawn chunks of wood.

I simply installed a wooden drip-strip over the doors, which of course is straight. It works just fine, and I think I will do the same when I build the 1/4 Nelson Stacker. The piano hinge doesn't leak and I have "D" shaped weatherstripping glued to the other openings, all around. It has survived a 3 day continuous rain at Shasta, with no ill affects.

Roly, waiting for the 111 degree temps to subside, in So Calif.
See the little 1/2 Nelson Woody constructions pics at: http://gages-56.com/roly.html
User avatar
Roly Nelson
L'il Ol' Woody Builder
 
Posts: 2971
Images: 13
Joined: Sun Jan 30, 2005 12:45 pm
Location: Wildomar, Calif
Top

Postby bennelson » Thu Jul 21, 2005 11:02 pm

Okay....

I went with....(drum roll please)

The doors exactly as they are laid out in the Cubby plans.

Ok, so I don't get points for originality, but it shows exactly how to build them, and the curves look nice with the rest of the camper.

For the record, I think some of the doors with straight sides, but a curved top, looked very nice.

I did make sure to measure out the size of the doors and mark it on the bed of the trailer, I sat on the side and looked to see where my butt landed.

The Cubby door size/shape looked fine.

I just got my sides and doors cut out tonight. I plopped the sides on the bed and stood them up with the leftover plywood corners.

The doors are a good size, I can get in and out of them real easy

PS.

Can anyone tell me how to use an AVATAR? I would like to have my latest build photo show up under my name.
still no idea what i'm doing...
User avatar
bennelson
Teardrop Master
 
Posts: 141
Images: 53
Joined: Sun May 01, 2005 5:49 pm
Location: Oconomowoc, Wisconsin, USA
Top

Postby toypusher » Fri Jul 22, 2005 5:48 am

bennelson wrote:Can anyone tell me how to use an AVATAR? I would like to have my latest build photo show up under my name.


When you are logged in, just go to the top of the index page and click on 'Profile'. This should bring up your profile info. Scroll down to the 'Avatar control panel'. Read this:

"Displays a small graphic image below your details in posts. Only one image can be displayed at a time, its width can be no greater than 150 pixels, the height no greater than 150 pixels, and the file size no more than 98 KB."

Just use a photo editing or graphics program to resize your picture (I would use a copy) and make sure it conforms to the dimensions and size requirements. Then just browse from the 'Avatar control panel' section to find the file on your computer and click 'Submit' at the bottom of the page.

Kerry
User avatar
toypusher
Site Admin
 
Posts: 43040
Images: 324
Joined: Fri Jan 28, 2005 12:21 pm
Location: York, PA Area
Top


Return to Teardrop Construction Tips & Techniques

Who is online

Users browsing this forum: No registered users and 1 guest