The 1947 Kit restoration is on hold for now http://www.tnttt.com/viewtopic.php?f=50&t=51843
This current project will be considerably larger and fully equipped for winter camping. I will be ready for the Thanksgiving gathering at Mineral Well SP.
The cabin will measure about 7 to 7-1/2' wide and 12" long. The actual trailer is somewhat longer and will have a large area on the tongue for a tool box, and an expanded metal platform for a generator, cargo, fire wood, etc. Not into ATVs but one would easily fit crossways.
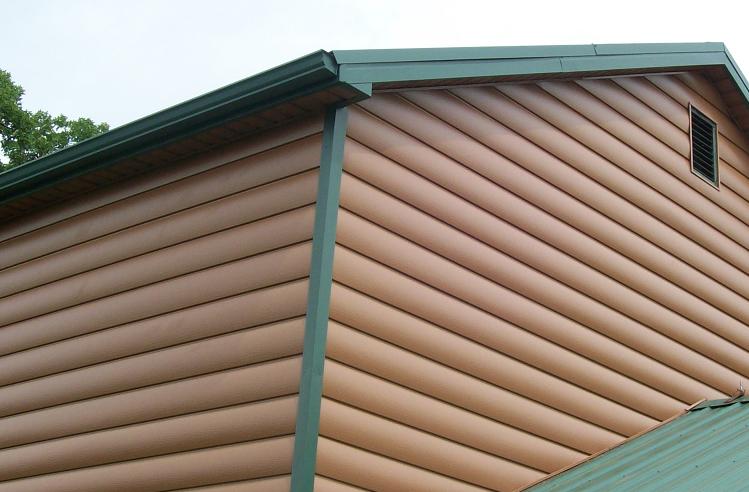
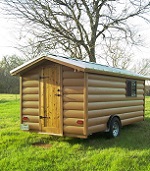
The shape will be rectangular with a gable roof. The exterior, similar to my first build, will be 26 ga steel siding material roll formed to mimic actual logs as seen here:
It will have a rear entry and dropped floor down the center. Inside height will be 6-1/2" at the peak, outside from the ground up about 8'. It will be fully self contained with shower, toilet, kitchen sink, refrigerator/freezer, oven/range (probably Camp Chef) and a microwave. It will be set up for 12V DC, 110V AC (shore and/or onboard generator) and propane. I will provide for an air conditioner to be installed later near the top of the front wall. Haven't decided on a heat source yet - hoping to find a salvage propane furnace but for Mineral Wells will proabably just use an electric if one is even needed.
Here's the platform - a used boat trailer 18-1/2' long, 6' wide between the fender bottoms, 8' overall outside width. It has a 3500# straight axle and 15" wheels: I had previously planned on using a pop-up frame I already have, same size bed but much shorter tongue. The boat trailer is better suited for the height issues and balance.
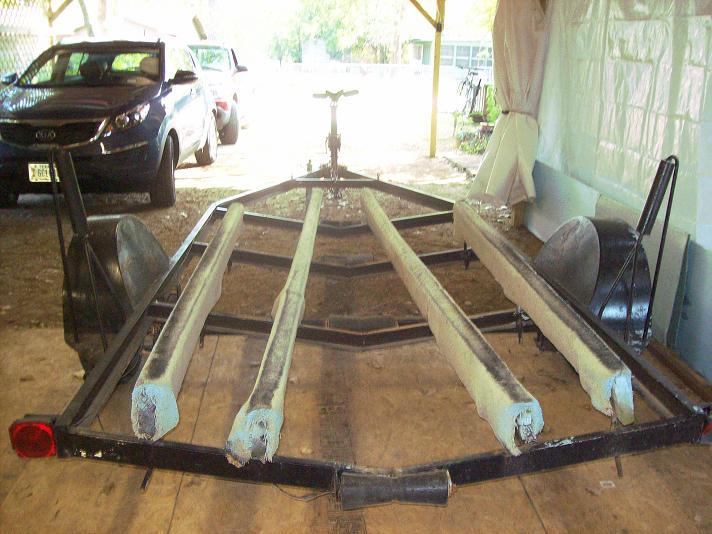
Stripped of bunks, brackets, rollers, winch, etc:
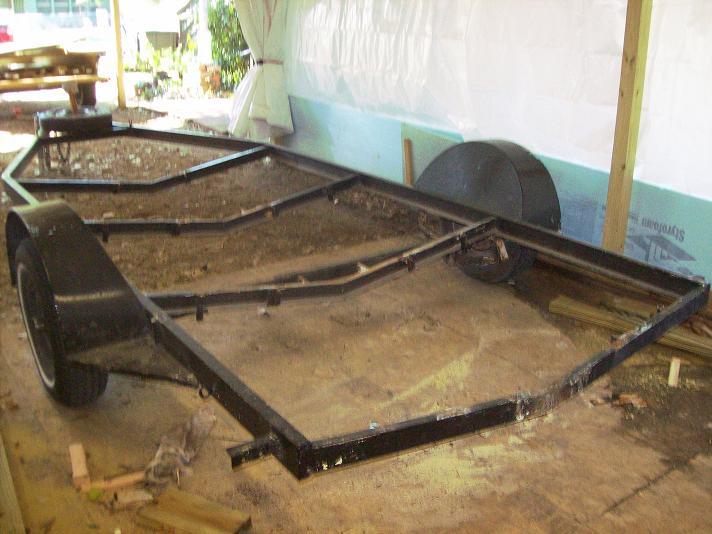
Framing:

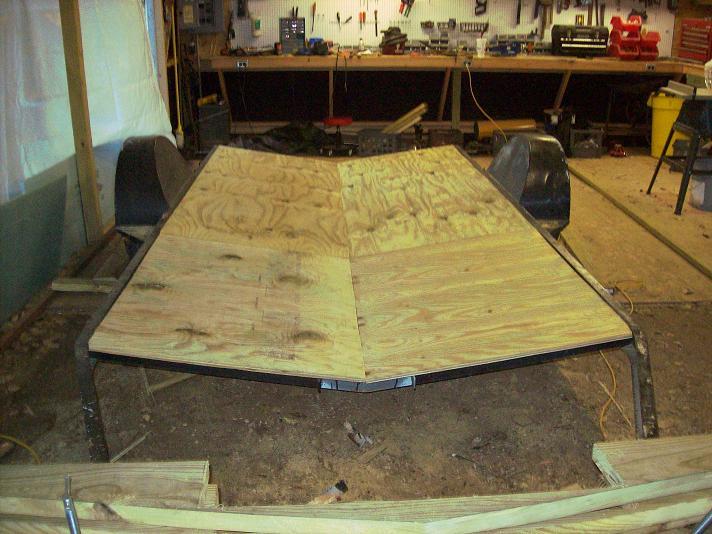
Sub-Floor:
Floor framing:
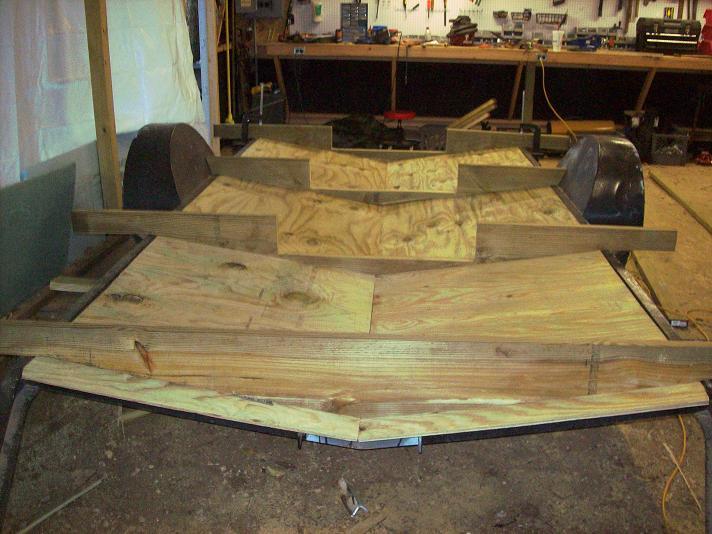
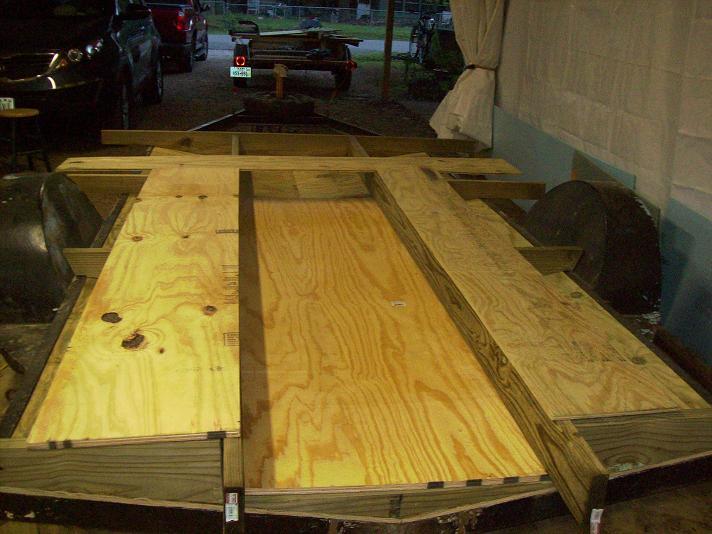
Center dropped walkway 28" wide - will extend full length of inside:

Drop frame:
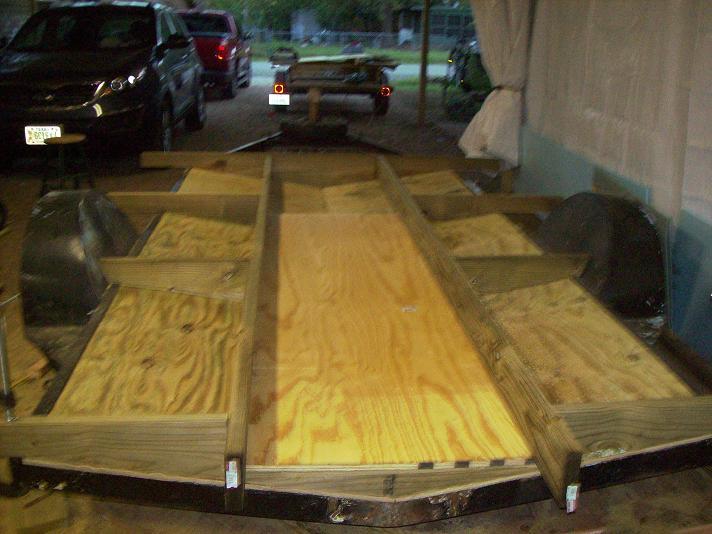
Decking (mocked up for photo) will be approximately 27 to 30" wide on each side except wheel well cut-outs. The decking will sit between the wood cross members leaving about 2" for rigid foam insulation. Interior partitions will rest on the cross members.
The shower / toilet will be at the left rear. The holding tanks will require a cut-out in the subfloor.
The kitchen sink and countertop will be at left toward center with plumbing, freshwater tank and water heater underneath.
The oven/range setup will be at the right rear with a slide-out for cooking outside. The refrigerator will be at right toward center with a countertop in between it and the oven/range.
There will be wall mounted exhaust fans on each side of the back wall - one for shower moisture and the other for the stove. I'm planning for an inward opening door at the rear to swing toward the shower / toilet for addditional privacy. Depending on what I've got out back in my barn the door may have a fixed or operating window. I think I've got one with frosted or stained glass.
The front wall will have a full size murphy bed mounted crossways with a table / desk attached to the underside.
Past center on both sides will be benches with storage below. There will be room on either side of the bed for shelving / cabinets and possibly a small closet on one side for hanging garments. If not there then a closet will be part of the partitiion between the refrigerator and table. Short wide awning or hoppper windows will be on each side near the top of the wall (which will only be 5' high).
Even with the v-bottom frame of the trailer and drop floor the height there will be about 16" so a step would be helpful though not necessary. In order to use the slide out stove I'll probably build a deck across the whole back to fold up like a tailgate when traveling.
M C


 Hope that doesn't screw you up too much.
 )
)


