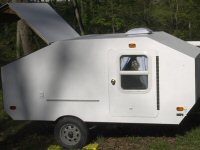
Here are pix of the bits I have gotten done in the past couple of days.
<img alt="Donor Castoffs" src="http://www.technoprimitive.org/wordpress/wp-content/uploads/2007/10/camperpixdonor-castoffs.jpg" width="500" height="375" />
Old seat cushions castoffs after I got the foam out. Need the foam for a seat cushion for the toilet cover seat.
<img alt="Foam Going On" src="http://www.technoprimitive.org/wordpress/wp-content/uploads/2007/10/camperpixfoam-going-on.jpg" width="500" height="375" />
Putting the foam on the seat top. Held in place by staples.
<img alt="Foam going on side view" src="http://www.technoprimitive.org/wordpress/wp-content/uploads/2007/10/camperpixfoam-going-on-side-view.jpg" width="500" height="375" />
Foam going on side view.
<img alt="Cloth we are using" src="http://www.technoprimitive.org/wordpress/wp-content/uploads/2007/10/camperpixcloth-we-are-using.jpg" width="500" height="375" />
Cloth we are using to cover the seat.
<img alt="Changes" src="http://www.technoprimitive.org/wordpress/wp-content/uploads/2007/10/camperpixchanges.jpg" width="500" height="375" />
After feeling it decided the front edge needed a bit more pading. Cut another piece about an inch thick and stappled it right at the edge.
<img alt="Back side getting started" src="http://www.technoprimitive.org/wordpress/wp-content/uploads/2007/10/camperpixback-side-getting-started.jpg" width="500" height="375" />
Back side of seat. Getting ready to staple the cloth.
<img alt="First side with initial tacking done" src="http://www.technoprimitive.org/wordpress/wp-content/uploads/2007/10/camperpixfirst-side-with-initial-tacking-done.jpg" width="500" height="375" />
First side with initial stapling done. I end up removing these later and retenesioning it after doing the other 3 sides.
<img alt="Second side done" src="http://www.technoprimitive.org/wordpress/wp-content/uploads/2007/10/camperpixsecond-side-done.jpg" width="500" height="375" />
Second side done.
<img alt="All sides done and back stapled" src="http://www.technoprimitive.org/wordpress/wp-content/uploads/2007/10/camperpixall-sides-done-and-back-stapled.jpg" width="500" height="375" />
All sides done then folded back over themselves and restapled.
<img alt="Raised base going on" src="http://www.technoprimitive.org/wordpress/wp-content/uploads/2007/10/camperpixraised-base-going-on.jpg" width="500" height="375" />
Raised base going on. Edge is already drilled for the screws.
<img alt="Sides screwed down." src="http://www.technoprimitive.org/wordpress/wp-content/uploads/2007/10/camperpixsides-screwed-down..jpg" width="500" height="375" />
Sides screwed down.
<img alt="Finished piece" src="http://www.technoprimitive.org/wordpress/wp-content/uploads/2007/10/camperpixfinished-piece.jpg" width="500" height="375" />
After the last picture I got busy and forgot to stop and take any more pix. I pulled the cloth covering the sides down around them and stapled it on the inside.
<img alt="View of right side from door" src="http://www.technoprimitive.org/wordpress/wp-content/uploads/2007/10/camperpixview-of-right-side-from-door.jpg" width="500" height="375" />
View of the right side from the door. Toilet bench to the right then storage unit with drawers and cubyholes.
<img alt="Cat on the bench" src="http://www.technoprimitive.org/wordpress/wp-content/uploads/2007/10/camperpixcat-on-the-bench.jpg" width="500" height="375" />
My lovely assistant, Cat, trying out the bench.
<img alt="Storage Drawers" src="http://www.technoprimitive.org/wordpress/wp-content/uploads/2007/10/camperpixstorage-drawers.jpg" width="500" height="375" />
These storage drawers are locked in top and bottom with scraps of wood. To come out the wood on top of each stack has to be unscrewed.
<img alt="Top storage shelves" src="http://www.technoprimitive.org/wordpress/wp-content/uploads/2007/10/camperpixtop-storage-shelves.jpg" width="500" height="375" />
Top storage shelves
<img alt="Side shelf" src="http://www.technoprimitive.org/wordpress/wp-content/uploads/2007/10/camperpixside-shelf.jpg" width="500" height="375" />
Side shelf for stuff of whatever type. Cleats in corners help hold it all up.
<img alt="Computer/eating table" src="http://www.technoprimitive.org/wordpress/wp-content/uploads/2007/10/camperpixcomputereating-table.jpg" width="500" height="375" />
Computer or eating or whatnot table on top of the left two drawers. Area at the bottom will have a piece of plastic velcroed to the face and store jack and tire tools.
<img alt="Seat waiting to be installed" src="http://www.technoprimitive.org/wordpress/wp-content/uploads/2007/10/camperpixseat-waiting-to-be-installed.jpg" width="500" height="375" />
Seat top waiting to be installed. Toilet seat is glued and screwed to the plywood base. Inside edge of plywood is also sealed with adheasive caulk. Will paint the entire thing asap.
<img alt="Sawdust storage and toilet" src="http://www.technoprimitive.org/wordpress/wp-content/uploads/2007/10/camperpixsawdust-storage-and-toilet.jpg" width="500" height="375" />
Clear tub at the left is for sawdust storage. Great odor killer.
<img alt="Inside toilet storage area" src="http://www.technoprimitive.org/wordpress/wp-content/uploads/2007/10/camperpixinside-toilet-storage-area.jpg" width="500" height="375" />
View inside toilet storage area
<img alt="Front bottom storage" src="http://www.technoprimitive.org/wordpress/wp-content/uploads/2007/10/camperpixfront-bottom-storage.jpg" width="500" height="375" />
Front bottom storage area.
<img alt="Front top storage area" src="http://www.technoprimitive.org/wordpress/wp-content/uploads/2007/10/camperpixfront-top-storage-area.jpg" width="500" height="375" />
Front top storage area.
<img alt="Side shelf bottom view" src="http://www.technoprimitive.org/wordpress/wp-content/uploads/2007/10/camperpixside-shelf-bottom-view.jpg" width="500" height="375" />
Side shelf bottom view.
<img alt="Side table side view" src="http://www.technoprimitive.org/wordpress/wp-content/uploads/2007/10/camperpixside-table-side-view.jpg" width="500" height="375" />
The side of this area will be covered with a sheet of plastic.
<img alt="Seat attached and hinges installed" src="http://www.technoprimitive.org/wordpress/wp-content/uploads/2007/10/camperpixseat-attached-and-hinges-installed.jpg" width="500" height="375" />
Seat pretty much finished. When closed it seals against the foam seat. I plan to add a piece of plastic to the bottom of the seat to further seal it when closed.
More as I get to it...


 Free in this case is so very nice.


 Don't think bugs can get through easy even when the fan is not on. May add a cover inside for times when we want all the heat we can get.
 So I unplugged the machine and took the switch out. Half the back is broken out but all the pieces are there. Take it as far a part as I could get it. Tis an old saw and has screws in places you only find rivets now. See all the major stuff is ok just pushed out the back. So, go and get some spray lube and oil and come back and try to spray it to find the can is empty.


