Re: The Pup's Penthouse - 7/17/12 - Flooring

...ask your questions in the appropriate forums BUT document your build here...preferably in a single thread...dates for updates, are appreciated....

Postby synaps3 » Thu Mar 11, 2010 9:36 am

Still raining. :o

I had the axle rewelded yesterday. It cost me $50, which was a bit of a rip-off. I was in a rush though, and didn't have the chance to look at other shops. They rewelded the two original mount points, welded a few points on the chassis that needed welded, and added four new thick welds along the mounts of the axle. It's not pretty, but should do the job well.

The new trailer doesn't have any dust caps on it. I need to clean the bearings and replace the cap. Anyone know how:
1. I find a replacement cap that is the right size
2. How I regrease / clean out the bearings
3. What I should get to do the above two...
-- Dave

Build log: here
User avatar
synaps3
The 300 Club
 
Posts: 433
Images: 254
Joined: Sun Nov 08, 2009 1:09 am
Location: Marietta, GA

Postby teardrop_focus » Thu Mar 11, 2010 10:55 am

sdtripper2's Index:

http://tnttt.com/viewtopic.php?t=12276, specifically:

http://tnttt.com/viewtopic.php?t=11178 (scroll down for bearing inffo...)

Bearings and Seals/Covers

There have been many threads on what to do about bearings and
Seals/Caps for the HF trailers. The discussions are around the metric
bearings that these trailers use. As of this writing I have not gotten a
satisfactory listing of maintenance part #s for the trailers here that
we have been touting. I have listed an incomplete list that may
help you get more information from HF for on going maintenance
for your trailers. These numbers may need revising.

Note: Check your trailer Owners Manual
for bearing and seal maintenance prior to running your trailer as well as on
going considerations of maintenance time frames. As a rule it is considered
wise counsel to check & or consider repacking wheel bearings before first use.

Tutorials for packing Bearings are shown here:

http://tinyurl.com/h5goy
http://tinyurl.com/erf43
http://tinyurl.com/e97an
http://tnttt.com/viewtopic.php?t=24508


:vroom:
.
Image

"There is something about these little trailers that brings out the best in people." - BigAl, Scotland, 2010

"Climb the mountains and get their good tidings. Nature's peace will flow into you as sunshine flows into the trees...
The winds will blow their own freshness into you and the storms their energy, while cares will drop away like autumn leaves..." - John Muir, 1898


Chris Squier / teardrop_focus :-)~
User avatar
teardrop_focus
Donating Member
 
Posts: 5975
Images: 127
Joined: Sat Apr 11, 2009 3:18 pm
Location: SoCal

Postby synaps3 » Thu Mar 11, 2010 5:01 pm

Thanks, Chris. That's perfect! :)
Any idea how I tell what bearings to use though? Can I measure them, or should I go to an automotive store, or what? :lol:

I tinkered around in Sketchup a bit today. :frustrated:

Here's my result:
Image

Image

I like the profile I came up with. It should be relatively easy to duplicate on wood, and will only require the use of one extra piece of Luaun.

:icedtea:

When does a trailer stop being a TTT, and start being a trailer? We're approaching 13'6" interior length... :thinking:
-- Dave

Build log: here
User avatar
synaps3
The 300 Club
 
Posts: 433
Images: 254
Joined: Sun Nov 08, 2009 1:09 am
Location: Marietta, GA
Top

Postby Ageless » Thu Mar 11, 2010 5:35 pm

Hi Dave; when i showwed up with the same ??. I was told if ya start getting close to 16'; they start snickerin'
Strangers on this road we are on; we are not two, we are one - Raymond Douglas Davies
User avatar
Ageless
Platinum Donating Member
 
Posts: 1603
Images: 8
Joined: Tue Aug 04, 2009 8:34 am
Location: Pt. Orchard, WA
Top

Postby starleen2 » Thu Mar 11, 2010 5:37 pm

synaps3 wrote:When does a trailer stop being a TTT, and start being a trailer? We're approaching 13'6" interior length... :thinking:


As long as it looking pretty cool - we'll let you slide with the extra six inches :thumbsup:
User avatar
starleen2
5th Teardrop Club
 
Posts: 16272
Images: 224
Joined: Sat May 12, 2007 8:26 pm
Location: Pea Ridge ,AR
Top

Postby synaps3 » Fri Mar 12, 2010 10:28 pm

I mounted the floor last night.

I have procured a garage to work on the trailer tomorrow, and have devoted the whole day to raising the walls and strapping on the roof. My goal is to get the exterior mostly done by Sunday. I'll be sure to get lots of pictures for you guys. :)

Bruce (aka Trackstriper) is local and has offered to take a look at my trailer tomorrow, to help me with deciding / ordering brakes. A little help goes a long way! :thumbsup:
-- Dave

Build log: here
User avatar
synaps3
The 300 Club
 
Posts: 433
Images: 254
Joined: Sun Nov 08, 2009 1:09 am
Location: Marietta, GA
Top

Postby synaps3 » Sun Mar 14, 2010 11:05 pm

In general, progress is slow for me on this build. I would love to work faster, but usually half of my time is spent setting up or tearing down shop. I was hoping the garage I was borrowing this weekend would make progress increase, but two days just isn't enough time -- I still spent about half my time setting up and tearing back down...

But, I digress. Progress is progress.

Saturday:
I met with Bruce to talk about trailer brakes in a suburb outside Atlanta. He was an awesome guy, and provided me with plenty of helpful advice. He also thoroughly convinced me to get brakes, with his horror-story about him, a utility trailer, and a small tow vehicle. Thanks again for your help Bruce!

I arrived at my fiancee's parents' house at around 11am. I unloaded and started work.
Image

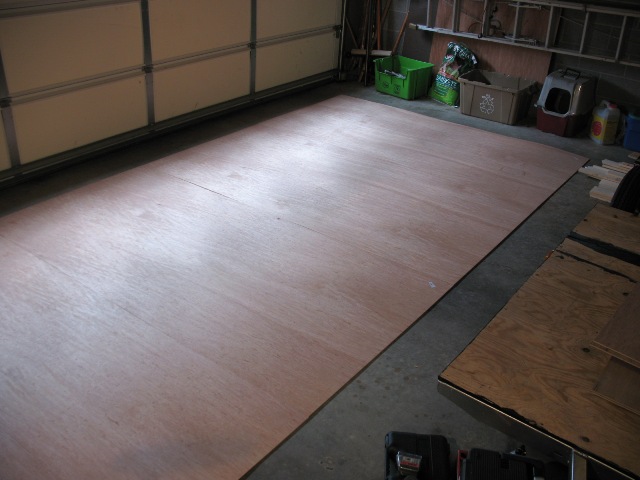
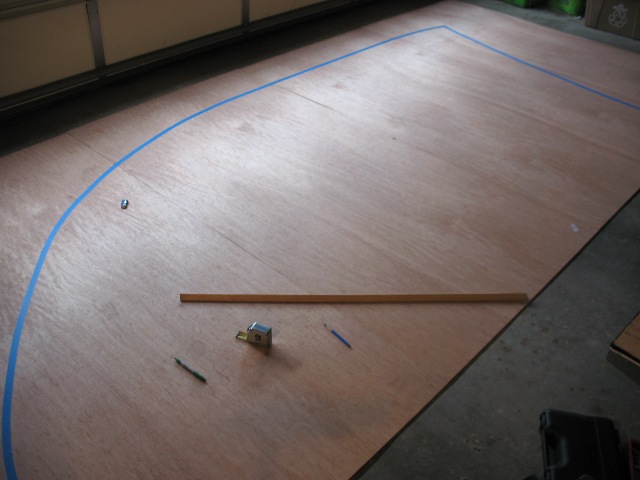
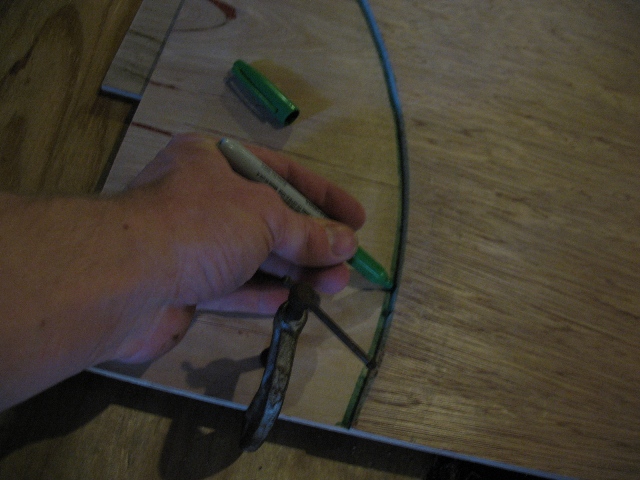
I laid out my luaun on the garage floor to trace out my profile:
Image

And powered on my netbook to load up my 3d renders:
Image

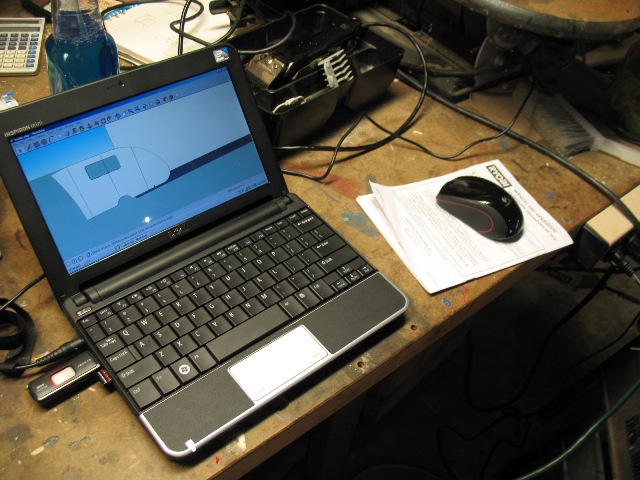
Then started measuring in the virtual world:
Image

To put on wood in the real world:
Image

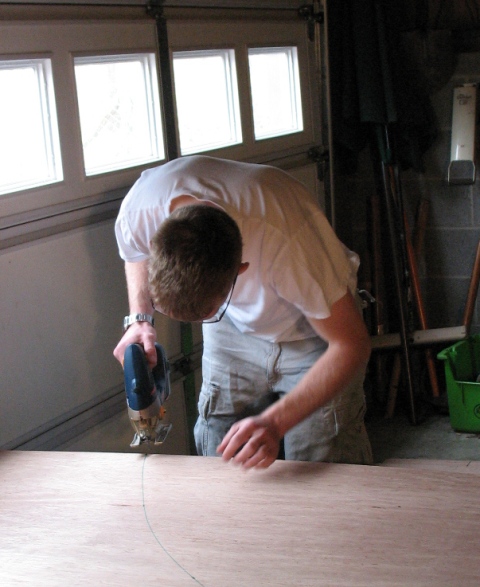
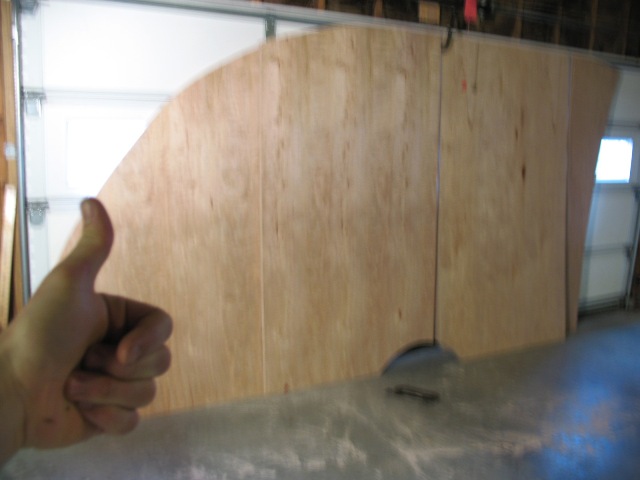
And then take those measurements, ripping them with a jigsaw into the shape of the profile:
Image

Finally, ending up with the end profile in a template form:
Image

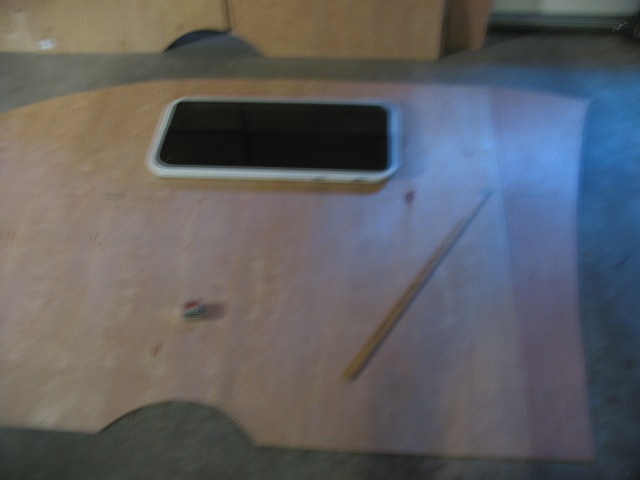
Then, trace out from template to more pieces of luaun:
Image

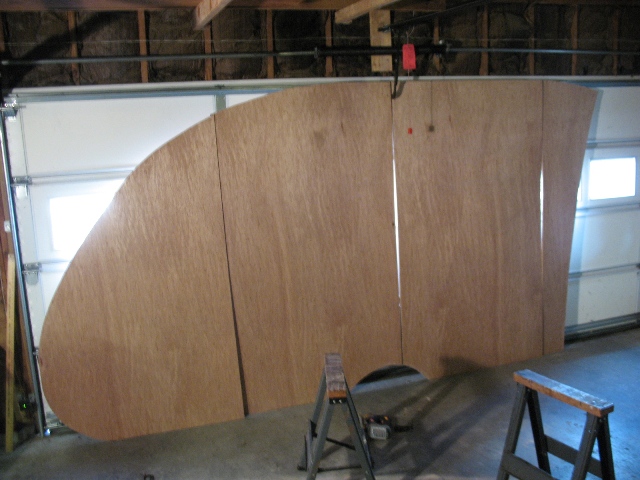
And cut until you end up with 16 panels -- 8 for each wall (4 inside and 4 outside):
Image

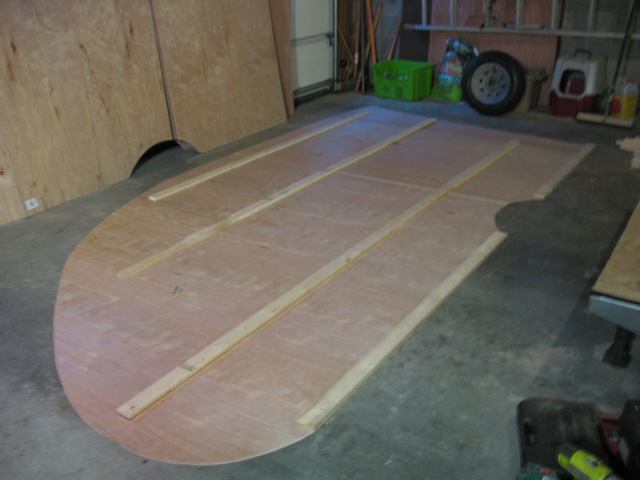
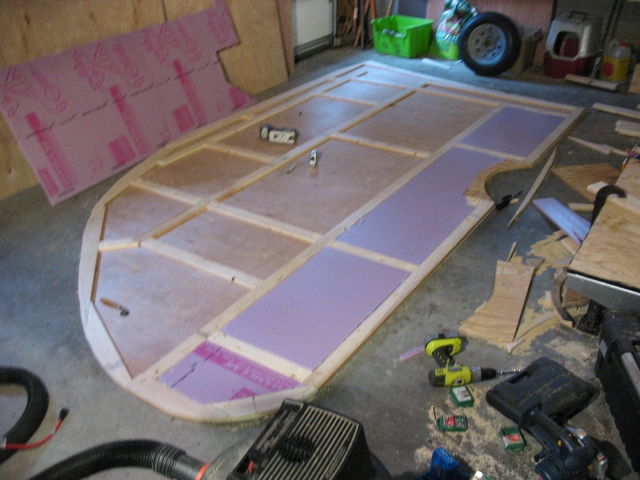
I laid out one set of the profiles, and mocked in the window so that I could plan the internal wall structure:
Image

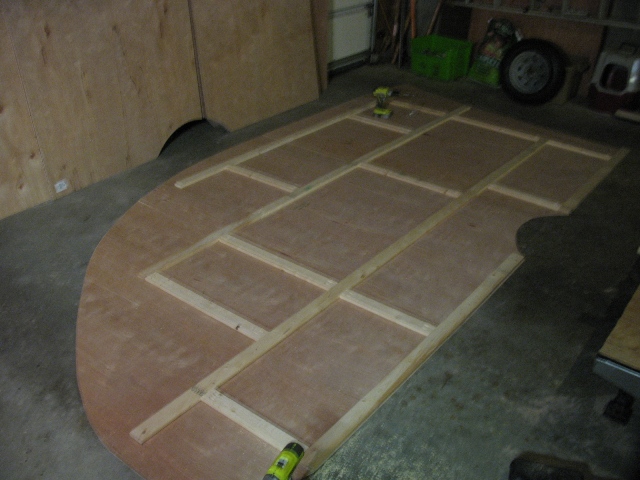
And started placing 1x3's down that will eventually be secured to the luaun:
Image

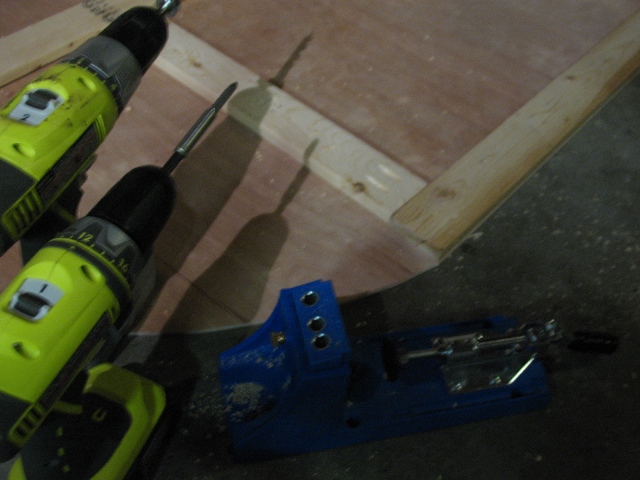
I pulled out my new toy (Kreg pocket hole jig!) to secure the verticals to the horizontals.
Image

Eventually, I came up with this:
Image

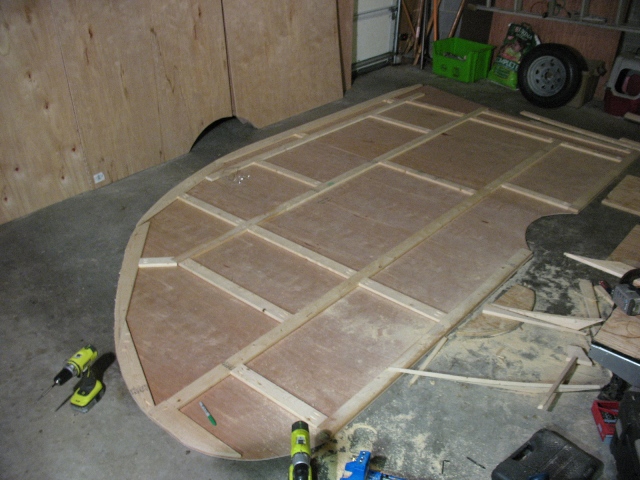
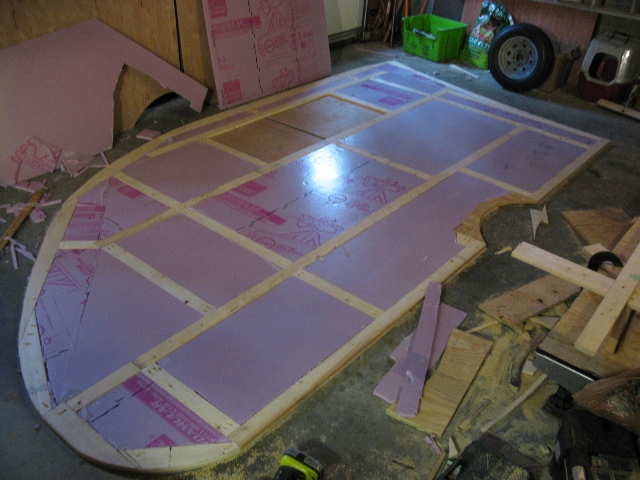
Then moved on to tracing the outer edge with custom-cut pieces (which took FOREVER):
Image

About halfway through the framing, I went to sleep.

Sunday:
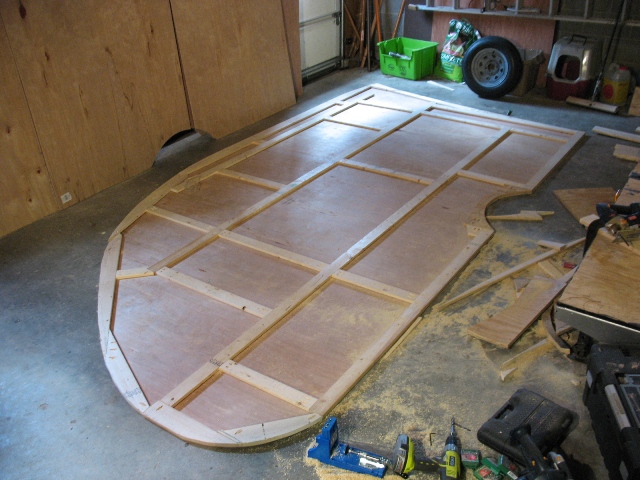
I finished with the frame:
Image

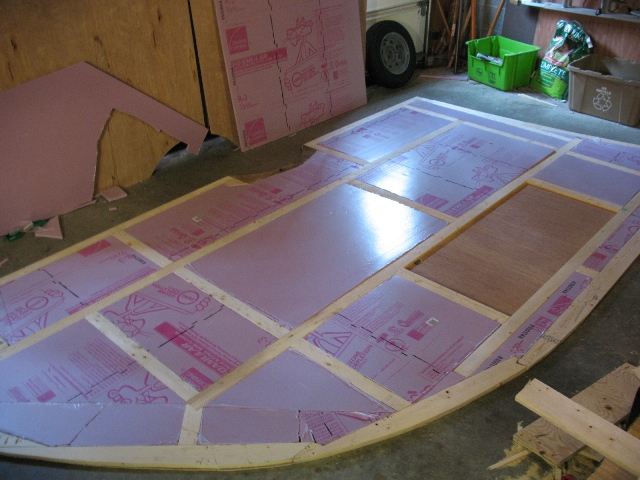
Next, I started my insulation:
Image

Maddie and Sophie helped:
Image

And suddenly the insulation was done:
Image

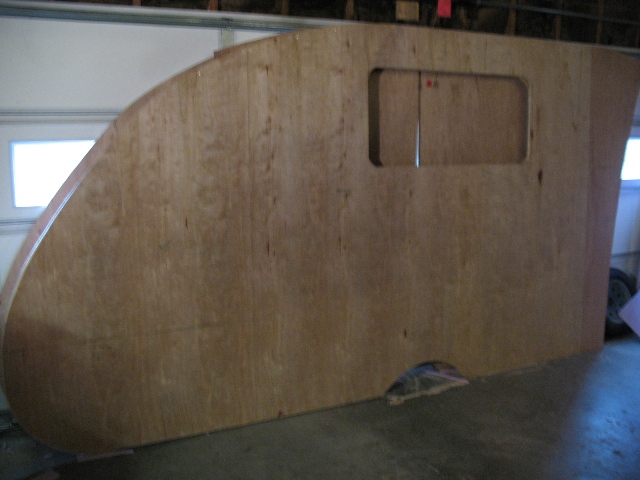
Since the side below the framing had all the markings on it for the window locations, I carefully slid it out and laid the luaun out on top, on the exact same location as before:
Image

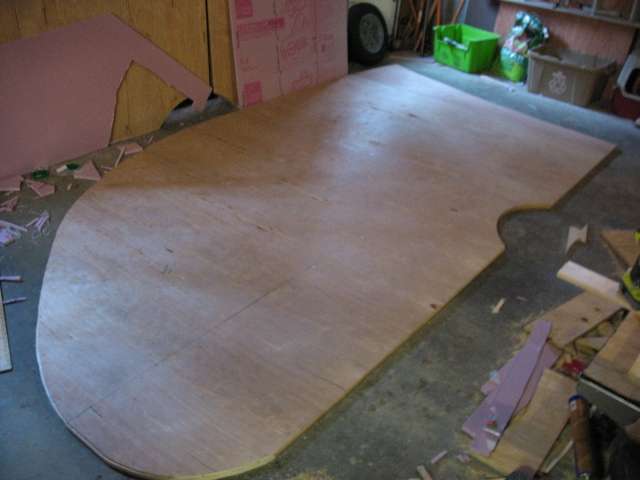
Once that was glued (liquid nails) and screwed (about 50 3/4" screws), I flipped the wall assembly over. At this point, the wall was a bit flimsy. It had a bit of a wobble to it, but held together well.
Image

I attached the other side using the same method, and propped the wall up. The window hole was cut out, meaning the basic frame of the passenger side wall is DONE!
Image

Phew, that took forever.

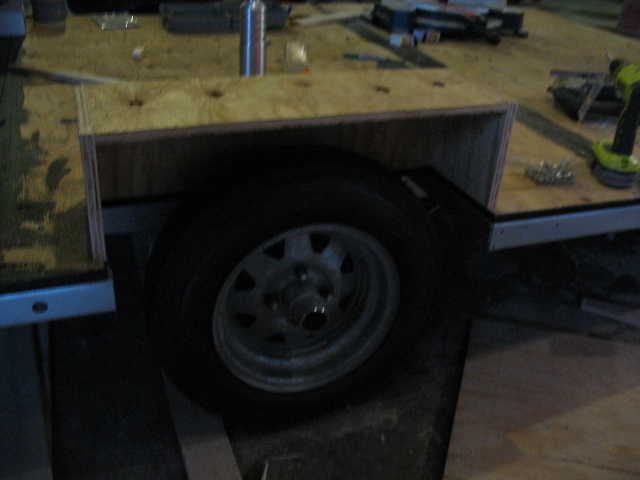
Not quite enough time to do the other wall, so I decided I would go ahead and make the wheel wells:
Image

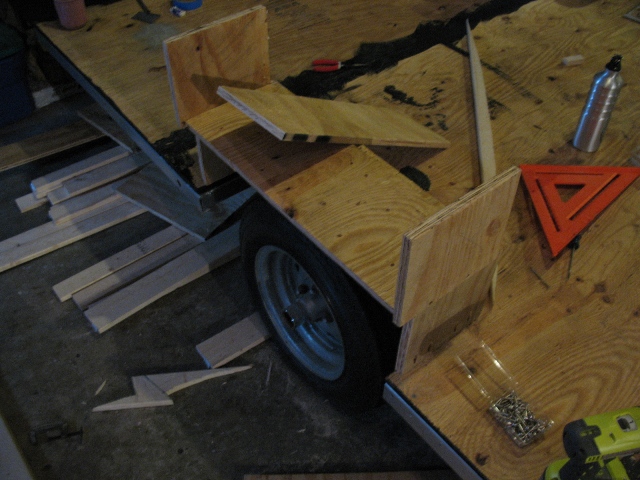
Which didn't take long:
Image

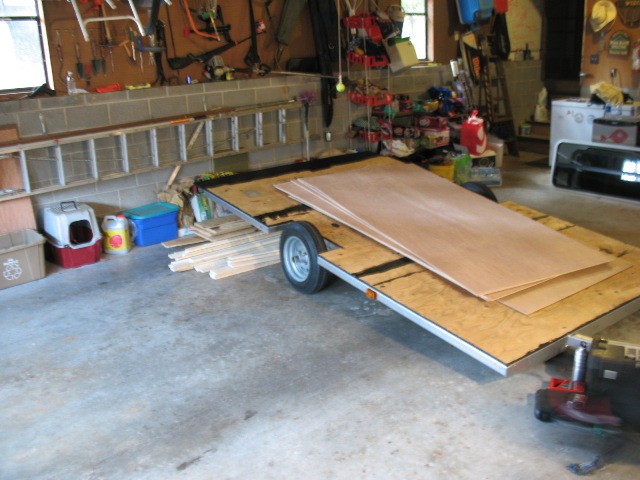
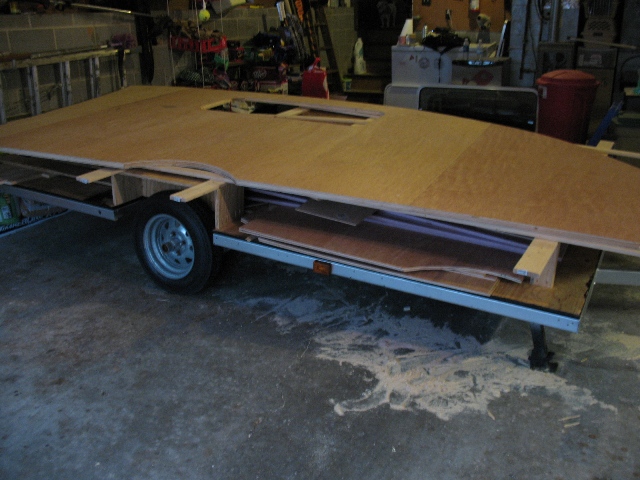
Time to pack up... I had to transport the wall somehow, so I built up a quick frame to lay the body on. All my extra wood, along with the drivers side wall panels went underneath:
Image

I had a hunch that it was going to rain earlier than the forecast stated, so I secured everything with a tarp. I moved the tarped trailer outside and hooked it up to the car, so we'd be ready to leave after dinner with the parents. Good thing too -- it started raining during dinner, and was soaking the whole way home. I wrapped it well, and everything stayed high and dry. :thumbsup:


My parents are going out of town tomorrow, and have volunteered their garage for the week. I will be busy tomorrow, but Tuesday-Friday should be major build days for me. :D
-- Dave

Build log: here
User avatar
synaps3
The 300 Club
 
Posts: 433
Images: 254
Joined: Sun Nov 08, 2009 1:09 am
Location: Marietta, GA
Top

Excellent, Dude

Postby down under tech » Mon Mar 15, 2010 8:47 pm

Hi Dave: It looks like you are in high gear to me !!!
Progress is progress.

Somebody once made the above quote. I am not sure where I heard that. Oh yes, it was YOU!!! Your TD is coming along great. It will take longer than you planed due to any number of things, (ie) weather, lack of funds, getting sick, working to hard at work, not having a place to build or personal obligations. I too wish I was farther along on my TD build. But, we will get there. You are moving along just fine. It takes time. It will be that much nicer at a slower pace since it is your first TD.
Who is Sophie? We have not met her, yet. Good job so far. I can tell you will have a very nice TD when you are finished.
Take care & it'il get done! :clapping hands:
Last edited by down under tech on Mon Mar 15, 2010 8:55 pm, edited 2 times in total.
Johnny D.

"If you think you can, you can. If you think you can't, your right !" ... Henry Ford

"The Silver Nugget" Build
viewtopic.php?t=35314&postdays=0&postorder=asc&start=0
User avatar
down under tech
Silver Donating Member
 
Posts: 565
Images: 571
Joined: Sat Feb 06, 2010 10:01 pm
Location: Reno, Nevada
Top

Excellent, Dude

Postby down under tech » Mon Mar 15, 2010 8:47 pm

Hi Dave: I found out what happens when I double click to send my posts. It doubles up the post. I cleared the second post that was a copy of the above quote.
Thanks,
:oops:
Johnny D.

"If you think you can, you can. If you think you can't, your right !" ... Henry Ford

"The Silver Nugget" Build
viewtopic.php?t=35314&postdays=0&postorder=asc&start=0
User avatar
down under tech
Silver Donating Member
 
Posts: 565
Images: 571
Joined: Sat Feb 06, 2010 10:01 pm
Location: Reno, Nevada
Top

Postby Conestoga » Mon Mar 15, 2010 10:00 pm

Sophie is surely the one on the right.

"ehhh Daaave... the sun is shining out there... and we're being really good.
do we have to spell it out for ya? "

Image

this is my little dog last year. her heart is enlarged, wearing out :(
BIG HEARTS these critters have!!!
Image
User avatar
Conestoga
Donating Member
 
Posts: 261
Images: 22
Joined: Wed Dec 30, 2009 12:01 pm
Location: Central PA
Top

Postby Conestoga » Mon Mar 15, 2010 10:11 pm

dave, good show! :thumbsup:

i'm guessing you won't be fastening the walls on with the trailer in the garage... oops, shouldn't have said anything and waited for the funny pix afterwards :lol:
User avatar
Conestoga
Donating Member
 
Posts: 261
Images: 22
Joined: Wed Dec 30, 2009 12:01 pm
Location: Central PA
Top

Postby synaps3 » Tue Mar 16, 2010 10:43 am

Johnny -
Sophie is the pup on the right. She's my fiancee's rat terrier (or should I say terror :lol: ). Thanks for the words of encouragement.

Conestoga --
After Maddie and Sophie helped me with the insulation, they went outside and ran around the backyard with my fiancee's parents' lab Gracie-Doodle. Maddie, Sophie, and Gracie all were trying to get a chipmunk, so they tore up their garden digging holes. Needless to say, I spent at least an hour bathing all three of them and filling in holes... They were ORANGE from the red clay! It was hilarious.

I love the wirey hair on your pooch. She's adorable. She certainly looks like she has a big heart. :)

I already thought of about getting the trailer in and out. At first, I was going to take off the wheels and put the whole thing on dollies -- but it still wouldn't have fit outside! I'm probably going to build the other wall tonight, then stand them up and raise the roof on Wednesday. We're house-sitting for my parents until Friday, so we have yet another garage (with power!) to work out of. :twisted:
-- Dave

Build log: here
User avatar
synaps3
The 300 Club
 
Posts: 433
Images: 254
Joined: Sun Nov 08, 2009 1:09 am
Location: Marietta, GA
Top

Postby absolutsnwbrdr » Tue Mar 16, 2010 10:47 am

Making some GREAT progress Dave! Keep it up!
Zach
Coming Soon...
Image Image
User avatar
absolutsnwbrdr
Donating Member
 
Posts: 2657
Images: 412
Joined: Mon Jan 25, 2010 6:10 pm
Location: Hanover, PA
Top

Postby Classic Finn » Tue Mar 16, 2010 3:42 pm

Looking Great Dave. :applause: :applause: :applause: Wish I was as fast :lol: :lol: ;)
Royal Teardrop Society Scandinavian Bureau Chief of Staff

Image
User avatar
Classic Finn
Midnight Sun Voyager
 
Posts: 17488
Images: 146
Joined: Fri Apr 29, 2005 4:29 am
Location: Country of Finland
Top

Postby Clifford Loose » Wed Mar 17, 2010 10:20 pm

Dave, looks like you're doing an excellent job! :applause: My wife was telling me she remembered back in the fall when we were building our walls and insulating them. Hoping that the weather starts to warm up for you and you get some sunny days to spend on your tear (or the use of someone's garage). It's a shame that you're having to tear down every day. Any chance you can talk to someone about leaving the tear together as you start getting farther along (surely if they can see that you're making steady progress it wouldn't be a problem)? The area looks slightly familiar in your pictures - do you live near the Ikea store?
User avatar
Clifford Loose
Teardrop Advisor
 
Posts: 51
Images: 145
Joined: Wed Mar 28, 2007 1:28 pm
Location: Otto, NC
Top

PreviousNext

Return to Build Journals

Who is online

Users browsing this forum: smeerkees and 5 guests