Update: Kids enjoyed the chili dogs with crinkle fries; Life is good. Well i added some more horizontal bracing and feel that is good enough and with the 1/4 inch ply i plan putting on it will stiffen it up, as someone suggested. i figured i will put the hinges 9 inches from the edge and installed some diagonal bracing to help transfer the load. mixed up the last batch i have of cpes and spread it in the fender areas and the areas i missed before. added more in the water inlet area and teh front marker lights. still had a little bit let so i decided to put it on the roof fiberglass just to see what it would do. then a few extra coats near the rear hatch seam and where the hinges will go. i then cut the excess splines out of the cabinet doors and sanded flush then set the router to round over the edges. i think it looks great and tomorrow will take my time and put the first coat of paint on them. Now the cherry is just about 1/8th of an inch and the channel i routed is a 1/4. so i added some glue from the back side and worked it in. this eliminated the rattling and hopefully firm up teh entire door.
Teardrops n Tiny Travel Trailersor t n ttt for short (tnttt.com) |
The Charlie Project
Re: The Charley Project 040612 Hating Fiberglass
![]() by Forrest747 » Thu Apr 12, 2012 11:17 am
by Forrest747 » Thu Apr 12, 2012 11:17 am
You know kirk it is a free country and i do perfer the glues over the alchol. infact mixing a batch up after work and feeding the kiddos. poor puppies stuck out in the garage with dad.
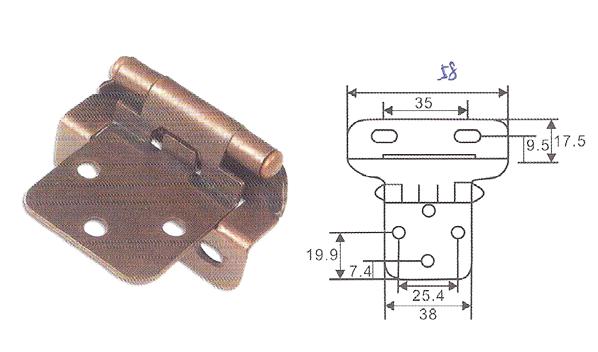
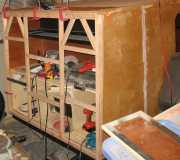
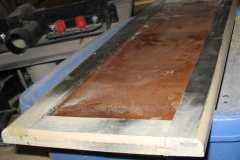
Update: Kids enjoyed the chili dogs with crinkle fries; Life is good. Well i added some more horizontal bracing and feel that is good enough and with the 1/4 inch ply i plan putting on it will stiffen it up, as someone suggested. i figured i will put the hinges 9 inches from the edge and installed some diagonal bracing to help transfer the load. mixed up the last batch i have of cpes and spread it in the fender areas and the areas i missed before. added more in the water inlet area and teh front marker lights. still had a little bit let so i decided to put it on the roof fiberglass just to see what it would do. then a few extra coats near the rear hatch seam and where the hinges will go. i then cut the excess splines out of the cabinet doors and sanded flush then set the router to round over the edges. i think it looks great and tomorrow will take my time and put the first coat of paint on them. Now the cherry is just about 1/8th of an inch and the channel i routed is a 1/4. so i added some glue from the back side and worked it in. this eliminated the rattling and hopefully firm up teh entire door.
Update: Kids enjoyed the chili dogs with crinkle fries; Life is good. Well i added some more horizontal bracing and feel that is good enough and with the 1/4 inch ply i plan putting on it will stiffen it up, as someone suggested. i figured i will put the hinges 9 inches from the edge and installed some diagonal bracing to help transfer the load. mixed up the last batch i have of cpes and spread it in the fender areas and the areas i missed before. added more in the water inlet area and teh front marker lights. still had a little bit let so i decided to put it on the roof fiberglass just to see what it would do. then a few extra coats near the rear hatch seam and where the hinges will go. i then cut the excess splines out of the cabinet doors and sanded flush then set the router to round over the edges. i think it looks great and tomorrow will take my time and put the first coat of paint on them. Now the cherry is just about 1/8th of an inch and the channel i routed is a 1/4. so i added some glue from the back side and worked it in. this eliminated the rattling and hopefully firm up teh entire door.
"All the success on the trail can not compensate for having square headlights"
"I've got a fever and the only prescription is more cowbell!"
http://www.tnttt.com/viewtopic.php?f=50&t=37701 Build Journal
"I've got a fever and the only prescription is more cowbell!"
http://www.tnttt.com/viewtopic.php?f=50&t=37701 Build Journal
-

Forrest747 - Cowbell Donating Member
- Posts: 1327
- Images: 447
- Joined: Mon Apr 06, 2009 3:40 am
- Location: West Valley Utah, Utah
Re: The Charley Project 041212 More CPES and hatch work
![]() by Forrest747 » Sat Apr 14, 2012 11:50 pm
by Forrest747 » Sat Apr 14, 2012 11:50 pm
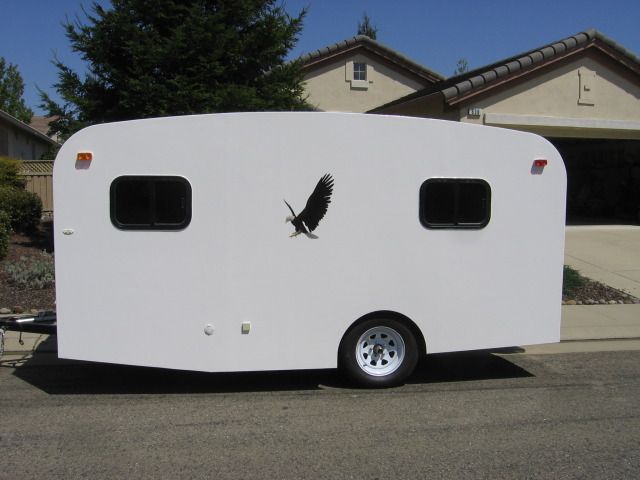
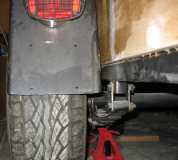
Well its been an intresting day. I ended up cutting up some spacers at one inch and then reinstalled the fenders. I am afraid I broke one of the hidden nuts. And two more I couldn't get to take the bolt so I will work on it tomorrow. I should of just planned on using carriage bolts but didn't think of that 2 years ago. I need to add a couple more on each side and going to use lag screws. And hoping that will work a little better. Wheels put back on and then turned Charley around in the garage to help make more room for the galley work and room for the new lawnmower. included a before and after inserting the spacers. cut and applied three more strips of fiberglass tape. finished the roof and then did the front seam. i was worried about the front seam sliding down and not staying in place so i put som thumb tacks about every 12 inches to hold it in place. have enough layup epoxy for maybe two more strips so need to plan on the top two front wall joints. wish i hadnt wasted that one piece, but hey we learn from these things. also did a little more painting on the cabinet doors and should hopefully have those up this week.
Before

After
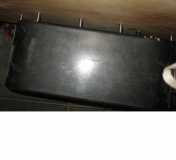
Before
After
"All the success on the trail can not compensate for having square headlights"
"I've got a fever and the only prescription is more cowbell!"
http://www.tnttt.com/viewtopic.php?f=50&t=37701 Build Journal
"I've got a fever and the only prescription is more cowbell!"
http://www.tnttt.com/viewtopic.php?f=50&t=37701 Build Journal
-
Forrest747 - Cowbell Donating Member
- Posts: 1327
- Images: 447
- Joined: Mon Apr 06, 2009 3:40 am
- Location: West Valley Utah, Utah