Regal Eagle Done! Video Tour 6/29/15

...ask your questions in the appropriate forums BUT document your build here...preferably in a single thread...dates for updates, are appreciated....

Re: First Build for 4, bow front, Critique welcome

Postby RandyG » Sun Jan 19, 2014 11:15 am

Mine is only about 44" from the rear, I figured there is no way to calculate how much total weight I will end up with so a guess was the best I could do. Once all built I can move things around to get the best tongue weight. The framing in the front of the Raindrop is a little bit heavier than a teardrop but not much. What kind of Tv are you using?
Randy
Aircraft fabricator, novice carpenter, electrical apprentice, audio engineer dropout.
Build thread - http://www.tnttt.com/viewtopic.php?f=50&t=54126
User avatar
RandyG
500 Club
 
Posts: 695
Images: 115
Joined: Thu May 10, 2012 6:52 pm

Re: First Build for 4, bow front, Critique welcome

Postby Gunguy05 » Sun Jan 19, 2014 11:24 am

RandyG wrote:Mine is only about 44" from the rear, I figured there is no way to calculate how much total weight I will end up with so a guess was the best I could do. Once all built I can move things around to get the best tongue weight. The framing in the front of the Raindrop is a little bit heavier than a teardrop but not much. What kind of Tv are you using?


I was going have the spring hangers welded on angle steel, and then drill holes and mount. This would me flexibility to slide the axle once the frame is more complete. A new torsion axle would make things easier because the mounting plate is shorter and shouldn't hit the angle going towards the tongue if slid forward. But not sure if the current one is worth replacing or not... Trying not to unless necessary.

TV will be jeep commander and Ford edge. Should always be something in that size range.
Brian


Checkout my buildThe Regal Eagle Bow front for 4
Image
Also my teardrop updates from blog on Dad Rambles
User avatar
Gunguy05
The 300 Club
 
Posts: 385
Images: 6
Joined: Mon Dec 02, 2013 4:45 pm
Location: South GA

Re: First Build for 4, bow front, Critique welcome

Postby citylights » Sun Jan 19, 2014 12:18 pm

Looks like a great start. I thought I would mention, it looks like you used doors sized for a standard 4 foot tall tear. With your 5 foot ceiling, you might want to extend your doors 6 or 8 inches taller. Standard doors work an a tear, but... If you have the extra tear height the added door height would make access all the better.

Also, your door placement seems far forward considering the front bunks. People that haven't used a tear before miss a key concept. When you enter a tear, butt first lean back, swing the legs in and back, head front, in a twisting motion... What you really want is your butt to hit the spot that it will stay in without much scooting forward or back. That means the door has to hit just about the middle of your bed. In your sketch the door hits your head pillows. That will cause a lot of scooting every time you enter and exit the tear.

Moving the door as I suggest might conflict with your axle location. That's OK! If you have to, move the axle back to just behind the door. The only down side of this is that it will increase your tongue weight a little. But the up sides of much better trailer handling are well worth it.

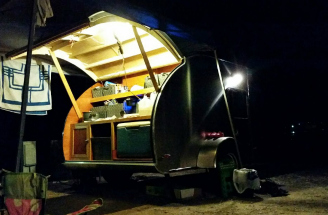
My tear is also a 5x10, although only 4 foot tall. I do not have front bunks. I need to get some new pictures with the roof rack installed, but this one gives the idea.

Image

Image
User avatar
citylights
500 Club
 
Posts: 591
Images: 1
Joined: Sun May 12, 2013 12:27 pm
Location: Las Vegas, Nevada
Top

Re: First Build for 4, bow front, Critique welcome

Postby RandyG » Sun Jan 19, 2014 12:43 pm

Since you are using larger tv's, you can move the axle back a little and take a little more tongue weight and it will track better. The axle position is more critical if using a small tv, you have to balance it just right. I think too far back would be better than too far forward in your case.
Randy
Aircraft fabricator, novice carpenter, electrical apprentice, audio engineer dropout.
Build thread - http://www.tnttt.com/viewtopic.php?f=50&t=54126
User avatar
RandyG
500 Club
 
Posts: 695
Images: 115
Joined: Thu May 10, 2012 6:52 pm
Top

Re: First Build for 4, bow front, Critique welcome

Postby citylights » Sun Jan 19, 2014 12:59 pm

RandyG wrote:Since you are using larger tv's, you can move the axle back a little and take a little more tongue weight and it will track better. The axle position is more critical if using a small tv, you have to balance it just right. I think too far back would be better than too far forward in your case.


Unless he goes with ultra light construction technique, a 5x10 x 5 foot tall isn't going to be towed by a small car anyway...

That brings another comment, mine is 1750 lb heavy. I went with all heavy construction 3/4 plywood, 2x2 spars. (I am even ashamed to admit there are some 2x4's at the trailer frame. Damn angle iron trailer frame made me do it!) Not a big deal because I planned for it and have a larger tow vehicle. I still have to check my tongue weight, but with the 50 lb air conditioner right over the tongue, I am guessing 200 maybe 225. Also, I still haven't completed my kitchen. When I put the cast iron in there, that will make a difference!

I also have plans and eventually may change out my axel and tires for heavier offroad use but...

If I was going to do it again, I would use 1/8 th inch ply, 1/2 inch foam, 1/8 th inch ply sandwich construction and 1 x 1/2 spars. I would go a lot lighter on all of the reinforcing and I am sure it would be about 500 lb lighter.
User avatar
citylights
500 Club
 
Posts: 591
Images: 1
Joined: Sun May 12, 2013 12:27 pm
Location: Las Vegas, Nevada
Top

Re: First Build for 4, bow front, Critique welcome

Postby Gunguy05 » Mon Jan 20, 2014 1:52 pm

The more I research building techniques (on this forum), the more I look at sourcing different parts, it seems like the less I know...

It appears that the matrix of parts affecting other parts is endless.... Every time I think I have one part or design feature figured out, I realize that it will greatly dictate what I do on a previous step... so back one step I take.

Then I realize that is Y affected by X... so you see the endless cycle.
Brian


Checkout my buildThe Regal Eagle Bow front for 4
Image
Also my teardrop updates from blog on Dad Rambles
User avatar
Gunguy05
The 300 Club
 
Posts: 385
Images: 6
Joined: Mon Dec 02, 2013 4:45 pm
Location: South GA
Top

Re: First Build for 4, bow front, Critique welcome

Postby KCStudly » Mon Jan 20, 2014 2:31 pm

Not endless, but it can be more complex than people might first perceive. If you can integrate design features in from the beginning, you can avoid some duplication of materials, and end up with a more efficient and elegant design. Might even save some weight.

In a small compact design like a TD, most things need to pull double duty or at least be package well with other things. Otherwise it can be like a Rube Goldberg contraption with a lot of add on clutter, or, worse, a bunch of 'do overs'.

My advice is, take your time. Think out your build. Keep researching parts and their dimensions (including where service connections need to be... like which side your roof vent fan wires come in on, etc.). Draw lots of sketches, preferably to scale. A lot of first time builders have managed to learn how to use Google Sketch Up (a free 3D design software tool), finding it to be an invaluable tool.

It is a lot easier, cheaper, and takes less time in the end to redesign in 3D than in real life. TPCE started out as a full 3D CAD model in a traditional style construction, and then was completely redesigned as a foamie. The first one only cost me time; no materials, money, or sweat.

Don't feel that you need to have every last little detail figured out, but the big things, like door and axle placement, hatch to galley counter clearance, the size and location of your cooler, the big stuff. Unless you are building out of solid plywood (not my choice), you are going to want to plan out your cabinets and other items that attach to the walls (fenders, coat hooks, cup holders, etc.) so that you have something to screw into.

A lot of people will make a full size cardboard (or cheap luan underlay ply) template to help lay things out full scale, before committing to a final design.
KC
My Build: The Poet Creek Express Hybrid Foamie

Poet Creek Or Bust
Engineering the TLAR way - "That Looks About Right"
TnTTT ORIGINAL 200A LANTERN CLUB = "The 200A Gang"
Green Lantern Corpsmen
User avatar
KCStudly
Donating Member
 
Posts: 9613
Images: 8169
Joined: Mon Feb 06, 2012 10:18 pm
Location: Southeastern CT, USA
Top

Re: First Build for 4, bow front, Critique welcome

Postby RandyG » Mon Jan 20, 2014 4:06 pm

Yes, like Kc said, planning every little detail at first will have you pulling your hair out. Plan the big stuff but keep the small details in the back of your mind. Everything will fall into place.
Randy
Aircraft fabricator, novice carpenter, electrical apprentice, audio engineer dropout.
Build thread - http://www.tnttt.com/viewtopic.php?f=50&t=54126
User avatar
RandyG
500 Club
 
Posts: 695
Images: 115
Joined: Thu May 10, 2012 6:52 pm
Top

Re: First Build for 4, bow front, Critique welcome

Postby Gunguy05 » Thu Jan 23, 2014 12:52 pm

One thing I am trying to work out right now is how far to bring my Aluminum (if we don't paint it) down. Do I take it over the wall, to the frame, or overlap the frame so there is no external frame showing.

My issue is the bow on the front and where it hangs out over the sides. My inital thought was to cover the sides including the frame... but. When I think about the radius on the front, that will mean I will have 4 inches of Al hanging over the edge (the thickness of the side frame rails), with only 1/8 ply behind it (the outer skin beneath the Al). My other thought is to make a frame behind that overhang, and just have it attached to the bottom side of the floor that is above it.

It just seems like with only the 1/8 behind it, it will get bent, chipped and damaged very easily.

Does this make sense? Suggestions from others? I'm sure there is any easy fix here... and I really don't want that 4" of frame showing if I can help it. We are going to talk to a welder on Sat am, so trying to work a few things out.

Brian
Brian


Checkout my buildThe Regal Eagle Bow front for 4
Image
Also my teardrop updates from blog on Dad Rambles
User avatar
Gunguy05
The 300 Club
 
Posts: 385
Images: 6
Joined: Mon Dec 02, 2013 4:45 pm
Location: South GA
Top

Re: First Build for 4, bow front, Critique welcome

Postby grantstew8 » Thu Jan 23, 2014 4:23 pm

To add to KC and Randy; consider how to make it waterproof in particular the galley hinge and wall to lid details. how to fit doors and windows with the same thoughts

Spending time planning has made the build really enjoyable. There are some details I've made changes to the detail as I've built as I spend most of drive to work and back mulling over a detail I'm stuck on or about to do.

There are some great build logs to read and avoid some deep holes. I've fallen in one or two. Cutting short a sealed hinge and galley hatch is my "best" so far . See the Galley hatch blunder video
User avatar
grantstew8
The 300 Club
 
Posts: 448
Images: 77
Joined: Tue May 28, 2013 5:26 pm
Location: Dunfermline, Scotland
Top

Re: First Build for 4, bow front, Critique welcome

Postby grantstew8 » Thu Jan 23, 2014 4:31 pm

If like me your always at camp sites with power consider using a computer power supply for all your. 12V requirements. They are cheap as chips. It is easy to add 12v battery as the wiring is there.
User avatar
grantstew8
The 300 Club
 
Posts: 448
Images: 77
Joined: Tue May 28, 2013 5:26 pm
Location: Dunfermline, Scotland
Top

Re: First Build for 4, bow front, Critique welcome

Postby RandyG » Thu Jan 23, 2014 5:16 pm

My plan for that over hang in the front consists of sandwiching foam and plywood the thickness of your frame, put it under the floor and trace a cut line to fit your radias, cut, glue and screw into place.
I may put a sheet of Al under that also, since I have skinned other parts of the under side of the frame. I may even build the radias of the foam out of wood so, like you said, it doesnt get dented in or crack out.
Randy
Aircraft fabricator, novice carpenter, electrical apprentice, audio engineer dropout.
Build thread - http://www.tnttt.com/viewtopic.php?f=50&t=54126
User avatar
RandyG
500 Club
 
Posts: 695
Images: 115
Joined: Thu May 10, 2012 6:52 pm
Top

Re: First Build for 4, bow front, Critique welcome

Postby aggie79 » Thu Jan 23, 2014 6:59 pm

Gunguy05 wrote:One thing I am trying to work out right now is how far to bring my Aluminum (if we don't paint it) down. Do I take it over the wall, to the frame, or overlap the frame so there is no external frame showing.

My issue is the bow on the front and where it hangs out over the sides. My inital thought was to cover the sides including the frame... but. When I think about the radius on the front, that will mean I will have 4 inches of Al hanging over the edge (the thickness of the side frame rails), with only 1/8 ply behind it (the outer skin beneath the Al). My other thought is to make a frame behind that overhang, and just have it attached to the bottom side of the floor that is above it.

It just seems like with only the 1/8 behind it, it will get bent, chipped and damaged very easily.

Does this make sense? Suggestions from others? I'm sure there is any easy fix here... and I really don't want that 4" of frame showing if I can help it. We are going to talk to a welder on Sat am, so trying to work a few things out.

Brian


Hey Brian,

One way to get some extra "meat" for your wall extensions is to build up the bottom of the floor. I sort of responded to this in your question about roll pans here: http://www.tnttt.com/viewtopic.php?p=1060613#p1060613.

I know you'll work things out. Take care and don't despair,
Tom
Tom (& Linda)
For build info on our former Silver Beatle teardrop:
Build Thread

93503
User avatar
aggie79
Super Duper Lifetime Member
 
Posts: 5405
Images: 686
Joined: Tue Aug 07, 2007 5:42 pm
Location: Watauga, Texas
Top

Re: First Build for 4, bow front, Critique welcome

Postby citylights » Thu Jan 23, 2014 7:19 pm

Gunguy05 wrote:One thing I am trying to work out right now is how far to bring my Aluminum (if we don't paint it) down. Do I take it over the wall, to the frame, or overlap the frame so there is no external frame showing.

My issue is the bow on the front and where it hangs out over the sides. My inital thought was to cover the sides including the frame... but. When I think about the radius on the front, that will mean I will have 4 inches of Al hanging over the edge (the thickness of the side frame rails), with only 1/8 ply behind it (the outer skin beneath the Al). My other thought is to make a frame behind that overhang, and just have it attached to the bottom side of the floor that is above it.

It just seems like with only the 1/8 behind it, it will get bent, chipped and damaged very easily.

Does this make sense? Suggestions from others? I'm sure there is any easy fix here... and I really don't want that 4" of frame showing if I can help it. We are going to talk to a welder on Sat am, so trying to work a few things out.

Brian


Your choice. Some build over the frame, some build to the frame. I built over my frame.

Regarding the front bow, I would build out the floor deck to meet the front bow. That will supply the support and attachment point that you are looking for. If you cover the frame on the rest, then this front piece will need to be built up or thickened to match elevation with the rest.

Also, I would use aluminum trim at every edge of the aluminum. That means the bottom and top of the front bow would get a bent piece of aluminum trim to hold and seal the edges.
User avatar
citylights
500 Club
 
Posts: 591
Images: 1
Joined: Sun May 12, 2013 12:27 pm
Location: Las Vegas, Nevada
Top

Re: First Build for 4, bow front, Critique welcome

Postby KCStudly » Thu Jan 23, 2014 7:36 pm

I think the reason you are having trouble "wrapping your brain around" roll pans for a rain drop is because they would have to be formed in compound curves, whereas the roll pans on a standard tear are merely radii or ellipses.

If you are serious about doing compound formed metal, I would recommend looking at some of Ron Covell's videos. But be warned, he is a master metal craftsman and makes it look far easier than it is in real life for us mere mortals. :lol:
KC
My Build: The Poet Creek Express Hybrid Foamie

Poet Creek Or Bust
Engineering the TLAR way - "That Looks About Right"
TnTTT ORIGINAL 200A LANTERN CLUB = "The 200A Gang"
Green Lantern Corpsmen
User avatar
KCStudly
Donating Member
 
Posts: 9613
Images: 8169
Joined: Mon Feb 06, 2012 10:18 pm
Location: Southeastern CT, USA
Top

PreviousNext

Return to Build Journals

Who is online

Users browsing this forum: No registered users and 25 guests