Harbor Freight Trailer - Square?

Anything to do with mechanical, construction etc

Harbor Freight Trailer - Square?

Postby darkroomsource » Fri Jan 21, 2005 2:24 am

If you are using a harbor freight trailer, I suggest you be absolutely certain the HF trailer and the floor to be attached are flat and square BEFORE attaching the floor, and especially before the walls.

Take it from experience, if the trailer flexes even a quarter of an inch over the 8 feet, you'll complicate all of the following build.
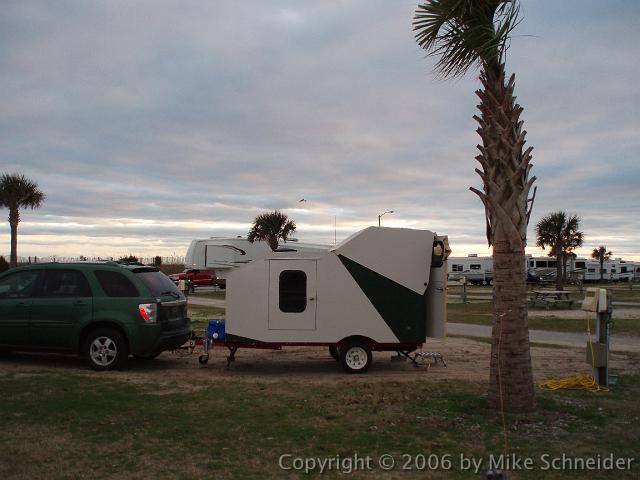
-- Andy Hughes
My Teardrop
<><
Grace Happens
User avatar
darkroomsource
Teardrop Advisor
 
Posts: 64
Joined: Thu Oct 28, 2004 12:08 pm
Location: Silverton, Oregon

Postby Arne » Fri Jan 21, 2005 7:54 am

Once the walls are on, the shape is pretty much set... you are right....

I set mine on some jack stands and got the deck trued up.. didn't take it off the stands till the walls were on and the tear is nice and square..
www.freewebs.com/aero-1
---
.
I hope I never get too old to play (Arne, Sept 11, 2010)
.
User avatar
Arne
Mr. Subject Line
 
Posts: 5383
Images: 96
Joined: Fri Aug 13, 2004 12:25 pm
Location: Middletown, CT

Postby D. Tillery » Fri Jan 21, 2005 10:17 am

I just had the pleasure of going up to see Steve H in Bulverde and take a look at his tear under construction. I could ramble about the quality of his work but one thing he pointed out to me seemed relevant here.

Steve said everything seemed square but when he put on the 1/4" plywood on the roof it did not line up quite right and left a tapering gap about 3/8" at the wide end. My point is that his work is square, the plywood is not.

Do not assume that a sheet of plywood is square when you buy it. Sheet steel is definitely not square. That is why it is sold long.

D. Tillery
D. Tillery
User avatar
D. Tillery
Teardrop Master
 
Posts: 266
Images: 9
Joined: Thu Jul 22, 2004 5:47 pm
Location: Providence, still a Texan, RI
Top

Postby Arne » Fri Jan 21, 2005 10:49 am

I trued up my deck on the jack stands..... then I squared up the sides to the deck.

The roof was installed by putting a jack under the back, with a 2x4 across the jack pad. At on each end of this 2x4, which was about 48 inches long, I put a 2x4 stub. I jacked the board up till the stubs just touched the bottom of the tear body... This gave me a locator on each side to rest the plywood on. I ran my ply the long way, something I would not do next time. I left a 1/4 inch hanging over the outside wall edge.

After being attached and the glue dried, I used a belt sander to remove the overhang. Though tedious, the wall/roof mating was right on.

My tear body overhung the back of the h/f frame by 8 inches, so I could use this method of alignment.....

The ply was square, but I did it this way so I wouldn't be messing around with alignment as the glue was setting up before my very eyes.... and I didn't have to be concerned with coming up short at the top after the bottom was nailed in place...
www.freewebs.com/aero-1
---
.
I hope I never get too old to play (Arne, Sept 11, 2010)
.
User avatar
Arne
Mr. Subject Line
 
Posts: 5383
Images: 96
Joined: Fri Aug 13, 2004 12:25 pm
Location: Middletown, CT
Top

Postby asianflava » Fri Jan 21, 2005 2:31 pm

D. Tillery wrote: My point is that his work is square, the plywood is not.

Do not assume that a sheet of plywood is square when you buy it. Sheet steel is definitely not square. That is why it is sold long.

D. Tillery


Don't let the people who used the remnants to square up the sides (ala Kuffel Creek) hear you say that.
User avatar
asianflava
8000 Club
8000 Club
 
Posts: 8412
Images: 45
Joined: Mon Aug 02, 2004 5:11 am
Location: CO, Longmont
Top

Postby BobR » Fri Jan 21, 2005 4:25 pm

asianflava wrote:
D. Tillery wrote: My point is that his work is square, the plywood is not.

Do not assume that a sheet of plywood is square when you buy it. Sheet steel is definitely not square. That is why it is sold long.

D. Tillery


Don't let the people who used the remnants to square up the sides (ala Kuffel Creek) hear you say that.


My point is is don't assume anything...check it before, during and after you build anything. You always need to check all of the component parts and materials. Don't forget to check the level of the frame in multiple directions to remove any twist when assembling the body.

1. There is a very simple way to check if something is square. This method has been in use for thousands of years. Starting at the intersection point of the two lines, measure down one line 3 feet and make a mark. Measure down the other line 4 feet and make a mark. Measure accurately in a straight line between your two marks. The distance between the two marks will be exactly 5 feet if the two lines are square. This third line makes a triangle. It is often referred to as the diagonal.

OR choose a easier method

2. Use a framing square (but check it for square first, see the link below)

If the plywood is square there is no reason you can't use the factory edges to build the temporary braces that Kuffel Creek suggests.


http://www.sawdustmaking.com/Measuring%20Tools/measuring_tools.htm#Squares
Bob Richert
Parrish, FL
"Be glad of life because it gives you the chance to love and to work and to play and to look up at the stars"
User avatar
BobR
Donating Member
 
Posts: 387
Images: 1
Joined: Thu Nov 04, 2004 8:12 pm
Location: San Antonio, TX
Top

Postby Marty » Sat Jan 22, 2005 7:11 am

Bob,

Nice link at the bottom of your post. Great information for those less familiar with keeping it square, plumb and level. When I'm Trimming any project another tip my (40+ year finish carpenter) father taught me was to use the same measuring tape thruout that project. 18 1/8" will be 18 1/8" on the same tape but it might be 18" or 18 1/16" on another tape.
But again great info on your link, the 3,4,5 or the diagonals are critical and then you can't miss.

Marty
The four most expensive words in renovation are: "While we're at it..."
Marty
Teardrop Builder
 
Posts: 29
Joined: Tue Sep 21, 2004 6:16 pm
Location: Hastings, Mn.
Top

Postby Arne » Sat Jan 22, 2005 8:23 am

I read the link.. great, another case of discrimination against left-handers... <g>....
www.freewebs.com/aero-1
---
.
I hope I never get too old to play (Arne, Sept 11, 2010)
.
User avatar
Arne
Mr. Subject Line
 
Posts: 5383
Images: 96
Joined: Fri Aug 13, 2004 12:25 pm
Location: Middletown, CT
Top

Postby BILLYL » Sat Jan 22, 2005 10:12 am

One thing I have found and what my father taught me is - use the same tape measure through out the project. Although NIST does a good job keeping the standard - some tapes will vary.

BILL
"If your children ever find out how lame you really are, they'll
gonna murder you in your sleep...." Frank Zappa
User avatar
BILLYL
Donating Member
 
Posts: 2822
Joined: Thu Jan 20, 2005 8:12 am
Location: Maryland, Gaithersburg
Top

Postby Denzagrad » Sat Jan 22, 2005 11:38 am

A tool I found very useful for marking and cutting square was what I think is called a sheet rock square. It looks like a big aluminum "T" with the long leg 4 feet long. I would hook the short leg over the side of what I was working on, clamp the end on the long leg to the work surface (to keep it from moving) and mark, cut, etc., nice straight lines on the aluminum, luan, foam, etc., 4 foot wide sheets.

To square the HF frame, one of the techniques used was repeated cross angle measurements and a 5 pound tapping hammer. I.e., measuring from one front corner to a rear corner on the opposite side;, then doing the other front corner to the other rear corner. Tap until they are both exactly the same measurement. These measurements were rechecked and adjusted square every time the HF trailer was moved or worked on until it was solidly bolted the floor to the HF trailer. Even then it was checked for square until there were enough bolts in place to secure it against changing square. Also, it was necessary to ensure that there was enough wood removed from the floor support frame to allow the wood floor assembly to straddle the bolt heads and sit flat onto the HF frame rails. A level doesn’t do much good if the wood floor is resting on bolt heads and not the frame rails.

What I did to square the walls was build two wooden angles out of scrap plywood (the front curve waste). Using the “T” square, make sure that the plywood edges are square. Then attached wood pieces on the two working edges (I used a couple of the spars for this) making sure the 90 degree angle ended up square. Lining up the front edge of the wall with the front edge of the floor, I screwed the home made wooden angles into both the floor and the wall. Once the bottom edge of the walls and the plywood angles were in place, I temporarily screwed (not glued) a couple of the spars in place until the glue dried to help control the plywood sides tendency to flop.
User avatar
Denzagrad
Teardrop Advisor
 
Posts: 85
Joined: Thu Dec 23, 2004 1:33 am
Top

Postby D. Tillery » Sat Jan 22, 2005 11:40 am

Bob, Great site. I've always wondered how to fix a framing square. I'm glad I held onto the three I have hanging on a nail that are screwed up.

I use alot of 4x10 and 5x10 sheet and plate steel. It might look OK with a framing square but until I measure it on the diagonals I can never be sure. I also have to remind myself that 1/64th over 11' or so is pretty darn close. You reach a point of diminishing returns trying to work tighter than that on most projects.

If you are working with others you might make sure they have the same brand tape too. I can remenber when Mike got his frame from the welders it did not quite line up with the body he had built. Most times that I try to match my work to a woodworker's using blueprints only, it almost never matches up. But that may also hold true with work comming from two separate woodshops.

D. Tillery
D. Tillery
User avatar
D. Tillery
Teardrop Master
 
Posts: 266
Images: 9
Joined: Thu Jul 22, 2004 5:47 pm
Location: Providence, still a Texan, RI
Top

Postby BobR » Sat Jan 22, 2005 12:33 pm

Good point on using the same tape...I have three lying around on my workbench and sometimes I just grab the closest one...with inaccurate results. :shock:
Bob Richert
Parrish, FL
"Be glad of life because it gives you the chance to love and to work and to play and to look up at the stars"
User avatar
BobR
Donating Member
 
Posts: 387
Images: 1
Joined: Thu Nov 04, 2004 8:12 pm
Location: San Antonio, TX
Top

trailer square/trailer flex

Postby doug hodder » Tue Jan 25, 2005 9:56 pm

I have an inexpensive Home Depot trailer that I use for hauling firewood etc. If you are using one of these type trailers, hitch it up to your vehicle, stand of the far back end of it and shift your weight back and forth. Some of the ligher frames will flex quite a bit. While this weight will not be on the trailer while towing, it gives you an idea of how much it will flex. Mine flexes quite a bit and all the welds are still good. You might want to beef it up and make it stiffer, as the flex will eventually work it's way into the construction. Maybe I'm out of line in my thinking. Any one else had this experience? Doug
doug hodder
*Snoop Dougie Doug
 
Posts: 12625
Images: 562
Joined: Tue Dec 14, 2004 11:20 pm
Top


Return to Teardrop Construction Tips & Techniques

Who is online

Users browsing this forum: No registered users and 5 guests