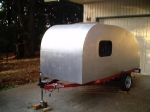
by Denzagrad » Sat Jan 22, 2005 11:38 am
A tool I found very useful for marking and cutting square was what I think is called a sheet rock square. It looks like a big aluminum "T" with the long leg 4 feet long. I would hook the short leg over the side of what I was working on, clamp the end on the long leg to the work surface (to keep it from moving) and mark, cut, etc., nice straight lines on the aluminum, luan, foam, etc., 4 foot wide sheets.
To square the HF frame, one of the techniques used was repeated cross angle measurements and a 5 pound tapping hammer. I.e., measuring from one front corner to a rear corner on the opposite side;, then doing the other front corner to the other rear corner. Tap until they are both exactly the same measurement. These measurements were rechecked and adjusted square every time the HF trailer was moved or worked on until it was solidly bolted the floor to the HF trailer. Even then it was checked for square until there were enough bolts in place to secure it against changing square. Also, it was necessary to ensure that there was enough wood removed from the floor support frame to allow the wood floor assembly to straddle the bolt heads and sit flat onto the HF frame rails. A level doesn’t do much good if the wood floor is resting on bolt heads and not the frame rails.
What I did to square the walls was build two wooden angles out of scrap plywood (the front curve waste). Using the “T” square, make sure that the plywood edges are square. Then attached wood pieces on the two working edges (I used a couple of the spars for this) making sure the 90 degree angle ended up square. Lining up the front edge of the wall with the front edge of the floor, I screwed the home made wooden angles into both the floor and the wall. Once the bottom edge of the walls and the plywood angles were in place, I temporarily screwed (not glued) a couple of the spars in place until the glue dried to help control the plywood sides tendency to flop.