Hatch Springback

Anything to do with mechanical, construction etc

Hatch Springback

Postby ssample » Fri Feb 19, 2010 6:28 pm

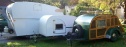
I am preparing to build my TT rear hatch and need advice as to how thick to make it to avoid springback. The hatch will be 48 inches long and 52 inches wide. I already have purchased Grant's hinge. The top body spar is 1 1/2 inches thick and was laminated from two 3/4 inch oak boards. I was thinking of making the top and bottom ends 2 inches wide and flaring the middle of the hatch to 3 inches and using 5 spars of 3/4 inch ash, and maybe making the two end spars 4 inches wide. If I use the wider end spars, I will slot out my kitchen counter to provide clearance. I would join these spars horizontally with 3/4 inch supports. The outside surface will be two layers of 1/8 inch luan plywood and the inside will be 1/8 inch baltic birch. This is what I will use on the rest of the frame.

So can anyone advise me if this is a sound plan and what material is suggested for the spars? Also, How much space would you allow between the hatch and the vertical sides of the trailer? Thanks.
ssample
Teardrop Inspector
 
Posts: 21
Joined: Thu Jan 22, 2009 6:57 pm

Postby john » Sat Feb 20, 2010 1:44 am

On my second hatch attempt on my first build I curled the skin and held it in place with a couple of tie-down straps.

I left it outside in the yard over several nights while working on other things.

By the time I was ready to put the skin on, the skin had more curl than the hatch had curve.

There was no springback and I still had a lightweight hatch.


Good luck.
Build I -- Scenic ---
http://www.flickr.com/photos/8121727@N04/
Goto the Tear Build file

Build II -- Scenic II ---
viewtopic.php?t=29603

Build III -- Scenic Solo---
viewtopic.php?f=50&t=50324

Travel Blog----Now without Political Commentary
http://polifrogblog.blogspot.com/2009/0 ... -2009.html

The Constitution was ratified, not an interpretation thereof...

Penomeli ikibobo
john
User avatar
john
500 Club
 
Posts: 663
Images: 261
Joined: Tue Oct 05, 2004 6:26 pm
Location: eden nc

Postby len19070 » Sat Feb 20, 2010 2:09 am

My approach to eliminating Spring back was simple.

Sheath it with materials that don't spring back.

I used FRP covered with Aluminum.

Happy Trails

Len
:peace: :peace: :peace: :peace: :peace:
http://s26.photobucket.com/user/len1907 ... 20trailers

"If you do good things, good things will happen to you"..... Earl Hickey
User avatar
len19070
3000 Club
3000 Club
 
Posts: 3054
Images: 24
Joined: Tue Aug 17, 2004 7:44 pm
Location: S.E Pa. Morton
Top

Postby Mauleskinner » Sat Feb 20, 2010 11:11 am

I'm not entirely sure that "springback" is really "springback" :thinking:

I suspect that a lot of it is actually just not maintaining the proper geometry when attaching the skin. On my trailer, I ended up with slightly MORE curvature than what I started with--I used straps to hold the skin during glue-up, and ended up squeezing the ends together slightly. Not enough to make much difference, but it's definitely too rigid to move after skinning.

Just my 2 cents, probably worth less than the electricity you used to read it. :lol:

David
User avatar
Mauleskinner
The 300 Club
 
Posts: 350
Joined: Tue Aug 21, 2007 8:57 pm
Location: Southern MN
Top

Postby aggie79 » Sat Feb 20, 2010 7:05 pm

You may want to try to build it in place. This picture shows my hatch framing waiting to get its outside plywood skin. I used spacers and screwed through the sidewall to hold the framing in place. The blue tap is to keep the plywood from adhering to the sidewalls and upper spar.

Image

You can't really see it in this photo, but I have a wicked curve at the bottom of the hatch, and so far I don't have any springback.

Tom
Tom (& Linda)
For build info on our former Silver Beatle teardrop:
Build Thread

93503
User avatar
aggie79
Super Duper Lifetime Member
 
Posts: 5405
Images: 686
Joined: Tue Aug 07, 2007 5:42 pm
Location: Watauga, Texas
Top

What were your side and bottom gaps?

Postby ssample » Sun Feb 21, 2010 1:39 pm

aggie79 wrote:You may want to try to build it in place. This picture shows my hatch framing waiting to get its outside plywood skin. I used spacers and screwed through the sidewall to hold the framing in place. The blue tap is to keep the plywood from adhering to the sidewalls and upper spar.

Image

You can't really see it in this photo, but I have a wicked curve at the bottom of the hatch, and so far I don't have any springback.

Tom


I also plan to build the hatch in place. What were your side and bottom gaps and what was your outside skin material? I see that you used plywood for the ribs. How wide are the ribs? Did you use pine for the cross braces? You did a beautiful job on your build. Thanks, Steve
ssample
Teardrop Inspector
 
Posts: 21
Joined: Thu Jan 22, 2009 6:57 pm
Top

Wet skin material?

Postby ssample » Sun Feb 21, 2010 1:41 pm

I like the tie strap ideas. Did anyone wet the material before pulling it into a curve for a few days? Thanks again.
ssample
Teardrop Inspector
 
Posts: 21
Joined: Thu Jan 22, 2009 6:57 pm
Top

Postby john » Sun Feb 21, 2010 6:19 pm

When I used the straps I did not wet the material, but it was exposed to southern humid nights followed by direct sun during the day. I would see if bending without water works before spraying the ply down, as the glues in the ply may not respond well to the water. If dry bending over time doesn't work I would resort to spraying it periodically in the evening.

Time is your friend in this.

len's approach is good too, but I wanted to avoid the extra cost of finding, buying, and picking up bendy plywood. Patience saved me money.

I also hung my hatch frame before applying the skin. I went so far as to screw the hatch frame fully into position through the sides of the tear. That way I could avoid the hatch perhaps having a twist built into it causing one lower corner to sit higher than the other. I was left with holes in the sides of the tear where the set screws were that I had to fill, but they were covered by aluminum later anyway. In the end I was left with a hatch frame that was perfectly parallel with the sides of the trailer which was needed for the hatch struts.

Lastly when I put the skin on the hatch I let it over hang the sides of the tear. I trimmed it with a router later.

Again, this was for the first build, not the second.
Build I -- Scenic ---
http://www.flickr.com/photos/8121727@N04/
Goto the Tear Build file

Build II -- Scenic II ---
viewtopic.php?t=29603

Build III -- Scenic Solo---
viewtopic.php?f=50&t=50324

Travel Blog----Now without Political Commentary
http://polifrogblog.blogspot.com/2009/0 ... -2009.html

The Constitution was ratified, not an interpretation thereof...

Penomeli ikibobo
john
User avatar
john
500 Club
 
Posts: 663
Images: 261
Joined: Tue Oct 05, 2004 6:26 pm
Location: eden nc
Top

Postby roger-c » Sun Feb 21, 2010 9:15 pm

Build the hatch first then build the trailer to match the hatch. That's what
I did .

Roger C.
Don�t force it use a bigger hammer!
User avatar
roger-c
Teardrop Advisor
 
Posts: 59
Images: 9
Joined: Mon Jun 14, 2004 12:34 am
Location: Lakewood WA
Top

Postby afreegreek » Sun Feb 21, 2010 11:03 pm

roger-c wrote:Build the hatch first then build the trailer to match the hatch. That's what
I did .

Roger C.
yup, definitely the smart way to go.
afreegreek
500 Club
 
Posts: 723
Images: 0
Joined: Mon Jan 25, 2010 8:35 pm
Top

Re: What were your side and bottom gaps?

Postby aggie79 » Sun Feb 21, 2010 11:47 pm

ssample wrote:I also plan to build the hatch in place. What were your side and bottom gaps and what was your outside skin material? I see that you used plywood for the ribs. How wide are the ribs? Did you use pine for the cross braces? You did a beautiful job on your build. Thanks, Steve


Steve,

Thanks for the compliments. I used 1/4" spacers for the sides and the bottom and 3/8" spacer where the hurricane hinge will be. The outer ribs are doubled 3/4" plywood and the inner ribs are single 3/4" plywood. I used poplar for the cross braces. They are fastened with PL Premium and pocket screws (Kreg has the blue ceramic coated ones for weather resistance.) The ribs are only 1 1/2" deep. It seems pretty rigid and will get more so when the interior plywood is attached. That said, I would probably go with a deeper outer rib if I were to do it over again.

Tom
Tom (& Linda)
For build info on our former Silver Beatle teardrop:
Build Thread

93503
User avatar
aggie79
Super Duper Lifetime Member
 
Posts: 5405
Images: 686
Joined: Tue Aug 07, 2007 5:42 pm
Location: Watauga, Texas
Top


Return to Teardrop Construction Tips & Techniques

Who is online

Users browsing this forum: No registered users and 10 guests