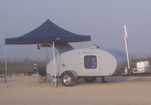
With the urging of my dad who has one of those huge RV/coaches I've decided to go the petcool route.
Can some of you folks that have installed them help us out with some things? We haven't ordered it yet, but we're discussing the hows of the install based on pics and some assumptions we're making.
We plan to install in the galley. We are okay with losing space. In Texas, air conditioning is more important than pots and pans.
Venting:
We assume we need an intake and an exhaust.
On SteveT's (SonnetPro's) build he used boat bilge vents to send the exhaust. Do I need to duct the side to the vent or just put the petcool close to the wall? My dad is thinking if i put it right against the wall, that might be all that is needed.
For intake, do we need another vent somewhere? If so, can someone provide details or pics? Does the air get sucked in at the back where the coils are or on the side at the roundish vent/fan? At night the galley will be closed, of course.
Knobs - did you guys extend the knobs somehow so you could control the petcool from inside? Just put a little door to slide open and use the existing knobs?
Thanks,
Petcool installation Questions
17 posts
• Page 1 of 2 • 1, 2
-

lcurrie - Silver Donating Member
- Posts: 128
- Images: 4
- Joined: Sun May 14, 2006 8:18 pm
- Location: TX, Austin
![]() by Steve Frederick » Sun Mar 25, 2007 5:02 pm
by Steve Frederick » Sun Mar 25, 2007 5:02 pm
Lynn!
I don't think you need to "install it".
The installations I've seen just set the unit near the camper, ducting the air in/out of the tear with flexable hose, like dryer venting. you would need to build a suitable ducting system into the cabin.
You could carry the unit in your tow vehicle, set it up as needed!
Blessings, Steve
Adirondacks, Upstate New York
Building Journals
The Shop Manual's 8-years old!! Thank's everyone!
New! 'Rondack Lodge Plans!Order Here!

Adirondacks, Upstate New York
Building Journals
The Shop Manual's 8-years old!! Thank's everyone!
New! 'Rondack Lodge Plans!Order Here!
-

Steve Frederick - Custom Teardrop Builder
- Posts: 1984
- Images: 29
- Joined: Thu Apr 15, 2004 5:02 pm
- Location: Upstate New York, Adirondacks (Great Sacandaga Lake)