No Fastener Glue Alignment Technique
I’ve been using this technique to help align glue-ups without adding a bunch of extra fasteners or having to deal with the extra holes that come along with them.
I hope some of you will find it helpful. I’m not sure that it is an original idea, but it just sort of came to me and seems to work well.
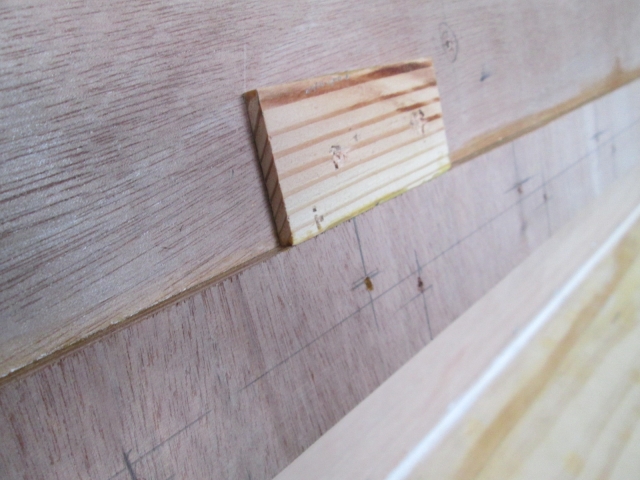
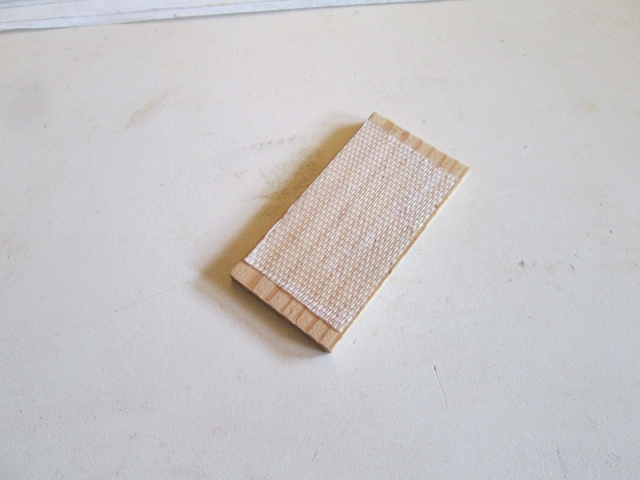
Basically I’m using small pieces of scrap wood (in this case 1/4 inch thick ripped 2x at about 2-1/2 inches long) with double backed tape applied as temporary alignment blocks. This really helps keep the piece being glued from squirming around in the glue when you go to apply the clamps. I had these scraps from another part of my build and have been using them as protectors under clamps all along, but you could pretty much use any small pieces of wood.
This was really important to me while working on my prefabricated ceiling panel where I didn’t want any fasteners to show from the inside, and for laminating a thin plywood screw flange flap along the front edge of the thin ceiling panel where screws or nails just wouldn’t work.
Here is a pic showing the glue up of the screw flange along the front lip of the ceiling panel to help pull the edge of the panel down that last little bit at the front radius. (Disregard the square wooden screw washers in the field of the front curve.)
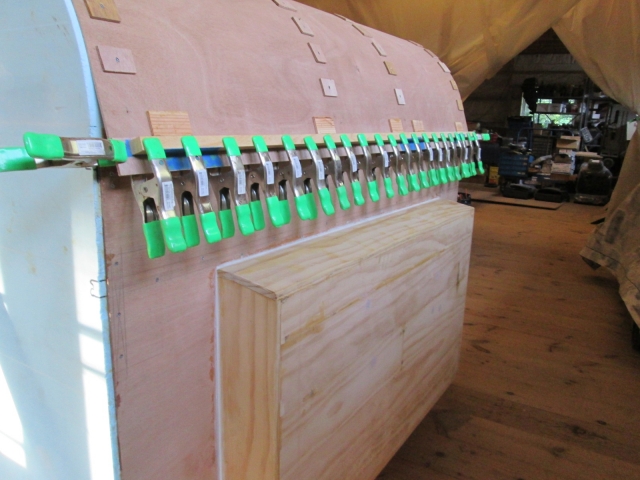
(The extra backer piece under the clamps was just temporary to help spread the clamp pressure and to keep the edge of the panel flat until the glue dried).
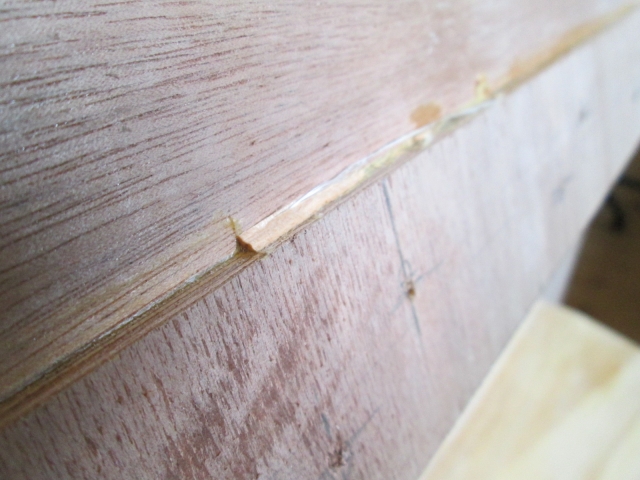
You can see the alignment blocks better in this pic after removing the clamps. First I clamped the 2 inch wide screw flange overlapping the bottom edge of the ceiling panel, and then I stuck the blocks on the panel so that they were butting up against the flange.
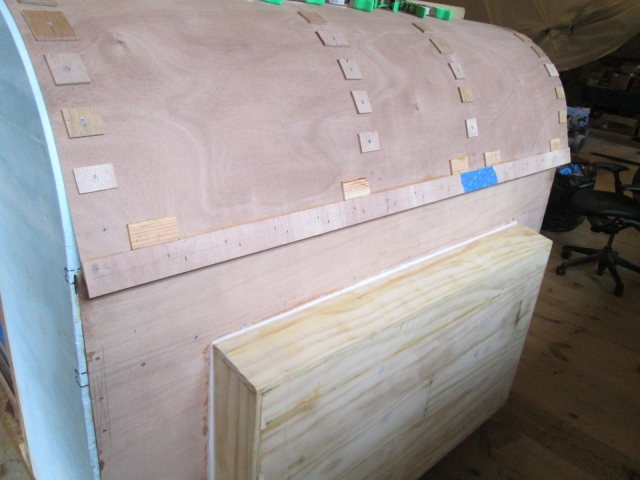
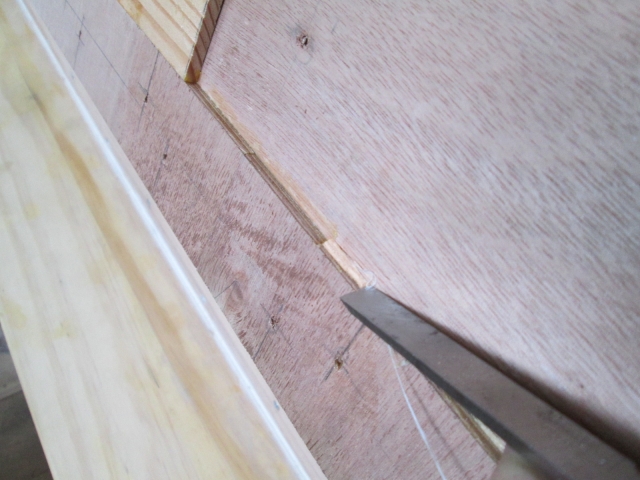
From there I could remove the flange, apply the glue and return the flange back into perfect alignment. If you stick the spring clamps on with a little bias they will tend to drive the piece into the blocks.
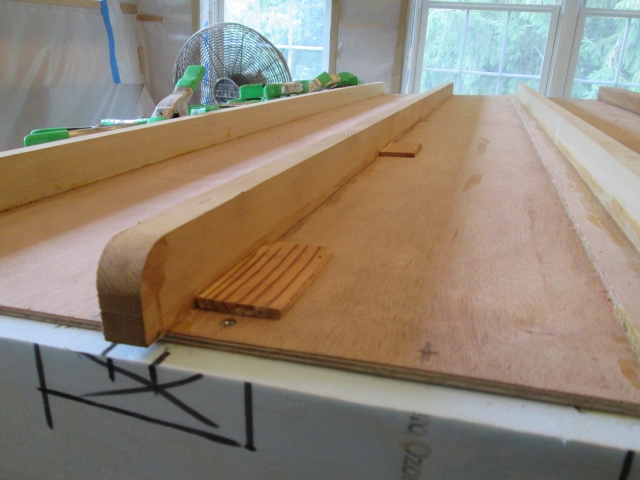
Here’s another example (actually, a reenactment) showing how I used the taped on pucks to help align my roof spars to the top of the panel (the clamp job was more complicated and done on the bench… check my build thread for more details on that).
The double backed tape I’m using is the heavy duty stuff with fiberglass core.
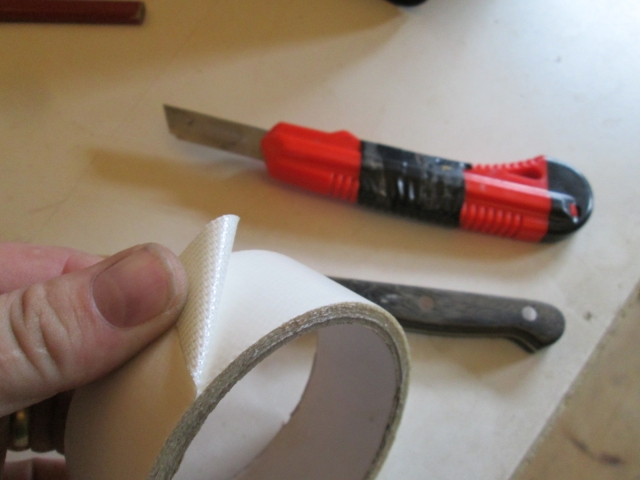
I fold a piece back on itself and use a cheap extending blade utility knife to cut the tape in one clean action thru the peel ply, otherwise it can fray, and/or bunch up (scissors can get gummy from the adhesive and are harder to clean than the knife).
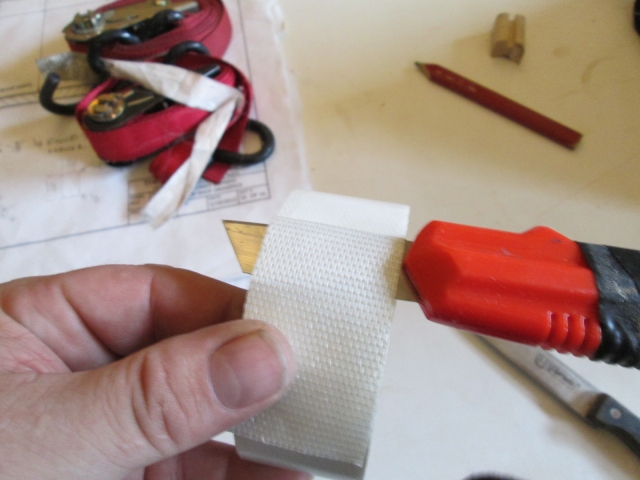
Obviously, stick the tape on the puck and peel the peel ply off.
When it comes time to remove the pucks, I use a straight edged kitchen knife (with a stiff but relatively thin blade that I got for cheap from the Goodwill store) and slide it straight in under the edge. Once the blade is far enough in the puck will usually pop right off.
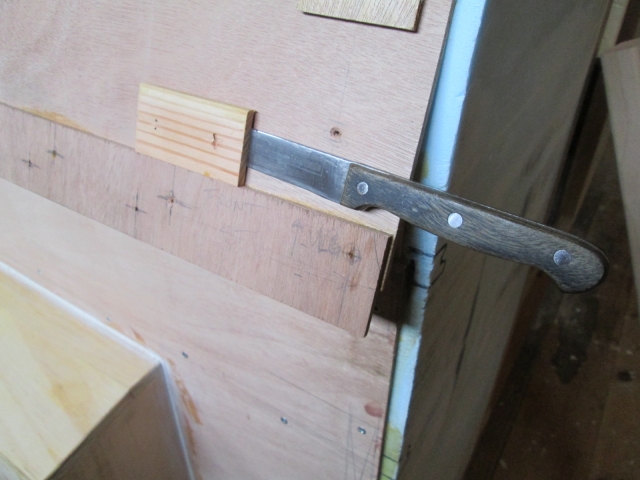
If not a slight twist will do the trick.
Sometimes glue squeeze out will stick and rip an edge off of the pucks…
… but it is a simple matter to clean these off with a scrapper or chisel.
I suppose you could tape the edges or maybe stick a little wax on there to keep this from happening, but you can get a couple of uses out of each block and it’s no big deal to just clean them up after the fact.
The glue from the tape will gum up the knife blades, so have a can of acetone, a rag or paper towel, and some disposable rubber gloves handy for occasional clean up.
I hope some of you will find it helpful. I’m not sure that it is an original idea, but it just sort of came to me and seems to work well.
Basically I’m using small pieces of scrap wood (in this case 1/4 inch thick ripped 2x at about 2-1/2 inches long) with double backed tape applied as temporary alignment blocks. This really helps keep the piece being glued from squirming around in the glue when you go to apply the clamps. I had these scraps from another part of my build and have been using them as protectors under clamps all along, but you could pretty much use any small pieces of wood.
This was really important to me while working on my prefabricated ceiling panel where I didn’t want any fasteners to show from the inside, and for laminating a thin plywood screw flange flap along the front edge of the thin ceiling panel where screws or nails just wouldn’t work.
Here is a pic showing the glue up of the screw flange along the front lip of the ceiling panel to help pull the edge of the panel down that last little bit at the front radius. (Disregard the square wooden screw washers in the field of the front curve.)
(The extra backer piece under the clamps was just temporary to help spread the clamp pressure and to keep the edge of the panel flat until the glue dried).
You can see the alignment blocks better in this pic after removing the clamps. First I clamped the 2 inch wide screw flange overlapping the bottom edge of the ceiling panel, and then I stuck the blocks on the panel so that they were butting up against the flange.
From there I could remove the flange, apply the glue and return the flange back into perfect alignment. If you stick the spring clamps on with a little bias they will tend to drive the piece into the blocks.
Here’s another example (actually, a reenactment) showing how I used the taped on pucks to help align my roof spars to the top of the panel (the clamp job was more complicated and done on the bench… check my build thread for more details on that).
The double backed tape I’m using is the heavy duty stuff with fiberglass core.
I fold a piece back on itself and use a cheap extending blade utility knife to cut the tape in one clean action thru the peel ply, otherwise it can fray, and/or bunch up (scissors can get gummy from the adhesive and are harder to clean than the knife).
Obviously, stick the tape on the puck and peel the peel ply off.
When it comes time to remove the pucks, I use a straight edged kitchen knife (with a stiff but relatively thin blade that I got for cheap from the Goodwill store) and slide it straight in under the edge. Once the blade is far enough in the puck will usually pop right off.
If not a slight twist will do the trick.
Sometimes glue squeeze out will stick and rip an edge off of the pucks…
… but it is a simple matter to clean these off with a scrapper or chisel.
I suppose you could tape the edges or maybe stick a little wax on there to keep this from happening, but you can get a couple of uses out of each block and it’s no big deal to just clean them up after the fact.
The glue from the tape will gum up the knife blades, so have a can of acetone, a rag or paper towel, and some disposable rubber gloves handy for occasional clean up.
 kind sir.