Simple Solar Lighting DIY

Anything electric, AC or DC

Simple Solar Lighting DIY

Postby claw73 » Fri Jul 09, 2010 10:05 am

Here is were I am at so far with my solar lighting system. I wanted my tear to be just like a tent, but hard sided. I had no intention of having A/C, TV, stereos, etc. in my TD, but a few lights would help with finding my shoes in the middle of the night. So, I got started: :twisted:

First I went to Walmart. My original plan had been to work with the small $2.50 or $4.00 solar lights. These are the kind that are meant to be shoved in the ground next to walkways to provide illumination. I started looking at them and the $2.50 ones had one LED. I thought about maybe getting 4 and doing two lights for reading or dressing composed of two of these LEDs. Then I thought the more expensive one was better, but the most I could tell was that it was the same thing with a different size glass piece!! Alas, I found the mac daddy of solar lights. Westinghouse had these lights that came with a 3.2V rechargeable battery and had three 10mm LEDs in it. For $20 I got two lights. This was about twice what I wanted to spend but it looked about 100x better. Here is a picture of the unit first out of the box:

[img]http://tnttt.com/album_pic.php?
pic_id=67948[/img]

I started by removing the stake holder that was meant to be stuck into the ground:

[img]http://www.tnttt.com/gallery/image.php?image_id=67949
[/img]

Then I marked the curve onto the plastic piece that held the stake holder. I didn't want to try and plug up the hold if I took the stake holder out, so we will just cut it off:

Image

Remove piece:

Image

No we focus on the other end. The joint will be perfect for use as lighting when mounted to the roof. But first, we need to separate the joint so it is easier to work on the electronics:

Image

Pulled apart:
Image

Now open the compartment with the solar panel. There are two green wires that go to the photo sensor. Cut them. For clarification, follow the screwdriver to the wires:

Image

Remove the photo sensor and find a switch for the system. This particular unit had a switch and the photo sensor. The switch has to be on to allow the light to work AND to allow the unit to charge. Since I didn't want to have the light come on anytime the sensor felt it needed light, we replaced that sensor with a manual switch. The switch I used can handle 120V and 25A...a bit overkill but for $0.75 a piece, I figured it would work. The post happened to be the right size for the preexisting hole too!!

Image

Mount the switch in the photo sensor hole:

Image

Solder up the wires from the photo sensor to the switch. In this case, the photo sensor disconnected the wires when there was no light, so I wired my switch accordingly. I tried to have it match the other switches labels for On/Off:

Image

While this panel is open, i ground down the nubs where the screws fit into. I did this because this weekend I will be mounting the system.
[img]http://www.tnttt.com/gallery/image.php?image_id=67972
[/img]
The way I will mount it is this: I will drill a small hole through my entire roof and extend the wires between the solar panel and the electronics. This extension will go through the hole so the solar panel is mounted on the outside of the roof and the electronics case is mounted inside, with silicone inside the hole. Anyway, here is the final product reassembled to be mounted:

Image

I'll try to get some pics of it when it is mounted in the trailer....as soon as I finish the trailer... Hope it can help those who want the most simplistic electrical lighting!!

Thanks and let me know questions/comments[/img]
claw73
Teardrop Advisor
 
Posts: 64
Images: 28
Joined: Tue Feb 23, 2010 5:35 pm
Location: Bozeman MT

Postby Woodbutcher » Fri Jul 09, 2010 11:44 am

Nice write up. Very interested in how it works when installed. Keep us posted. I may want to give this a try in my new build. Thanks!
User avatar
Woodbutcher
Platinum Donating Member
 
Posts: 4191
Images: 45
Joined: Fri Mar 10, 2006 10:01 pm
Location: Chicago Suburbs

Postby Ageless » Fri Jul 09, 2010 12:09 pm

Righteous!!


I just love cheapo-cheapo productions
Strangers on this road we are on; we are not two, we are one - Raymond Douglas Davies
User avatar
Ageless
Platinum Donating Member
 
Posts: 1603
Images: 8
Joined: Tue Aug 04, 2009 8:34 am
Location: Pt. Orchard, WA
Top

Postby parnold » Fri Jul 09, 2010 12:59 pm

I'd like to make a simple suggestion which may save some grief, or make you feel better.

Charge the light up entirely, then bring it into a dark area and see how much light you get out of it, and how long the battery will last before making any mods on your trailer. You could also see about wiring in an additional battery in parallel if it doesn't last as long as you like.

I can't tell you how many times in my life I've done mods, only to find out what I was using didn't work up to my expectations!

Good luck, sounds like a great find, and a better idea!!
User avatar
parnold
Donating Member
 
Posts: 2344
Images: 302
Joined: Mon Feb 08, 2010 4:49 pm
Location: Northwest New Jersey
Top

Postby claw73 » Sat Jul 10, 2010 12:13 am

Thanks everyone!

I definitely used it to light up my lab when it was pitch dark. I didn't sit and watch how long it lasted though. "They" say it is about 8 hours of light when fully charged. I figure 1.5 hours constant with maybe a half hour in the night is what I need.

If I were to add a second battery I would have to make a different case (I don't think that I could fit another battery in there). I may mount the solar panel and run it, and if I need to rebuild something I can at least leave the panel mounted. Anyway, the first trip is planned for one week from today so I can thoroughly test it then!
claw73
Teardrop Advisor
 
Posts: 64
Images: 28
Joined: Tue Feb 23, 2010 5:35 pm
Location: Bozeman MT
Top

Postby claw73 » Mon Jul 26, 2010 11:41 pm

I took a trip to Yellowstone last weekend with the fiance'. The tear held up nicely to the weather, although it was a beautiful weekend. It also held up to the 75 mph drive for an hour and a half to go from Bozeman to Gardner. The lights worked wonderfully. They are definitely spot lights and are very directional, but there was plenty of light to see clearly in my clothes nook or read a book (trail guide) by at midnight. It isn't the type of floodlights that illuminated every nook and cranny of the trailer but it was enough to get ready for bed and into bed after long days of critter watching!

Thanks for all the help!
claw73
Teardrop Advisor
 
Posts: 64
Images: 28
Joined: Tue Feb 23, 2010 5:35 pm
Location: Bozeman MT
Top

Postby Shadow Catcher » Tue Jul 27, 2010 9:25 am

I love adaptive re purposing. So where does the solar cell go?
User avatar
Shadow Catcher
Donating Member
 
Posts: 6008
Images: 234
Joined: Sat Apr 11, 2009 8:26 pm
Location: Metamora, OH
Top

Postby claw73 » Tue Jul 27, 2010 9:57 am

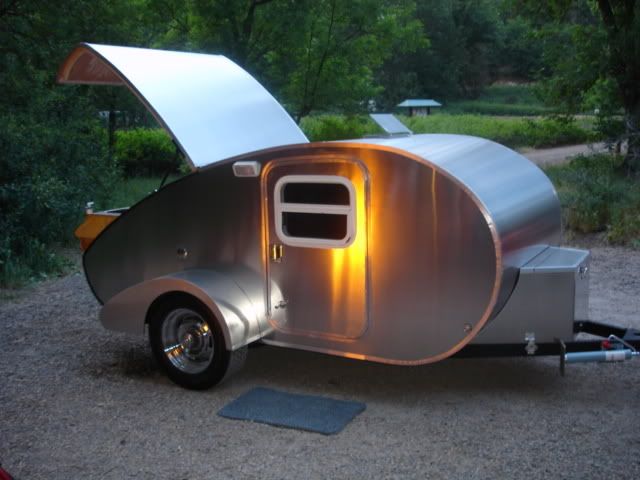
From the outside, it looks like:
[img]http://www.tnttt.com/gallery/image.php?image_id=68858
[/img]

Where the two black squares in front of the window are the two solar cells.

From the inside, the lights look like:
Image

Like I said, it worked really well and I think it doesn't look half bad. All it took was a little trimming of the part and extending two wires.
claw73
Teardrop Advisor
 
Posts: 64
Images: 28
Joined: Tue Feb 23, 2010 5:35 pm
Location: Bozeman MT
Top

Postby H-Balm » Fri Jan 14, 2011 5:01 am

Now, show an outside pic!
:applause:
Image
User avatar
H-Balm
Teardrop Master
 
Posts: 243
Joined: Sat May 27, 2006 5:52 am
Location: Where NY/NJ/PA Meet
Top

Postby Oasis Maker » Fri Jan 14, 2011 5:56 am

H-Balm wrote:Now, show an outside pic!
:applause:


From his Album. ;)
Scott


Image
Jeeping, Teardropping, and Cycling!......Where To Next?
Image
Jeep Wave>> :peace: <<Jeep Wave
User avatar
Oasis Maker
1000 Club
1000 Club
 
Posts: 1906
Images: 187
Joined: Sun Dec 16, 2007 11:25 am
Location: Scottsdale, Arizona
Top

Postby Shadow Catcher » Fri Jan 14, 2011 6:11 am

One of the nice aspects is that the batteries can be taken out and stuck in a charger, or they can be replaced when they fail or with a larger capacity battery. :thumbsup:
User avatar
Shadow Catcher
Donating Member
 
Posts: 6008
Images: 234
Joined: Sat Apr 11, 2009 8:26 pm
Location: Metamora, OH
Top

Postby claw73 » Fri Jan 14, 2011 10:54 am

Thanks guys! This site was a life saver and in the end it was a very functional set up. I'm hoping to work on the beautiful part this coming spring. I want to replace the windows and doors, but the lights worked phenomenally!

Thanks again for the compliments!
claw73
Teardrop Advisor
 
Posts: 64
Images: 28
Joined: Tue Feb 23, 2010 5:35 pm
Location: Bozeman MT
Top


Return to Electrical Secrets

Who is online

Users browsing this forum: No registered users and 4 guests